
Thanksgiving Relish Charcuterie Board Easy Holiday Appetizer
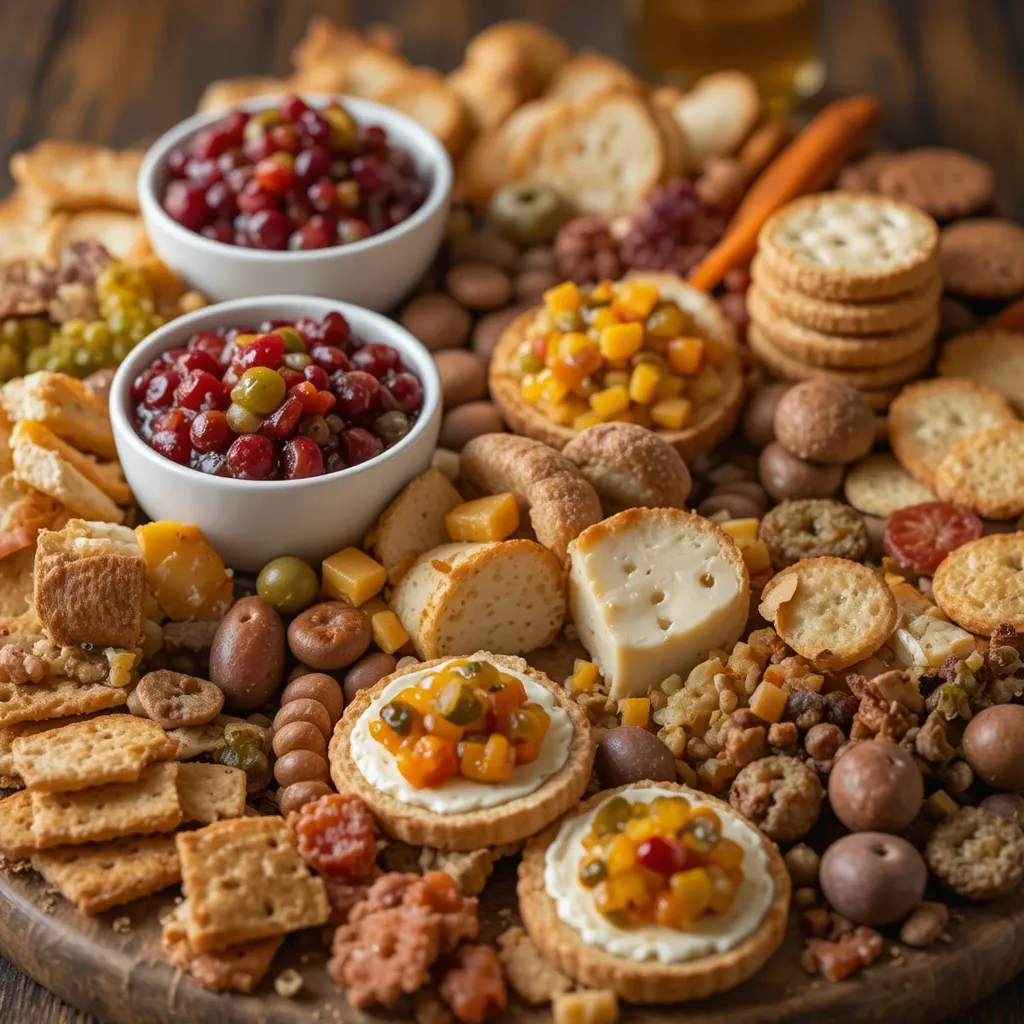
Picture this: your guests arrive early, the turkey’s still in the oven, and everyone’s asking “what can I nibble on?” Enter the thanksgiving relish charcuterie board – your holiday lifesaver! This stunning spread combines sweet, tangy, and savory relishes with crackers, cheeses, and pickled delights that’ll keep your guests happily munching until dinner’s ready.
I discovered this genius idea three years ago when my sister-in-law showed up with store-bought everything, and honestly? It was still a hit! Now I make mine from scratch, and it’s become our family’s favorite pre-dinner tradition. Similar to my popular [Holiday Cheese Board], this relish-focused version adds that quintessential Thanksgiving tang everyone craves.
What is a Thanksgiving Relish Charcuterie Board?
You might be wondering, “Wait, a whole board dedicated to relishes?” Yes, and trust me, it’s absolutely brilliant! Think of it as the unsung hero of your Thanksgiving table – while everyone’s fussing over the turkey and mashed potatoes, this gorgeous spread quietly steals the show.
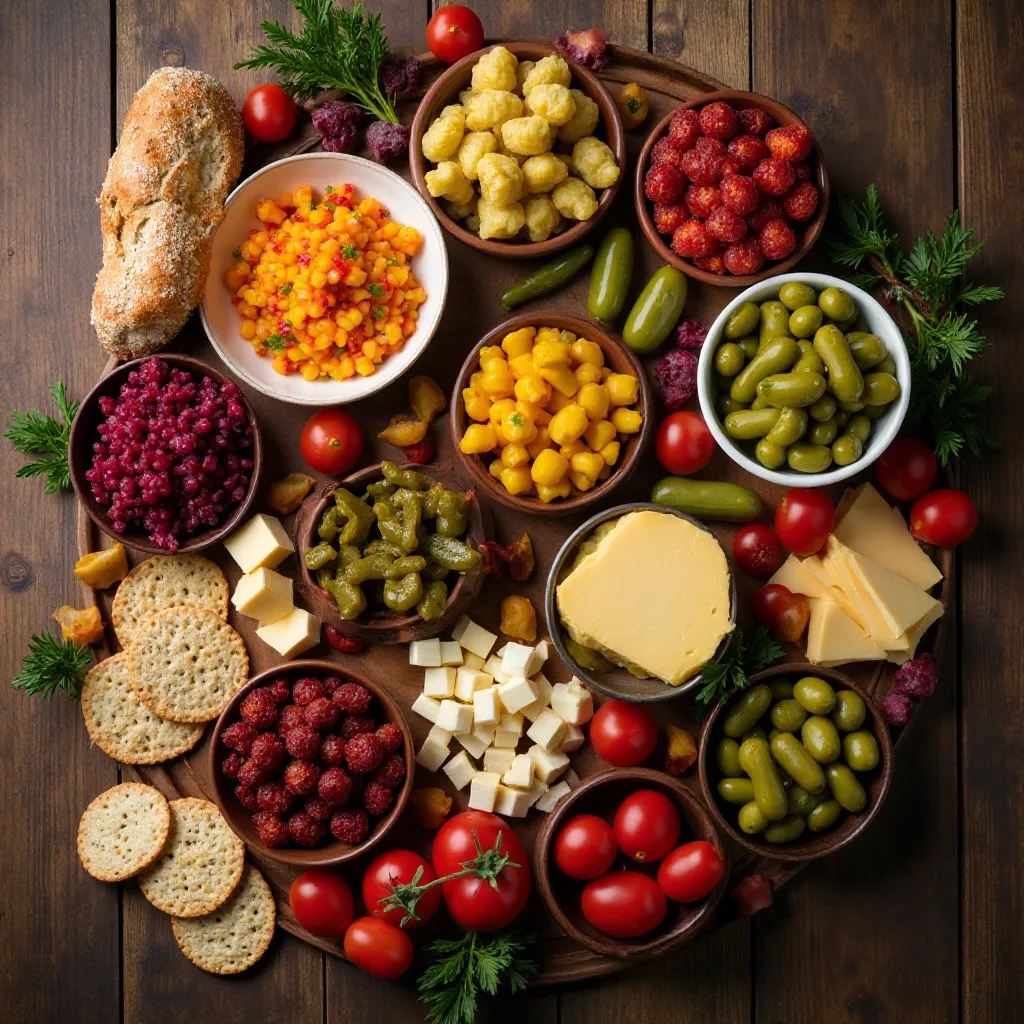
It’s basically a beautiful arrangement of homemade and store-bought relishes, pickled vegetables, olives, crackers, and complementary bites that celebrate all those zesty, tangy flavors we associate with the holiday. After all, they say the way to your guests’ hearts is through their stomachs, right? So why not start the feast early with something that’s both gorgeous to look at and absolutely delicious to devour?
Why You’ll Love This Thanksgiving Relish Charcuterie Board
The Ultimate Crowd-Pleaser
Here’s what makes this board absolutely perfect: it satisfies every single palate at your table. Your aunt who loves sweet things? She’ll gravitate toward the cranberry-orange relish. Your brother who’s all about savory? The dill pickles and olives have his name written all over them. The beauty of a thanksgiving relish charcuterie board is its incredible versatility. You’re not forcing one flavor profile on everyone; instead, you’re offering a spectrum of tastes that let each person create their perfect bite.
Budget-Friendly Elegance
Let me tell you something that’ll make you smile – this board looks like you spent a fortune, but you absolutely didn’t! While a traditional charcuterie board loaded with expensive cured meats can set you back $50-75 easily, a relish-focused board costs a fraction of that.
You can make several homemade relishes for under $20, add some affordable crackers, maybe one nice cheese, and boom – you’ve got an Instagram-worthy spread that feeds 12-15 people. I love combining two homemade relishes (cranberry and corn, my favorites) with 3-4 quality store-bought options. It’s honestly the smartest entertaining investment you’ll make this holiday season.
Flavor Combinations That Wow
The magic happens when you pair these relishes correctly. Imagine spreading tangy cranberry relish on a buttery cracker with a tiny smear of cream cheese – that sweet-tart explosion is addictive! Or try the corn relish with a sharp cheddar and whole grain cracker.
The pickled green beans add that essential crunch factor, while bread-and-butter pickles bring nostalgic sweetness. If you enjoyed my [Mediterranean Mezze Platter], you’ll love how this board similarly layers different textures and flavors, but with that distinctly American Thanksgiving twist. The best part? You can prep almost everything ahead, leaving you stress-free on the big day.
How to Make a Thanksgiving Relish Charcuterie Board
Quick Overview
Creating a stunning thanksgiving relish charcuterie board is genuinely easier than you think, and I promise it’ll become your go-to entertaining trick. The beauty lies in its flexibility – you can go completely homemade, totally store-bought, or my preferred method: a smart mix of both.
Time Investment:
- Prep Time: 30-45 minutes (if using all store-bought items)
- Prep Time: 2-3 hours (if making 2-3 homemade relishes)
- Assembly Time: 15-20 minutes
- Total Time: 45 minutes to 3.5 hours (depending on your approach)
The result? A gorgeous, conversation-starting centerpiece that tastes even better than it looks and keeps guests satisfied without spoiling their dinner appetite.
Key Ingredients for Thanksgiving Relish Charcuterie Board
Relishes & Pickled Items (The Stars):
- 1 cup cranberry-orange relish (homemade or store-bought)
- 1 cup corn relish
- 1 cup pickle relish (sweet or dill, your choice)
- 1 jar (16 oz) dill pickle spears
- 1 jar (16 oz) bread-and-butter pickles
- 1 cup pickled green beans
- 1 cup mixed olives (green, kalamata, or Castelvetrano)
- 1 jar (12 oz) pickled beets, drained and sliced
- 1 cup pepper jelly or hot pepper relish (optional, for heat lovers)
Crackers & Bread:
- 1 box water crackers
- 1 box whole grain crackers
- 1 box butter crackers (like Ritz)
- 1 baguette, sliced and lightly toasted
Cheeses (The Supporting Cast):
- 8 oz cream cheese, softened
- 8 oz sharp white cheddar, cubed
- 6 oz brie or goat cheese
Fresh Elements:
- 1 cup cherry tomatoes
- Fresh herbs for garnish (rosemary, thyme, or parsley)
- Celery sticks (great for scooping relishes)
Extras:
- Small serving spoons (one for each relish)
- Small bowls for wet items
Step-by-Step Instructions
Step 1: Prepare Your Workspace
Start by selecting your board – I use a large wooden cutting board (at least 18×14 inches), but you can also use a large platter or even a clean marble slab. Make sure it’s completely clean and dry. Gather all your small bowls for the wet relishes and your serving spoons. Trust me, having everything ready before you start arranging makes the whole process so much smoother. I learned this the hard way when I once had to pause mid-assembly to hunt for bowls, and my perfectly arranged pickles rolled everywhere!
Step 2: Make Your Homemade Relishes (If Desired)
If you’re going the homemade route, start here. For cranberry-orange relish: pulse 12 oz fresh cranberries, 1 peeled orange (seeded), and 3/4 cup sugar in a food processor until finely chopped. Refrigerate for at least 2 hours. For corn relish: sauté 2 cups corn kernels with 1/4 cup each diced red bell pepper and onion, add 2 tablespoons apple cider vinegar, 1 tablespoon sugar, salt, and pepper. Cool completely. These can be made up to 3 days ahead, which is a total game-changer for your sanity!
Step 3: Place Your Bowls First
This is the secret to a professional-looking board! Position 3-4 small bowls across your board first – don’t fill them yet, just place them strategically. I like to put one in each corner area and maybe one in the center. These will hold your wettest relishes (cranberry, corn relish, pickle relish, and pepper jelly). By placing empty bowls first, you can visualize the layout and ensure balanced spacing. This prevents that common mistake of running out of room halfway through!
Step 4: Add the Largest Items
Now add your biggest components: the pickle jars can go directly on the board (fancy, right?), or transfer pickles to small serving dishes. Place your cheese blocks – I like to cut the cheddar into cubes first, but leave the brie whole with a small knife beside it. Position your cracker stacks in 3-4 spots around the board. Think of this step as creating your “anchor points” that everything else will flow around.
Step 5: Fill Your Bowls
Time to fill those strategically placed bowls with your relishes. Spoon the cranberry relish into one, corn relish in another, and so on. Make sure each bowl has its own small spoon – nothing’s worse than flavor crossover when someone uses the pickle relish spoon in the cranberry! I use those tiny gold-plated appetizer spoons from Target; they’re like $8 for a set and make everything look expensive.
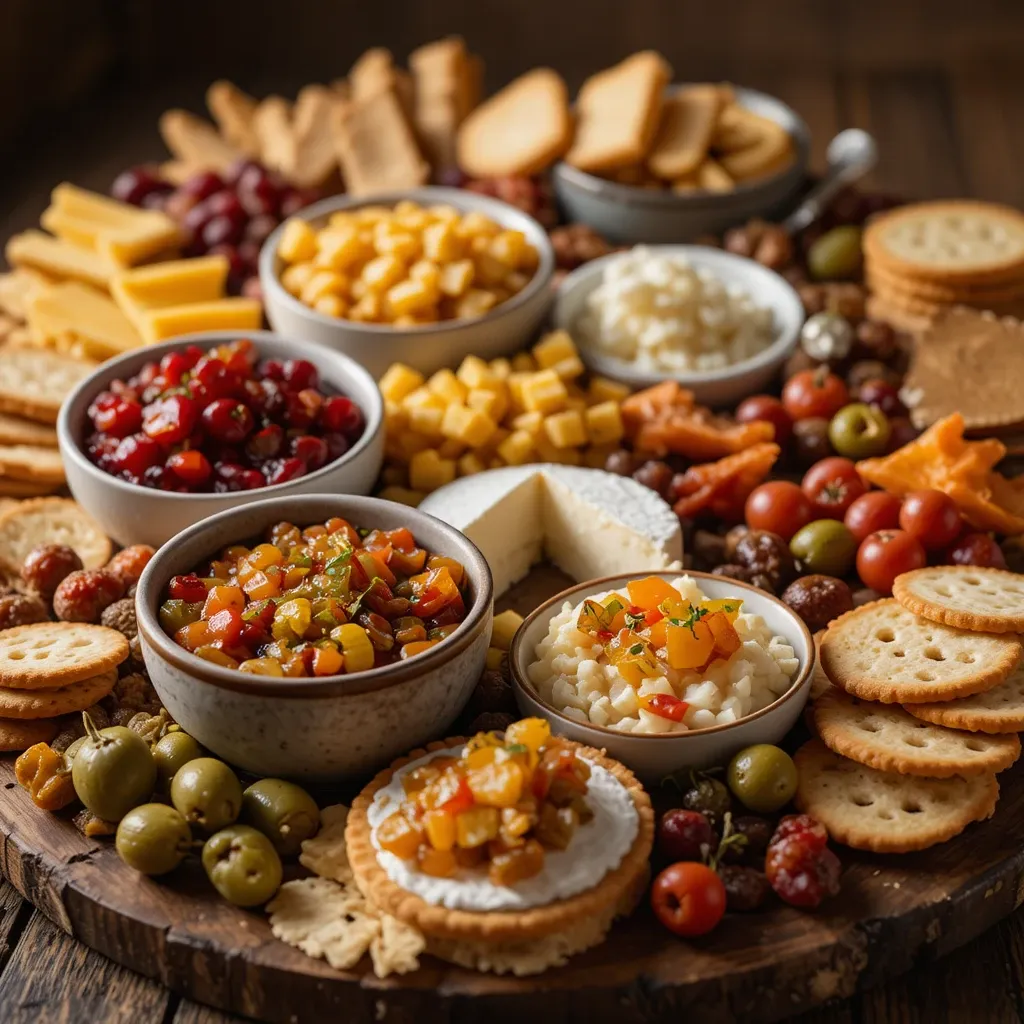
Step 6: Fill in the Gaps
Here’s where the magic happens! Start filling in all those empty spaces with your remaining items. Tuck pickle spears in vertical stacks against the bowls. Arrange the bread-and-butter pickles in overlapping circles. Create little piles of olives in multiple spots. Add those pickled green beans fanned out like little log cabins (my kids love this part). Scatter the cherry tomatoes wherever you need pops of color. The goal is to make the board look abundant and full, with no naked wood showing through.
Step 7: Add the Finishing Touches
Tuck fresh herbs into any remaining gaps – they add gorgeous color and a subtle fragrance. Arrange your toasted baguette slices around the edges or in a basket alongside the board. Do a final scan: Does anything need adjusting? Are the colors balanced? Can guests easily reach everything? Step back and admire your work – you’ve just created something beautiful!
Step 8: Serve with Style
Right before guests arrive, set out the board with small appetizer plates and cocktail napkins nearby. I like to add tiny wooden forks or toothpicks in a small jar for easy picking. You might also want to include a few small serving knives for spreading the softer relishes on crackers. Stand back and watch as your guests inevitably pull out their phones for photos before diving in!
What to Serve Thanksgiving Relish Charcuterie Board With
This board is incredibly versatile, and I’ve served it at different points throughout the holiday with great success:
Pre-Dinner Cocktail Hour: This is peak performance time for your relish board! Pair it with classic Thanksgiving cocktails like spiced apple cider (spiked or not), cranberry mimosas, or bourbon-based drinks. The tangy relishes cut through rich cocktails beautifully. I also love serving it with a crisp white wine like Sauvignon Blanc or a light Pinot Noir.
Part of Your Appetizer Spread: If you’re doing multiple appetizers, this board plays so well with others! Serve alongside warm baked brie, stuffed mushrooms, or my popular [Spinach Artichoke Dip]. The cool, crisp nature of the relish board balances out hot, creamy appetizers perfectly.
Thanksgiving Leftovers Meal: Here’s a genius move I discovered by accident: this board is INCREDIBLE on Black Friday with your leftovers! Set it out while you’re making turkey sandwiches. Those relishes add amazing flavor to leftover turkey, and it’s a light, refreshing contrast to all the heavy food you ate yesterday.
Accompaniments That Elevate:
- Roasted nuts (pecans or walnuts with rosemary)
- Grapes or apple slices for freshness
- A honey pot with dipper for drizzling over cheese
- Grainy mustard in a small bowl for the adventurous
Top Tips for Perfecting Thanksgiving Relish Charcuterie Board
Make It Ahead Like a Pro
Almost everything on this board can be prepped in advance, and here’s exactly how I do it: Make homemade relishes up to 5 days ahead and store them in airtight containers in the fridge. Buy your crackers, pickles, and olives 1-2 weeks early so you’re not scrambling last minute. Cube your cheese the morning of and cover it tightly with plastic wrap. The actual board assembly should happen 1-2 hours before guests arrive – any earlier and crackers might get soft, any later and you’ll be stressed!
Balance Your Flavors Intentionally
Don’t just throw random items on the board; think about flavor balance. You want sweet (bread-and-butter pickles, cranberry relish), tangy (dill pickles, pickled beans), savory (olives, cheese), and maybe spicy (pepper jelly). I always include at least one mild option for picky eaters – those water crackers with cream cheese save the day for kids and spice-averse adults.
Size Matters More Than You Think
A common mistake is making the board too small or too large. For 8-10 guests for a one-hour cocktail period, an 18×14 inch board is perfect. For 15-20 guests or a longer event, go bigger or make two smaller boards. Underfilling a giant board looks sad; overfilling a tiny board looks messy. Find that Goldilocks zone!
Temperature Control is Key
Take your cream cheese and brie out of the fridge 30-45 minutes before serving – nobody wants to spread rock-hard cheese. However, keep your relishes and pickles cool. I sometimes place an ice pack underneath the board (covered with a cloth napkin) if it’s sitting out longer than 2 hours, especially in a warm kitchen.
Use the Right Tools
Small details make a huge difference. Provide tiny spoons for each relish (prevents flavor mixing), small knives for cheese, and plenty of napkins. I set up a small “utensil station” next to the board with extra toothpicks, small plates, and napkins so guests don’t have to ask.
Avoid These Common Mistakes
Don’t mix raw and pickled vegetables directly on the board – keep fresh veggies separate or include them thoughtfully. Never put wet items directly on a wooden board without a bowl or liner (learned this the hard way – stained board!). Don’t forget dietary restrictions: label items containing dairy or gluten if you’re hosting guests with allergies. And please, don’t add the fresh herbs until right before serving or they’ll wilt under kitchen lights!
Make It Instagram-Worthy
Let’s be honest, people eat with their eyes first! Create height by stacking items rather than laying everything flat. Use odd numbers (3 pickle stacks instead of 2, 5 cracker piles instead of 4) – it’s more visually pleasing. Add pops of color strategically: red cherry tomatoes near white cheese, green olives near golden crackers. Take your board photo in natural light before guests arrive for that perfect social media shot!
Storing and Reheating Tips
Leftover Management:
Here’s what to do with leftovers (though honestly, there usually aren’t many!). Discard any items that have been sitting at room temperature for more than 2 hours – food safety first. The crackers can be resealed in their original packaging if they haven’t gotten soggy; they’ll keep for another 2-3 weeks. Transfer leftover relishes back to airtight containers and refrigerate for up to 1 week. Cheese should be wrapped tightly in fresh plastic wrap or wax paper and will last another 3-5 days.
Refrigeration Guidelines:
Store different items separately rather than trying to save the whole assembled board. Pickles in their brine will last months in the fridge. Homemade relishes stay fresh for 1-2 weeks. Opened olives should be kept in their liquid and consumed within 2 weeks. Cheese cubes last 5-7 days if well-wrapped. Never leave cream cheese or soft cheeses at room temperature overnight – refrigerate within 2 hours.
Freezing Options:
Most relishes freeze beautifully! Pour them into freezer bags, press out the air, label with the date, and freeze for up to 3 months. Thaw overnight in the refrigerator before serving. Unfortunately, cheese, crackers, pickles, and fresh vegetables don’t freeze well, so plan quantities accordingly.
No Reheating Needed:
The beauty of this board? Everything is served cold or at room temperature, so there’s no reheating necessary! If you’re repurposing leftovers, simply bring refrigerated items to room temperature for about 20 minutes before serving again. The flavors actually improve after a day or two as they meld together in the fridge.
Frequently Asked Questions
Can I make a thanksgiving relish charcuterie board entirely store-bought?
Absolutely, yes! There’s zero shame in a fully store-bought board, and honestly, your guests won’t know the difference. Hit up Trader Joe’s or Whole Foods for amazing prepared relishes, grab quality pickles, fancy crackers, and good cheese. You can create a stunning board in 20 minutes flat. I do this when I’m hosting and making the entire Thanksgiving dinner – something’s gotta give, and it might as well be this!
How long can a relish board sit out before serving?
For food safety, the maximum is 2 hours at room temperature. However, I find relish boards look and taste best when served within 1-1.5 hours of assembly. The crackers stay crispier, the cheese is at the perfect temperature, and everything looks fresh. If your event is longer, consider making two smaller boards and bringing out the second one fresh.
What’s the best size board for 15 guests?
For 15 guests during a typical 1-hour cocktail period, I’d recommend a 20×16 inch board or two smaller 15×12 inch boards. Figure about 2-3 ounces of total food per person for a pre-dinner appetizer. If this is the only food being served, double that amount. Always better to have a little extra than to run out!
Can I include meat on a thanksgiving relish charcuterie board?
You certainly can! While the traditional version focuses on relishes and pickled items, adding sliced turkey, salami, or prosciutto works beautifully. I sometimes include sliced turkey breast as a nod to the holiday. Just keep the meat refrigerated until 30 minutes before serving and arrange it in folds or rolls for visual interest.
What if my guests don’t like pickles or relishes?
No worries! Include plenty of neutral options like mild cheese, plain crackers, fresh fruits (grapes, apple slices), and nuts. You can also add some honey or fig jam for those who prefer sweet over tangy. I always include at least 30% “safe” options for picky eaters, and they’ve never complained!
How do I keep the board looking full as items get eaten?
Great question! I use what I call the “fluff and redistribute” method. Every 20-30 minutes, quickly rearrange remaining items to fill gaps, spreading things out to cover empty spots. You can also keep a few backup items in the kitchen to replenish popular items. Moving crackers around and redistributing olives works wonders!
Can I make this board vegan or dairy-free?
Absolutely! Skip the cheese entirely or use cashew-based vegan cheese. The beauty of a relish-focused board is that most of the items are naturally vegan – pickles, olives, vegetables, most relishes, and many crackers. Add hummus, roasted vegetables, and nuts to bulk it up without dairy.
What’s the most budget-friendly way to create this board?
Focus on fewer, larger quantities rather than many tiny amounts. Buy pickle jars from discount stores like Aldi or Costco. Make one homemade relish (cranberry is easiest and cheapest). Use what’s on sale for crackers and cheese. Skip fancy olives and use standard ones. A beautiful board can easily be made for under $25-30 if you’re strategic!
Tips for Avoiding Common Assembly Mistakes
The Overcrowding Problem: Don’t pack every inch of the board. Leave some breathing room! Negative space makes the board look intentional and high-end, not cluttered. If you can’t see any board surface, you’ve gone too far.
The Moisture Disaster: Always, always use small bowls or ramekins for wet items like relishes and marinated olives. Putting them directly on a wooden board creates puddles and stains. I learned this lesson with a ruined cutting board – don’t be like me!
The Accessibility Issue: Place items strategically so guests don’t have to reach across the entire board. Put popular items (cheese, crackers) in multiple locations. Avoid creating “dead zones” where items are completely blocked by tall elements.
The Temperature Trap: Don’t assemble your board while items are still cold from the fridge, but don’t let cheese sit out for hours either. There’s a sweet spot – aim for assembly 1-2 hours before serving, with dairy items coming to room temp during that window.
The Color Confusion: Alternate colors as you arrange. Don’t put all the green items (pickles, olives, herbs) in one section and all the red items (beets, tomatoes, cranberry relish) in another. Scatter colors throughout for visual balance.
The Height Oversight: Creating different levels makes boards more interesting. Stack crackers, stand pickle spears upright, create little cheese pyramids. A completely flat board looks amateur.
The Proportion Mistake: Don’t make tiny amounts of many things. It’s better to have generous portions of 5-6 items than skimpy amounts of 15 items. Guests feel more comfortable digging in when there’s plenty available.
Nutrition Information (Per Serving, approximately 1/12 of board)
| Nutrient | Amount |
|---|---|
| Calories | 245 |
| Total Fat | 12g |
| Saturated Fat | 5g |
| Cholesterol | 25mg |
| Sodium | 580mg |
| Total Carbohydrates | 28g |
| Dietary Fiber | 3g |
| Sugars | 12g |
| Protein | 8g |
| Vitamin C | 15% DV |
| Calcium | 12% DV |
| Iron | 6% DV |
Note: Nutrition values are approximate and vary based on specific ingredients used. This calculation assumes a mix of all listed ingredients divided by 12 servings.
Final Thoughts
Creating a thanksgiving relish charcuterie board has become one of my absolute favorite holiday traditions. There’s something so satisfying about watching guests hover around this beautiful spread, trying different combinations and discovering their favorites. My uncle always goes straight for the pickled green beans, while my mom piles cranberry relish high on butter crackers. These little moments of joy are what the holidays are all about.
The best part? Unlike the pressure-cooker environment of getting the turkey perfect or timing all your sides to finish simultaneously, this board is forgiving, flexible, and actually fun to make. You can prep most of it days ahead, customize it to your family’s tastes, and adjust your budget up or down without sacrificing the wow factor.
So this Thanksgiving, give yourself the gift of an easy win. Set out a gorgeous relish board, pour yourself a glass of wine, and actually enjoy those precious moments before dinner when your house smells amazing and everyone’s gathering in the kitchen. Your guests will be impressed, your stress level will thank you, and you might just start a new tradition that outlasts the turkey itself.