
10 Best Summer Dinner Recipes the Whole Family Will Love
Summers are made for sunshine, laughter, and food that brings everyone to the table with a big smile. Whether you’re planning a backyard cookout or a quick weeknight dinner, the right recipe can turn an ordinary evening into a memory your kids will talk about for years.
These 10 summer dinner recipes are fresh, flavorful, and so easy that you’ll actually enjoy making them. Just like our popular Slow Cooker Chicken Tacos, each dish here is built for real families with real schedules. Get ready to fall in love with summer cooking all over again!
What Are Summer Dinner Recipes?
Have you ever stared at your fridge on a hot July evening, completely drawing a blank? You’re not alone! Summer dinner recipes are meals specifically designed to be light, fresh, and satisfying without making you feel like you need a nap afterward.
They celebrate seasonal produce, bold flavors, and the kind of simplicity that lets you spend less time in the kitchen and more time making memories outside. As the old saying goes, the way to a family’s heart is through their stomach — so let these recipes do the talking!
Why You’ll Love These Summer Dinner Recipes
They Are Fresh, Light, and Incredibly Flavorful
Summer is all about vibrant flavors — think juicy tomatoes, sweet corn, zesty citrus, and herbs fresh from the garden. These recipes celebrate exactly that. Each dish uses seasonal ingredients at their peak, which means more flavor with less effort.
Budget-Friendly and Perfect for Feeding a Crowd
Fresh produce in summer is abundant and affordable. You won’t need to break the bank to put a delicious, wholesome dinner on the table. Most of these recipes serve 4-6 people and cost under $20 to make, making them ideal for big family gatherings or a simple Tuesday night dinner.
Kid-Approved Ingredients and Fun to Make Together
Every recipe in this list uses ingredients that kids love — think cheesy quesadillas, grilled corn, and colorful wraps. Getting your little ones involved in cooking is a bonus summer activity! And if you love fun family recipes, don’t miss our Easy Homemade Pizza Rolls — another hit with kids of all ages.
The 10 Best Summer Dinner Recipes
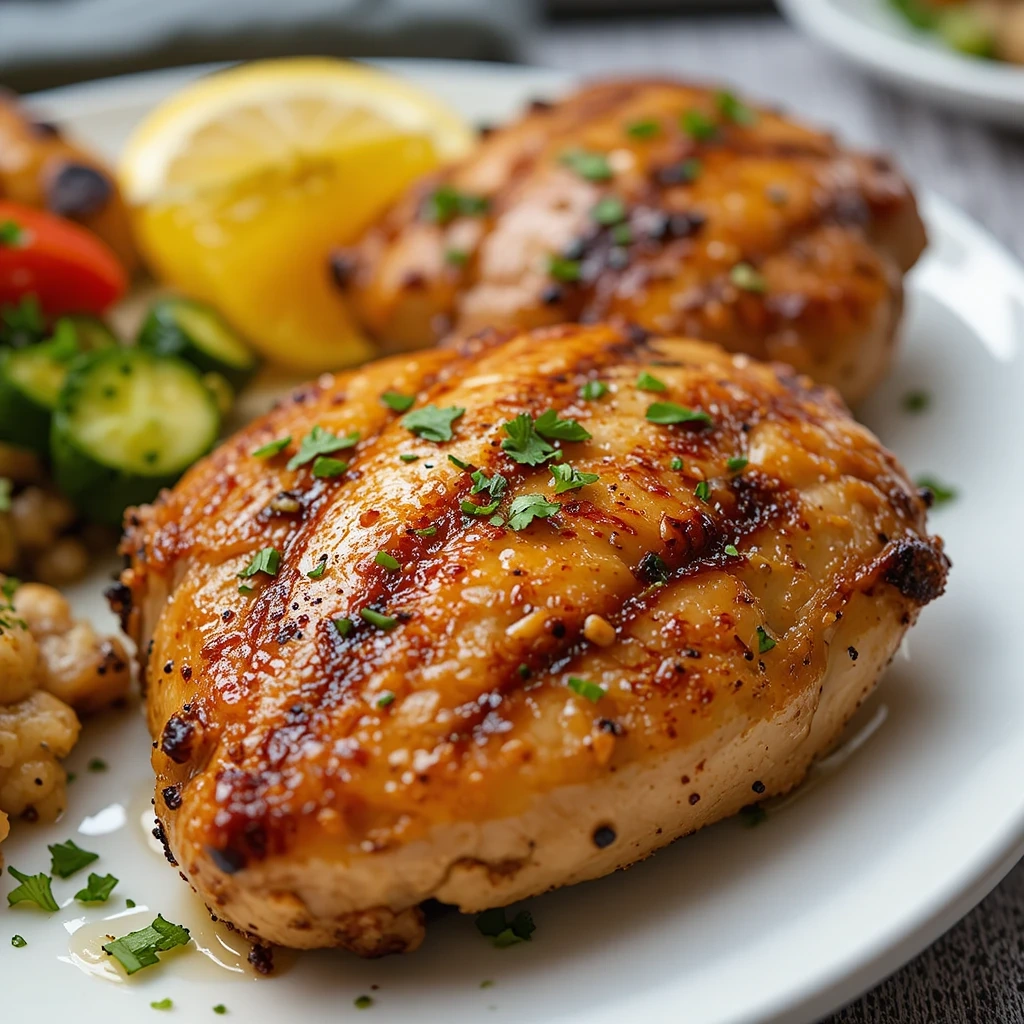
Recipe 1: Grilled Honey Garlic Chicken Thighs
Quick Overview
These juicy, caramelized chicken thighs are kissed by the grill and glazed with a sweet honey-garlic sauce that even picky eaters can’t resist. They’re ready in under 40 minutes and pair beautifully with almost any summer side.
- Prep Time: 10 minutes
- Cook Time: 25 minutes
- Total Time: 35 minutes
- Servings: 4
- Difficulty: Easy
Key Ingredients for Grilled Honey Garlic Chicken Thighs
- 6 bone-in, skin-on chicken thighs
- 3 tablespoons honey
- 4 garlic cloves, minced
- 2 tablespoons soy sauce (low sodium)
- 1 tablespoon olive oil
- 1 teaspoon smoked paprika
- Salt and black pepper to taste
- Fresh parsley for garnish
Step-by-Step Instructions
- In a bowl, whisk together honey, minced garlic, soy sauce, olive oil, and smoked paprika to make the marinade.
- Pat the chicken thighs dry and season both sides generously with salt and black pepper.
- Coat the chicken in the marinade and let it sit for at least 15 minutes (or up to 2 hours in the fridge for deeper flavor).
- Preheat your grill to medium-high heat (about 400°F). Oil the grates to prevent sticking.
- Grill the chicken thighs skin-side down for 6-8 minutes until nicely charred, then flip and cook for another 10-12 minutes until the internal temperature reaches 165°F.
- Brush with remaining marinade in the last 2 minutes for an extra glaze.
- Rest for 5 minutes, garnish with fresh parsley, and serve hot.
Nutrition Information (Per Serving)
| Nutrient | Per Serving |
| Calories | 320 kcal |
| Protein | 28g |
| Carbohydrates | 14g |
| Fat | 17g |
| Fiber | 0g |
| Sugar | 11g |
| Sodium | 480mg |
What to Serve It With
These chicken thighs shine alongside grilled corn on the cob, a crisp cucumber salad, or fluffy white rice. A cold glass of homemade lemonade completes the meal perfectly.
Top Tips for Perfect Grilled Chicken Thighs
- Always bring chicken to room temperature before grilling for even cooking.
- Don’t skip the resting time — it locks in all those delicious juices.
- If flare-ups occur, move chicken to an indirect heat zone briefly.
- Bone-in thighs stay juicier than boneless — trust the process!
Storing and Reheating Tips
Store leftovers in an airtight container in the fridge for up to 3 days. To reheat, place in a 350°F oven for 10-12 minutes or microwave with a damp paper towel to retain moisture. Freeze for up to 2 months — thaw overnight in the fridge before reheating.
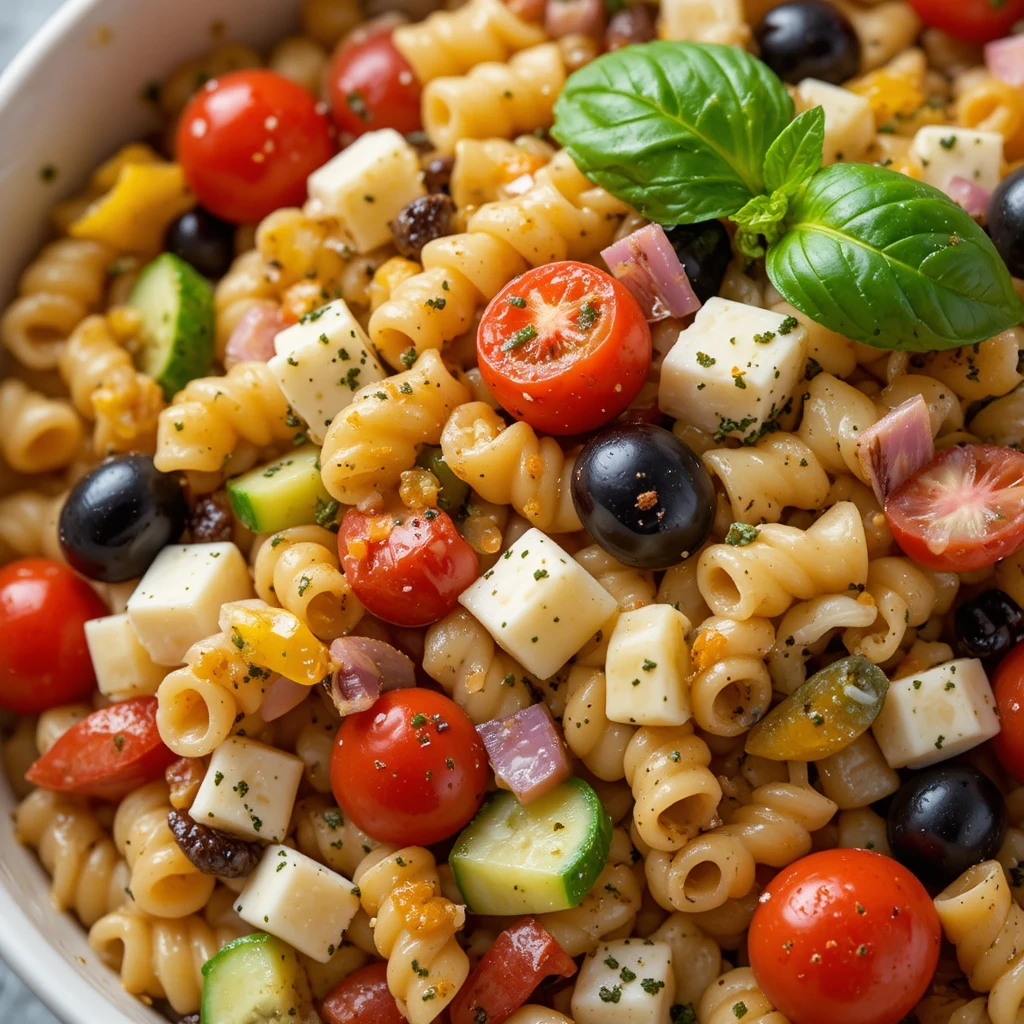
Recipe 2: Easy Summer Veggie Pasta Salad
Quick Overview
This vibrant pasta salad is loaded with colorful vegetables, tossed in a zesty Italian dressing, and ready in just 20 minutes. It’s the ultimate make-ahead summer dish that gets even better the next day.
- Prep Time: 15 minutes
- Cook Time: 10 minutes
- Total Time: 20 minutes (plus 30 min chill time)
- Servings: 6
- Difficulty: Very Easy
Key Ingredients for Summer Veggie Pasta Salad
- 3 cups rotini or penne pasta
- 1 cup cherry tomatoes, halved
- 1 cup cucumber, diced
- 1/2 cup yellow bell pepper, diced
- 1/2 cup black olives, sliced
- 1/4 cup red onion, finely chopped
- 1/2 cup cheddar or mozzarella cubes
- 1/2 cup Italian dressing (store-bought or homemade)
- 1 teaspoon dried oregano
- Salt and pepper to taste
Step-by-Step Instructions
- Cook pasta according to package instructions until al dente. Drain and rinse under cold water to stop cooking.
- While pasta cools, chop all vegetables and prepare your cheese.
- In a large bowl, combine cooled pasta, cherry tomatoes, cucumber, bell pepper, olives, red onion, and cheese.
- Pour Italian dressing over everything and toss to coat evenly.
- Season with oregano, salt, and pepper. Taste and adjust dressing as needed.
- Cover and refrigerate for at least 30 minutes before serving. Toss again right before serving.
Nutrition Information (Per Serving)
| Nutrient | Per Serving |
| Calories | 280 kcal |
| Protein | 9g |
| Carbohydrates | 38g |
| Fat | 10g |
| Fiber | 3g |
| Sugar | 5g |
| Sodium | 390mg |
What to Serve It With
This pasta salad is an excellent side for grilled chicken or burgers. It also stands beautifully on its own as a light lunch. Add grilled shrimp on top for an elevated main course.
Top Tips for Perfect Pasta Salad
- Rinse pasta with cold water after cooking to prevent clumping.
- Make it the night before for maximum flavor absorption.
- Add more dressing before serving if pasta has absorbed too much.
- Keep it dairy-free by skipping the cheese or using a plant-based alternative.
Storing and Reheating Tips
Store covered in the fridge for up to 4 days. This dish is served cold, so no reheating needed! It actually improves in flavor over 24 hours. Not recommended for freezing due to the fresh vegetables.
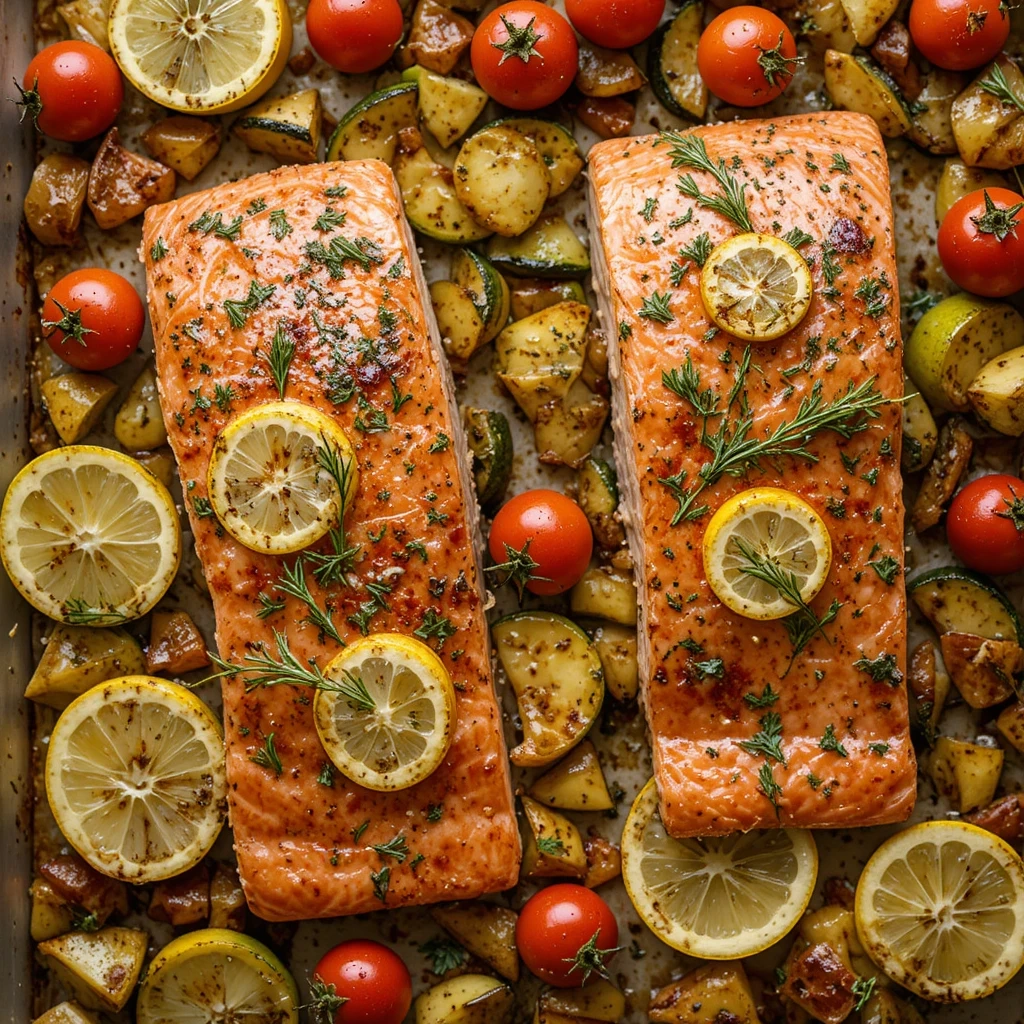
Recipe 3: Sheet Pan Lemon Herb Salmon with Vegetables
Quick Overview
Flaky, buttery salmon with crispy roasted vegetables — all cooked on one pan for minimal cleanup. The bright lemon-herb flavor makes this feel restaurant-quality, but it’s secretly one of the easiest dinners you’ll ever make.
- Prep Time: 10 minutes
- Cook Time: 20 minutes
- Total Time: 30 minutes
- Servings: 4
- Difficulty: Easy
Key Ingredients for Sheet Pan Lemon Herb Salmon
- 4 salmon fillets (6 oz each)
- 2 zucchini, sliced into half-moons
- 1 cup cherry tomatoes
- 1 lemon, sliced into rounds
- 3 tablespoons olive oil
- 3 garlic cloves, minced
- 1 tablespoon fresh dill or parsley
- 1 teaspoon lemon zest
- Salt, black pepper, and paprika to taste
Step-by-Step Instructions
- Preheat oven to 400°F. Line a large baking sheet with parchment paper.
- Toss zucchini and cherry tomatoes with 2 tablespoons olive oil, salt, and pepper. Spread on the sheet pan.
- Place salmon fillets on top of the vegetables.
- Mix remaining olive oil with garlic, lemon zest, dill, paprika, salt, and pepper. Brush generously over salmon.
- Arrange lemon slices over the salmon fillets.
- Roast for 18-20 minutes until salmon flakes easily with a fork and vegetables are tender.
- Serve immediately with extra lemon wedges on the side.
Nutrition Information (Per Serving)
| Nutrient | Per Serving |
| Calories | 370 kcal |
| Protein | 35g |
| Carbohydrates | 8g |
| Fat | 22g |
| Fiber | 2g |
| Sugar | 4g |
| Sodium | 300mg |
What to Serve It With
Pair with fluffy couscous, garlic roasted potatoes, or a simple arugula salad with lemon vinaigrette. A side of warm pita bread is also a wonderful addition.
Storing and Reheating Tips
Refrigerate leftovers in an airtight container for up to 2 days. Reheat gently in a 275°F oven for 10-12 minutes to avoid drying out the salmon. Not ideal for microwaving. Salmon is not recommended for freezing once cooked.
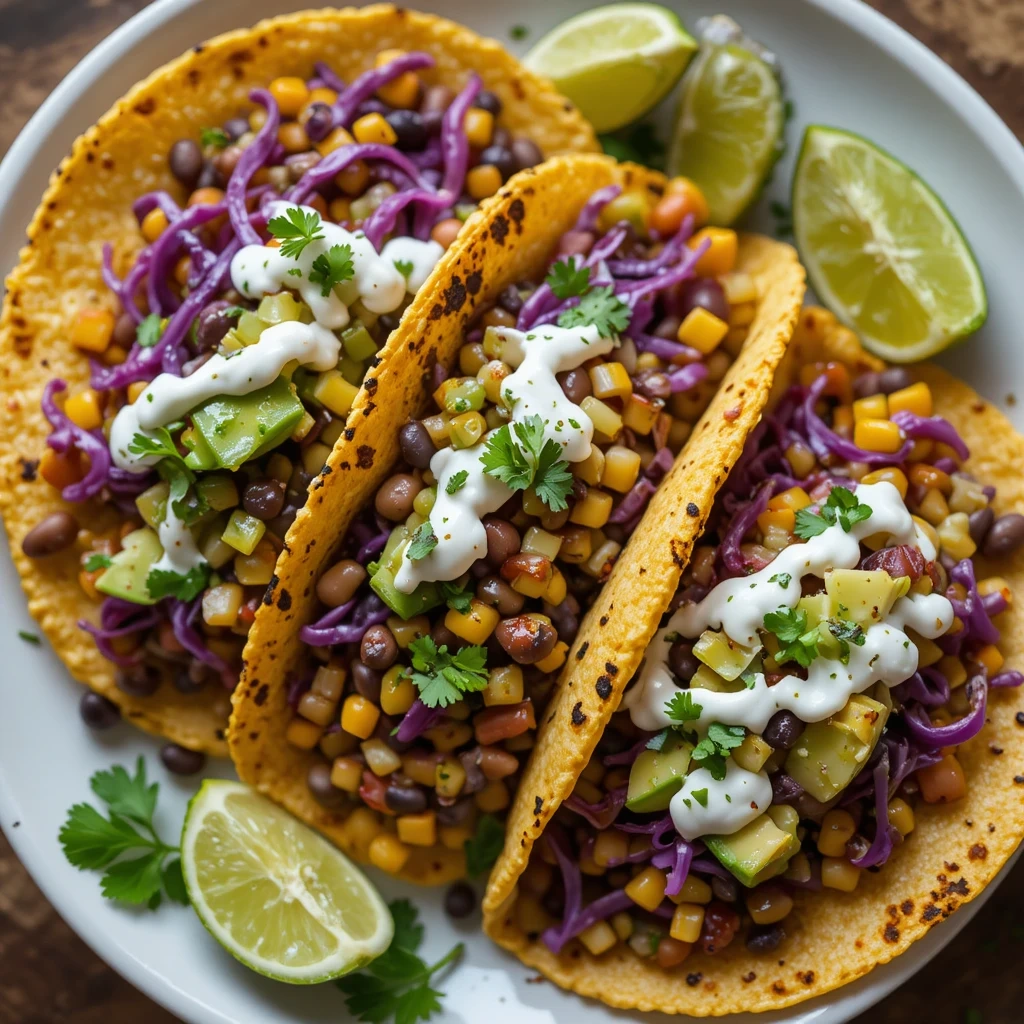
Recipe 4: Grilled Corn and Black Bean Tacos
Quick Overview
These vibrant vegetarian tacos are bursting with smoky grilled corn, hearty black beans, creamy avocado, and a zippy lime crema. They’re assembled in minutes and absolutely loved by kids and adults alike.
- Prep Time: 15 minutes
- Cook Time: 10 minutes
- Total Time: 25 minutes
- Servings: 4 (2 tacos each)
- Difficulty: Easy
Key Ingredients for Grilled Corn and Black Bean Tacos
- 8 small corn or flour tortillas
- 2 ears of corn, husked
- 1 can (15 oz) black beans, drained and rinsed
- 1 avocado, sliced
- 1/2 cup shredded purple cabbage
- 1/2 cup plain yogurt or sour cream
- Juice of 1 lime
- 1/2 teaspoon cumin
- 1/4 cup fresh cilantro
- Salt and chili flakes to taste
Step-by-Step Instructions
- Grill corn directly on the grates over medium-high heat for 8-10 minutes, turning occasionally until charred in spots. Cut kernels off the cob.
- Warm black beans in a small saucepan with cumin, a pinch of salt, and a splash of water.
- Mix yogurt with lime juice, a pinch of salt, and a tiny pinch of chili flakes to make the lime crema.
- Warm tortillas in a dry skillet for 30 seconds per side.
- Assemble tacos: layer black beans, grilled corn, avocado, and purple cabbage on each tortilla.
- Drizzle with lime crema and top with fresh cilantro.
- Serve immediately with extra lime wedges.
Nutrition Information (Per Serving — 2 tacos)
| Nutrient | Per Serving |
| Calories | 340 kcal |
| Protein | 13g |
| Carbohydrates | 52g |
| Fat | 10g |
| Fiber | 10g |
| Sugar | 6g |
| Sodium | 350mg |
What to Serve It With
Serve with a fresh mango salsa, tortilla chips and guacamole, or a cool watermelon feta salad. A homemade agua fresca or sparkling water with mint makes the perfect drink pairing.
Storing and Reheating Tips
Store components separately in the fridge. Corn and beans keep for 3 days; assemble tacos fresh. Tortillas can be reheated in a dry skillet. Avocado should be sliced fresh to prevent browning.
Recipe 5: One-Pan Garlic Butter Shrimp and Zucchini
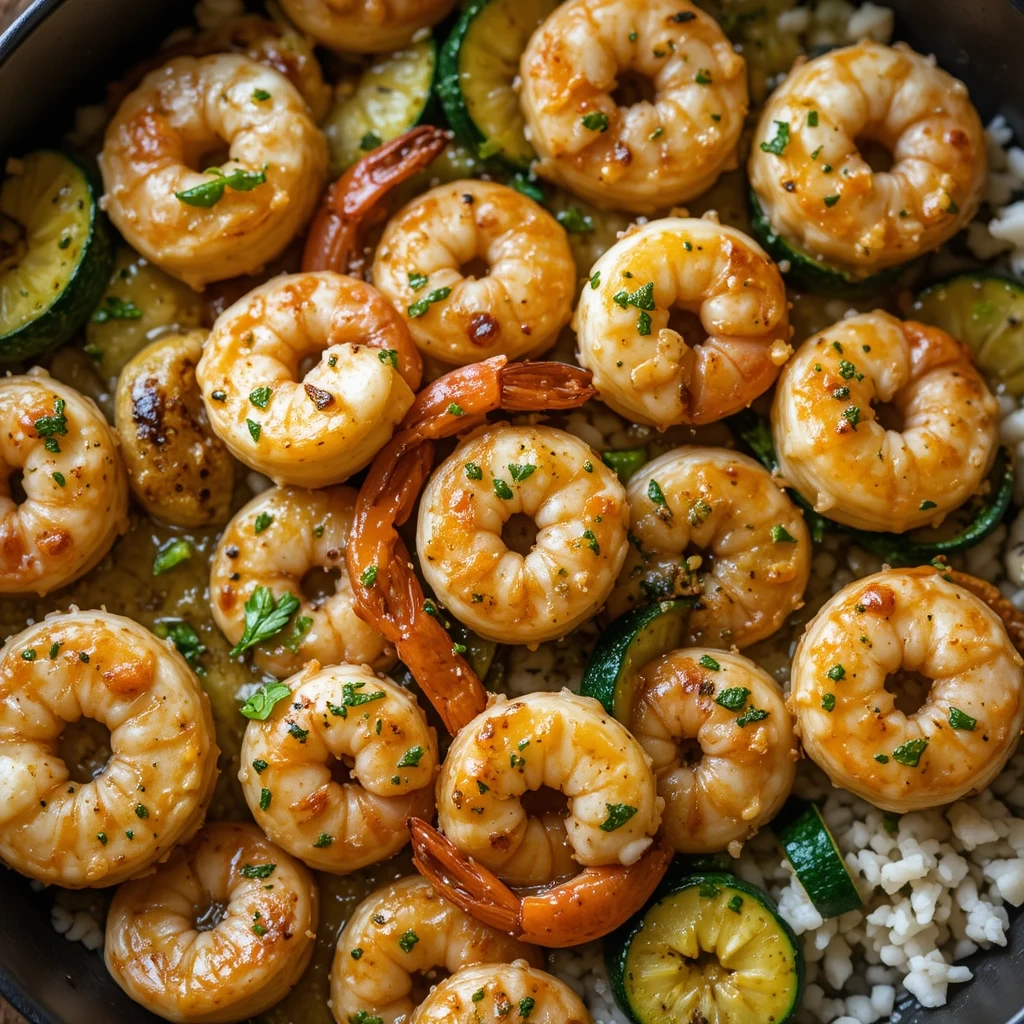
Quick Overview
Golden, garlicky shrimp and tender zucchini come together in one pan in just 15 minutes. This dish is low-carb, ridiculously flavorful, and elegant enough for company — yet simple enough for a busy Tuesday.
- Prep Time: 5 minutes
- Cook Time: 10 minutes
- Total Time: 15 minutes
- Servings: 4
- Difficulty: Very Easy
Key Ingredients for Garlic Butter Shrimp and Zucchini
- 1 lb large shrimp, peeled and deveined
- 2 medium zucchini, cut into half-moons
- 4 tablespoons unsalted butter
- 5 garlic cloves, minced
- 1 teaspoon paprika
- Juice of half a lemon
- 2 tablespoons fresh parsley, chopped
- Salt and black pepper to taste
Step-by-Step Instructions
- Pat shrimp completely dry and season with paprika, salt, and pepper.
- Heat 2 tablespoons of butter in a large skillet over medium-high heat.
- Add zucchini and cook for 3-4 minutes until golden. Remove and set aside.
- In the same pan, melt remaining butter and add garlic. Cook for 30 seconds until fragrant.
- Add shrimp in a single layer. Cook 1-2 minutes per side until pink and cooked through.
- Return zucchini to the pan. Squeeze lemon juice over everything and toss gently.
- Top with fresh parsley and serve immediately over rice, pasta, or on its own.
Nutrition Information (Per Serving)
| Nutrient | Per Serving |
| Calories | 220 kcal |
| Protein | 24g |
| Carbohydrates | 5g |
| Fat | 12g |
| Fiber | 1g |
| Sugar | 2g |
| Sodium | 420mg |
What to Serve It With
Serve over buttery white rice, angel hair pasta, or cauliflower rice for a lighter option. A slice of crusty bread to soak up that garlic butter sauce is highly recommended!
Storing and Reheating Tips
Best enjoyed fresh. Store leftovers in the fridge for up to 2 days. Reheat gently in a pan over low heat with a splash of water to prevent rubbery shrimp. Avoid microwaving as it overcooks the shrimp.
Recipe 6: BBQ Pulled Chicken Sandwiches
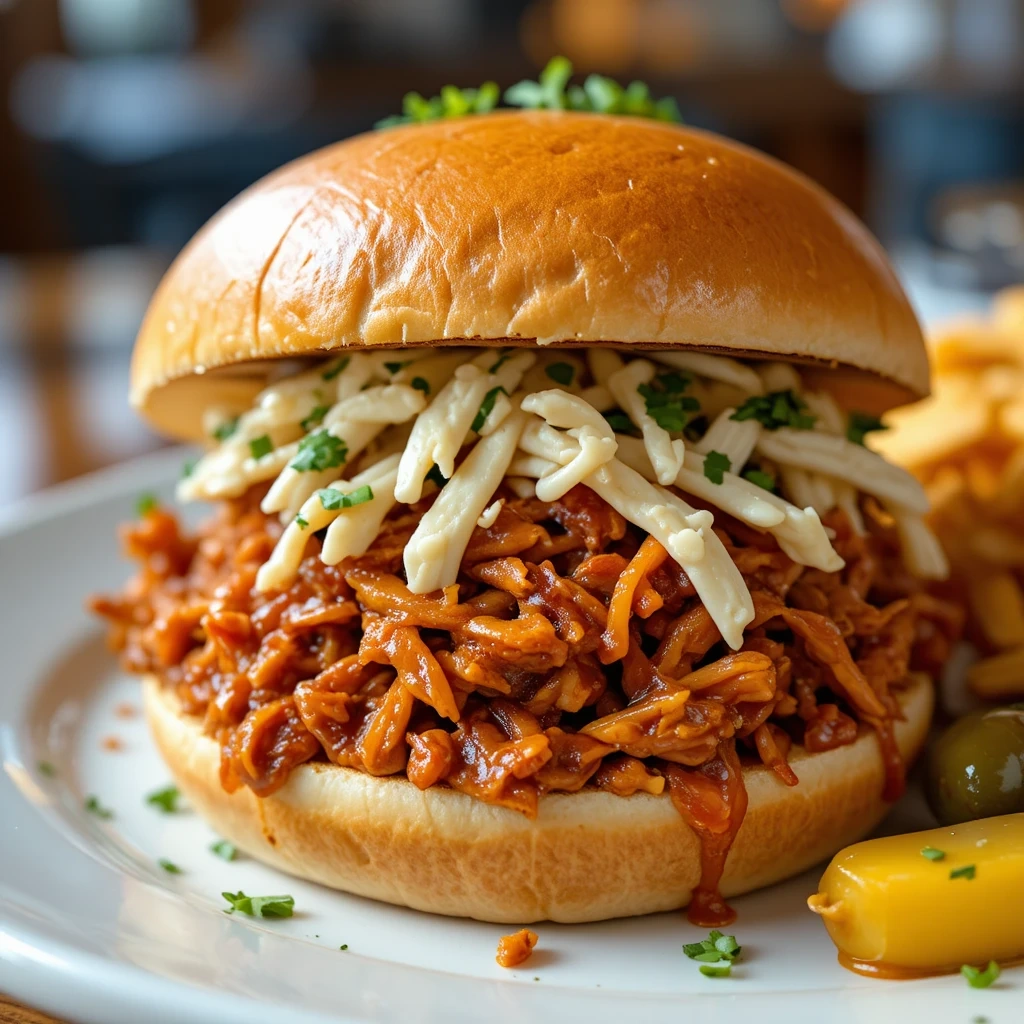
Quick Overview
Tender, slow-cooked pulled chicken drenched in tangy homemade BBQ sauce — piled high on a soft bun with creamy coleslaw. This is summer comfort food at its finest, and the whole family will line up for seconds.
- Prep Time: 10 minutes
- Cook Time: 25 minutes (stovetop) or 4 hours (slow cooker)
- Total Time: 35 minutes
- Servings: 6
- Difficulty: Easy
Key Ingredients for BBQ Pulled Chicken Sandwiches
- 2 lbs boneless, skinless chicken breasts
- 1 cup tomato ketchup
- 2 tablespoons apple cider vinegar
- 2 tablespoons brown sugar
- 1 tablespoon Worcestershire sauce
- 1 teaspoon garlic powder
- 1 teaspoon onion powder
- 1/2 teaspoon smoked paprika
- 6 burger buns
- 2 cups store-bought or homemade coleslaw
Step-by-Step Instructions
- Mix ketchup, apple cider vinegar, brown sugar, Worcestershire sauce, garlic powder, onion powder, and paprika together to make the BBQ sauce.
- Place chicken breasts in a wide skillet and pour BBQ sauce over them.
- Bring to a boil, then reduce to low heat. Cover and simmer for 20-25 minutes until chicken is cooked through.
- Remove chicken and shred with two forks on a cutting board.
- Return shredded chicken to the pan and toss in the sauce. Simmer for 5 more minutes.
- Toast burger buns lightly in the oven or on a skillet.
- Pile pulled chicken high on buns and top with creamy coleslaw. Serve immediately.
Nutrition Information (Per Serving)
| Nutrient | Per Serving |
| Calories | 410 kcal |
| Protein | 34g |
| Carbohydrates | 42g |
| Fat | 9g |
| Fiber | 2g |
| Sugar | 18g |
| Sodium | 620mg |
What to Serve It With
Serve alongside sweet potato fries, corn on the cob, pickles, or a classic baked bean salad. A tall glass of iced sweet tea or sparkling lemonade is the perfect drink to wash it all down.
Storing and Reheating Tips
The pulled chicken keeps wonderfully in the fridge for up to 4 days or can be frozen for up to 3 months. Reheat in a covered skillet over medium-low heat with a splash of water. Store the buns and coleslaw separately for best results.
Recipe 7: Caprese Stuffed Avocados
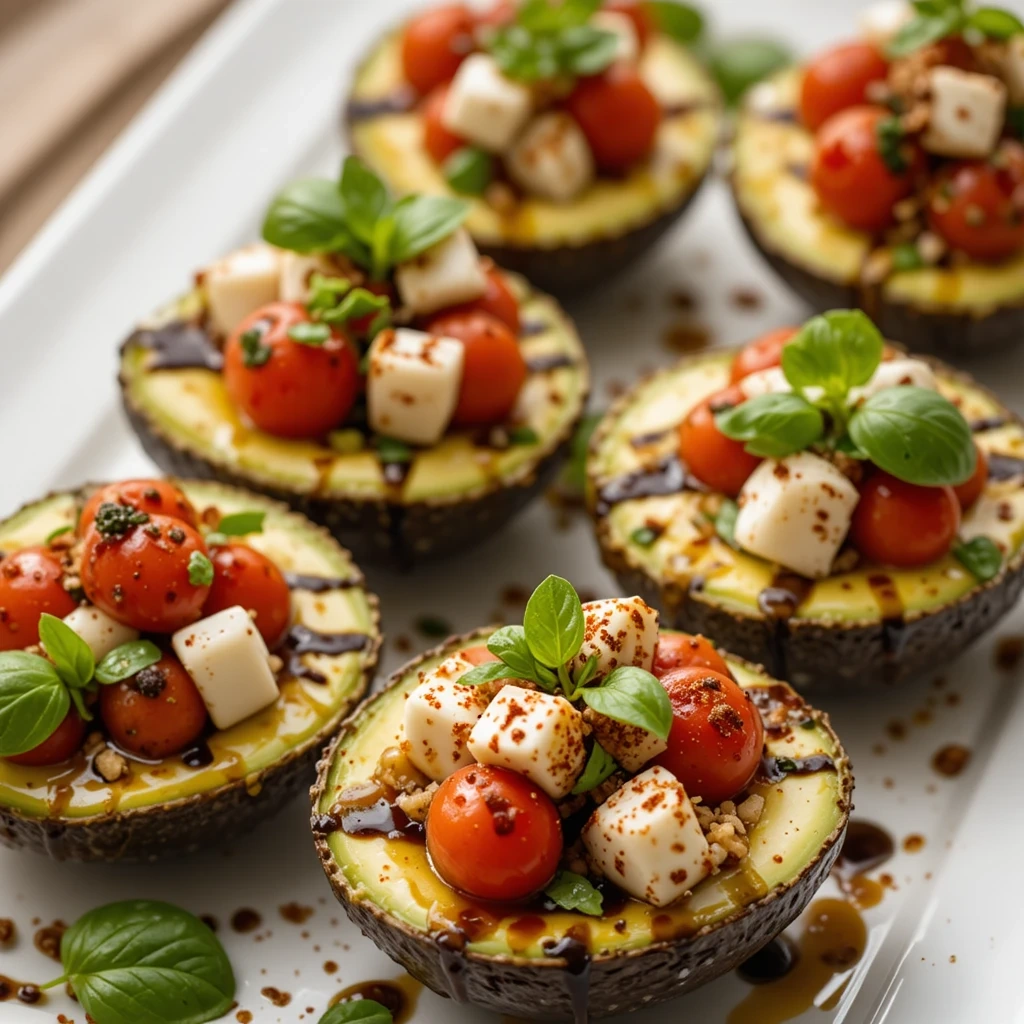
Quick Overview
No-cook, no-fuss, and absolutely gorgeous — these Caprese stuffed avocados are ready in 10 minutes and taste like a restaurant appetizer turned into a full meal. Creamy avocado meets fresh mozzarella, juicy tomatoes, and fragrant basil.
- Prep Time: 10 minutes
- Cook Time: 0 minutes
- Total Time: 10 minutes
- Servings: 4
- Difficulty: Very Easy
Key Ingredients for Caprese Stuffed Avocados
- 2 large ripe avocados, halved and pitted
- 1 cup cherry tomatoes, quartered
- 4 oz fresh mozzarella, cut into small cubes
- 1/4 cup fresh basil leaves, torn
- 2 tablespoons extra virgin olive oil
- 1 tablespoon balsamic glaze
- Salt and black pepper to taste
- Optional: a pinch of red chili flakes
Step-by-Step Instructions
- Halve and pit the avocados. Use a spoon to slightly scoop out a little extra flesh to make more room for the filling.
- Dice the scooped avocado flesh and combine with cherry tomatoes, mozzarella, and basil.
- Drizzle with olive oil, season with salt and pepper, and toss gently.
- Spoon the Caprese filling generously into each avocado half.
- Drizzle balsamic glaze over the top and add chili flakes if desired.
- Serve immediately on a pretty platter for maximum wow factor.
Nutrition Information (Per Serving)
| Nutrient | Per Serving |
| Calories | 290 kcal |
| Protein | 10g |
| Carbohydrates | 10g |
| Fat | 24g |
| Fiber | 7g |
| Sugar | 3g |
| Sodium | 200mg |
What to Serve It With
Serve as a starter with crusty sourdough bread, alongside grilled chicken, or as a light main with a simple green salad. The balsamic glaze also makes it a showstopping brunch dish.
Storing and Reheating Tips
Best assembled and served immediately — avocados brown quickly once cut. If prepping ahead, prepare the filling separately and store in the fridge for up to 24 hours. Halve and fill the avocados right before serving.
Recipe 8: Cheesy Chicken Quesadillas with Mango Salsa

Quick Overview
Golden, crispy quesadillas filled with gooey melted cheese and seasoned chicken, served with a bright, tropical mango salsa — this is the kind of dinner kids request every single week. And honestly, you won’t blame them.
- Prep Time: 10 minutes
- Cook Time: 15 minutes
- Total Time: 25 minutes
- Servings: 4
- Difficulty: Easy
Key Ingredients for Cheesy Chicken Quesadillas
- 2 cups cooked, shredded chicken
- 4 large flour tortillas
- 1.5 cups shredded Mexican cheese blend
- 1 teaspoon cumin
- 1/2 teaspoon garlic powder
- 1 tablespoon olive oil
- 1 mango, diced
- 1/4 cup red onion, finely diced
- 1 jalapeño, finely diced (optional, for adults)
- Juice of 1 lime
- 2 tablespoons fresh cilantro
Step-by-Step Instructions
- Season shredded chicken with cumin, garlic powder, and a pinch of salt.
- Make the mango salsa: combine diced mango, red onion, lime juice, cilantro, and jalapeño. Set aside.
- Lay a tortilla flat and sprinkle cheese on one half. Add chicken on top of the cheese, then fold tortilla over.
- Heat olive oil in a skillet over medium heat. Cook each quesadilla for 2-3 minutes per side until golden and crispy.
- Slice each quesadilla into triangles using a pizza cutter.
- Serve hot with the fresh mango salsa and a dollop of sour cream or plain yogurt.
Nutrition Information (Per Serving)
| Nutrient | Per Serving |
| Calories | 430 kcal |
| Protein | 30g |
| Carbohydrates | 40g |
| Fat | 16g |
| Fiber | 2g |
| Sugar | 8g |
| Sodium | 530mg |
What to Serve It With
Serve with fresh guacamole, tortilla chips, or a simple Mexican rice. A cold glass of homemade horchata or sparkling water with lime makes this feel like a fiesta at home.
Storing and Reheating Tips
Store leftover quesadillas in the fridge for up to 3 days. Reheat in a dry skillet over medium heat for 2-3 minutes per side to restore crispiness. Store mango salsa separately and use within 1-2 days.
Recipe 9: Greek Chicken Bowls with Tzatziki
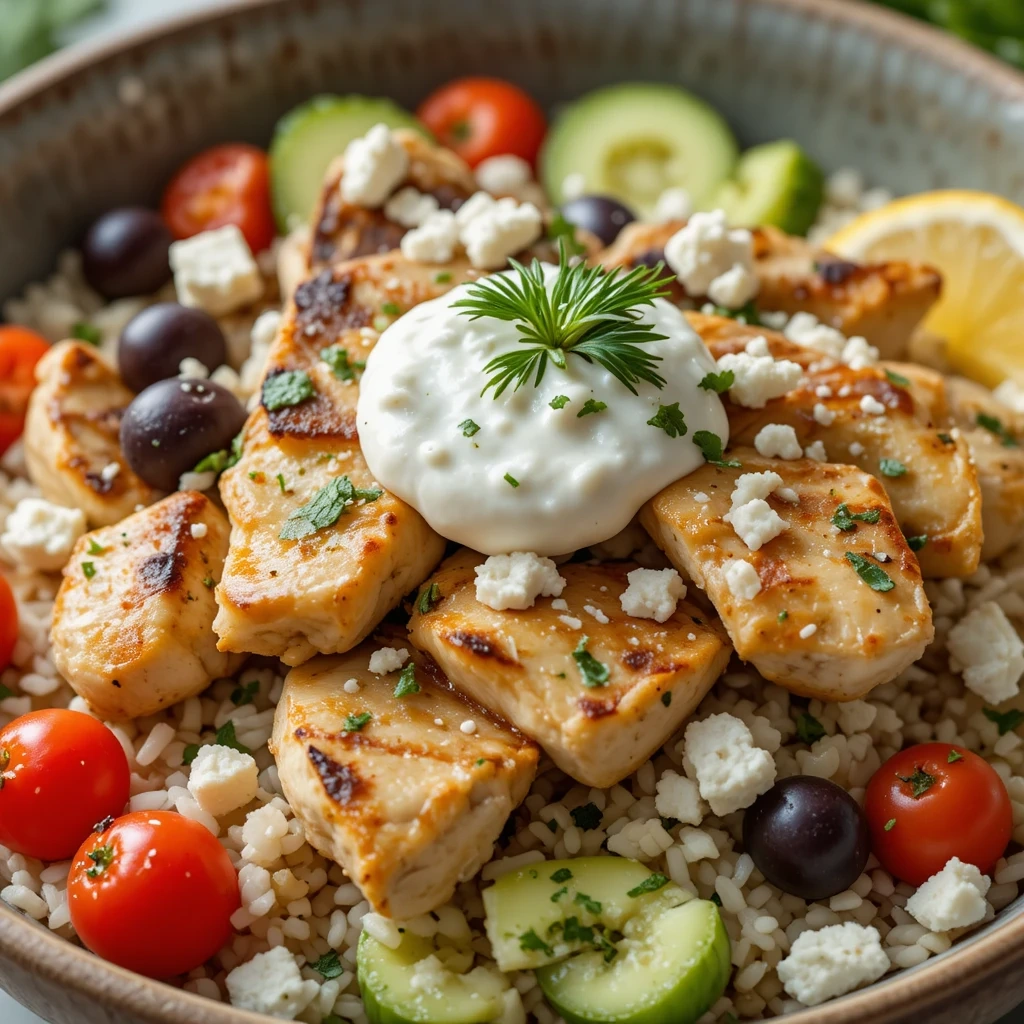
Quick Overview
Bright, Mediterranean-inspired chicken bowls loaded with fresh veggies, fluffy rice, and a cool homemade tzatziki. This one is a meal prep champion — make everything ahead and assemble bowls all week long.
- Prep Time: 15 minutes
- Cook Time: 15 minutes
- Total Time: 30 minutes
- Servings: 4
- Difficulty: Easy
Key Ingredients for Greek Chicken Bowls
- 1.5 lbs boneless chicken breast, cut into chunks
- 2 tablespoons olive oil
- 2 teaspoons dried oregano
- 1 teaspoon garlic powder
- Juice of 1 lemon
- 2 cups cooked rice or orzo
- 1 cup cherry tomatoes, halved
- 1 cup cucumber, diced
- 1/2 cup Kalamata olives, sliced
- 1/2 cup feta cheese, crumbled
- 1/2 cup plain Greek yogurt
- 1 garlic clove, grated
- 2 tablespoons fresh dill or mint
- Salt and pepper to taste
Step-by-Step Instructions
- Marinate chicken chunks in olive oil, oregano, garlic powder, lemon juice, salt, and pepper for at least 15 minutes.
- Make tzatziki: Mix Greek yogurt with grated garlic, dill, a squeeze of lemon juice, and salt. Refrigerate until serving.
- Cook chicken in a hot skillet or grill pan for 5-6 minutes per side until fully cooked and golden.
- Assemble bowls: start with rice or orzo, add chicken, cherry tomatoes, cucumber, and olives.
- Crumble feta cheese on top.
- Add a generous spoonful of tzatziki and drizzle with olive oil.
- Serve immediately or pack into meal prep containers for the week.
Nutrition Information (Per Serving)
| Nutrient | Per Serving |
| Calories | 450 kcal |
| Protein | 38g |
| Carbohydrates | 35g |
| Fat | 16g |
| Fiber | 3g |
| Sugar | 5g |
| Sodium | 570mg |
What to Serve It With
Warm pita bread, hummus, and a simple tabbouleh salad round out this bowl perfectly. For a bigger spread, add a plate of stuffed grape leaves.
Storing and Reheating Tips
Store all components separately in the fridge for up to 4 days. Reheat chicken and rice gently in the microwave. Keep tzatziki cold and add fresh just before eating. This is an excellent meal prep recipe!
Recipe 10: Watermelon Feta Mint Salad
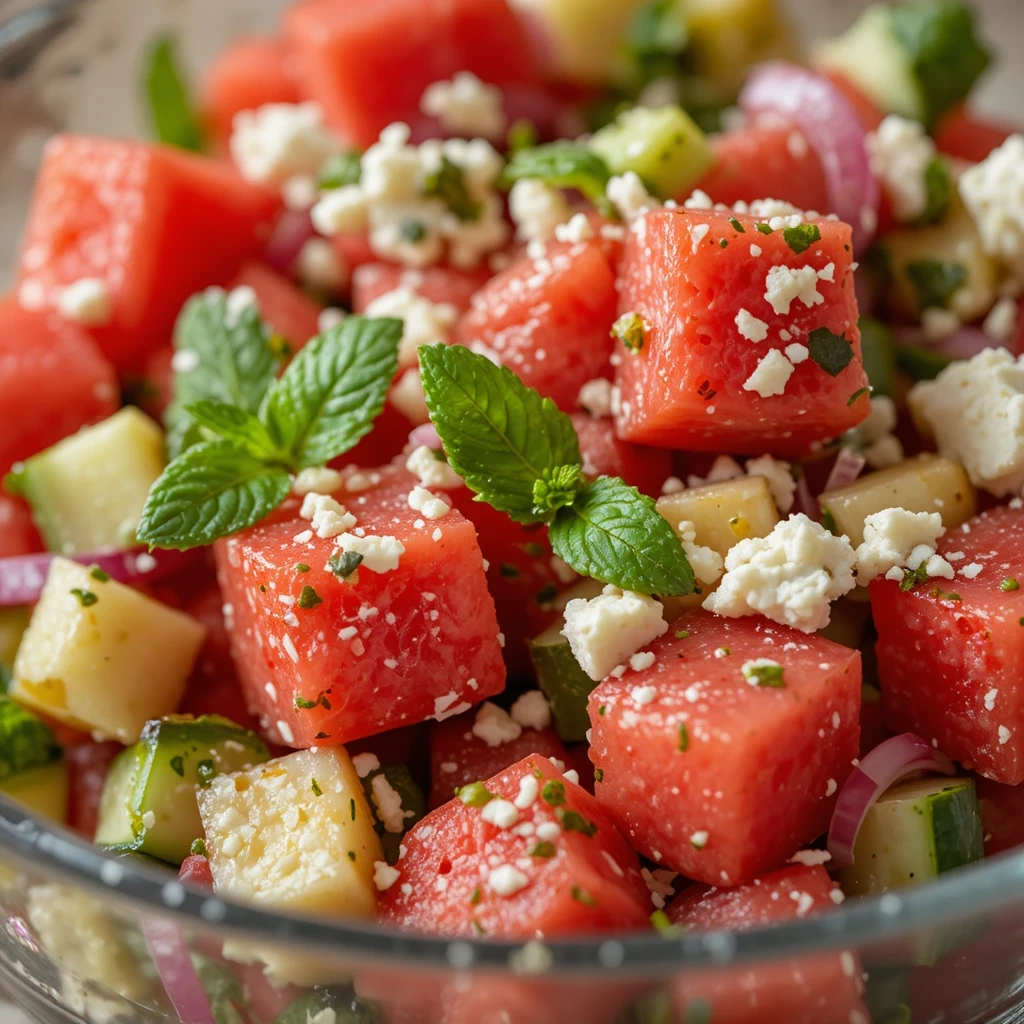
Quick Overview
Don’t underestimate this salad — it’s the unexpected showstopper of every summer gathering. Sweet watermelon, salty feta, crisp cucumber, and fresh mint come together in the most refreshing, simple dish of the season. Technically no cooking required!
- Prep Time: 10 minutes
- Cook Time: 0 minutes
- Total Time: 10 minutes
- Servings: 6
- Difficulty: Very Easy
Key Ingredients for Watermelon Feta Mint Salad
- 5 cups watermelon, cubed
- 1 cup feta cheese, crumbled
- 1 cup cucumber, diced
- 1/4 cup fresh mint leaves
- 2 tablespoons extra virgin olive oil
- 1 tablespoon fresh lime juice
- 1/4 teaspoon black pepper
- Optional: 1/4 cup thinly sliced red onion
Step-by-Step Instructions
- Cut watermelon into bite-sized cubes and place in a large serving bowl.
- Add diced cucumber and crumbled feta cheese.
- Tear mint leaves and scatter over the salad.
- Whisk together olive oil and lime juice, then drizzle over the salad.
- Season with black pepper (no salt needed — the feta is already salty).
- Toss gently and serve immediately, or chill for 10 minutes for extra refreshment.
Nutrition Information (Per Serving)
| Nutrient | Per Serving |
| Calories | 160 kcal |
| Protein | 5g |
| Carbohydrates | 16g |
| Fat | 9g |
| Fiber | 1g |
| Sugar | 12g |
| Sodium | 310mg |
What to Serve It With
This salad is a brilliant companion to grilled meats, BBQ chicken, or lamb chops. It also works beautifully as a standalone afternoon snack on a hot day. Gorgeous on a picnic table!
Storing and Reheating Tips
Best served fresh. Leftovers can be stored in the fridge for up to 1 day, though the watermelon will release some juice over time. Give it a gentle toss before serving again. Not suitable for freezing.
Tips for Avoiding Common Cooking Mistakes with Summer Recipes
Don’t Overcook the Protein
Whether it’s chicken, shrimp, or salmon — overcooking is the most common culprit of dry summer dishes. Use a meat thermometer and always pull proteins off heat 2-3 degrees before the target temperature, as they continue to cook as they rest.
Season Every Layer
One of the biggest mistakes home cooks make is seasoning only at the end. Each component — the marinade, the vegetables, the sauce — should be seasoned independently. This builds depth of flavor that makes every bite satisfying.
Don’t Skip the Resting Time
After grilling or cooking protein, always let it rest for 3-5 minutes. This allows the juices to redistribute throughout the meat. Cutting into it too soon will cause all those delicious juices to run out onto the board, leaving you with a dryer result.
Use Fresh Ingredients Whenever Possible
Summer is the season when fresh produce is at its absolute best. Opt for ripe tomatoes, fresh herbs, and seasonal vegetables. The difference in flavor between a watery off-season tomato and a sun-ripened summer one is remarkable.
Balance Your Flavors
Every great dish needs a balance of salty, sweet, acidic, and savory notes. If something tastes flat, it usually needs a squeeze of lemon or a pinch of salt. If it’s too rich, a splash of vinegar or citrus cuts right through it.
Frequently Asked Questions About Summer Dinner Recipes
What are the easiest summer dinner recipes for a family of 4?
The easiest options from this list include Garlic Butter Shrimp and Zucchini (15 minutes!), Cheesy Chicken Quesadillas, and Grilled Honey Garlic Chicken Thighs. All of them require minimal prep and use simple pantry staples.
Can I make summer dinner recipes ahead of time?
Absolutely! Pasta salad, Greek Chicken Bowls, and BBQ Pulled Chicken are all excellent make-ahead recipes. Prep them on Sunday and enjoy easy dinners all week long. Store components separately and assemble fresh for best results.
What are good summer dinner ideas that kids will eat?
Kids tend to love the Cheesy Chicken Quesadillas, BBQ Pulled Chicken Sandwiches, Grilled Corn Tacos, and Garlic Butter Shrimp. These all have familiar flavors with fun presentations that make dinner feel exciting.
What summer dinners are healthy and light?
For lighter options, try the Sheet Pan Lemon Herb Salmon, Caprese Stuffed Avocados, Watermelon Feta Mint Salad, and Greek Chicken Bowls. They’re high in protein, loaded with fresh vegetables, and free from heavy sauces.
Can I use frozen vegetables in summer recipes?
Yes! While fresh is always preferred, frozen corn, edamame, peas, and mixed vegetables work perfectly in most of these recipes. Just thaw and pat dry before cooking to avoid excess moisture.
How do I stop chicken from drying out on the grill?
Always marinate your chicken for at least 30 minutes before grilling. Use bone-in thighs over breasts for juicier results. Avoid pressing down on the meat while cooking, and use a meat thermometer to pull the chicken the moment it hits 165°F.
What are some no-cook summer dinner recipes?
The Caprese Stuffed Avocados and Watermelon Feta Mint Salad require absolutely zero cooking. The pasta salad only needs a brief boil for the pasta. These are perfect for extremely hot days when the last thing you want is to stand over a stove.
What drinks pair well with summer dinners?
Homemade lemonade, infused water (think cucumber-mint or strawberry-basil), sparkling water with citrus, fresh fruit juices, and herbal iced teas all pair beautifully with these summer meals. All refreshing, all halal, and all delicious!
Final Thoughts
Summer dinners should feel as carefree and joyful as the season itself. Whether you’re firing up the grill on a Saturday evening, looking for something quick on a school night, or planning a weekend family feast — this list of 10 summer dinner recipes has you covered from every angle.
The best part? Every single recipe here was designed with real families in mind. They’re kid-friendly, budget-conscious, and packed with the bold, fresh flavors that make summer food so unforgettable. So pick your favorite, gather the family, and make some delicious memories together. Happy cooking!
If you tried any of these recipes, we’d love to hear from you! Leave a comment below and tell us which one was a hit at your table. And don’t forget to save this post to your Pinterest board so you can come back to it all summer long!