
15 Easy Spring Dinner Ideas the Whole Family Will Love
Spring has arrived, and with it comes the most exciting time of year in the kitchen! After months of heavy soups and stews, the season hands us the most colorful, crunchy, and vibrant ingredients imaginable. These 15 spring dinner ideas are fresh, family-friendly, and surprisingly easy to pull together on a busy weeknight.
Whether you’re a confident home cook or just figuring things out, these recipes will make your dinner table feel like a celebration. Just like our popular One-Pan Lemon Chicken, every recipe here is designed to be simple, satisfying, and something the whole family will actually eat. Get ready to fall in love with cooking again!
What Are Spring Dinner Ideas?
Have you ever opened the fridge in April and stared blankly, wondering what on earth to cook? Spring dinner ideas are simply meals that lean into the season’s best produce — think asparagus, peas, zucchini, spinach, and tender herbs like basil and mint. There’s an old saying that goes, “the way to a man’s heart is through his stomach,” and honestly, spring produce makes that job a whole lot easier!
These meals feel lighter than winter comfort food but are still filling enough to keep everyone satisfied. Ready to bring some sunshine to your dinner table? Let’s dive in!
Why You’ll Love These Spring Dinner Ideas
Fresh Ingredients That Make Every Bite Sing
Spring produce is at its absolute peak right now. Asparagus spears snap perfectly, peas burst with sweetness, and herbs smell like a garden after rain. Cooking with seasonal ingredients means better flavor with less effort — nature does most of the work for you.
Budget-Friendly and Family-Approved
Seasonal produce is less expensive than out-of-season imports. These 15 dinners help you stretch your grocery budget without sacrificing a single bit of flavor. Even the pickiest little eaters at your table will find something they love here.
Quick Prep, Big Reward
Most recipes come together in 30 to 45 minutes. That’s more time for evening walks, homework help, or simply sitting together. If you love our Baked Pasta Primavera, you’ll feel right at home with everything in this collection.
Tips for Avoiding Common Cooking Mistakes
Before we get into the recipes, here are key tips to make sure everything turns out perfectly:
Don’t Skip Drying Your Proteins
Pat chicken, salmon, or shrimp completely dry with paper towels before cooking. Moisture on the surface creates steam in the pan, which prevents the beautiful golden-brown crust you’re looking for.
Avoid Crowding the Pan
Whether roasting vegetables or searing chicken, give everything enough space. A crowded pan traps steam and causes food to stew rather than roast, leaving you with pale, soggy results instead of caramelized, flavorful ones.
Watch Your Garlic Carefully
Garlic goes from golden and wonderful to bitter and burnt in about 30 seconds. Always keep the heat at medium and stir frequently when garlic is in the pan.
Season Every Layer
Season your vegetables before roasting, season your protein before cooking, and always taste the finished dish before serving. Seasoning at every stage builds depth and complexity of flavor that you simply cannot add all at once at the end.
Use Fresh Herbs the Right Way
Woody herbs like rosemary and thyme can go in early during cooking. Delicate herbs like basil, mint, parsley, and dill should always be added at the very end or used as a garnish to preserve their bright, fresh flavor and beautiful green color.
Prep Everything Before You Start Cooking
In French cooking this is called mise en place — “everything in its place.” Chop, measure, and arrange all your ingredients before you turn on the stove. Spring recipes cook quickly, and having everything ready prevents burning or overcooking while you’re still chopping.
Storing and Reheating Tips
Refrigerator Storage
Most of these spring dinner recipes store well in airtight containers in the refrigerator for 3 to 4 days. Pasta dishes are best stored with sauce separate if possible to prevent them from drying out as the pasta absorbs moisture overnight.
Freezer Storage
Soups, stuffed peppers, stir fries, and falafel freeze beautifully for up to 3 months. Label containers with the date and recipe name. Pasta and avocado-based dishes do not freeze well and are best eaten fresh.
Reheating Instructions
- Oven-baked dishes: Reheat at 325°F (160°C) for 10 to 15 minutes, covered with foil to prevent drying out.
- Soups and pasta: Reheat on the stovetop over low heat with a splash of broth or water to restore moisture.
- Shrimp and salmon: Reheat gently in a covered pan on the lowest heat setting to avoid rubbery, overcooked results.
- Rice dishes: Add 1 tablespoon of water per cup of rice before microwaving, covered, for 90 seconds.
What to Serve These Spring Dinners With
These recipes pair beautifully with:
- A fresh green salad tossed with lemon vinaigrette and shaved Parmesan
- Warm crusty bread or toasted garlic flatbread
- Steamed jasmine or basmati rice
- Chilled sparkling water infused with cucumber and fresh mint
- A simple fruit salad with strawberries, kiwi, and mango for dessert
- Roasted baby potatoes with fresh herbs
- A simple cucumber and tomato salad with olive oil and lemon
THE RECIPES
Recipe 1: Lemon Herb Grilled Chicken with Asparagus
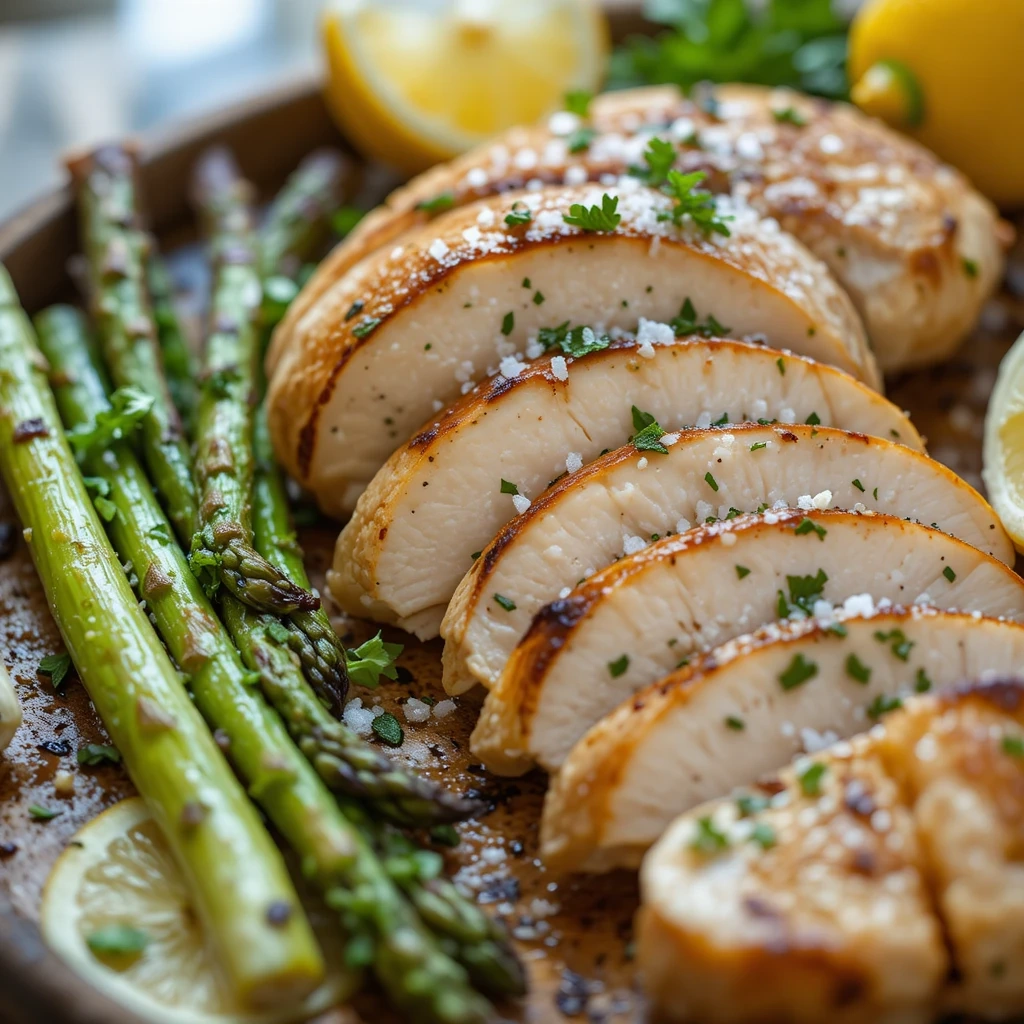
Bright, juicy, and on the table in 35 minutes — this is the spring dinner that will earn you standing ovations at the dinner table.
| Detail | Info |
|---|---|
| Prep Time | 15 minutes |
| Marinating Time | 10 minutes (or up to 2 hours) |
| Cook Time | 20 minutes |
| Total Time | 35 minutes |
| Servings | 4 |
| Difficulty | Easy |
Key Ingredients
For the Chicken:
- 4 boneless, skinless chicken breasts (about 6 oz / 170g each)
- 3 tablespoons extra-virgin olive oil
- Juice of 2 lemons (about 6 tablespoons)
- Zest of 2 lemons (use a microplane or fine grater)
- 3 garlic cloves, finely minced
- 2 tablespoons fresh flat-leaf parsley, finely chopped
- 1 teaspoon dried oregano
- 1/2 teaspoon onion powder
- 1 teaspoon fine sea salt
- 1/2 teaspoon freshly ground black pepper
For the Asparagus:
- 1 bunch fresh asparagus (about 1 lb / 450g), woody ends snapped off
- 1 tablespoon olive oil
- Pinch of salt and pepper
To Serve:
- Extra lemon wedges
- Fresh parsley, roughly chopped
- Flaky sea salt (optional but recommended)
Step-by-Step Instructions
Step 1 — Make the Marinade
In a medium mixing bowl, combine the olive oil, fresh lemon juice, lemon zest, minced garlic, chopped parsley, dried oregano, onion powder, salt, and black pepper. Whisk everything together until well combined. The marinade should smell bright and herby — taste it and adjust salt if needed. You want it slightly salty because the chicken will absorb those flavors.
Step 2 — Prepare the Chicken
Place your chicken breasts on a clean cutting board. If any of them are very thick (over 1 inch), use a sharp knife to carefully slice them horizontally through the middle to create thinner, even pieces — this ensures they cook evenly without the outside drying out before the inside is done. Pat each piece dry with paper towels first. Place chicken into a zip-lock bag or shallow dish.
Step 3 — Marinate the Chicken
Pour the marinade over the chicken, making sure every piece is fully coated. Press the chicken into the marinade. Seal the bag or cover the dish with plastic wrap and let marinate for a minimum of 10 minutes at room temperature, or refrigerate for up to 2 hours. The longer it marinates, the more flavorful and tender the chicken will be. Do not marinate longer than 2 hours as the lemon acid will start to break down the protein too much.
Step 4 — Preheat Your Grill or Grill Pan
If using an outdoor grill, heat to medium-high heat (about 400°F / 200°C). Clean and oil the grill grates by folding a paper towel, dipping it in oil, and using tongs to rub it across the grates — this prevents sticking. If using an indoor grill pan, place it over medium-high heat for 2 full minutes before adding food. A properly preheated cooking surface is essential for beautiful grill marks and easy release.
Step 5 — Prepare the Asparagus
While the grill heats, prepare the asparagus. Hold each stalk at both ends and bend gently — it will snap naturally at the point where the woody, tough end begins. Discard the woody ends. Drizzle the asparagus with 1 tablespoon olive oil, season with salt and pepper, and toss to coat evenly.
Step 6 — Grill the Chicken
Remove chicken from the marinade, letting excess drip off. Place chicken on the hot grill. Do not move it for the first 3 minutes — this allows the grill marks to form properly. After 3 minutes, rotate the chicken 90 degrees (but don’t flip yet) to create crosshatch grill marks. Cook for a further 3 to 4 minutes, then flip. Cook the second side for 5 to 7 minutes, depending on thickness. The chicken is done when an instant-read thermometer inserted into the thickest part reads 165°F (75°C). Remove from grill and let rest on a plate.
Step 7 — Grill the Asparagus
Lay asparagus spears perpendicular to the grill grates so they don’t fall through. Grill for 3 to 5 minutes, turning once or twice with tongs, until tender with slight char marks. Asparagus should be bright green and slightly yielding when pressed — not mushy. Remove from grill.
Step 8 — Rest and Serve
Let the chicken rest for 5 minutes before cutting — this step is non-negotiable. Resting allows the juices to redistribute throughout the meat instead of running out when you cut into it. Slice or serve whole. Arrange on a platter with asparagus alongside. Finish with a squeeze of fresh lemon juice, a scatter of fresh parsley, and a pinch of flaky sea salt.
Nutrition Table (Per Serving)
| Nutrient | Amount |
|---|---|
| Calories | 320 kcal |
| Protein | 38g |
| Carbohydrates | 8g |
| Fat | 14g |
| Fiber | 3g |
| Sodium | 480mg |
Recipe 2: Spring Pea and Mint Pasta
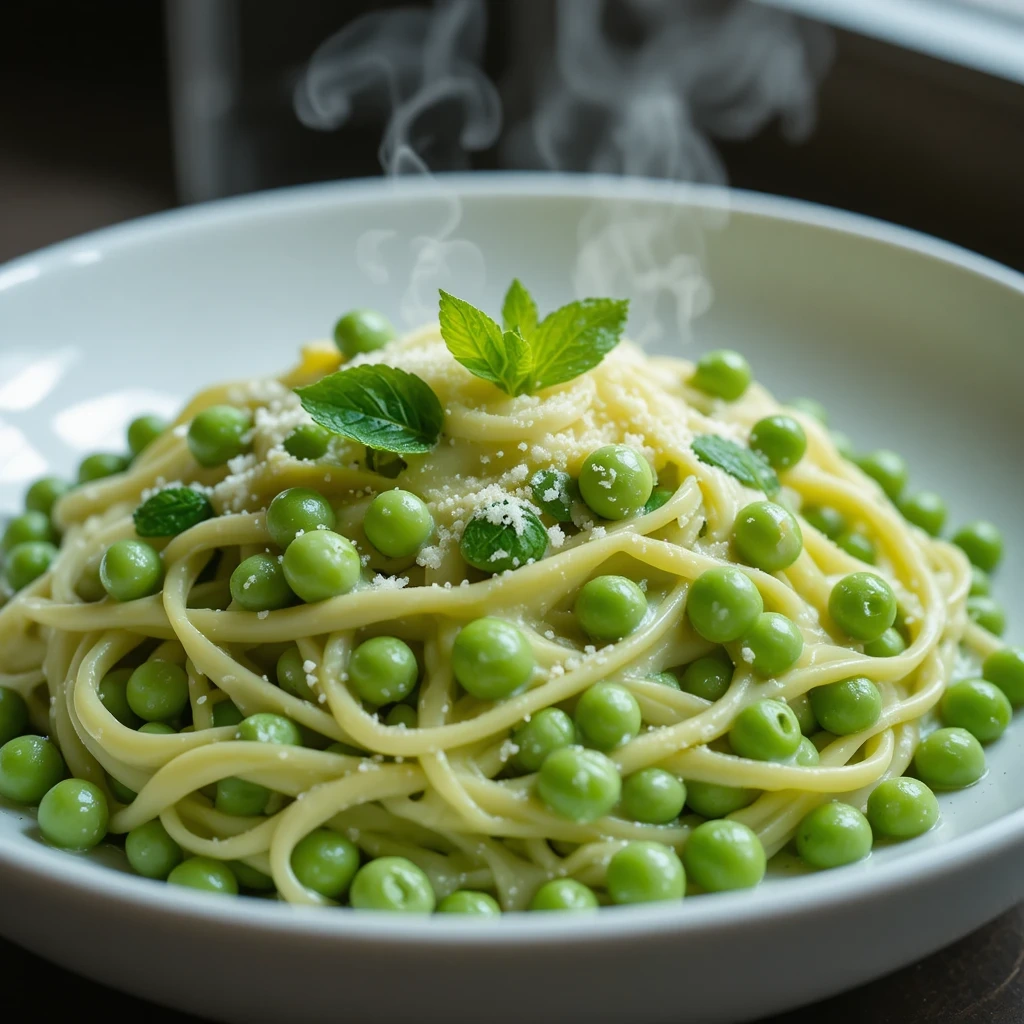
Creamy, vibrant, and so fast it feels like cheating — this pasta is the kind of weeknight miracle that deserves a regular spot in your rotation.
| Detail | Info |
|---|---|
| Prep Time | 5 minutes |
| Cook Time | 20 minutes |
| Total Time | 25 minutes |
| Servings | 4 |
| Difficulty | Very Easy |
Key Ingredients
For the Pasta:
- 12 oz (340g) penne, spaghetti, or linguine
- 1 tablespoon salt (for pasta water)
For the Creamy Pea Sauce:
- 2 cups fresh peas (or frozen peas, thawed — both work beautifully)
- 3 tablespoons unsalted butter
- 2 garlic cloves, finely minced
- 1/2 cup heavy cream (or half-and-half for a lighter version)
- Juice of 1 large lemon (about 3 tablespoons)
- 1/4 cup fresh mint leaves, roughly torn (do not chop — tearing releases more flavor)
- 1/2 cup finely grated Parmesan cheese, plus extra to serve
- Fine sea salt and freshly ground black pepper to taste
- Pinch of red pepper flakes (optional, omit for very young kids)
To Serve:
- Extra Parmesan
- Fresh mint leaves
- Lemon zest
Step-by-Step Instructions
Step 1 — Bring a Large Pot of Water to a Boil
Fill your largest pot with water — pasta needs plenty of room to move and cook evenly. Add 1 tablespoon of salt to the water. The water should taste pleasantly salty, like mild seawater. This is your only chance to season the pasta itself, so don’t skip the salt. Bring to a rolling boil over high heat.
Step 2 — Cook the Pasta
Add pasta to the boiling water and stir immediately to prevent sticking. Cook according to the package instructions, but start checking 1 to 2 minutes before the stated time. You want the pasta al dente — tender but with the tiniest bit of resistance when you bite through it. It should not be hard, but it also should not be completely soft and floppy. Al dente pasta holds the sauce better and has a more satisfying texture.
Step 3 — Reserve the Pasta Water (Very Important!)
Before draining, scoop out at least 1 cup of the cloudy pasta cooking water using a ladle or heatproof measuring cup. Set it aside. This starchy water is liquid gold — it binds and loosens the sauce beautifully and is far more effective than plain water.
Step 4 — Drain the Pasta
Drain pasta through a colander. Do not rinse it — rinsing washes away the starch that helps sauce cling to the pasta. Set drained pasta aside briefly.
Step 5 — Start the Sauce
While the pasta cooks, melt butter in a large, wide skillet over medium heat. Watch carefully — you want the butter to melt gently and turn golden, not burn. Once melted, add the minced garlic and stir constantly for 60 to 90 seconds until it smells fragrant and turns light golden. Do not let it brown.
Step 6 — Cook the Peas
Add the peas to the skillet. If using fresh peas, cook for 3 to 4 minutes until just tender. If using thawed frozen peas, cook for just 1 to 2 minutes — they only need warming through. Season with a pinch of salt. The peas should be bright green and tender; if they’ve turned a dull, army-green color, they’re overcooked.
Step 7 — Add the Cream and Lemon
Pour the heavy cream into the skillet and add the lemon juice. Stir to combine. Let the mixture come to a gentle simmer (small bubbles around the edges) over medium heat. Let it simmer for 2 minutes, stirring occasionally, until it thickens slightly into a silky sauce.
Step 8 — Add the Pasta to the Sauce
Add the drained pasta directly to the skillet with the sauce. Use tongs to toss everything together, coating each strand or tube in the creamy green sauce. If the sauce looks too thick or the pasta seems dry, add a splash of the reserved pasta water — start with 2 tablespoons, toss, and add more as needed. The sauce should coat the pasta in a smooth, creamy film.
Step 9 — Finish and Season
Remove the skillet from heat. Add the grated Parmesan and the torn fresh mint leaves. Toss quickly. The Parmesan will melt into the sauce, making it extra silky. Taste the pasta carefully — season with salt, pepper, and a little more lemon juice if it needs brightness. Add red pepper flakes if using.
Step 10 — Serve Immediately
Divide into warm bowls. Top each serving with extra Parmesan, a few fresh mint leaves, and a little lemon zest grated directly over the bowl. Pasta waits for no one — serve right away!
Nutrition Table (Per Serving)
| Nutrient | Amount |
|---|---|
| Calories | 480 kcal |
| Protein | 18g |
| Carbohydrates | 62g |
| Fat | 18g |
| Fiber | 5g |
| Sodium | 390mg |
Recipe 3: Sheet Pan Salmon with Spring Vegetables
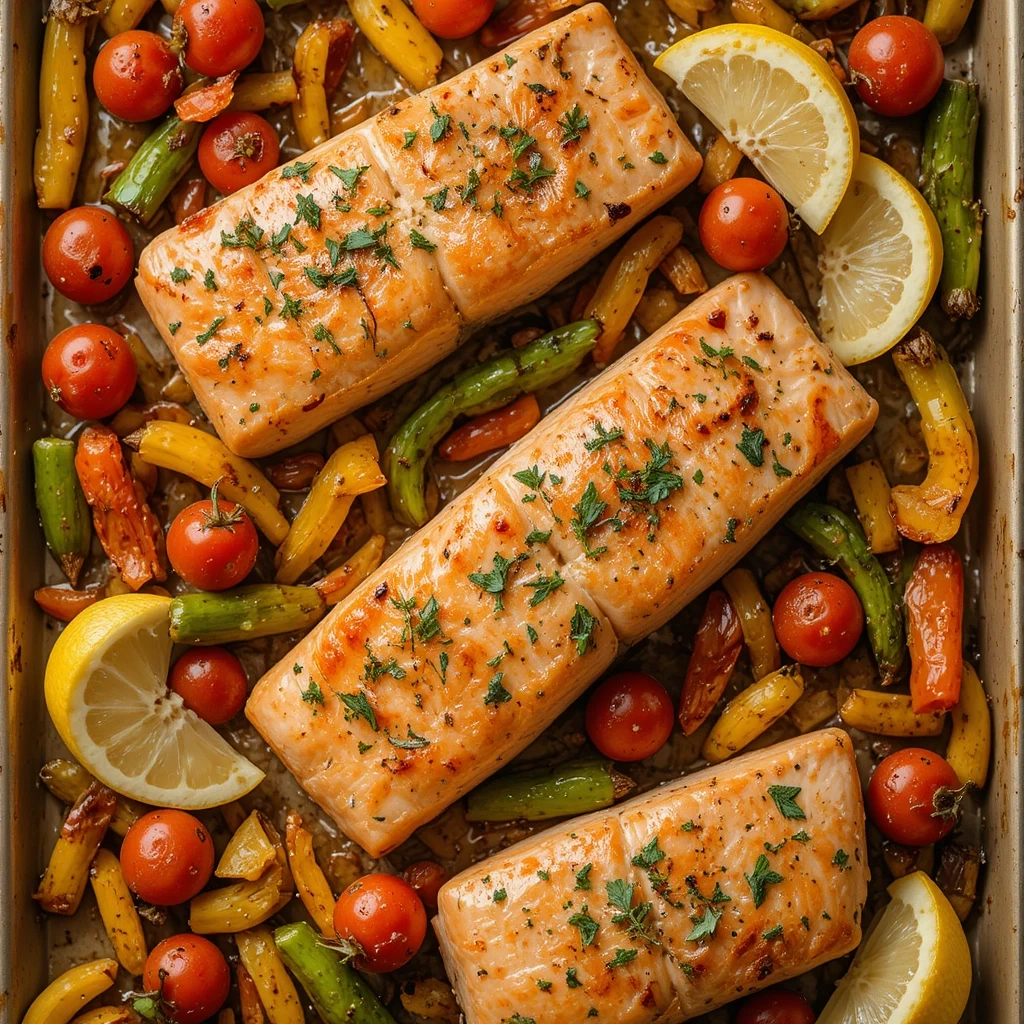
One pan. One oven. Almost zero cleanup. This is the dinner that makes weeknights feel effortless.
| Detail | Info |
|---|---|
| Prep Time | 10 minutes |
| Cook Time | 20 minutes |
| Total Time | 30 minutes |
| Servings | 4 |
| Difficulty | Easy |
Key Ingredients
For the Salmon:
- 4 salmon fillets (about 6 oz / 170g each), skin-on or skinless
- 2 tablespoons extra-virgin olive oil
- 1 teaspoon smoked paprika
- 1/2 teaspoon garlic powder
- 1/2 teaspoon onion powder
- Fine sea salt and black pepper to taste
For the Spring Vegetables:
- 1 cup cherry tomatoes, halved
- 1 medium zucchini, sliced into 1/4-inch rounds
- 1 cup snap peas, strings removed
- 1 red bell pepper, cut into bite-sized pieces
- 1 yellow bell pepper, cut into bite-sized pieces
- 2 tablespoons olive oil
- 1 teaspoon smoked paprika
- Salt and pepper to taste
To Serve:
- Fresh dill, roughly chopped
- Lemon wedges
- Optional: a drizzle of good olive oil at the end
Step-by-Step Instructions
Step 1 — Preheat the Oven and Prepare the Pan
Position an oven rack in the center of your oven and preheat to 400°F (200°C). Allow at least 15 minutes for it to fully preheat — an underheated oven produces steamed rather than roasted vegetables. Line a large rimmed baking sheet (18×13 inches is ideal) with parchment paper. Parchment ensures nothing sticks and makes cleanup effortless.
Step 2 — Season the Vegetables
Place all the prepared vegetables — cherry tomatoes, zucchini, snap peas, and bell peppers — in a large bowl. Drizzle with 2 tablespoons olive oil and sprinkle with smoked paprika, salt, and pepper. Toss thoroughly using your hands or a spoon until every piece of vegetable is lightly coated. This coating of oil and spice is what gives the vegetables that gorgeous caramelized, slightly crispy edge.
Step 3 — Spread Vegetables on the Pan
Pour seasoned vegetables onto the prepared baking sheet and spread them out in a single, even layer. The most important rule of sheet pan cooking: do not pile or overlap the vegetables. Overlapping causes steaming instead of roasting. If your pan feels crowded, use two pans. Roast vegetables for 8 minutes while you prepare the salmon.
Step 4 — Prepare the Salmon
While the vegetables get a head start in the oven, pat the salmon fillets completely dry with paper towels on all sides. Dryness is crucial for proper browning and prevents the salmon from steaming. Drizzle each fillet with olive oil and use your fingers to rub it over all exposed surfaces. Season generously with smoked paprika, garlic powder, onion powder, salt, and pepper.
Step 5 — Add Salmon to the Pan
After 8 minutes, remove the pan from the oven carefully — it will be very hot. Push the vegetables to the edges of the pan to create space in the center or nestled among the vegetables for the salmon. Place the salmon fillets skin-side down (if using skin-on fillets). Return the pan to the oven.
Step 6 — Roast Everything Together
Roast for 12 to 15 minutes. The exact time depends on the thickness of your salmon fillets. Check doneness by pressing the center of the thickest fillet gently with your finger — it should flake apart easily. You can also use a fork to gently tease a piece apart. The center can still be slightly translucent and rosy — that’s perfect. If it’s completely opaque throughout, it’s well-done. If you prefer, use a thermometer: 125°F (52°C) for medium-rare, 145°F (63°C) for fully cooked.
Step 7 — Finish and Serve
Remove the pan from the oven. Scatter fresh dill generously over everything — the heat of the pan will slightly wilt the dill and release its fragrance. Serve directly from the pan for a beautiful, casual presentation, or plate individually. Offer lemon wedges on the side for squeezing at the table.
Nutrition Table (Per Serving)
| Nutrient | Amount |
|---|---|
| Calories | 410 kcal |
| Protein | 42g |
| Carbohydrates | 12g |
| Fat | 22g |
| Fiber | 4g |
| Sodium | 440mg |
Recipe 4: Chicken and Vegetable Stir Fry with Brown Rice
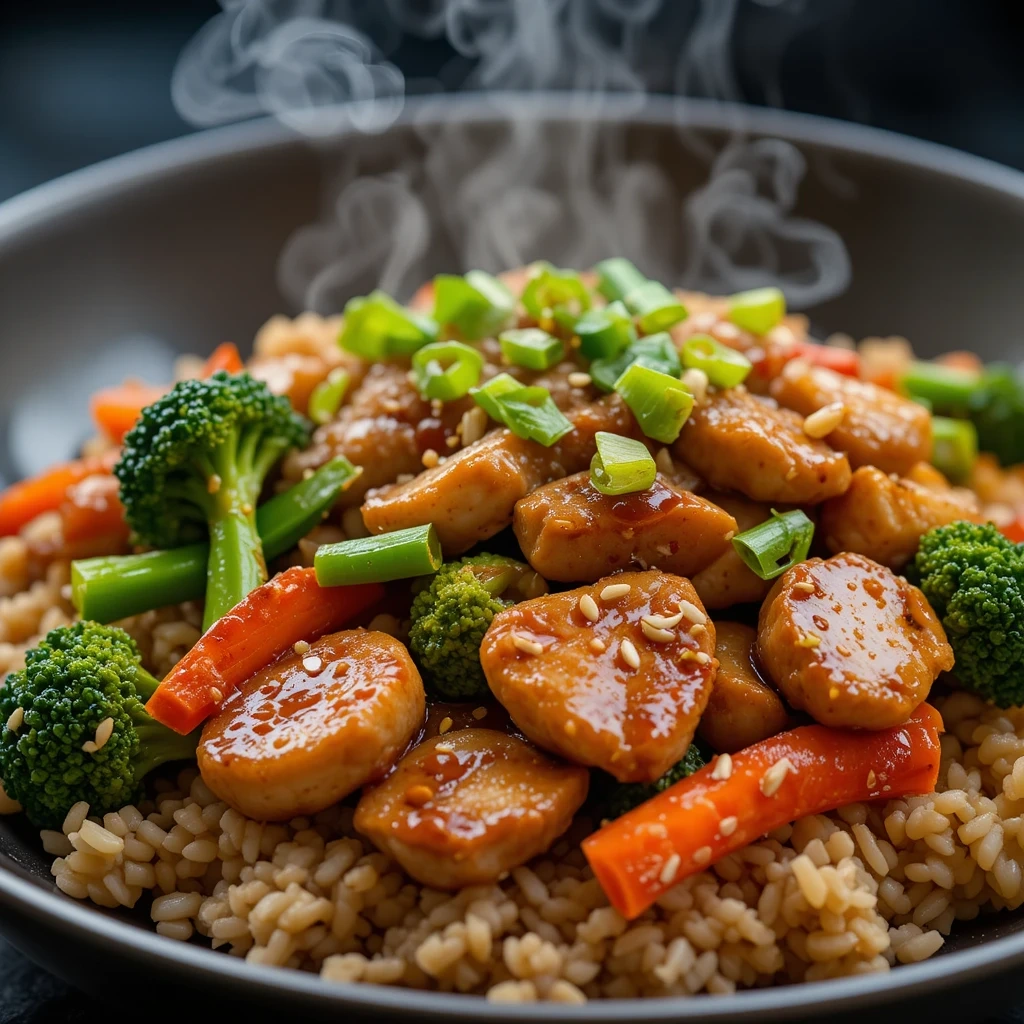
Faster than takeout, healthier than takeout, and honestly — more delicious than takeout. This stir fry is a Tuesday night hero.
| Detail | Info |
|---|---|
| Prep Time | 15 minutes |
| Cook Time | 15 minutes |
| Total Time | 30 minutes |
| Servings | 4 |
| Difficulty | Easy |
Key Ingredients
For the Stir Fry:
- 1.5 lbs (680g) boneless, skinless chicken breast, sliced very thinly against the grain (about 1/4 inch thick)
- 1 cup broccoli florets, cut into small, bite-sized pieces
- 1 cup snap peas, strings removed
- 1 red bell pepper, thinly sliced
- 2 medium carrots, cut into thin matchsticks (julienned)
- 3 garlic cloves, finely minced
- 1 teaspoon fresh ginger, grated on a microplane (or 1/2 teaspoon ground ginger)
- 2 tablespoons neutral oil (vegetable, canola, or avocado oil)
For the Sauce:
- 3 tablespoons low-sodium soy sauce
- 1 tablespoon sesame oil (toasted)
- 1 tablespoon honey
- 1 tablespoon rice vinegar
- 1 tablespoon cornstarch
- 2 tablespoons cold water
- Pinch of white pepper
To Serve:
- 2 cups cooked brown rice (or white rice, quinoa, or noodles)
- Sesame seeds
- Sliced green onions
- Optional: extra soy sauce at the table
Step-by-Step Instructions
Step 1 — Cook Your Rice First
If you don’t have pre-cooked rice, start here. Rinse 1 cup of brown rice under cold water until the water runs clear. Combine with 2.5 cups water in a saucepan, bring to a boil, reduce to the lowest heat, cover, and cook for 40 to 45 minutes. If using white rice, it takes 18 to 20 minutes. Fluff with a fork and keep covered until ready to serve.
Step 2 — Make the Stir Fry Sauce
In a small bowl, combine the soy sauce, sesame oil, honey, and rice vinegar. Stir until the honey is fully dissolved. In a separate tiny bowl, mix the cornstarch with the cold water until completely smooth with no lumps — this is your slurry, which thickens the sauce at the end. Set both bowls right next to the stove so they’re ready when you need them fast.
Step 3 — Slice the Chicken Properly
The key to tender stir fry chicken is slicing it very thin — about 1/4 inch — and slicing against the grain (perpendicular to the muscle fibers you can see running through the meat). Thinner slices cook faster and stay more tender. For easiest slicing, place the chicken in the freezer for 15 minutes until it’s slightly firm but not frozen — this makes clean, thin slicing much easier.
Step 4 — Heat the Wok or Skillet to the Right Temperature
Place your largest wok or heavy skillet (cast iron or stainless steel work best) over high heat. Let it heat for a full 2 minutes until it’s extremely hot — you should see a faint wisp of smoke rising from the pan. A very hot pan is the single most important factor in great stir fry. Add 1 tablespoon of oil and swirl to coat.
Step 5 — Cook the Chicken (First Batch)
Add the chicken slices in a single layer — do not pile them. Cook undisturbed for 2 minutes until the bottom is golden and slightly caramelized. Flip and cook for 1 to 2 more minutes. Work in two batches if needed; overcrowding the pan drops the temperature and causes the chicken to steam instead of sear. Remove all cooked chicken to a clean plate and set aside.
Step 6 — Stir Fry the Vegetables
Add the remaining tablespoon of oil to the still-hot pan. Add the carrots and broccoli first (hardest vegetables) and stir fry for 2 minutes, tossing constantly. Add the snap peas and bell pepper and stir fry for another 2 minutes. The vegetables should be tender but still have a pleasant crunch and maintain their bright colors. Add the garlic and ginger in the last 30 seconds and toss vigorously — garlic burns quickly over high heat, so keep it moving.
Step 7 — Combine Chicken and Sauce
Return the cooked chicken and any resting juices back to the pan with the vegetables. Stir everything together. Give your sauce bowl a quick stir (the honey may have settled) and pour the sauce over the chicken and vegetables. Toss everything quickly to coat. Let it sizzle for 30 seconds.
Step 8 — Thicken the Sauce
Give the cornstarch slurry a quick stir (it settles fast) and pour it into the pan. Toss everything constantly for 30 to 60 seconds — you’ll see the sauce transform from thin and watery to glossy, thick, and clingy. Remove from heat immediately once the sauce has thickened to avoid over-thickening.
Step 9 — Serve
Spoon over cooked brown rice in individual bowls. Finish each bowl with a sprinkle of sesame seeds and sliced green onions. Serve immediately — stir fry is best eaten right away when everything is hot and the vegetables still have their crunch.
Nutrition Table (Per Serving)
| Nutrient | Amount |
|---|---|
| Calories | 390 kcal |
| Protein | 40g |
| Carbohydrates | 38g |
| Fat | 10g |
| Fiber | 5g |
| Sodium | 620mg |
Recipe 5: Spring Vegetable Frittata
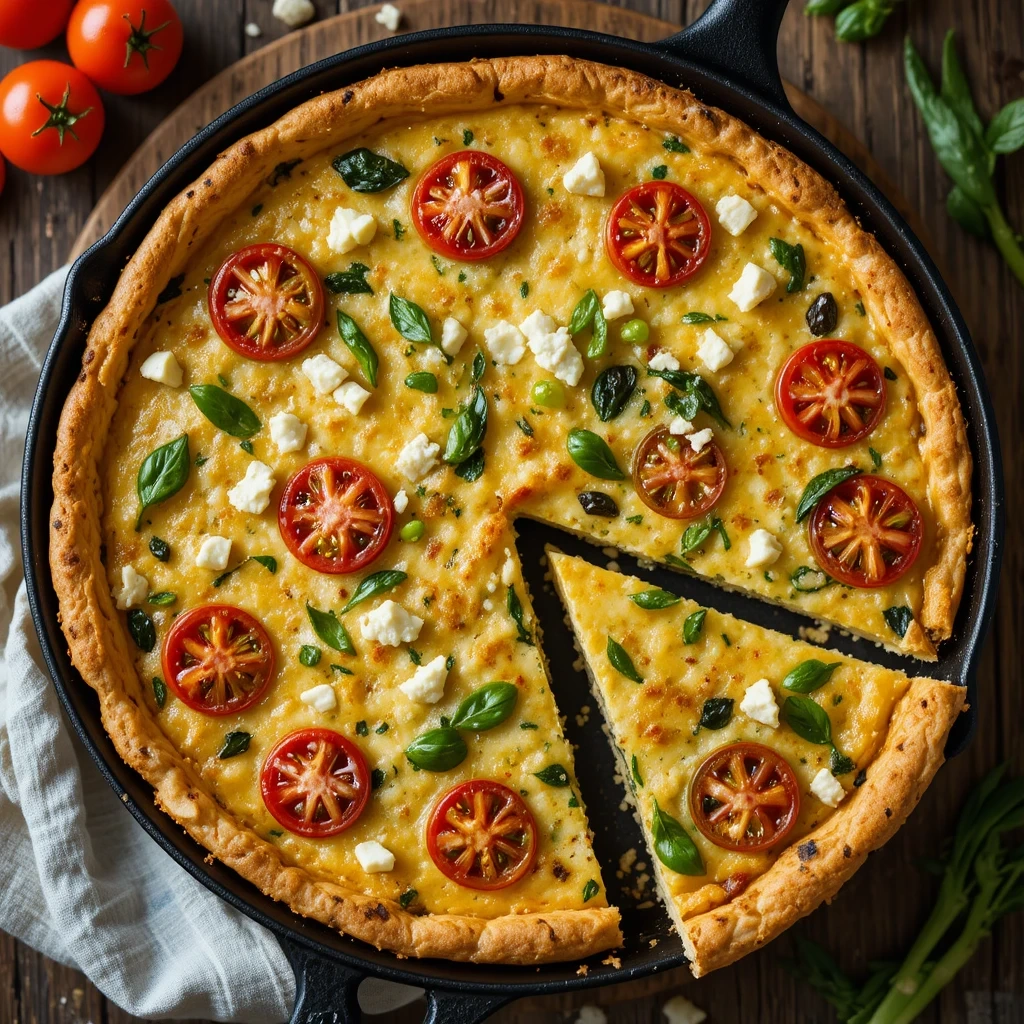
A frittata is Italy’s answer to the question “what do we have in the fridge?” — and the answer is always delicious.
| Detail | Info |
|---|---|
| Prep Time | 10 minutes |
| Cook Time | 25 minutes |
| Total Time | 35 minutes |
| Servings | 4 to 6 |
| Difficulty | Easy |
Key Ingredients
For the Frittata:
- 8 large eggs, at room temperature
- 1/4 cup whole milk (or cream for richer results)
- 1 cup baby spinach, roughly chopped
- 1 small zucchini (about 6 oz), diced into 1/2-inch cubes
- 1/2 cup cherry tomatoes, halved
- 1/4 cup crumbled feta cheese
- 2 green onions (scallions), thinly sliced, white and green parts separated
- 2 tablespoons extra-virgin olive oil
- 1/2 teaspoon dried basil
- 1/2 teaspoon garlic powder
- Fine sea salt and freshly ground black pepper
- Optional: 1/4 cup shredded mozzarella for a cheesier top
Step-by-Step Instructions
Step 1 — Preheat the Oven
Preheat your oven to 375°F (190°C). Place a rack in the center of the oven. It’s important to have the oven fully preheated before the frittata goes in so it cooks evenly and sets properly in the middle.
Step 2 — Crack and Whisk the Eggs
Crack all 8 eggs into a large mixing bowl. Add the milk, dried basil, garlic powder, 1/4 teaspoon fine salt, and a good grinding of black pepper. Whisk vigorously for at least 60 seconds until the mixture is completely uniform — no streaks of white or yolk — and slightly frothy. This aerates the eggs and creates a lighter, fluffier frittata. Set aside.
Step 3 — Sauté the Vegetables
Heat the olive oil in a 10-inch oven-safe skillet (cast iron is ideal; stainless steel also works — avoid non-stick skillets that cannot handle high oven temperatures) over medium heat. Add the white parts of the green onions and the diced zucchini. Cook, stirring occasionally, for 3 to 4 minutes until the zucchini softens slightly and the onions turn translucent. You want the zucchini to still have some shape — it will continue cooking in the oven.
Step 4 — Add the Spinach
Add the chopped spinach to the skillet and stir. Spinach wilts very quickly — within 60 seconds it will reduce dramatically in volume. Stir until just wilted and bright green. Season the vegetable mixture with a light pinch of salt and pepper. Spread the vegetables out into an even layer across the bottom of the skillet.
Step 5 — Pour in the Egg Mixture
Reduce heat to medium-low. Pour the egg mixture evenly over the vegetables in the skillet. Do not stir. Gently shake the pan to help the eggs settle into the gaps between the vegetables.
Step 6 — Add Toppings
Arrange the halved cherry tomatoes, cut-side up, over the surface of the egg mixture. They’ll look beautiful and roast slightly in the oven. Scatter the crumbled feta cheese and the green parts of the green onions over the top. If using mozzarella, add it now too.
Step 7 — Start on the Stovetop
Let the frittata cook on the stovetop over medium-low heat for 2 to 3 minutes without stirring. Watch the edges — when you see them beginning to turn opaque and set (no longer liquid), it’s time to transfer to the oven. This partial cooking on the stovetop speeds up oven time and ensures the bottom doesn’t get rubbery.
Step 8 — Bake in the Oven
Carefully transfer the skillet to the preheated oven. Bake for 18 to 22 minutes. Check at 18 minutes by gently shaking the pan — the center should jiggle only very slightly (like Jell-O), not slosh like liquid. The surface should be set and lightly golden. A toothpick inserted in the center should come out clean with no wet egg on it.
Step 9 — Rest Before Slicing
Remove from oven (use oven mitts — the skillet handle will be extremely hot). Let the frittata rest in the pan for 5 minutes before cutting. Resting allows the eggs to fully set and makes for cleaner slices. Use a rubber spatula or a thin knife to loosen the edges, then slide a spatula under each slice. Serve warm, at room temperature, or cold — a frittata is wonderful all three ways!
Nutrition Table (Per Serving — based on 5 servings)
| Nutrient | Amount |
|---|---|
| Calories | 240 kcal |
| Protein | 16g |
| Carbohydrates | 6g |
| Fat | 17g |
| Fiber | 1g |
| Sodium | 360mg |
Recipe 6: Turkey and Spinach Stuffed Bell Peppers
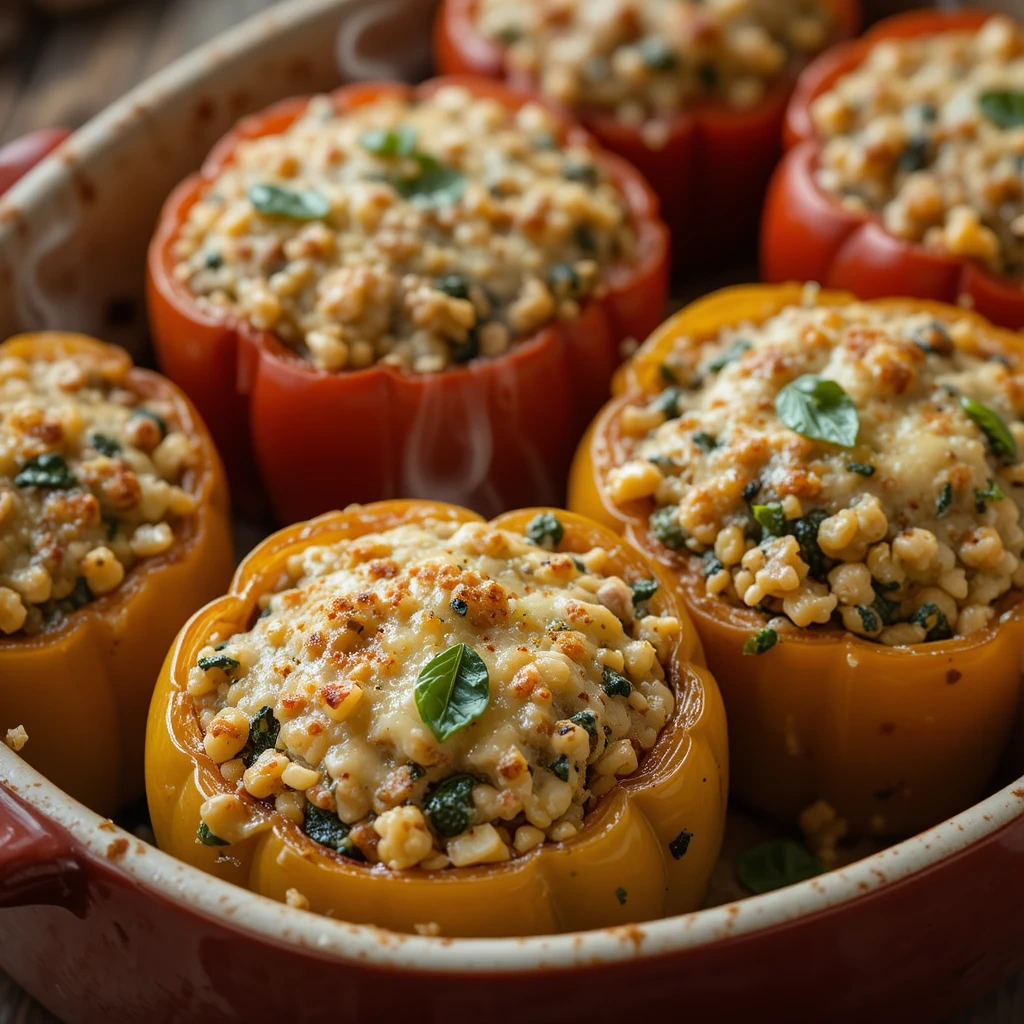
These gorgeous stuffed peppers are basically a complete, balanced meal sitting inside its own edible bowl. Kids love eating the container as much as the filling.
| Detail | Info |
|---|---|
| Prep Time | 15 minutes |
| Cook Time | 40 minutes |
| Total Time | 55 minutes |
| Servings | 4 |
| Difficulty | Easy–Medium |
Key Ingredients
For the Peppers:
- 4 large bell peppers (mix of colors — red, yellow, orange, green)
- 1/4 cup water (for the baking dish)
For the Filling:
- 1 lb (450g) lean ground turkey (93% lean recommended)
- 1 cup cooked white or brown rice
- 2 cups baby spinach, roughly chopped
- 1 cup tomato passata or tomato sauce (no added sugar)
- 2 garlic cloves, finely minced
- 1/2 medium onion, finely diced
- 1 teaspoon Italian seasoning
- 1/2 teaspoon smoked paprika
- 1/2 teaspoon garlic powder
- Fine sea salt and black pepper to taste
For the Topping:
- 1/2 cup shredded mozzarella cheese
- 2 tablespoons grated Parmesan
- Fresh basil to garnish
Step-by-Step Instructions
Step 1 — Cook Your Rice (if Not Already Done)
If you don’t have leftover rice, cook 1/2 cup of dry rice now according to package instructions (it will yield about 1 cup cooked). You can also use microwave rice pouches for speed. Let it cool slightly while you prepare everything else. The rice adds bulk, absorbs the sauce flavors, and makes the filling more cohesive.
Step 2 — Prepare the Bell Peppers
Wash the bell peppers under cold water. Using a sharp knife, cut straight across each pepper about 1/2 inch below the stem to remove the top. Save the tops — you can dice the clean pepper flesh from around the stem and add it to the filling! Stand the peppers upright and use a small knife or your fingers to remove the white membrane (the ribs) and all the seeds from inside. Rinse the cavity. If any peppers don’t stand upright easily, carefully shave a thin slice off the bottom to create a flat base — be careful not to cut through.
Step 3 — Pre-Bake the Peppers (Optional but Recommended)
Preheat oven to 375°F (190°C). If you prefer your peppers very tender, place them in a baking dish and bake empty for 10 minutes before filling. This head-start ensures the peppers are fully cooked through even though the filling is already hot when it goes in. Skip this step if you prefer peppers with more bite.
Step 4 — Cook the Turkey Filling
Heat a large skillet over medium-high heat. Add a drizzle of olive oil. Once hot, add the diced onion and cook for 3 minutes, stirring, until translucent. Add the minced garlic and stir for 30 more seconds. Add the ground turkey, breaking it apart with a wooden spoon or spatula into small crumbles. Cook for 5 to 7 minutes, stirring and breaking it up constantly, until no pink remains. Drain any excess liquid from the pan if needed.
Step 5 — Season and Add Remaining Filling Ingredients
Reduce heat to medium. Add the Italian seasoning, smoked paprika, garlic powder, salt, and pepper. Stir to coat the turkey. Add the tomato sauce and stir to combine. Add the chopped spinach and stir — it will wilt into the mixture in about 60 seconds. Taste the filling carefully and adjust seasoning. It should taste well-seasoned and delicious — remember it has to flavor the rice too. Remove from heat and stir in the cooked rice until evenly combined.
Step 6 — Fill the Peppers
Stand the prepared peppers upright in a baking dish that fits them snugly (they support each other this way). Using a large spoon, fill each pepper generously with the turkey-rice mixture. Press it down gently and mound the filling slightly above the rim of the pepper — it will settle during baking. Add 1/4 cup water to the bottom of the baking dish (this creates steam and helps cook the peppers evenly).
Step 7 — Top with Cheese
Divide the shredded mozzarella and Parmesan evenly over the tops of each filled pepper. The cheese will melt and bubble into a golden, irresistible crust.
Step 8 — Bake Covered, Then Uncovered
Cover the baking dish tightly with aluminum foil. Bake at 375°F for 30 minutes — the foil traps steam that cooks the peppers through and keeps the filling moist. After 30 minutes, remove the foil and bake uncovered for an additional 8 to 10 minutes until the cheese is melted, bubbly, and beginning to turn golden brown.
Step 9 — Rest and Garnish
Let the stuffed peppers rest for 5 minutes before serving — the filling is very hot and needs a moment to settle. Tear fresh basil leaves over the top just before serving. Use a wide spatula or large serving spoon to transfer each pepper to a plate.
Nutrition Table (Per Serving — 1 stuffed pepper)
| Nutrient | Amount |
|---|---|
| Calories | 360 kcal |
| Protein | 32g |
| Carbohydrates | 28g |
| Fat | 12g |
| Fiber | 4g |
| Sodium | 520mg |
Recipe 7: Honey Garlic Glazed Shrimp Bowls
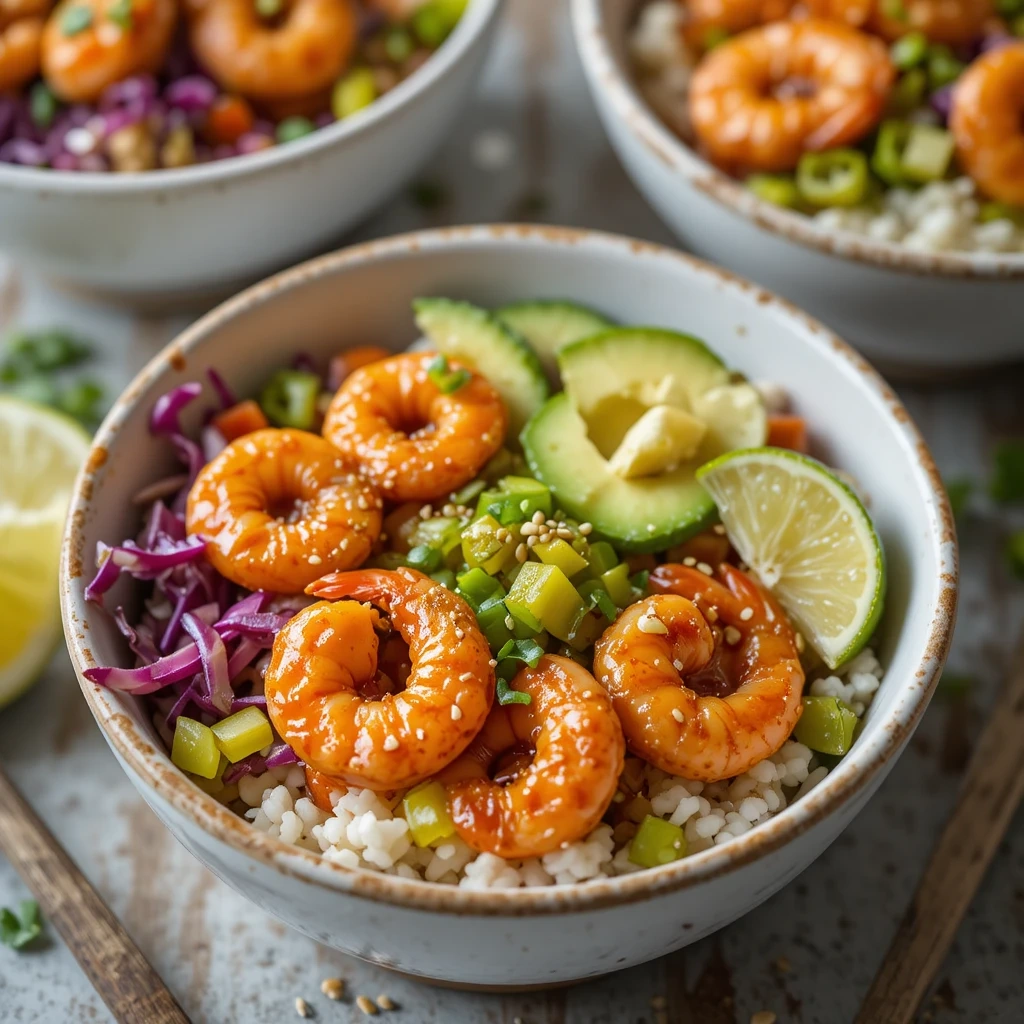
Sweet, sticky, garlicky shrimp over fluffy rice — this bowl dinner is a weeknight superstar that comes together in just 20 minutes.
| Detail | Info |
|---|---|
| Prep Time | 10 minutes |
| Cook Time | 10 minutes |
| Total Time | 20 minutes |
| Servings | 4 |
| Difficulty | Very Easy |
Key Ingredients
For the Shrimp:
- 1.5 lbs (680g) large shrimp, peeled and deveined (fresh or frozen-thawed)
- 3 tablespoons raw honey
- 2 tablespoons low-sodium soy sauce
- 3 garlic cloves, finely minced
- 1 tablespoon fresh lemon or lime juice
- 1 tablespoon olive oil or avocado oil
- Pinch of black pepper
For the Bowl:
- 2 cups dry jasmine rice, cooked (yields about 4 cups cooked)
- 1 large cucumber, diced into small cubes
- 2 ripe avocados, sliced
- 1 cup shredded red cabbage (optional — adds great crunch and color)
- 1 lime, cut into wedges
To Garnish:
- 1 tablespoon sesame seeds (toasted if possible)
- 3 green onions, thinly sliced
- Optional: drizzle of sriracha or chili sauce (skip for young kids)
Step-by-Step Instructions
Step 1 — Thaw and Prepare the Shrimp
If using frozen shrimp, thaw properly first: place in a colander and run cold water over them for 5 minutes, or thaw overnight in the refrigerator. Never thaw in warm water — it begins cooking the shrimp unevenly. Once thawed, pat every single shrimp very dry with paper towels on both sides. This step is the difference between shrimp that sear beautifully and shrimp that steam in their own moisture. Remove tails if desired for easier eating.
Step 2 — Mix the Honey Garlic Sauce
In a small bowl, combine the honey, soy sauce, minced garlic, and lemon juice. Whisk together until the honey is completely dissolved — tilt the bowl and make sure no honey is sitting at the bottom. Taste it: it should be sweet, salty, garlicky, and slightly tangy. Adjust any element to your taste. Set the sauce right next to your stove — you’ll need it quickly.
Step 3 — Cook Your Rice
Cook jasmine rice according to package instructions. For perfect fluffy rice: rinse the rice until water runs almost clear, use a 1:1.5 ratio of rice to water, bring to a boil, cover, reduce to the absolute lowest heat, and cook for 18 minutes without lifting the lid. Remove from heat and let steam, covered, for 5 more minutes. Fluff with a fork.
Step 4 — Prepare Your Bowl Ingredients
While the rice cooks, set up your bowl components. Dice the cucumber into small, uniform cubes. Slice the avocados in half, remove the pit, and use a spoon to scoop the flesh, then slice. If using red cabbage, slice thinly. Arrange each component in separate small bowls or sections of your cutting board so assembling the final bowls is quick and easy.
Step 5 — Heat the Pan Properly
Place a large skillet or wok over high heat. Let it heat for 90 seconds until very hot. Add the olive oil and swirl to coat. The oil should shimmer immediately. This high heat is essential for shrimp — it gives them a beautiful sear rather than a steamed texture.
Step 6 — Cook the Shrimp in a Single Layer
Add the shrimp in a single layer — do not pile them. If your pan is not large enough, cook in two batches. Cook without moving for 1 minute — then flip each shrimp. They should be pink and slightly golden on the first side. Cook the second side for 1 minute.
Step 7 — Add the Sauce
Pour the honey garlic sauce over the shrimp. It will sizzle vigorously — stand back slightly. Toss the shrimp in the sauce using tongs or a spoon. Let everything cook together for 60 to 90 seconds, tossing constantly, until the sauce bubbles, thickens, and becomes beautifully glossy and sticky. The shrimp should be fully pink and cooked through. Remove from heat immediately — overcooked shrimp become rubbery within seconds.
Step 8 — Assemble the Bowls
Spoon rice into the base of each bowl. Arrange cucumber, avocado, and any other components around the rice. Spoon the glazed shrimp over the top, and drizzle any remaining sauce from the pan over everything. Garnish with sesame seeds, sliced green onions, and a lime wedge on the side.
Nutrition Table (Per Serving)
| Nutrient | Amount |
|---|---|
| Calories | 370 kcal |
| Protein | 34g |
| Carbohydrates | 40g |
| Fat | 10g |
| Fiber | 3g |
| Sodium | 580mg |
Recipe 8: Creamy Tuscan White Bean Soup
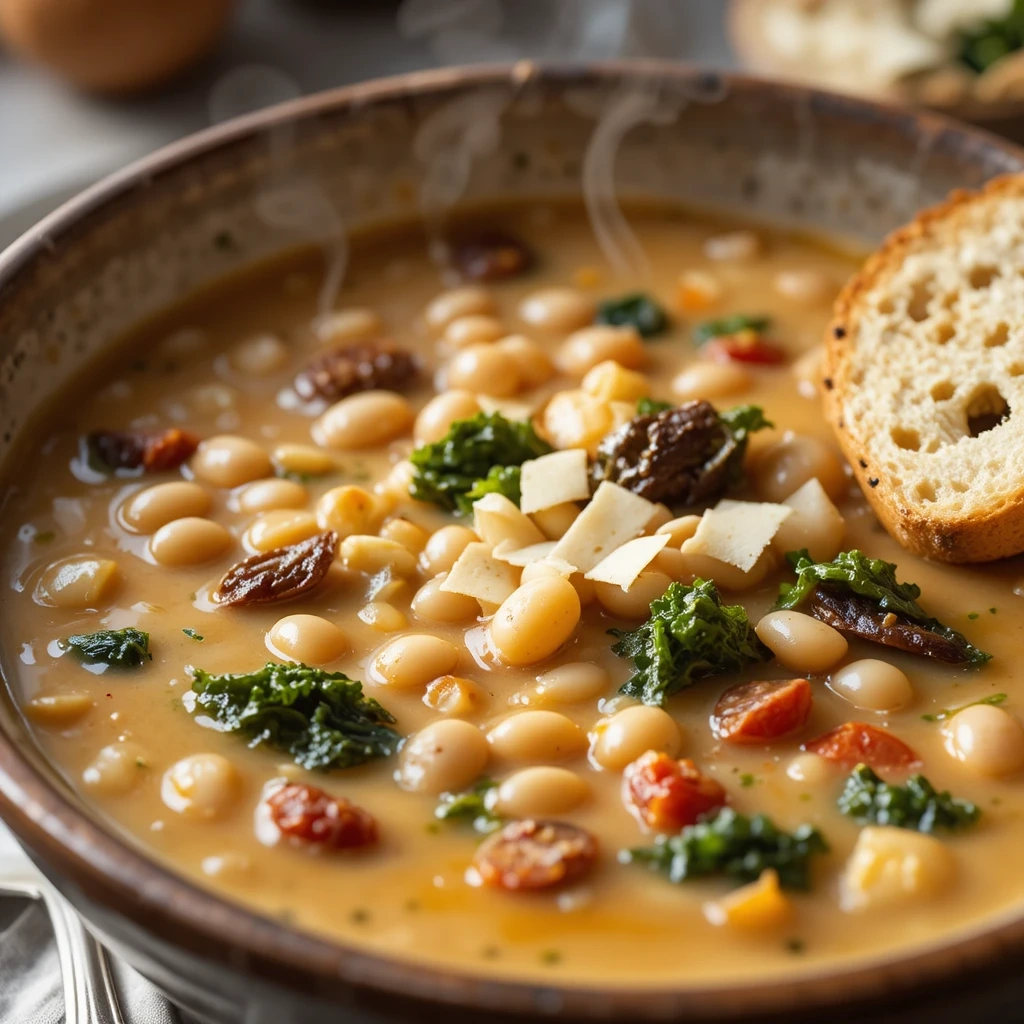
Cozy yet light, satisfying yet simple — this soup is everything a spring evening calls for.
| Detail | Info |
|---|---|
| Prep Time | 10 minutes |
| Cook Time | 30 minutes |
| Total Time | 40 minutes |
| Servings | 6 |
| Difficulty | Very Easy |
Key Ingredients
- 2 cans (15 oz / 425g each) white cannellini beans, drained and rinsed thoroughly
- 2 cups chopped curly kale (stems removed) or baby spinach
- 1/3 cup oil-packed sun-dried tomatoes, drained and roughly chopped
- 4 cups (1 liter) low-sodium vegetable broth
- 1 cup heavy cream (or full-fat coconut milk for dairy-free)
- 4 garlic cloves, finely minced
- 1 small yellow onion, finely diced
- 1 teaspoon Italian seasoning
- 1/2 teaspoon smoked paprika
- 1/4 teaspoon red pepper flakes (optional)
- 2 tablespoons extra-virgin olive oil
- Fine sea salt and freshly ground black pepper
- Fresh Parmesan rind (optional — adds incredible depth of flavor)
- To serve: crusty bread, extra olive oil, Parmesan shavings
Step-by-Step Instructions
Step 1 — Prepare All Ingredients Before Cooking
Drain and rinse the canned white beans in a colander under cold water for a full minute — this removes excess sodium and the thick starchy liquid from the can. Chop the kale (or measure spinach), dice the onion, mince the garlic, and chop the sun-dried tomatoes. Having everything ready means this soup comes together without any rushing.
Step 2 — Build the Flavor Base
Heat olive oil in a large, heavy-bottomed pot or Dutch oven over medium heat. Add the diced onion and cook, stirring occasionally, for 4 to 5 minutes until it turns soft, translucent, and slightly golden at the edges. This process — softening the onion slowly — builds a savory foundation for the whole soup. Do not rush it by turning up the heat.
Step 3 — Add Garlic and Sun-Dried Tomatoes
Add the minced garlic to the softened onion and stir constantly for 60 seconds until fragrant and light golden — just barely golden, not brown. Add the chopped sun-dried tomatoes and stir together for another minute. The tomatoes will release their concentrated, intensely savory flavor into the oil, which will permeate the whole soup.
Step 4 — Add Spices
Add the Italian seasoning, smoked paprika, and red pepper flakes (if using). Stir and let the spices toast in the oil for 30 seconds. This brief toasting activates the spice oils and deepens the flavor significantly compared to adding them directly to liquid.
Step 5 — Add Broth and Beans
Pour in the vegetable broth. If you have a Parmesan rind, drop it in now — it will simmer quietly and add an extraordinary savory, umami depth to the broth. Stir in the drained white beans. Bring the soup to a gentle boil over medium-high heat, then reduce the heat to medium-low to maintain a steady, gentle simmer.
Step 6 — Simmer and Partially Mash the Beans
Simmer uncovered for 15 minutes. This time allows the flavors to marry together beautifully. After 15 minutes, use the back of a large wooden spoon to press and mash about one-third of the beans against the side of the pot. This technique — mashing some beans — thickens the soup naturally and gives it a creamy, hearty body without adding any additional thickeners. You should still have plenty of whole beans remaining for texture.
Step 7 — Add Cream and Greens
Reduce heat to the lowest setting. Pour in the heavy cream slowly, stirring as you add it. Add the chopped kale (or spinach). Stir and let simmer for 4 to 5 minutes until the kale is tender (kale takes slightly longer than spinach) and the soup is creamy, rich, and beautifully pale orange in color.
Step 8 — Season and Adjust
Remove the Parmesan rind if you used one. Taste the soup carefully. Add salt and pepper as needed — canned beans and broth already contain sodium, so add salt gradually. If the soup tastes flat, a tiny squeeze of lemon juice brightens everything immediately.
Step 9 — Serve Generously
Ladle into wide, warm bowls. Drizzle a little good olive oil over the surface of each bowl. Top with Parmesan shavings. Serve with thick slices of crusty bread for dipping — this soup practically begs for it.
Nutrition Table (Per Serving)
| Nutrient | Amount |
|---|---|
| Calories | 310 kcal |
| Protein | 14g |
| Carbohydrates | 38g |
| Fat | 12g |
| Fiber | 9g |
| Sodium | 480mg |
Recipe 9: Baked Lemon Garlic Butter Chicken Thighs
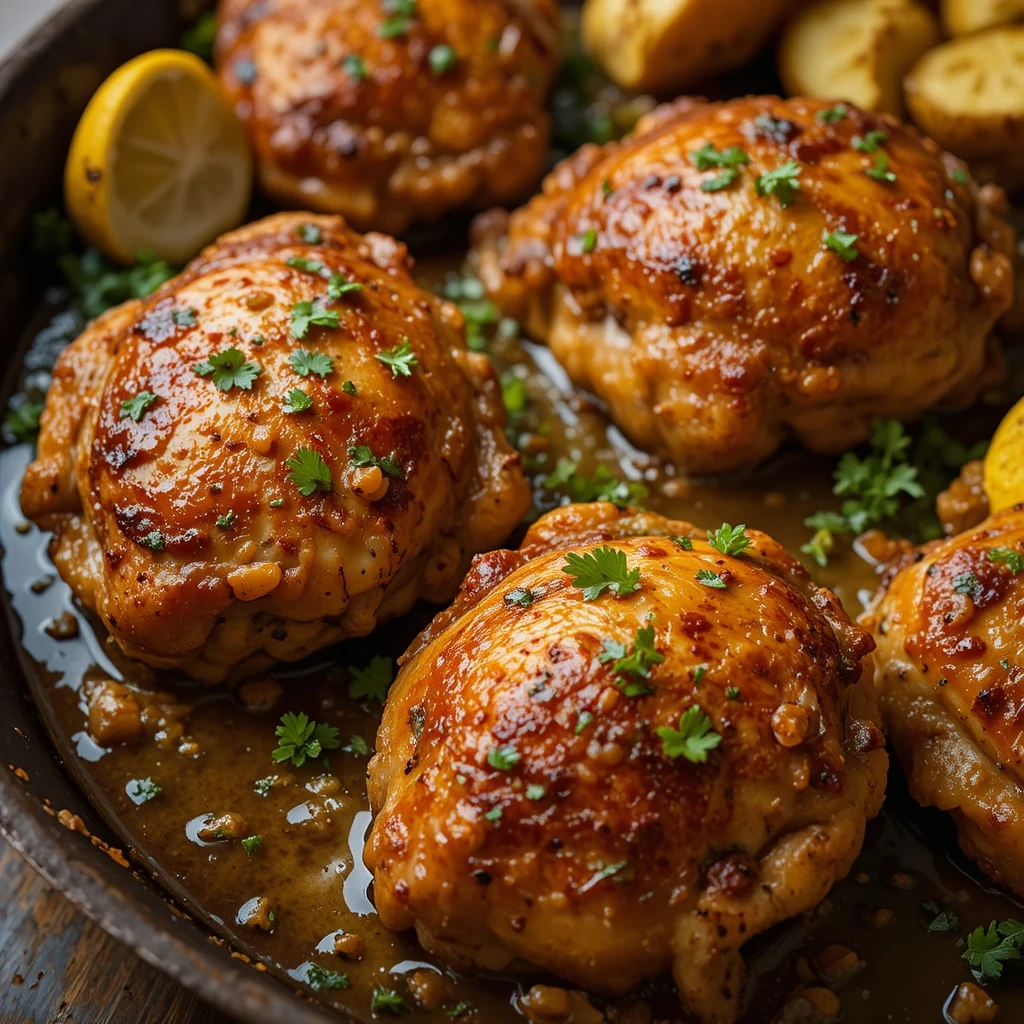
The most requested dinner in our house. Crispy skin, juicy meat, and a pan full of buttery lemon drippings that you’ll want to pour over everything.
| Detail | Info |
|---|---|
| Prep Time | 10 minutes |
| Cook Time | 38 minutes |
| Total Time | 48 minutes |
| Servings | 4 |
| Difficulty | Very Easy |
Key Ingredients
For the Chicken:
- 8 bone-in, skin-on chicken thighs (about 3 lbs / 1.4kg total)
- Fine sea salt and freshly ground black pepper
For the Lemon Butter Sauce:
- 4 tablespoons unsalted butter, melted
- Juice of 2 large lemons (about 6 tablespoons)
- Zest of 2 lemons
- 5 garlic cloves, finely minced
- 1 teaspoon dried thyme
- 1 teaspoon onion powder
- 1/2 teaspoon smoked paprika
- 1/4 teaspoon black pepper
- 1/2 teaspoon fine sea salt
To Serve:
- Fresh flat-leaf parsley, roughly chopped
- Lemon slices for presentation
- Roasted potatoes, rice, or crusty bread
Step-by-Step Instructions
Step 1 — Prepare the Chicken Thighs
At least 30 minutes (ideally 1 hour) before cooking, take the chicken thighs out of the refrigerator to allow them to come to room temperature. Cold chicken placed in a hot oven cooks unevenly — the outside overcooks before the center reaches a safe temperature. Pat each chicken thigh completely dry on all sides with paper towels. The drier the skin, the crispier it will get in the oven — this is the most important step for that golden, crackling skin.
Step 2 — Preheat the Oven Properly
Preheat your oven to 425°F (220°C). A high temperature is essential for chicken skin to become properly crispy. If your oven has a convection setting, use it — the fan circulates hot air and produces even crispier results. Place the oven rack in the upper-middle position.
Step 3 — Make the Lemon Butter Sauce
In a medium bowl, combine the melted butter, lemon juice, lemon zest, minced garlic, dried thyme, onion powder, smoked paprika, 1/4 teaspoon black pepper, and 1/2 teaspoon salt. Whisk together until fully combined. Taste the sauce — it should be intensely flavored since it will be spread over all 8 chicken thighs and some will drip into the pan. Adjust salt or lemon to your preference.
Step 4 — Season the Chicken
Season the chicken thighs on both sides with a generous pinch of fine sea salt and black pepper — don’t be shy, you’re seasoning both the meat and the skin. Place them skin-side up in a large baking dish (9×13 inch works well) or a large cast-iron skillet, arranged in a single layer. They can be close together but should not overlap.
Step 5 — Apply the Sauce
Pour the lemon butter sauce evenly over all the chicken thighs. Use a pastry brush or a spoon to make sure the sauce is on every inch of skin. Tilt the dish slightly to help the sauce pool around the chicken. The sauce that pools in the bottom of the dish will become a magnificent pan dripping sauce.
Step 6 — Bake at High Heat
Place the baking dish in the preheated oven. Bake for 35 to 40 minutes. Resist the urge to open the oven repeatedly — every time you open it, the temperature drops. At the 35-minute mark, check the chicken: the skin should be deeply golden and visibly crispy. An instant-read thermometer inserted into the thickest part of the thigh (not touching bone) should read 165°F (75°C). For extra-crispy skin, switch to the broiler setting for the last 2 to 3 minutes, watching carefully.
Step 7 — Rest the Chicken
Remove from the oven and let the chicken rest in the pan, uncovered, for 5 minutes. During this rest time, the juices inside the chicken redistribute. If you cut into the chicken immediately, all those flavorful juices will pour out onto the cutting board instead of staying inside the meat where they belong.
Step 8 — Spoon Over the Pan Drippings
Using a spoon, scoop up the pan drippings — the mixture of lemon butter sauce and chicken juices that has collected at the bottom of the dish — and spoon it generously over each chicken thigh. This is the chef’s move that elevates the dish from good to spectacular. Garnish with fresh chopped parsley and lemon slices.
Nutrition Table (Per Serving — 2 thighs)
| Nutrient | Amount |
|---|---|
| Calories | 430 kcal |
| Protein | 36g |
| Carbohydrates | 3g |
| Fat | 30g |
| Fiber | 0g |
| Sodium | 510mg |
Recipe 10: Spring Vegetable Flatbread Pizza
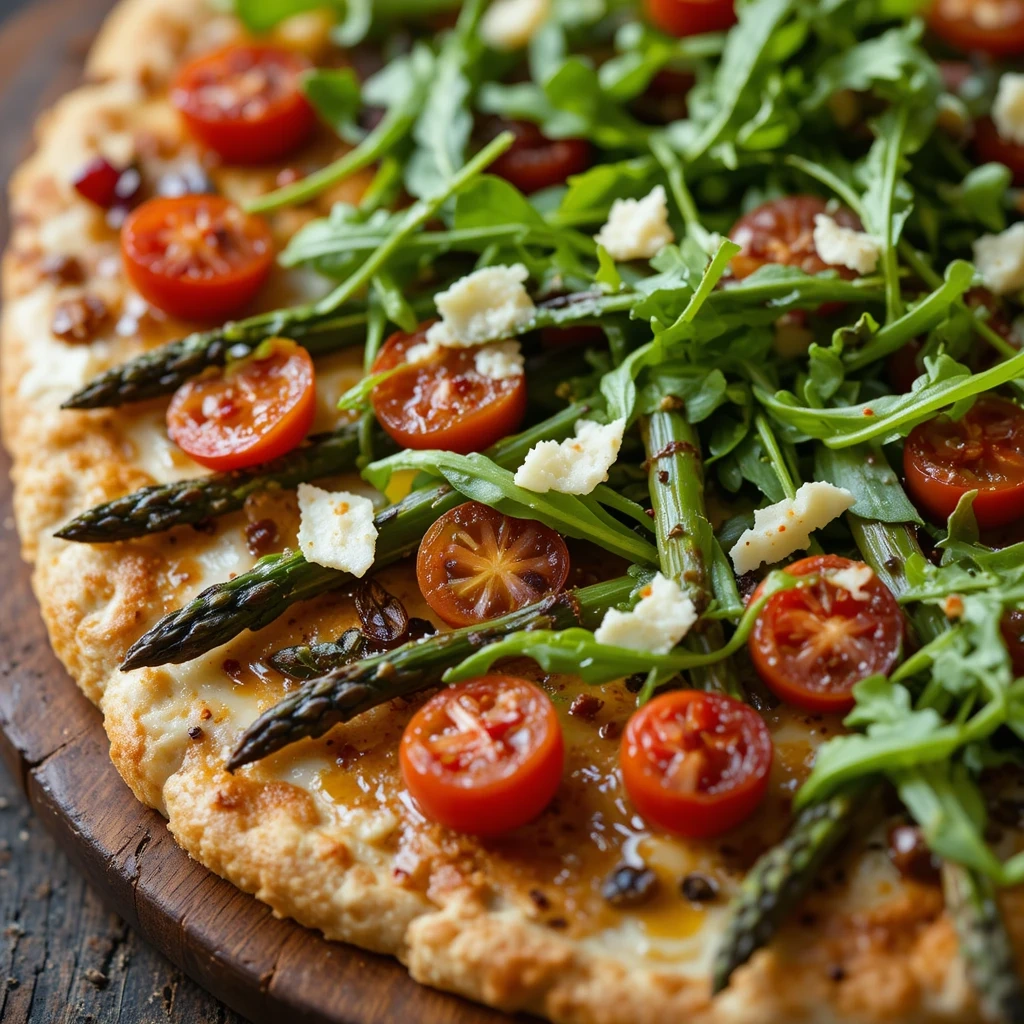
Pizza night just got a spring makeover. Ricotta, crispy asparagus, peppery arugula, and a drizzle of honey — this is the pizza that makes everyone ask for the recipe.
| Detail | Info |
|---|---|
| Prep Time | 10 minutes |
| Cook Time | 15 minutes |
| Total Time | 25 minutes |
| Servings | 4 |
| Difficulty | Very Easy |
Key Ingredients
- 4 store-bought flatbreads or naan breads (or homemade if you’re feeling ambitious!)
- 1 cup whole-milk ricotta cheese
- 1/2 cup shredded mozzarella cheese
- 1 bunch thin asparagus spears, woody ends removed, sliced into 2-inch pieces
- 1 cup cherry tomatoes, halved
- 2 tablespoons olive oil (divided)
- 2 garlic cloves, minced (to stir into the ricotta)
- 1 teaspoon lemon zest
- 1 cup fresh arugula (to add after baking)
- 1 tablespoon raw honey (for drizzling at the end)
- 1/4 cup shaved Parmesan
- Pinch of red pepper flakes
- Fine sea salt and black pepper
Step-by-Step Instructions
Step 1 — Preheat the Oven to the Highest Setting
Set your oven to 425°F (220°C) — or even higher if your flatbreads are sturdy. Preheat a baking sheet in the oven as well; placing the flatbreads on a hot surface creates a crispier base, similar to how a pizza oven works. A pizza stone is even better if you have one.
Step 2 — Season the Ricotta Base
In a small bowl, stir together the ricotta cheese, minced garlic, lemon zest, a pinch of salt, and a grind of black pepper. Mixing garlic and lemon zest directly into the ricotta infuses it with flavor, so every bite of the base is delicious, not bland.
Step 3 — Prepare the Vegetables
Toss the asparagus pieces and halved cherry tomatoes in 1 tablespoon of olive oil with a pinch of salt and pepper. Having well-seasoned, oiled vegetables means they’ll roast rather than steam in the short baking time.
Step 4 — Assemble the Flatbreads
Brush each flatbread lightly with a little olive oil (the remaining tablespoon) — this helps the base crisp up. Spread a generous, even layer of seasoned ricotta over each flatbread, leaving a 1/2-inch border around the edges. Scatter the asparagus pieces and cherry tomatoes over the ricotta. Sprinkle shredded mozzarella over the top.
Step 5 — Bake Until Crispy and Golden
Carefully slide the flatbreads onto the preheated baking sheet (use a large spatula). Bake for 12 to 15 minutes until the edges of the flatbreads are golden and crispy, the mozzarella is melted and beginning to bubble, and the asparagus is tender with slightly charred tips.
Step 6 — Add Fresh Toppings After Baking
Remove flatbreads from the oven. Immediately pile fresh arugula on top — the heat from the flatbread will slightly wilt the arugula, but it stays mostly crisp. Scatter shaved Parmesan over the arugula. Add a pinch of red pepper flakes. Drizzle honey in a thin, even stream over everything. The combination of peppery arugula, creamy ricotta, and sweet honey is extraordinary.
Step 7 — Slice and Serve
Use a pizza cutter or sharp knife to slice each flatbread into pieces. Serve immediately while everything is warm and the arugula is still fresh.
Nutrition Table (Per Serving — 1 flatbread)
| Nutrient | Amount |
|---|---|
| Calories | 380 kcal |
| Protein | 16g |
| Carbohydrates | 42g |
| Fat | 17g |
| Fiber | 3g |
| Sodium | 560mg |
Recipe 11: Creamy Avocado Pasta with Roasted Tomatoes
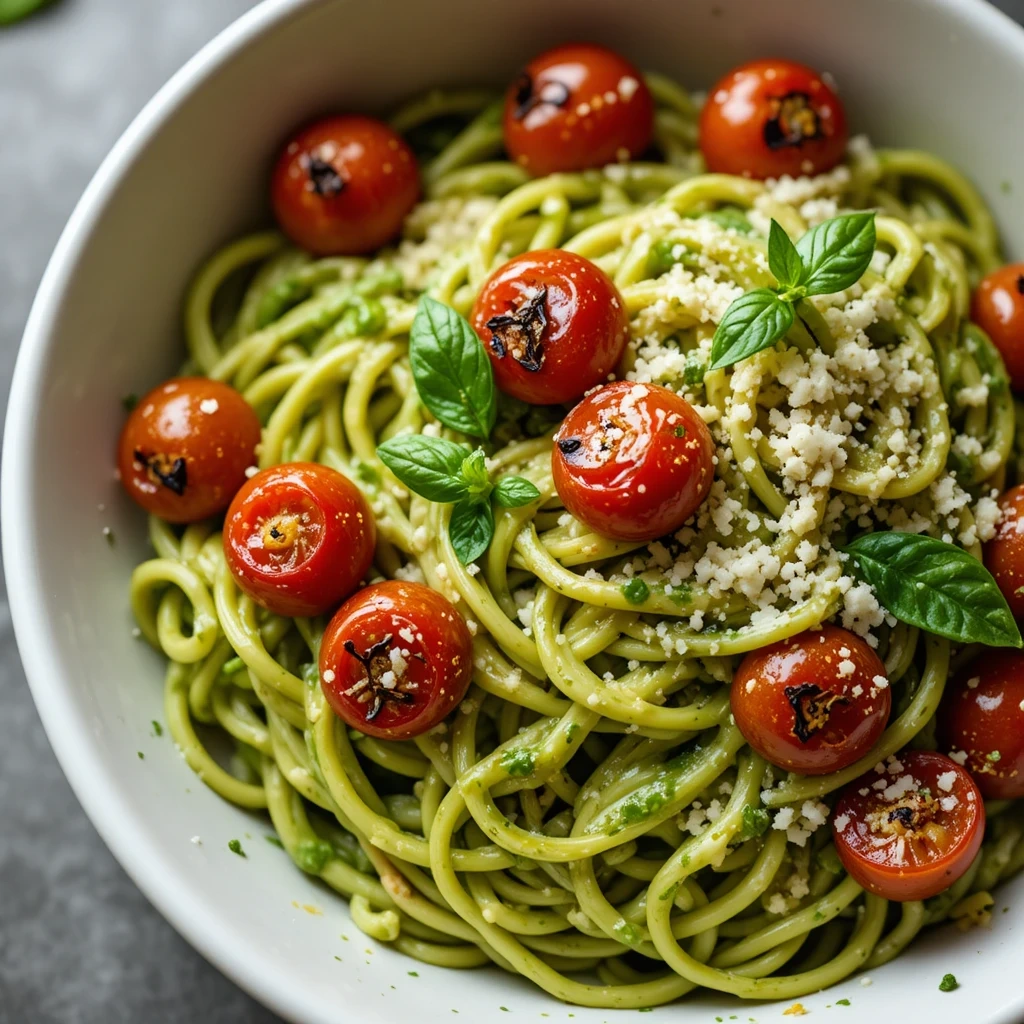
No cooking for the sauce. No complicated technique. Just pure, creamy, spring-green deliciousness.
| Detail | Info |
|---|---|
| Prep Time | 10 minutes |
| Cook Time | 20 minutes |
| Total Time | 30 minutes |
| Servings | 4 |
| Difficulty | Very Easy |
Key Ingredients
For the Pasta:
- 12 oz (340g) spaghetti or linguine
For the Avocado Sauce:
- 2 perfectly ripe avocados (they should yield slightly when pressed)
- Juice of 1 large lemon (about 4 tablespoons)
- 2 garlic cloves
- 1/4 cup fresh basil leaves, tightly packed
- 3 tablespoons extra-virgin olive oil
- 2 to 4 tablespoons pasta cooking water (added gradually)
- 1/2 teaspoon fine sea salt
- 1/4 teaspoon black pepper
For the Roasted Tomatoes:
- 2 cups cherry tomatoes, left whole
- 1 tablespoon olive oil
- Pinch of salt and pepper
- Optional: 2 sprigs fresh thyme
To Serve:
- Freshly grated Parmesan
- Extra basil leaves
- Lemon zest
Step-by-Step Instructions
Step 1 — Roast the Tomatoes First
Preheat oven to 400°F (200°C). Place the whole cherry tomatoes on a small baking tray. Drizzle with olive oil, season with salt, pepper, and tuck in the thyme sprigs if using. Roast for 18 to 20 minutes until the tomatoes are blistered, burst, and caramelized. The tomato skins will split and the juices will pool on the tray — do not discard this liquid! It becomes part of the sauce.
Step 2 — Cook the Pasta
Bring a large pot of well-salted water to a rolling boil. Cook pasta according to package directions until al dente. Remember to scoop out at least 1 cup of pasta water before draining. Drain but do not rinse.
Step 3 — Make the Avocado Sauce
While pasta cooks, halve the avocados, remove the pits, and scoop the flesh into a blender or food processor. Add the lemon juice, garlic cloves, fresh basil, olive oil, salt, and pepper. Blend until completely smooth and silky, about 60 seconds, scraping down the sides once. The sauce should be bright green, ultra-smooth, and smell incredible. Taste and adjust — more lemon for brightness, more salt for flavor, more basil for freshness.
Step 4 — Add Pasta Water to Adjust the Sauce
The avocado sauce will be quite thick from the blender. Add 2 tablespoons of the warm pasta water and blend again for 10 seconds. This thins it to a pourable, sauce-like consistency and also slightly warms the sauce, which helps it coat the pasta better. Add more pasta water a tablespoon at a time if needed.
Step 5 — Toss the Pasta
Add the drained pasta to a large bowl or back into the warm pot. Pour the avocado sauce over the pasta. Toss quickly and thoroughly using tongs or two forks. Every strand should be coated in the green, creamy sauce. Work fast — avocado oxidizes (turns brown) when exposed to air for too long. The lemon juice in the sauce helps prevent this, but serving promptly is still best.
Step 6 — Add the Roasted Tomatoes
Spoon the roasted tomatoes and all their wonderful caramelized juices over the plated pasta. The sweet, burst tomatoes against the creamy avocado sauce are a combination that simply works on every level.
Step 7 — Finish and Serve
Grate fresh Parmesan generously over each bowl. Add a little lemon zest grated directly over the top. Garnish with a few fresh basil leaves. Serve immediately — avocado pasta is best enjoyed right away before the sauce begins to oxidize.
Nutrition Table (Per Serving)
| Nutrient | Amount |
|---|---|
| Calories | 520 kcal |
| Protein | 16g |
| Carbohydrates | 68g |
| Fat | 22g |
| Fiber | 8g |
| Sodium | 340mg |
Recipe 12: One-Pan Chicken Orzo with Spinach and Sun-Dried Tomatoes
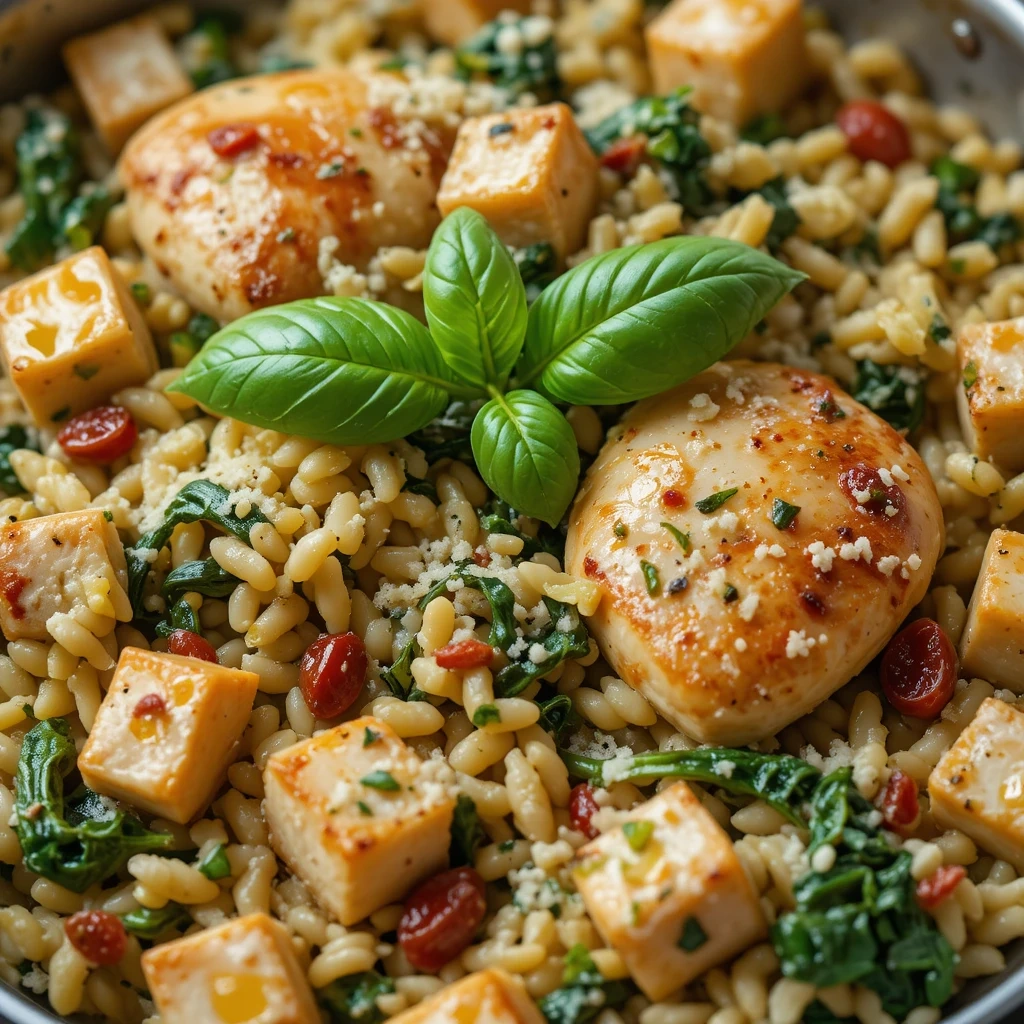
Orzo cooks right in the pan, soaking up all those gorgeous chicken-and-herb flavors. One pan, barely any dishes, maximum flavor.
| Detail | Info |
|---|---|
| Prep Time | 10 minutes |
| Cook Time | 30 minutes |
| Total Time | 40 minutes |
| Servings | 4 |
| Difficulty | Easy |
Key Ingredients
- 1.5 lbs (680g) boneless, skinless chicken breast, cut into 1-inch bite-sized cubes
- 1.5 cups orzo pasta (uncooked)
- 3 cups low-sodium chicken broth
- 2 cups baby spinach
- 1/3 cup oil-packed sun-dried tomatoes, drained and roughly chopped
- 3 garlic cloves, finely minced
- 1 small shallot or 1/2 small onion, finely diced
- 1 teaspoon Italian seasoning
- Juice and zest of 1 lemon
- 2 tablespoons olive oil
- Fine sea salt and black pepper
- 1/3 cup freshly grated Parmesan cheese
- Fresh basil to serve
Step-by-Step Instructions
Step 1 — Season and Prepare the Chicken
Cut the chicken into uniform, bite-sized cubes — roughly 1 inch. Uniform size is important so all the pieces cook at the same rate. Season generously all over with salt, pepper, and half the Italian seasoning. Pat the seasoning into the chicken pieces with your hands.
Step 2 — Sear the Chicken Until Golden
Heat 2 tablespoons of olive oil in a large, deep skillet or wide saucepan (at least 12 inches, with a lid) over medium-high heat. When the oil shimmers, add the seasoned chicken in a single layer. Cook for 4 to 5 minutes without stirring until the bottom is golden brown and releases easily from the pan. Flip and cook another 2 minutes. The chicken does not need to be fully cooked through at this stage — it will finish cooking with the orzo. Remove to a plate and set aside.
Step 3 — Sauté the Aromatics
In the same pan (don’t clean it — those golden bits are flavor!), reduce heat to medium. Add the diced shallot and cook for 2 minutes until softened. Add the minced garlic and stir for 60 seconds until fragrant. Add the sun-dried tomatoes and the remaining Italian seasoning. Stir and cook for 1 more minute.
Step 4 — Toast the Orzo
Add the dry orzo to the pan and stir, cooking for 1 minute. This brief toasting of the orzo in the flavorful pan drippings adds a nutty depth to the finished dish and helps the orzo hold its shape better during cooking.
Step 5 — Add Broth and Return Chicken
Pour in the chicken broth and bring to a boil over medium-high heat, stirring to scrape up any browned bits from the bottom of the pan — these bits are pure concentrated flavor. Return the seared chicken pieces and any resting juices back to the pan. Stir everything together. The liquid should just cover or nearly cover the orzo.
Step 6 — Simmer Until Orzo is Cooked
Reduce heat to medium-low. Cook uncovered, stirring every 3 to 4 minutes to prevent the orzo from sticking to the bottom. Simmer for 12 to 14 minutes until the orzo is al dente, most of the liquid has been absorbed, and the mixture has a creamy, risotto-like consistency. If it looks dry before the orzo is done, add a splash more broth or water.
Step 7 — Add Spinach and Lemon
Add the baby spinach to the pan and stir until wilted, about 60 seconds. Add the lemon juice and lemon zest. Stir to incorporate. Taste and adjust salt, pepper, and lemon.
Step 8 — Finish with Parmesan and Serve
Remove from heat. Stir in the grated Parmesan until melted and distributed throughout. The orzo will look beautifully creamy and glossy. Serve directly from the pan at the table, topped with fresh basil leaves and an extra drizzle of good olive oil.
Nutrition Table (Per Serving)
| Nutrient | Amount |
|---|---|
| Calories | 490 kcal |
| Protein | 44g |
| Carbohydrates | 48g |
| Fat | 14g |
| Fiber | 3g |
| Sodium | 590mg |
Recipe 13: Baked Falafel Bowls with Tahini Sauce
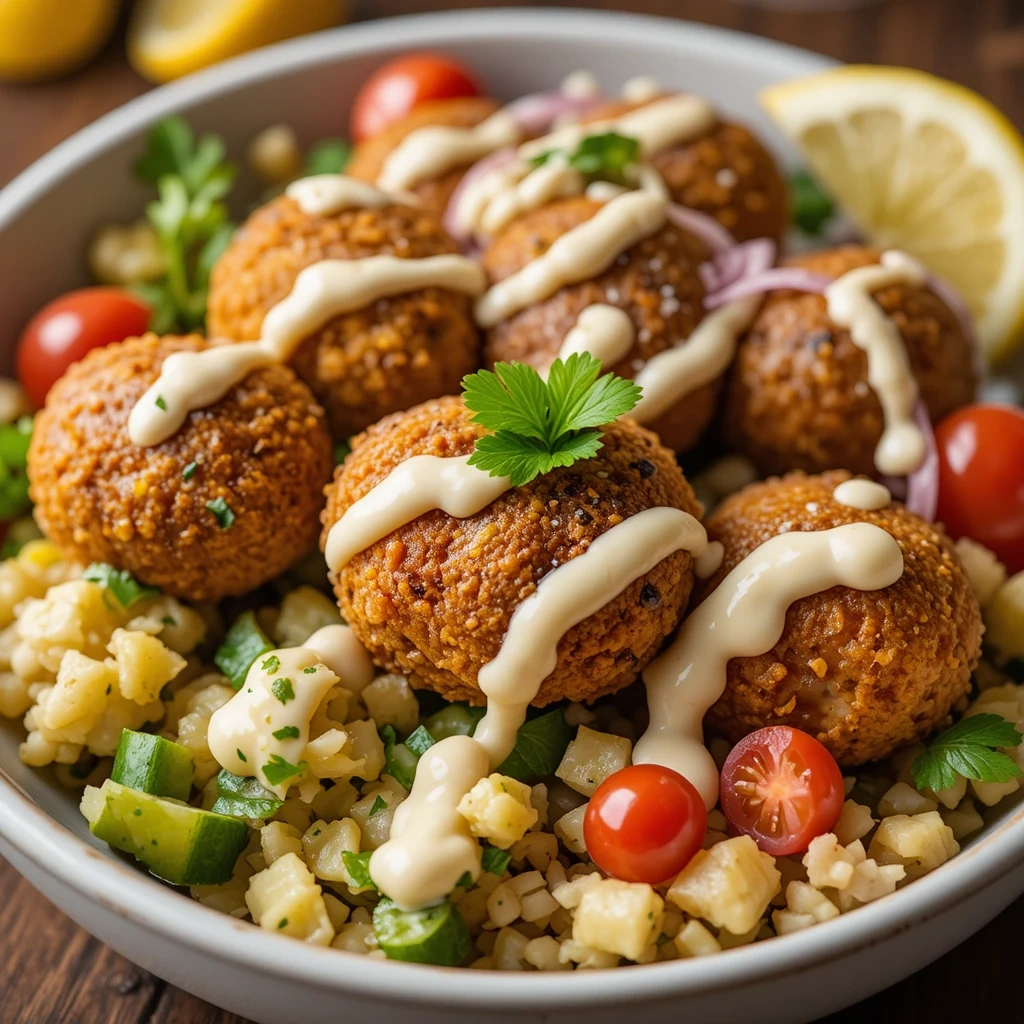
Crispy, golden, protein-packed baked falafel — no frying required. Served in a bowl with fresh vegetables and silky tahini sauce that you’ll want to put on everything.
| Detail | Info |
|---|---|
| Prep Time | 20 minutes |
| Cook Time | 25 minutes |
| Total Time | 45 minutes |
| Servings | 4 |
| Difficulty | Easy–Medium |
Key Ingredients
For the Falafel:
- 2 cans (15 oz / 425g each) chickpeas, drained, rinsed, and very thoroughly dried
- 1/4 cup fresh flat-leaf parsley, tightly packed
- 1/4 cup fresh cilantro, tightly packed
- 3 garlic cloves
- 1 small onion, quartered
- 1 teaspoon ground cumin
- 1/2 teaspoon ground coriander
- 1/4 teaspoon cayenne pepper (optional — omit for young kids)
- 1/2 teaspoon fine sea salt
- 2 tablespoons all-purpose flour (or chickpea flour for gluten-free)
- 1/2 teaspoon baking powder (adds lightness)
- Olive oil spray
For the Tahini Sauce:
- 3 tablespoons tahini (well-stirred)
- Juice of 1 large lemon (about 4 tablespoons)
- 1 garlic clove, minced or grated on a microplane
- 3 to 4 tablespoons cold water (to thin)
- Pinch of cumin
- Salt to taste
For the Bowls:
- 2 cups cooked rice, quinoa, or couscous
- 1 cucumber, diced
- 2 cups cherry tomatoes, halved
- 1/4 red onion, very thinly sliced
- Fresh parsley to garnish
- Lemon wedges
Step-by-Step Instructions
Step 1 — Dry the Chickpeas Thoroughly
This is the most critical step for good falafel. After draining and rinsing the chickpeas, spread them out on a clean kitchen towel or several layers of paper towels. Pat them dry, then let them air dry for 10 to 15 minutes. Wet chickpeas produce dense, mushy falafel. Dry chickpeas produce light, crispy falafel. Do not skip this drying time.
Step 2 — Preheat Oven and Prepare Pan
Preheat oven to 400°F (200°C). Line a large baking sheet with parchment paper. Spray the parchment generously with olive oil spray. A well-oiled surface is essential for the baked falafel to develop a crispy exterior; without it, they’ll stick and remain pale.
Step 3 — Process the Falafel Mixture
Add the dried chickpeas, fresh parsley, cilantro, garlic, onion, cumin, coriander, cayenne (if using), and salt to a food processor. Pulse in 10-second bursts — 6 to 8 pulses total. Stop and scrape down the sides between pulses. The mixture should resemble coarse, slightly chunky breadcrumbs. It should hold together when pressed between your fingers but should NOT be smooth or paste-like. Over-processing makes dense, gummy falafel.
Step 4 — Add Flour and Baking Powder
Add the flour and baking powder to the food processor. Pulse just 2 to 3 more times to incorporate. The mixture should now hold its shape firmly when pressed. If it seems too wet and won’t hold shape, add 1 more tablespoon of flour and pulse once.
Step 5 — Rest the Mixture
Transfer the mixture to a bowl, cover, and refrigerate for 10 minutes. This rest time firms the mixture, making it much easier to shape and helping the falafel hold together during baking.
Step 6 — Shape the Falafel
Use a 1.5-tablespoon cookie scoop or two spoons to portion the mixture into equal rounds. Roll gently between your palms to form smooth balls or slightly flattened patties (patties have more surface area touching the pan and get crispier — recommended!). Place on the prepared baking sheet with a little space between each. You should get approximately 20 to 24 falafel.
Step 7 — Spray and Bake
Spray the tops of all the falafel generously with olive oil spray. Place in the oven and bake for 12 minutes undisturbed. After 12 minutes, carefully flip each falafel using a thin spatula. Spray the newly exposed side with more olive oil. Bake for another 10 to 13 minutes until both sides are deep golden brown and the exterior is crispy.
Step 8 — Make the Tahini Sauce
While falafel bakes, make the sauce. In a small bowl, combine the tahini and lemon juice. It will immediately seize up into a thick paste — this is normal! Whisk in cold water one tablespoon at a time. As you whisk and add water, the sauce will loosen into a beautifully smooth, pourable consistency. Add garlic, cumin, and salt. Taste and adjust — add more lemon for brightness, more tahini for nuttiness, more water for a thinner drizzle.
Step 9 — Assemble the Bowls
Spoon the cooked grain into each bowl as the base. Arrange cucumber, cherry tomatoes, and thinly sliced red onion alongside. Place 4 to 6 warm falafel in each bowl. Drizzle everything generously with tahini sauce. Garnish with fresh parsley and a lemon wedge on the side.
Nutrition Table (Per Serving)
| Nutrient | Amount |
|---|---|
| Calories | 420 kcal |
| Protein | 18g |
| Carbohydrates | 56g |
| Fat | 15g |
| Fiber | 12g |
| Sodium | 480mg |
Recipe 14: Ground Beef Tacos with Fresh Mango Salsa
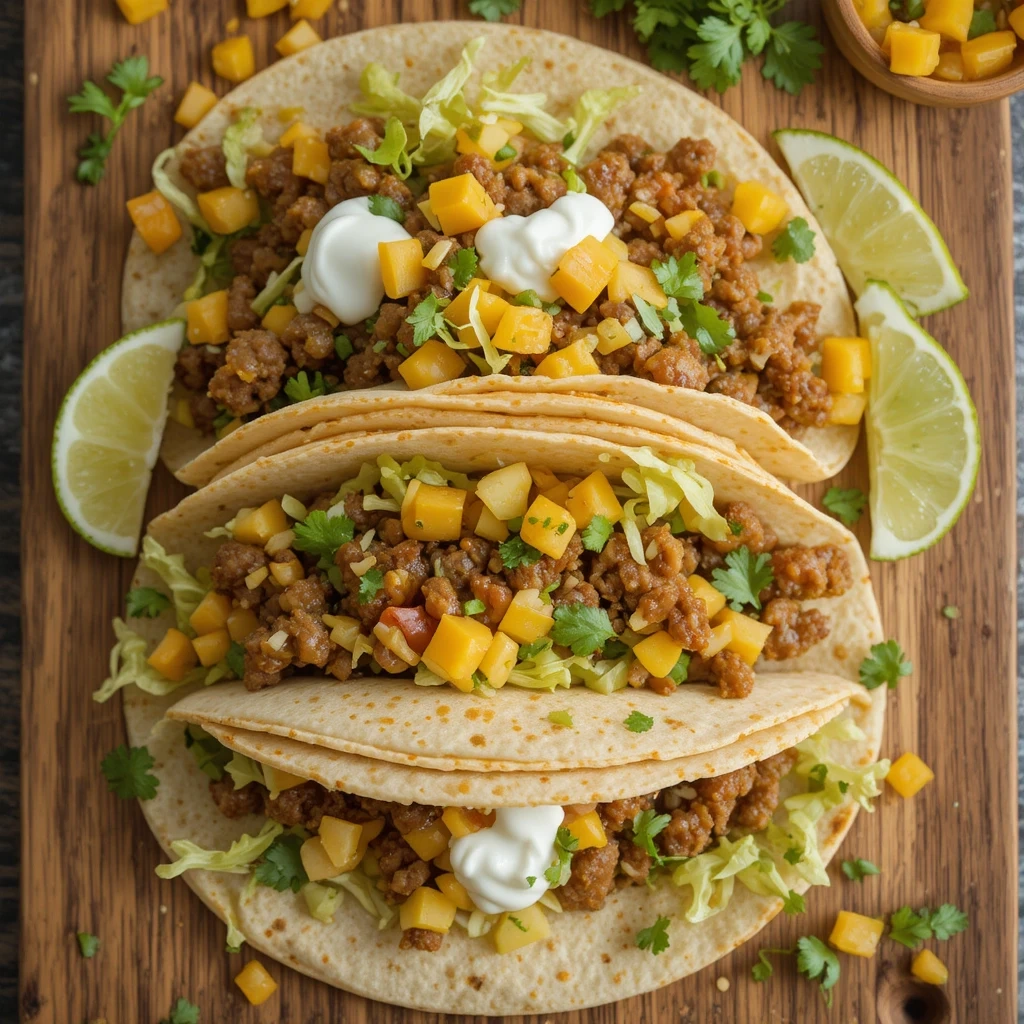
Taco Tuesday just leveled up. Sweet mango salsa on perfectly spiced beef is a combination that will immediately make this a family tradition.
| Detail | Info |
|---|---|
| Prep Time | 15 minutes |
| Cook Time | 15 minutes |
| Total Time | 30 minutes |
| Servings | 4 (about 8 tacos) |
| Difficulty | Very Easy |
Key Ingredients
For the Taco Meat:
- 1.5 lbs (680g) lean ground beef (90% lean)
- 1 teaspoon ground cumin
- 1 teaspoon chili powder
- 1/2 teaspoon garlic powder
- 1/2 teaspoon onion powder
- 1/4 teaspoon smoked paprika
- 1/4 teaspoon dried oregano
- 1/2 teaspoon fine sea salt
- 1/4 teaspoon black pepper
- 1/2 cup water or low-sodium beef broth (makes the meat juicier)
For the Fresh Mango Salsa:
- 1 large ripe mango, peeled and diced into small cubes
- 1/2 red onion, very finely diced
- 1 jalapeño, seeds removed, finely diced (optional — skip for young kids)
- 1/4 cup fresh cilantro, chopped
- Juice of 2 limes
- 1/4 teaspoon fine sea salt
For the Tacos:
- 8 small flour or corn tortillas
- 1 cup shredded lettuce or cabbage
- 1/2 cup sour cream or plain Greek yogurt
- 1 lime, cut into wedges
Step-by-Step Instructions
Step 1 — Make the Mango Salsa First
Make the salsa before cooking the meat — it improves significantly with 10 to 15 minutes of resting time as the flavors meld together. In a medium bowl, combine the diced mango, finely diced red onion, jalapeño (if using), chopped cilantro, lime juice, and salt. Stir gently to combine. Taste and adjust — add more lime for tartness, more salt to bring out the sweetness of the mango. Set aside at room temperature.
Step 2 — Make the Spice Mix
Combine cumin, chili powder, garlic powder, onion powder, smoked paprika, dried oregano, salt, and pepper in a small bowl. Having the spice mix pre-measured and ready allows you to add it quickly to the meat at just the right moment without fumbling with individual spice jars over a hot stove.
Step 3 — Brown the Ground Beef
Heat a large skillet over medium-high heat. You don’t need oil — ground beef has enough fat. Add the ground beef and let it sit undisturbed for 2 minutes to begin browning. Then use a wooden spoon or spatula to break it into small, even crumbles. Continue cooking and breaking up the meat for 5 to 7 minutes until completely browned with no pink remaining. You should hear a good sizzle — if not, your heat is too low.
Step 4 — Drain Excess Fat
Tilt the pan and spoon out or drain excess fat if there’s a large amount. Leave a small amount of fat in the pan — it carries flavor and keeps the meat moist.
Step 5 — Add Spices and Water
Sprinkle the entire spice mix over the browned beef. Stir well to coat every crumble with the seasoning mixture. Cook for 1 minute — the spices will bloom in the residual fat and smell incredible. Pour in the water or broth. Stir and let it simmer for 2 to 3 minutes until the liquid is absorbed and the meat looks saucy and juicy rather than dry. This step prevents the dry, crumbly taco meat that nobody enjoys.
Step 6 — Warm the Tortillas
Warm tortillas properly — it makes a huge difference in the eating experience. Options: place directly over a gas flame for 10 seconds per side until slightly charred; heat in a dry skillet over medium-high heat for 30 seconds per side; or wrap in a damp paper towel and microwave for 30 to 60 seconds. Keep warm tortillas wrapped in a clean kitchen towel.
Step 7 — Set Up a Taco Bar
Place all components — seasoned beef, mango salsa, shredded lettuce, sour cream, and lime wedges — in separate bowls in the center of the table and let everyone build their own tacos. This is especially fun for kids and eliminates the pressure of guessing what everyone wants on theirs.
Step 8 — Assemble and Serve
Build your taco: warm tortilla → beef → shredded lettuce → a generous spoonful of mango salsa → a drizzle of sour cream → squeeze of fresh lime. Eat immediately while everything is warm.
Nutrition Table (Per Serving — 2 tacos)
| Nutrient | Amount |
|---|---|
| Calories | 440 kcal |
| Protein | 34g |
| Carbohydrates | 38g |
| Fat | 16g |
| Fiber | 3g |
| Sodium | 580mg |
Recipe 15: Baked Honey Mustard Salmon with Roasted Potatoes
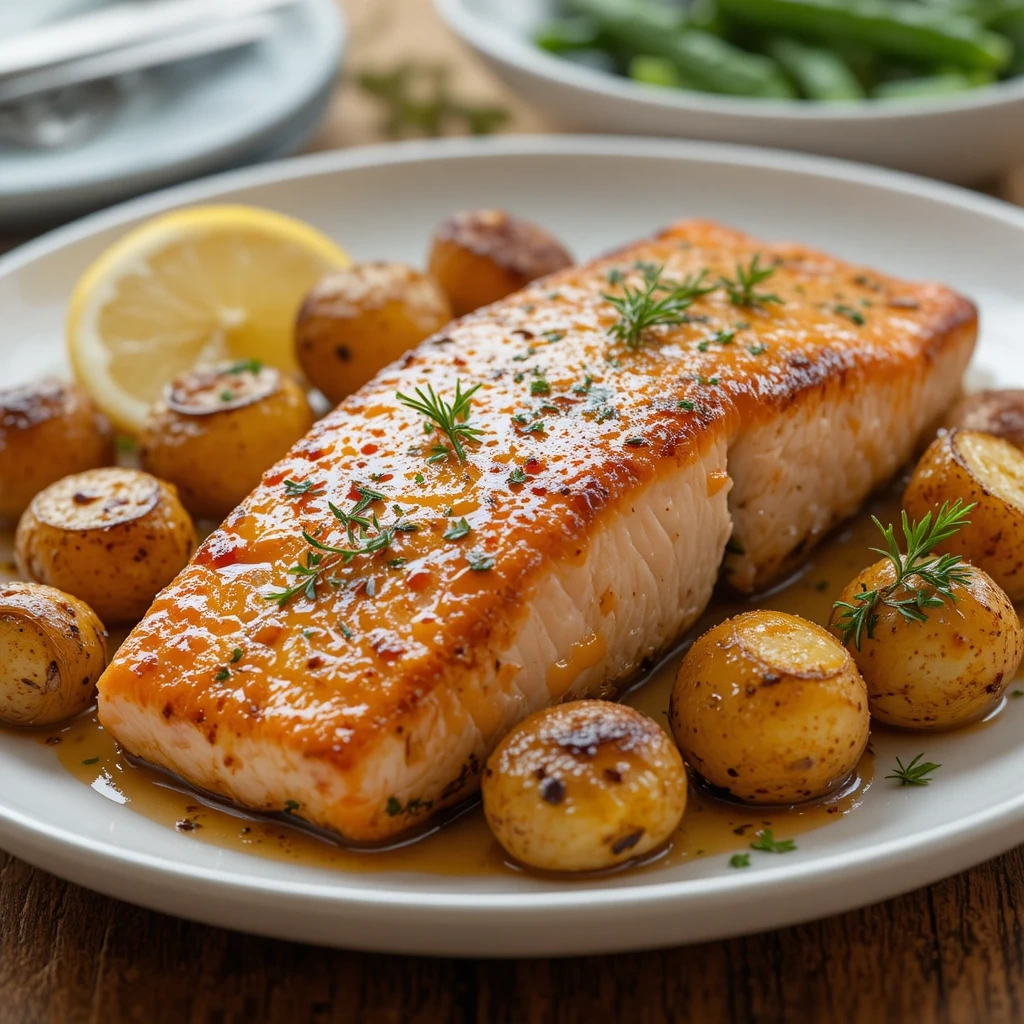
The recipe that will make you fall completely in love with baking salmon. Sweet, tangy, golden — and the potatoes are crispy perfection.
| Detail | Info |
|---|---|
| Prep Time | 10 minutes |
| Cook Time | 35 minutes |
| Total Time | 45 minutes |
| Servings | 4 |
| Difficulty | Easy |
Key Ingredients
For the Honey Mustard Salmon:
- 4 salmon fillets (about 6 oz / 170g each), skin-on
- 3 tablespoons raw honey
- 2 tablespoons Dijon mustard
- 1 tablespoon whole-grain mustard
- 1 tablespoon olive oil
- 2 garlic cloves, minced or grated
- Juice of 1/2 lemon
- 1/4 teaspoon smoked paprika
- Fine sea salt and black pepper
For the Roasted Potatoes:
- 1.5 lbs (680g) baby potatoes or small Yukon Gold potatoes, halved
- 2 tablespoons olive oil
- 1 teaspoon garlic powder
- 1 teaspoon dried rosemary (or 2 sprigs fresh rosemary)
- 1/2 teaspoon smoked paprika
- Fine sea salt and black pepper
To Serve:
- Fresh dill or parsley
- Lemon wedges
- Optional: steamed broccoli or green beans
Step-by-Step Instructions
Step 1 — Start the Potatoes Early
The potatoes need a head start since they take longer than the salmon. Preheat oven to 400°F (200°C) with a baking sheet inside the oven while it heats. Wash and halve the baby potatoes. In a bowl, toss the potatoes with olive oil, garlic powder, dried rosemary, smoked paprika, salt, and pepper until well and evenly coated. Carefully remove the hot baking sheet from the oven (use oven mitts!). Place the potatoes cut-side down on the hot sheet — the sizzle you hear is the key to a crispy cut surface. Roast for 20 minutes without disturbing.
Step 2 — Make the Honey Mustard Glaze
While the potatoes roast, prepare the glaze. In a small bowl, whisk together the honey, Dijon mustard, whole-grain mustard, olive oil, minced garlic, lemon juice, and smoked paprika. The glaze should be smooth, thick, and glossy. Taste it — it should be a perfect balance of sweet and tangy. Set aside. If you have time, you can marinate the salmon in half the glaze for 15 minutes before baking for deeper flavor.
Step 3 — Prepare the Salmon
Pat the salmon fillets completely dry with paper towels — this is essential for the glaze to adhere properly and for the flesh to caramelize rather than steam. Season each fillet lightly with salt and pepper before applying the glaze. Place the salmon fillets on a piece of parchment paper or prepare a section of the baking sheet.
Step 4 — Add Salmon to the Pan
After 20 minutes, the potatoes should be beginning to turn golden on their cut sides. Open the oven, carefully push the potatoes to the sides of the baking sheet, and place the salmon fillets skin-side down in the center of the pan.
Step 5 — Apply the Glaze Generously
Using a pastry brush, spoon, or the back of a spoon, coat each salmon fillet with a thick, generous layer of honey mustard glaze. Use most of the glaze. The glaze should completely cover the surface of the flesh. Reserve a small amount of glaze to brush on during cooking.
Step 6 — Bake Together
Return the pan to the oven. Bake for 12 to 15 minutes, depending on the thickness of your salmon. At the 8-minute mark, open the oven and brush another thin layer of the reserved glaze over each fillet — this builds a deeper, more caramelized crust. The salmon is done when it flakes easily at the thickest part when pressed gently with a fork, and the glaze is golden and slightly caramelized.
Step 7 — Optional Broil for Caramelized Finish
For an extra-caramelized, restaurant-quality glaze, switch the oven to broil for the final 2 minutes. Watch very carefully — the honey in the glaze can burn quickly under the broiler. You want golden and caramelized, not charred.
Step 8 — Rest and Serve
Let the salmon rest on the pan for 3 minutes. The residual heat continues cooking it slightly during this time. Check your potatoes — they should be golden brown and completely tender when pierced with a fork. If needed, return them to the oven for a few extra minutes while the salmon rests.
Serve salmon and potatoes on warm plates. Scatter fresh dill or parsley over the salmon. Place a lemon wedge on the side. Add any additional steamed vegetables if desired.
Nutrition Table (Per Serving)
| Nutrient | Amount |
|---|---|
| Calories | 480 kcal |
| Protein | 40g |
| Carbohydrates | 38g |
| Fat | 18g |
| Fiber | 4g |
| Sodium | 460mg |
Top Tips for Perfecting Your Spring Dinners
Taste Your Seasoning As You Go
Spring vegetables are naturally mild and sweet. Don’t be shy with herbs, lemon, and garlic to bring out their best flavor. The difference between a good dish and a great one is often just a little more salt or lemon at the end.
Don’t Overcook Your Vegetables
Spring vegetables like asparagus, peas, and snap peas only need a few minutes of heat. Overcooked spring produce turns mushy, loses its gorgeous bright color, and becomes dull in flavor. If in doubt, undercook slightly — they’ll continue cooking from residual heat.
Let Proteins Rest Before Cutting
Whether it’s chicken or salmon, always let your protein rest for 3 to 5 minutes after cooking. Resting allows the muscle fibers to relax and reabsorb the juices. Skip this step and all those juices pour out the moment you cut into the meat.
Prep Ahead for Easier Weeknights
Chop your vegetables, make your sauces, and marinate your proteins on Sunday. Most of these dinners come together in under 10 minutes of active cooking if the prep is already done. Store prepped vegetables in airtight containers in the refrigerator for up to 3 days.
Use Fresh Herbs Generously
Fresh basil, mint, parsley, and dill are the secret weapons of spring cooking. They are not just garnishes — they’re flavor. Add them at the very end of cooking or directly at the table for maximum impact.
Frequently Asked Questions
What are the best spring dinner ideas for picky eaters?
Recipes like honey garlic shrimp bowls, pea and mint pasta, and tacos work wonderfully for picky eaters because they use familiar, comforting flavors in exciting new presentations. Allow kids to build their own bowls or tacos — ownership over their meal increases the likelihood they’ll eat it enthusiastically.
Can I make these spring dinner recipes ahead of time?
Absolutely. Most sauces, marinades, and chopped vegetables can be prepared 2 days in advance. Full meals like stuffed peppers and white bean soup actually taste better reheated the next day as the flavors deepen overnight.
What spring vegetables are best for family dinners?
Asparagus, peas, zucchini, snap peas, cherry tomatoes, and spinach are all mild enough for children and flavorful enough for adults. They’re also widely available and very affordable during spring months.
How do I make spring dinner ideas more kid-friendly?
Reduce or eliminate spice and heat, let children participate in assembling their meals (tacos, bowls, flatbreads), and keep sauces on the side so everyone can customize their plate. Make meals visually colorful and fun — kids genuinely eat with their eyes first.
What is the fastest spring dinner idea on this list?
The honey garlic shrimp bowls and spring pea pasta both come together in approximately 20 minutes from start to finish — perfect for the most hectic weeknights.
Can I substitute proteins in these recipes?
Absolutely. Chicken breast or thighs work beautifully in place of seafood in most recipes. Tofu works well in the stir fry for a vegetarian option. Simply adjust cooking times accordingly — chicken requires longer cooking than shrimp or salmon.
Are these spring dinner ideas healthy?
Yes! These recipes are built around lean proteins, fresh seasonal vegetables, whole grains, and healthy fats. They are nutrient-dense, well-balanced, and significantly healthier than most restaurant or takeout options.
What is a good spring dinner for a large family gathering?
The sheet pan salmon, stuffed bell peppers, and chicken orzo are all easy to double or triple for a crowd. The falafel bowls are excellent for gatherings with guests who have different dietary preferences, since they’re naturally vegetarian.
Can I make these recipes dairy-free?
Many of these recipes are already dairy-free or easily adapted. Substitute coconut cream for heavy cream in the pasta and soup. Use dairy-free cheese alternatives where cheese is called for. The falafel bowls and stir fry are naturally dairy-free.
How do I know when salmon is properly cooked?
Salmon is perfectly cooked when it flakes apart easily when pressed with a fork at the thickest point. The center can remain slightly translucent and rosy for medium doneness (most delicious), or completely opaque for well-done. A thermometer reading of 125°F (52°C) is medium-rare; 145°F (63°C) is fully cooked.
Happy cooking! May your spring table be colorful, your kitchen smell wonderful, and your family always ask for seconds.
Keywords: spring dinner ideas, family spring recipes, easy spring meals, spring dinner recipes for kids, healthy spring dinners, quick spring weeknight dinners, spring vegetable recipes