
15 Easy Spring Dinner Ideas Your Family Will Love
Spring has finally arrived, bringing with it longer days, warmer evenings, and the most incredible fresh produce! After months of hearty winter meals, your family deserves lighter, brighter dinners that celebrate the season. These 15 spring dinner ideas combine fresh vegetables, simple preparation, and kid-approved flavors that will have everyone asking for seconds.
Whether you’re a busy parent looking for quick weeknight solutions or planning a special weekend feast, these recipes bring sunshine to your dinner table without keeping you stuck in the kitchen for hours.
What Are Spring Dinner Ideas?
Ever wonder why certain meals just taste better when the seasons change? Spring dinner ideas are recipes that embrace the fresh, vibrant ingredients available during this beautiful season—think crisp asparagus, sweet peas, tender carrots, and bright herbs. They’re lighter than winter comfort foods but still satisfying enough to fill hungry bellies.
As the saying goes, “the way to a family’s heart is through delicious home-cooked meals,” and these spring recipes prove it! Get ready to transform your dinner routine with meals that taste like sunshine on a plate.
Why You’ll Love These Spring Dinner Ideas
First and foremost, these recipes celebrate seasonal produce at its peak freshness, meaning you’ll enjoy incredible flavor without complicated cooking techniques. The natural sweetness of spring vegetables like snap peas and baby carrots needs minimal seasoning, letting the ingredients shine through beautifully.
Beyond taste, cooking these meals at home saves you serious money compared to restaurant dining. A family dinner out can easily cost $60-80, while making these spring recipes at home typically runs $15-25 per meal. Your wallet will thank you, and you’ll have control over ingredients, ensuring everything is healthy and halal for your family.
The colorful toppings and fresh herbs that garnish these dishes make every plate Instagram-worthy. From vibrant lemon zest to freshly chopped parsley, these finishing touches elevate simple dinners into something special. If you enjoyed our “One-Pot Pasta Primavera” post, you’ll absolutely love how these spring recipes simplify mealtime while delivering restaurant-quality results. Ready to bring spring to your table? Let’s start cooking!
Recipe 1: Lemon Herb Chicken with Spring Vegetables

Quick Overview
This bright and flavorful chicken dinner comes together in just 35 minutes, making it perfect for busy weeknights. The combination of tender chicken breasts, zesty lemon, and a medley of colorful spring vegetables creates a complete meal that’s both satisfying and nutritious.
Prep Time: 15 minutes
Cook Time: 20 minutes
Total Time: 35 minutes
Servings: 4-6
Key Ingredients for Lemon Herb Chicken with Spring Vegetables
- 4 boneless, skinless chicken breasts
- 2 tablespoons olive oil
- 3 cloves garlic, minced
- Juice and zest of 2 lemons
- 1 teaspoon dried thyme
- 1 teaspoon dried rosemary
- 1 pound asparagus, trimmed
- 2 cups snap peas
- 2 medium carrots, sliced
- Salt and pepper to taste
- Fresh parsley for garnish
Step-by-Step Instructions
How do I prepare the chicken marinade?
In a large bowl, combine olive oil, minced garlic, lemon juice, lemon zest, thyme, rosemary, salt, and pepper. Add the chicken breasts and toss to coat evenly. Let marinate for at least 10 minutes while you prep your vegetables. This allows the flavors to penetrate the meat, creating juicy, flavorful chicken.
How do I cook the chicken perfectly?
Heat a large skillet over medium-high heat. Remove chicken from marinade (reserve the marinade) and cook for 6-7 minutes per side until golden brown and cooked through (internal temperature should reach 165°F). Transfer chicken to a plate and tent with foil to keep warm.
How do I prepare the spring vegetables?
In the same skillet, add a drizzle of olive oil if needed. Add carrots first as they take longest, cooking for 3 minutes. Then add asparagus and snap peas, cooking for another 4-5 minutes until vegetables are tender-crisp and bright green. Pour the reserved marinade over vegetables and toss to coat.
How do I bring everything together?
Return the chicken to the skillet with the vegetables, letting everything warm together for 2 minutes. Garnish with fresh parsley and additional lemon zest if desired. Serve immediately while hot.
What to Serve Lemon Herb Chicken With
This chicken pairs beautifully with fluffy rice pilaf, creamy mashed potatoes, or crusty bread to soak up the delicious lemon sauce. For a lighter option, serve over a bed of mixed greens or quinoa. A simple cucumber and tomato salad adds extra freshness.
Top Tips for Perfecting Lemon Herb Chicken
Pound chicken breasts to an even thickness before cooking to ensure they cook evenly and stay juicy. Don’t overcrowd the pan; cook chicken in batches if necessary to get that beautiful golden crust. Use fresh lemon juice instead of bottled for the brightest flavor. If your kids are sensitive to strong herbs, reduce the rosemary and thyme by half.
Storing and Reheating Tips
Store leftover chicken and vegetables in an airtight container in the refrigerator for up to 3 days. Reheat gently in a skillet over medium heat with a splash of chicken broth to prevent drying out, or microwave in 30-second intervals until warmed through. This dish isn’t ideal for freezing as the vegetables lose their crisp texture.
Recipe 2: Creamy Pesto Pasta with Peas and Cherry Tomatoes
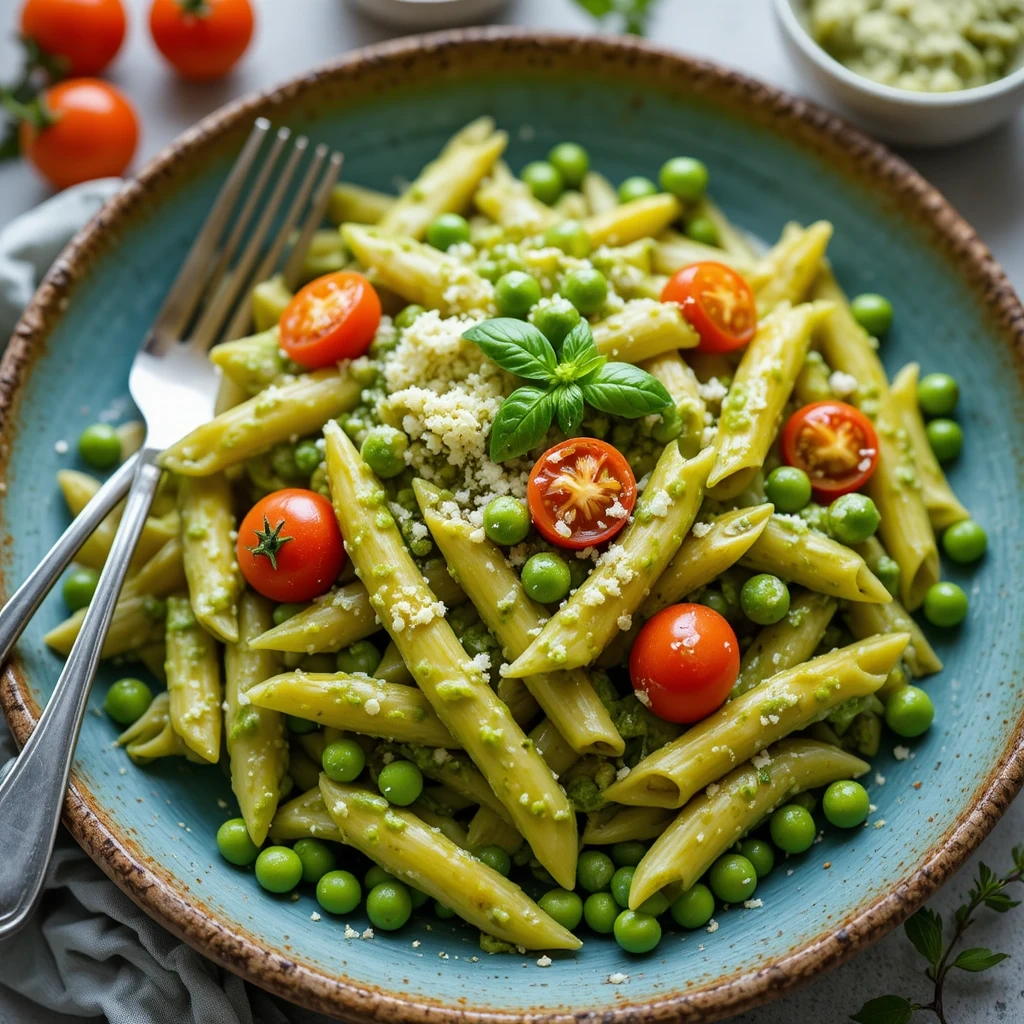
Quick Overview
This vibrant pasta dish combines the rich flavors of homemade-style pesto with sweet spring peas and burst cherry tomatoes. It’s ready in just 25 minutes and kids absolutely love the creamy sauce!
Prep Time: 10 minutes
Cook Time: 15 minutes
Total Time: 25 minutes
Servings: 6
Key Ingredients for Creamy Pesto Pasta
- 1 pound penne or rotini pasta
- 1 cup basil pesto (store-bought or homemade)
- 1/2 cup heavy cream or Greek yogurt
- 2 cups frozen or fresh peas
- 2 cups cherry tomatoes, halved
- 1/2 cup grated Parmesan cheese
- 2 tablespoons olive oil
- Salt and pepper to taste
- Fresh basil leaves for garnish
Step-by-Step Instructions
How do I cook the pasta perfectly?
Bring a large pot of salted water to a boil. Add pasta and cook according to package directions until al dente (usually 8-10 minutes). During the last 2 minutes of cooking, add the peas directly to the pasta water. This saves time and dishes while perfectly cooking the peas. Drain pasta and peas together, reserving 1 cup of pasta water.
How do I make the creamy pesto sauce?
In the same pot (wiped clean), combine pesto and heavy cream over low heat. Stir until well combined and warmed through, about 2 minutes. The cream mellows the pesto flavor, making it more kid-friendly while adding luxurious creaminess.
How do I combine everything?
Add the drained pasta and peas back to the pot with the pesto cream sauce. Toss well to coat every piece of pasta. If the sauce seems too thick, add reserved pasta water a few tablespoons at a time until you reach desired consistency.
How do I add the finishing touches?
Stir in halved cherry tomatoes and half the Parmesan cheese. The residual heat will slightly soften the tomatoes while keeping them fresh and juicy. Season with salt and pepper to taste. Serve immediately, topped with remaining Parmesan and fresh basil leaves.
What to Serve Creamy Pesto Pasta With
This pasta is quite filling on its own but pairs wonderfully with garlic bread or breadsticks. A simple side salad with Italian dressing balances the richness. For protein, add grilled chicken strips or white beans.
Top Tips for Perfecting Creamy Pesto Pasta
Use high-quality pesto for the best flavor—fresh from the refrigerated section beats jarred shelf-stable versions. If using Greek yogurt instead of cream for a healthier option, remove the pot from heat before adding it to prevent curdling. Toast pine nuts and sprinkle on top for added crunch and authentic pesto flavor.
Storing and Reheating Tips
Store in an airtight container in the refrigerator for up to 3 days. The pasta may absorb some sauce while stored, so when reheating, add a splash of milk or cream and warm gently on the stovetop or in the microwave. Freeze individual portions for up to 2 months; thaw overnight in the refrigerator before reheating.
Recipe 3: Sheet Pan Honey Garlic Salmon with Roasted Vegetables
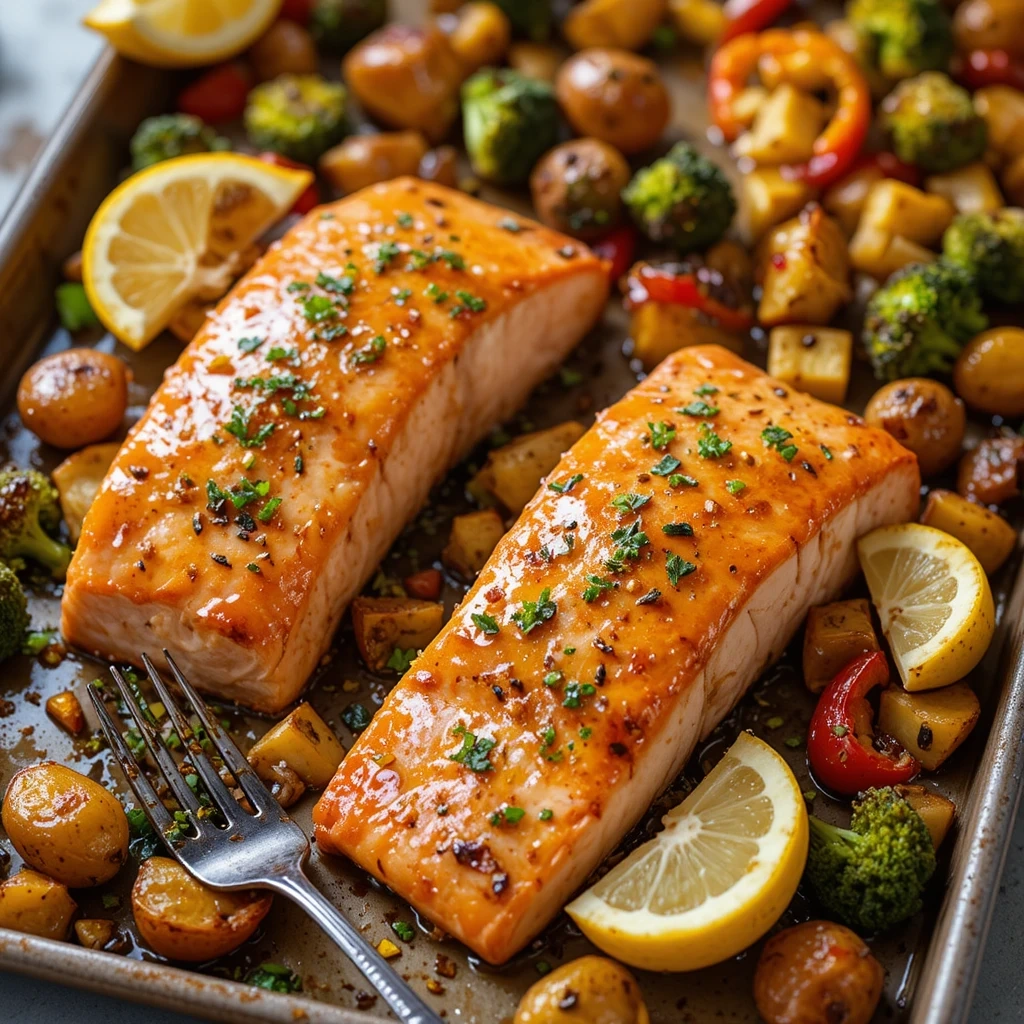
Quick Overview
This one-pan wonder delivers perfectly flaky salmon with caramelized edges alongside tender roasted vegetables. The sweet honey garlic glaze appeals to even the pickiest eaters, and cleanup is a breeze!
Prep Time: 15 minutes
Cook Time: 18 minutes
Total Time: 33 minutes
Servings: 4
Key Ingredients for Honey Garlic Salmon
For the Salmon:
- 4 salmon fillets (6 ounces each)
- 1/4 cup honey
- 3 tablespoons low-sodium soy sauce (or tamari for gluten-free)
- 3 cloves garlic, minced
- 1 tablespoon olive oil
- 1 teaspoon fresh ginger, grated
For the Vegetables:
- 1 pound baby potatoes, halved
- 2 cups broccoli florets
- 2 bell peppers, cut into chunks
- 2 tablespoons olive oil
- Salt and pepper to taste
- Lemon wedges for serving
Step-by-Step Instructions
How do I prepare the sheet pan?
Preheat your oven to 400°F (200°C) and line a large baking sheet with parchment paper or aluminum foil for easy cleanup. This prevents sticking and makes washing up much simpler.
How do I prepare the vegetables?
In a large bowl, toss halved baby potatoes, broccoli florets, and bell pepper chunks with olive oil, salt, and pepper. Spread vegetables in a single layer on one side of the prepared baking sheet, leaving space for the salmon. Roast vegetables for 10 minutes while you prepare the salmon and glaze.
How do I make the honey garlic glaze?
In a small bowl, whisk together honey, soy sauce, minced garlic, olive oil, and grated ginger until well combined. This sweet and savory glaze is the secret to amazing flavor!
How do I cook the salmon?
After vegetables have roasted for 10 minutes, remove the pan from the oven. Place salmon fillets skin-side down on the empty side of the baking sheet. Brush generously with half of the honey garlic glaze. Return to oven and roast for 10-12 minutes until salmon flakes easily with a fork. Brush with remaining glaze during the last 2 minutes of cooking for extra flavor.
What to Serve Honey Garlic Salmon With
This dish is complete as-is but pairs nicely with rice, quinoa, or crusty bread. A fresh green salad or coleslaw adds crunch. For Asian-inspired sides, try steamed edamame or cucumber salad.
Top Tips for Perfecting Honey Garlic Salmon
Choose salmon fillets of similar thickness so they cook evenly. Pat salmon dry with paper towels before glazing to help the sauce adhere better. Don’t overcook—salmon continues cooking slightly after you remove it from the oven. If your kids don’t like fish skin, simply remove it after cooking (it slides right off).
Storing and Reheating Tips
Store leftover salmon and vegetables separately in airtight containers for up to 2 days in the refrigerator. Reheat vegetables in the oven at 350°F until warmed through. For salmon, reheat gently in a covered skillet over low heat to prevent drying, or enjoy cold over salad. Salmon can be frozen for up to 2 months, though texture may change slightly upon reheating.
Recipe 4: Spring Vegetable Fried Rice
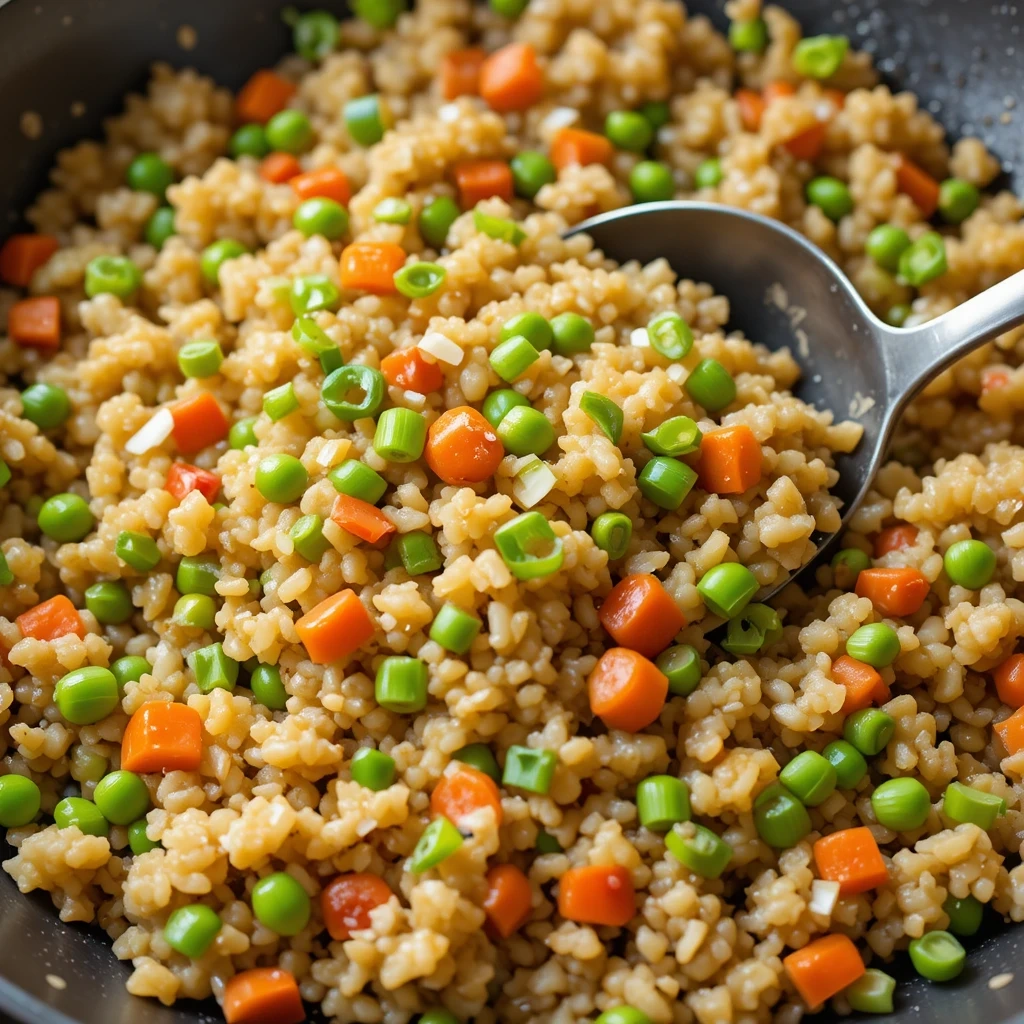
Quick Overview
Transform leftover rice into a colorful, veggie-packed dinner in just 20 minutes! This better-than-takeout fried rice is customizable, budget-friendly, and sneaks in plenty of vegetables your kids will actually eat.
Prep Time: 10 minutes
Cook Time: 10 minutes
Total Time: 20 minutes
Servings: 4-6
Key Ingredients for Spring Vegetable Fried Rice
- 4 cups cooked, cold rice (day-old works best)
- 3 tablespoons vegetable oil, divided
- 3 eggs, beaten
- 1 cup frozen peas and carrots
- 1 cup fresh snap peas, trimmed and halved
- 1 red bell pepper, diced
- 4 green onions, sliced
- 3 cloves garlic, minced
- 3 tablespoons low-sodium soy sauce
- 1 tablespoon sesame oil
- Salt and pepper to taste
Step-by-Step Instructions
How do I prepare the rice properly?
Cold, day-old rice is essential for perfect fried rice because freshly cooked rice is too moist and becomes mushy. If using fresh rice, spread it on a baking sheet and refrigerate for 30 minutes to dry out. Break up any clumps with your hands before cooking.
How do I cook the eggs?
Heat 1 tablespoon vegetable oil in a large wok or skillet over medium-high heat. Pour in beaten eggs and let them cook undisturbed for about 30 seconds until they start to set. Scramble the eggs until fully cooked but still soft, then transfer to a plate and set aside.
How do I cook the vegetables?
Add remaining 2 tablespoons oil to the same pan over high heat. Add garlic and cook for 30 seconds until fragrant. Add all vegetables (peas and carrots, snap peas, bell pepper, and green onions) and stir-fry for 3-4 minutes until vegetables are tender-crisp and bright in color.
How do I combine everything?
Add the cold rice to the pan, breaking up any remaining clumps. Stir-fry for 3-4 minutes, letting the rice get slightly crispy on the edges. Pour soy sauce and sesame oil over the rice, tossing constantly to evenly coat. Return the scrambled eggs to the pan and mix everything together for one final minute.
What to Serve Spring Vegetable Fried Rice With
This dish is hearty enough to serve as a main course but also works beautifully as a side dish with grilled chicken, shrimp, or tofu. Spring rolls or dumplings make great appetizers. Add a drizzle of sriracha or sweet chili sauce for those who like heat.
Top Tips for Perfecting Spring Vegetable Fried Rice
Use a large wok or the biggest skillet you have—overcrowding causes vegetables to steam rather than fry. Keep the heat high and ingredients moving constantly for that authentic restaurant flavor. Customize vegetables based on what’s in your fridge or what your kids will eat. Add protein like cooked chicken, shrimp, or tofu for a heartier meal.
Storing and Reheating Tips
Store fried rice in an airtight container in the refrigerator for up to 4 days. Reheat in a skillet over medium heat with a small splash of water or broth to refresh the rice, or microwave in 1-minute intervals, stirring between each. Fried rice freezes beautifully for up to 3 months—portion into individual servings for quick lunches.
Recipe 5: Cheesy Broccoli and Chicken Casserole

Quick Overview
This comforting one-dish meal combines tender chicken, vibrant broccoli, and a creamy cheese sauce all baked together until bubbly and golden. It’s the ultimate family-friendly dinner that even picky eaters request!
Prep Time: 15 minutes
Cook Time: 30 minutes
Total Time: 45 minutes
Servings: 6
Key Ingredients for Cheesy Broccoli Chicken Casserole
- 3 cups cooked chicken, diced or shredded
- 4 cups fresh broccoli florets
- 2 cups cooked rice or pasta
- 1 can (10.5 oz) cream of chicken soup (or make homemade)
- 1 cup sour cream
- 2 cups shredded cheddar cheese, divided
- 1/2 cup milk
- 1 teaspoon garlic powder
- 1/2 teaspoon onion powder
- Salt and pepper to taste
- 1 cup breadcrumbs or crushed crackers
- 2 tablespoons melted butter
Step-by-Step Instructions
How do I prepare the casserole base?
Preheat oven to 350°F (175°C) and grease a 9×13-inch baking dish. If using fresh broccoli, blanch it in boiling water for 3 minutes until bright green but still crisp, then drain well. This removes the raw edge while keeping vegetables from becoming mushy during baking.
How do I make the creamy sauce?
In a large bowl, mix together cream of chicken soup, sour cream, milk, 1 cup shredded cheddar cheese, garlic powder, onion powder, salt, and pepper. Stir until smooth and well combined. This creamy mixture holds everything together and delivers that comforting flavor.
How do I assemble the casserole?
Add cooked chicken, blanched broccoli, and cooked rice (or pasta) to the sauce mixture. Fold everything together gently until evenly coated. Pour into the prepared baking dish and spread into an even layer. Sprinkle remaining 1 cup of cheddar cheese over the top.
How do I create the crispy topping?
In a small bowl, mix breadcrumbs with melted butter until crumbs are evenly coated. Sprinkle this mixture over the cheese layer. Bake for 25-30 minutes until the casserole is hot and bubbly around the edges and the topping is golden brown.
What to Serve Cheesy Broccoli Chicken Casserole With
This casserole is a complete meal in itself but pairs well with a simple side salad or sliced fresh fruit. Garlic bread or dinner rolls are perfect for soaking up the creamy sauce. For a lighter option, serve with steamed green beans or carrot sticks.
Top Tips for Perfecting Cheesy Broccoli Chicken Casserole
Use rotisserie chicken to save major prep time—it’s already cooked, seasoned, and delicious. Don’t skip blanching fresh broccoli; raw broccoli won’t cook fully in the oven and frozen broccoli can make the casserole watery. For a healthier version, use Greek yogurt instead of sour cream and reduced-fat cheese. Make it ahead by assembling everything, covering tightly, and refrigerating up to 24 hours before baking (add 10 extra minutes to baking time if starting from cold).
Storing and Reheating Tips
Cover leftovers tightly with foil and refrigerate for up to 4 days. Reheat individual portions in the microwave for 2-3 minutes or the entire casserole in a 350°F oven for 20 minutes until heated through. Freeze unbaked casserole (without breadcrumb topping) for up to 3 months. Thaw overnight in refrigerator, add breadcrumb topping, and bake as directed.
Recipe 6: Lemon Garlic Shrimp with Asparagus
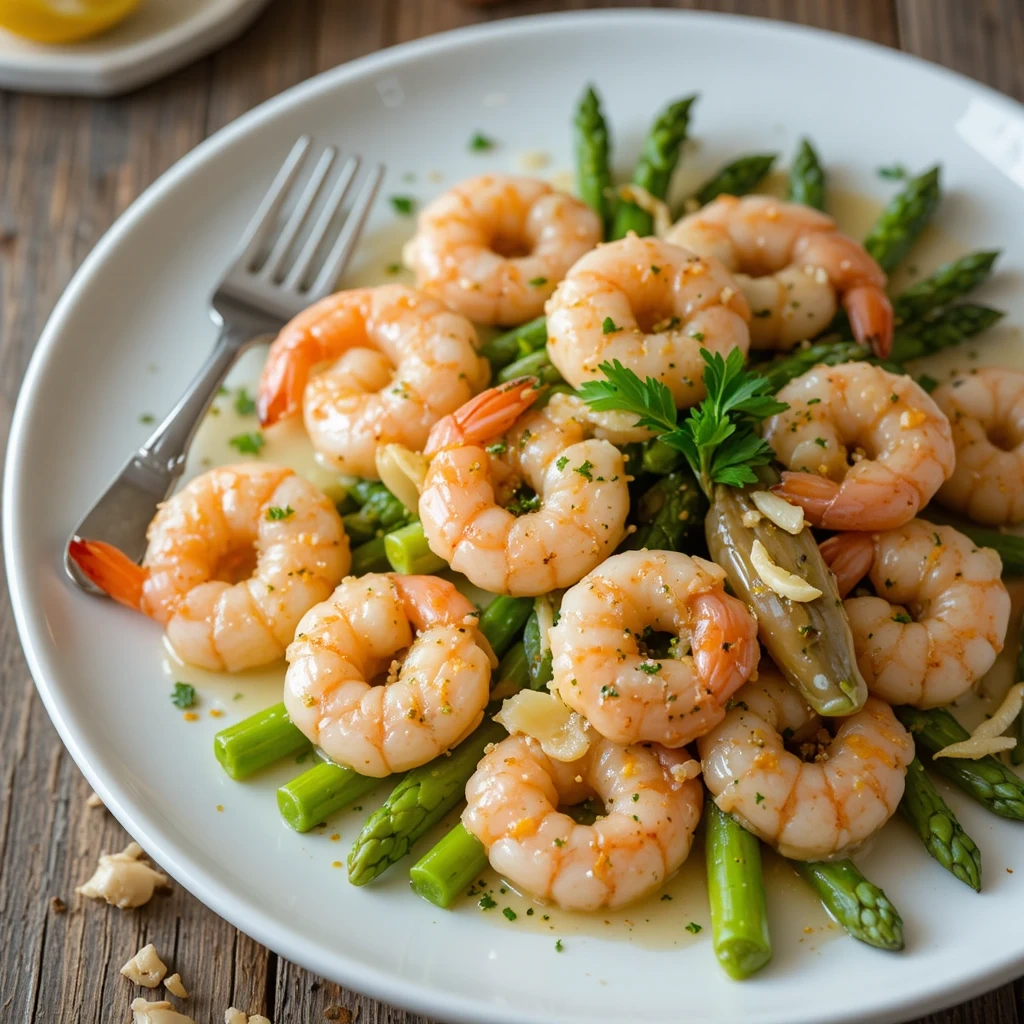
Quick Overview
This elegant yet simple dinner is ready in 15 minutes and tastes like restaurant quality! The bright lemon and garlic flavors complement sweet shrimp and tender asparagus perfectly.
Prep Time: 8 minutes
Cook Time: 7 minutes
Total Time: 15 minutes
Servings: 4
Key Ingredients for Lemon Garlic Shrimp
- 1.5 pounds large shrimp, peeled and deveined
- 1 pound asparagus, trimmed and cut into 2-inch pieces
- 4 tablespoons butter
- 4 cloves garlic, minced
- Juice of 2 lemons
- Zest of 1 lemon
- 1/4 teaspoon red pepper flakes (optional)
- Salt and pepper to taste
- Fresh parsley, chopped for garnish
Step-by-Step Instructions
How do I prepare the asparagus?
Snap off the woody ends of asparagus (they’ll break naturally where the tender part begins) and cut spears into 2-inch pieces. This ensures even cooking and makes eating easier, especially for kids.
How do I cook shrimp perfectly?
Pat shrimp completely dry with paper towels and season with salt and pepper. Heat 2 tablespoons butter in a large skillet over medium-high heat until melted and starting to foam. Add shrimp in a single layer (work in batches if needed) and cook for 2 minutes per side until pink and opaque. Transfer shrimp to a plate.
How do I cook the asparagus?
In the same skillet, add remaining 2 tablespoons butter. Add asparagus pieces and cook for 3-4 minutes, stirring occasionally, until tender-crisp and bright green. The asparagus should still have some bite to it.
How do I finish the dish?
Add minced garlic to the asparagus and cook for 30 seconds until fragrant. Return shrimp to the pan along with lemon juice, lemon zest, and red pepper flakes if using. Toss everything together for 1 minute until heated through and well combined. Garnish with fresh chopped parsley and serve immediately.
What to Serve Lemon Garlic Shrimp With
Serve this dish over pasta, rice, or quinoa to soak up the delicious lemony butter sauce. Crusty bread is essential for mopping up every last drop. A light green salad or coleslaw provides nice contrast to the rich shrimp.
Top Tips for Perfecting Lemon Garlic Shrimp
Buy pre-cleaned shrimp to save time—look for ones labeled “peeled and deveined.” Don’t overcook shrimp or they’ll become rubbery; they’re done when they turn pink and form a C-shape (not a tight O). Use fresh lemon juice, not bottled, for the brightest flavor. If your family doesn’t like asparagus, substitute green beans, snap peas, or zucchini.
Storing and Reheating Tips
Store leftovers in an airtight container in the refrigerator for up to 2 days. Shrimp are best enjoyed fresh but can be gently reheated in a skillet over low heat for 2-3 minutes—just enough to warm through without overcooking. This dish isn’t recommended for freezing as shrimp texture deteriorates significantly.
Recipe 7: Spring Vegetable Minestrone Soup
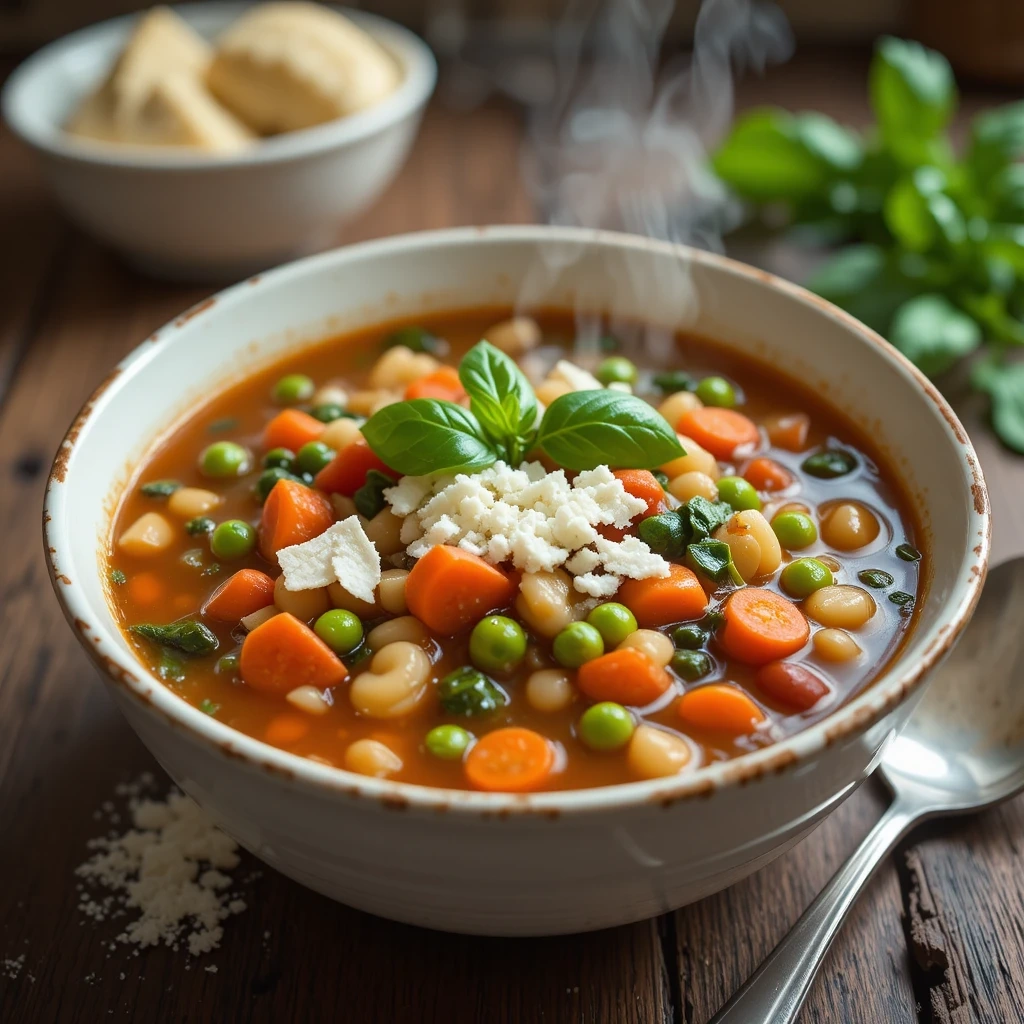
Quick Overview
This hearty Italian soup is loaded with colorful spring vegetables and small pasta, creating a comforting bowl that’s perfect for those cooler spring evenings. It’s naturally vegetarian but so satisfying!
Prep Time: 15 minutes
Cook Time: 30 minutes
Total Time: 45 minutes
Servings: 6-8
Key Ingredients for Spring Vegetable Minestrone
- 2 tablespoons olive oil
- 1 onion, diced
- 3 carrots, diced
- 2 celery stalks, diced
- 4 cloves garlic, minced
- 6 cups vegetable broth
- 1 can (14 oz) diced tomatoes
- 1 can (15 oz) cannellini beans, drained and rinsed
- 2 cups fresh spinach
- 1 cup frozen peas
- 1 cup small pasta (ditalini or orzo)
- 2 teaspoons Italian seasoning
- Salt and pepper to taste
- Parmesan cheese for serving
- Fresh basil for garnish
Step-by-Step Instructions
How do I build the soup base?
Heat olive oil in a large pot over medium heat. Add diced onion, carrots, and celery (this classic trio is called “soffritto” in Italian cooking). Cook for 8-10 minutes, stirring occasionally, until vegetables are softened and onion is translucent. This builds deep flavor for your soup.
How do I add the aromatics and liquids?
Add minced garlic and Italian seasoning to the pot, stirring for 30 seconds until fragrant. Pour in vegetable broth and diced tomatoes with their juice. Bring the mixture to a boil, then reduce heat and let simmer for 10 minutes so flavors can meld together.
How do I add the pasta and vegetables?
Add small pasta to the simmering soup and cook according to package directions (usually 8-10 minutes) until al dente. During the last 5 minutes of cooking, stir in cannellini beans and frozen peas. These don’t need much time—just enough to heat through.
How do I finish the soup?
Turn off the heat and stir in fresh spinach. It will wilt quickly from the residual heat. Taste and adjust seasoning with salt and pepper as needed. Ladle into bowls and top with grated Parmesan cheese and torn fresh basil leaves.
What to Serve Spring Vegetable Minestrone Soup With
Serve this soup with crusty Italian bread, garlic bread, or grilled cheese sandwiches for dipping. A simple Caesar salad or caprese salad makes a nice accompaniment. For kids, add a handful of goldfish crackers or oyster crackers on top!
Top Tips for Perfecting Spring Vegetable Minestrone
Make a double batch—this soup tastes even better the next day as flavors continue developing. Customize vegetables based on what’s seasonal and available; zucchini, green beans, or cabbage all work beautifully. If cooking the pasta in the soup makes it too thick, cook pasta separately and add to individual bowls. For a heartier meal, add cooked Italian sausage or diced chicken.
Storing and Reheating Tips
Store soup in an airtight container in the refrigerator for up to 5 days. The pasta will absorb liquid over time, so add extra broth when reheating. Warm on the stovetop over medium heat, stirring occasionally, or microwave in 2-minute intervals. Freeze for up to 3 months, though pasta texture may soften. Some prefer freezing the soup without pasta and adding freshly cooked pasta when reheating.
Recipe 8: Baked Chicken Parmesan Meatballs with Marinara
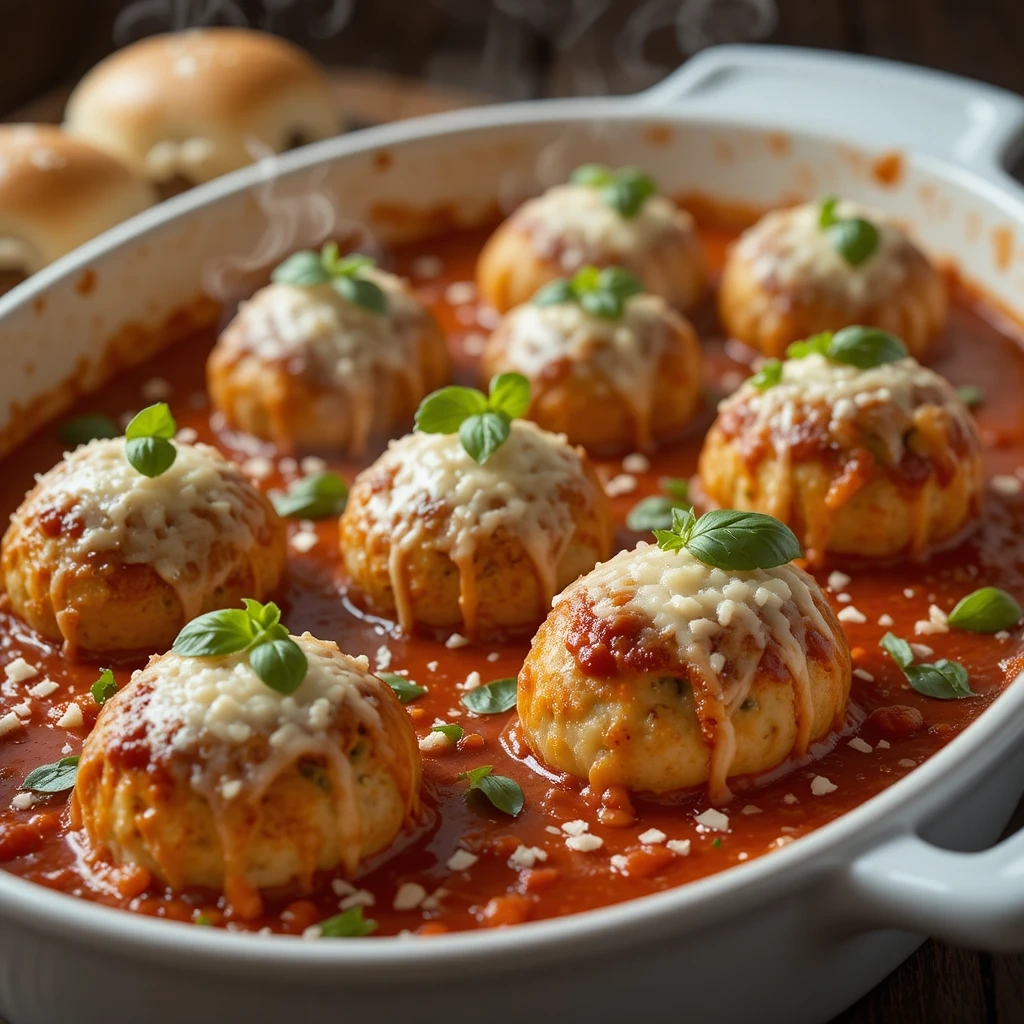
Quick Overview
All the flavors of classic chicken parmesan in easy-to-eat meatball form! These tender, cheesy meatballs are baked (not fried) for a healthier option kids absolutely devour.
Prep Time: 20 minutes
Cook Time: 25 minutes
Total Time: 45 minutes
Servings: 4-6 (makes about 24 meatballs)
Key Ingredients for Chicken Parmesan Meatballs
For the Meatballs:
- 1.5 pounds ground chicken
- 1 cup Italian breadcrumbs
- 1/2 cup grated Parmesan cheese
- 1 egg
- 3 cloves garlic, minced
- 1 teaspoon Italian seasoning
- 1/2 teaspoon salt
- 1/4 teaspoon black pepper
For Serving:
- 2 cups marinara sauce
- 1 cup shredded mozzarella cheese
- Fresh basil for garnish
- Cooked pasta or hoagie rolls
Step-by-Step Instructions
How do I make the meatball mixture?
Preheat oven to 400°F (200°C) and line a baking sheet with parchment paper. In a large bowl, combine ground chicken, breadcrumbs, Parmesan cheese, egg, minced garlic, Italian seasoning, salt, and pepper. Mix with your hands until just combined—don’t overmix or meatballs will be tough.
How do I shape the meatballs?
Using a cookie scoop or your hands, form mixture into balls about 1.5 inches in diameter (roughly the size of a golf ball). Place meatballs on the prepared baking sheet, spacing them about 1 inch apart. You should get approximately 24 meatballs.
How do I bake the meatballs?
Bake meatballs for 15 minutes until they’re mostly cooked through and starting to brown. Remove from oven and carefully pour or spoon marinara sauce over the meatballs. Sprinkle shredded mozzarella cheese over the top. Return to oven and bake for an additional 8-10 minutes until cheese is melted and bubbly and meatballs are cooked through (internal temperature of 165°F).
How do I serve them?
Let meatballs rest for 5 minutes after removing from oven. Garnish with torn fresh basil leaves. Serve over pasta, in hoagie rolls as meatball subs, or with crusty bread for dipping.
What to Serve Chicken Parmesan Meatballs With
These meatballs are incredibly versatile! Serve over spaghetti, penne, or any pasta shape for a classic Italian meal. Make meatball subs by piling them into hoagie rolls with extra sauce and cheese. Side with a Caesar salad, garlic bread, or roasted vegetables like zucchini and bell peppers.
Top Tips for Perfecting Chicken Parmesan Meatballs
Keep meatballs uniform in size so they cook evenly. Wet your hands with cold water when rolling to prevent sticking. Ground chicken is lean and can dry out, so don’t overbake. Using a meat thermometer ensures perfect doneness. Make them mini for kid-friendly portions or appetizers. For extra flavor, add 1/4 cup fresh basil chopped into the meatball mixture.
Storing and Reheating Tips
Store cooked meatballs in an airtight container with sauce for up to 4 days in the refrigerator. Reheat gently in a covered saucepan over medium-low heat or in the microwave. Freeze fully cooked meatballs (with or without sauce) for up to 3 months. Thaw overnight in the refrigerator and reheat in sauce until warmed through.
Recipe 9: Spring Quinoa Bowl with Lemon Tahini Dressing
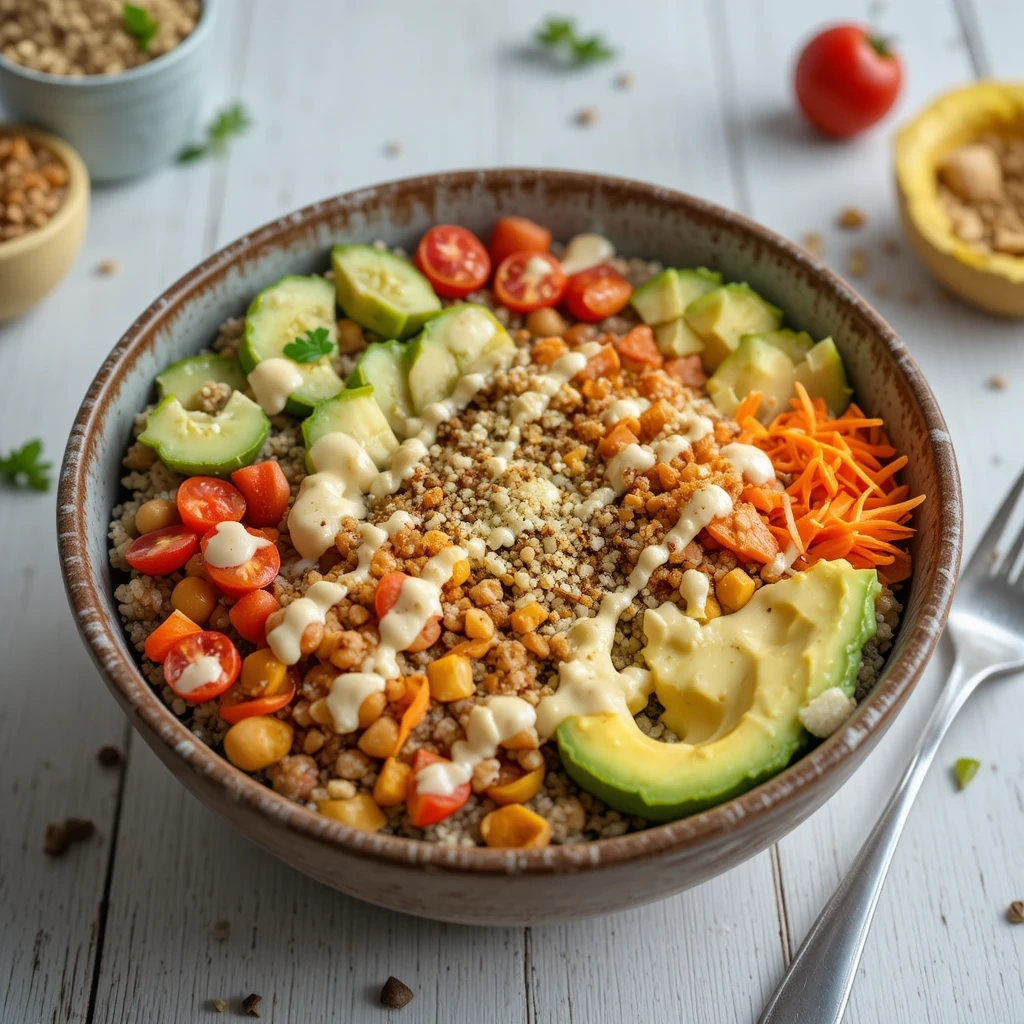
Quick Overview
These customizable grain bowls are packed with spring vegetables, protein-rich quinoa, and a creamy lemon tahini dressing that ties everything together beautifully. They’re healthy, filling, and look gorgeous!
Prep Time: 15 minutes
Cook Time: 20 minutes
Total Time: 35 minutes
Servings: 4
Key Ingredients for Spring Quinoa Bowls
For the Bowls:
- 1.5 cups uncooked quinoa
- 3 cups water or vegetable broth
- 2 cups roasted chickpeas (or chicken)
- 2 cups cherry tomatoes, halved
- 2 cups cucumber, diced
- 1 cup shredded carrots
- 2 avocados, sliced
- 1/4 cup sunflower seeds or pumpkin seeds
For the Lemon Tahini Dressing:
- 1/3 cup tahini
- Juice of 2 lemons
- 2 tablespoons olive oil
- 2 cloves garlic, minced
- 2-4 tablespoons water
- Salt and pepper to taste
Step-by-Step Instructions
How do I cook quinoa perfectly?
Rinse quinoa thoroughly in a fine-mesh strainer under cold water for 30 seconds (this removes bitterness). In a medium saucepan, combine rinsed quinoa with water or broth. Bring to a boil, then reduce heat to low, cover, and simmer for 15 minutes. Remove from heat and let stand covered for 5 minutes, then fluff with a fork.
How do I make the lemon tahini dressing?
In a small bowl or jar, whisk together tahini, lemon juice, olive oil, minced garlic, and a pinch of salt and pepper. The mixture will seize up initially—this is normal! Add water 1 tablespoon at a time, whisking constantly, until you reach a pourable, creamy consistency. Taste and adjust seasonings.
How do I roast chickpeas?
Drain and rinse canned chickpeas, then pat completely dry with paper towels. Toss with 1 tablespoon olive oil, salt, and any spices you like (cumin, paprika, garlic powder). Spread on a baking sheet and roast at 400°F for 20-25 minutes, shaking pan halfway through, until crispy. Alternatively, use cooked chicken, tofu, or feta cheese as your protein.
How do I assemble the bowls?
Divide cooked quinoa among four bowls. Arrange sections of roasted chickpeas, cherry tomatoes, cucumber, shredded carrots, and avocado slices on top of the quinoa. Drizzle generously with lemon tahini dressing and sprinkle with sunflower or pumpkin seeds. Serve immediately or store components separately for meal prep.
What to Serve Spring Quinoa Bowls With
These bowls are complete meals on their own but can be served with pita bread, naan, or flatbread on the side. Add hummus for extra protein and flavor. A cup of soup makes it an even heartier meal.
Top Tips for Perfecting Spring Quinoa Bowls
Prep all components ahead of time for quick assembly during busy weeknights. Store quinoa, dressing, and toppings separately in the refrigerator. Customize vegetables based on preferences—spring onions, radishes, snap peas, or steamed broccoli all work beautifully. Make dressing in a jar so you can shake it to recombine before serving. Get kids involved by letting them choose their own toppings!
Storing and Reheating Tips
Store components separately in airtight containers for up to 4 days. Quinoa can be eaten cold or reheated quickly in the microwave. Keep dressing refrigerated in a jar for up to one week—shake well before using as it may separate. Avocado browns quickly, so add fresh when serving. Assemble bowls fresh each day for best texture and appearance.
Recipe 10: Honey Mustard Chicken Tenders with Sweet Potato Fries
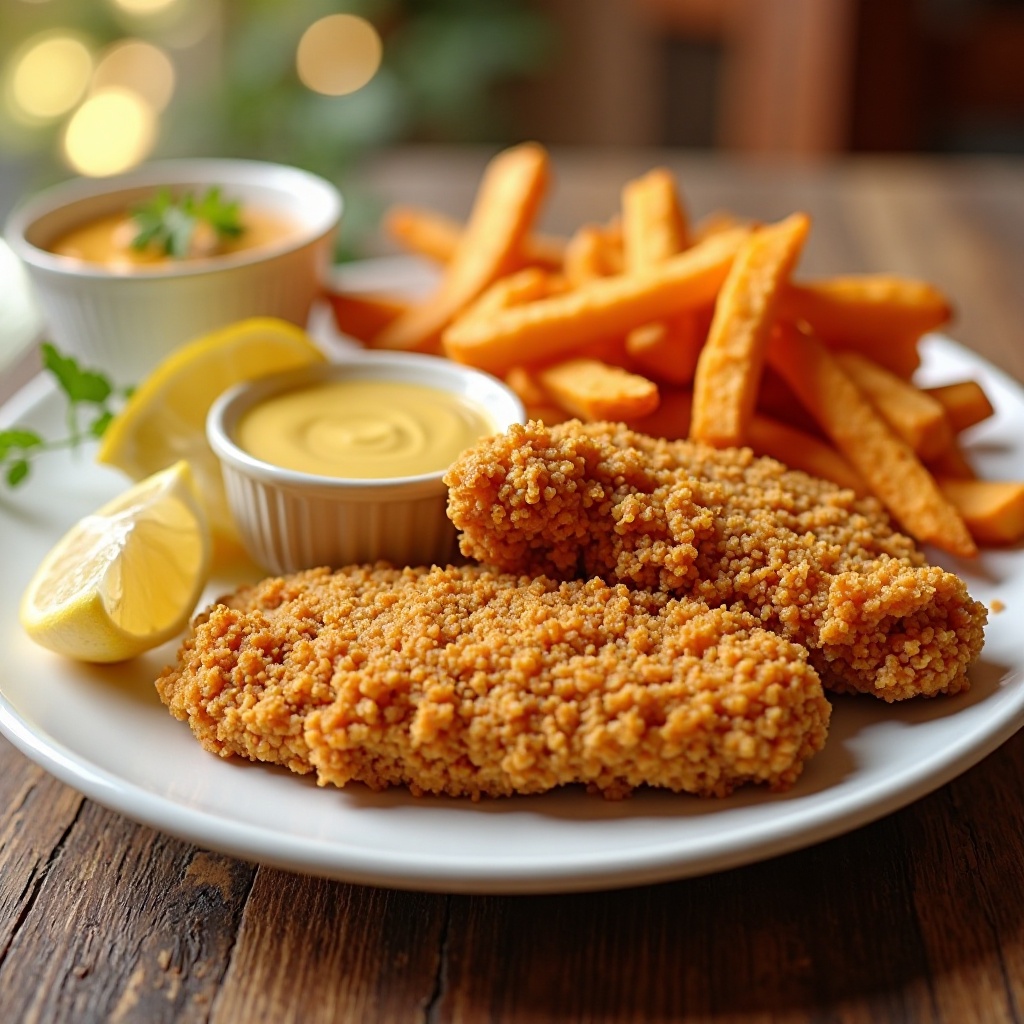
Quick Overview
Homemade chicken tenders are healthier, more delicious, and surprisingly easy compared to store-bought frozen versions. The sweet honey mustard sauce makes these irresistible to kids and adults alike!
Prep Time: 15 minutes
Cook Time: 25 minutes
Total Time: 40 minutes
Servings: 4
Key Ingredients for Honey Mustard Chicken Tenders
For Chicken Tenders:
- 1.5 pounds chicken tenderloins
- 1 cup flour
- 2 eggs, beaten
- 2 cups panko breadcrumbs
- 1 teaspoon garlic powder
- 1 teaspoon paprika
- Salt and pepper to taste
- Cooking spray
For Sweet Potato Fries:
- 3 large sweet potatoes, cut into fries
- 2 tablespoons olive oil
- 1 teaspoon paprika
- Salt to taste
For Honey Mustard Sauce:
- 1/2 cup mayonnaise
- 1/4 cup honey
- 3 tablespoons Dijon mustard
- 1 tablespoon lemon juice
Step-by-Step Instructions
How do I prepare the sweet potato fries?
Preheat oven to 425°F (220°C). Peel sweet potatoes and cut into evenly-sized fries (about 1/4-inch thick). Toss fries with olive oil, paprika, and salt until evenly coated. Spread in a single layer on a baking sheet lined with parchment paper, making sure fries don’t overlap. Bake for 25-30 minutes, flipping halfway through, until crispy and golden.
How do I set up the breading station?
While fries bake, set up three shallow bowls: one with flour seasoned with salt and pepper, one with beaten eggs, and one with panko breadcrumbs mixed with garlic powder and paprika. This assembly line makes breading quick and efficient.
How do I bread the chicken tenders?
Pat chicken tenders dry with paper towels. Working with one tender at a time, coat in flour (shake off excess), dip in beaten egg (let excess drip off), then press into panko breadcrumbs to coat completely. Place breaded tenders on a baking sheet sprayed with cooking spray.
How do I bake the chicken?
Spray tops of breaded chicken with cooking spray (this helps them brown). When sweet potato fries have 15 minutes left, add the chicken to a second oven rack. Bake chicken for 12-15 minutes, flipping halfway through, until golden brown and internal temperature reaches 165°F.
How do I make the honey mustard sauce?
While everything bakes, whisk together mayonnaise, honey, Dijon mustard, and lemon juice in a small bowl until smooth. Refrigerate until serving time.
What to Serve Honey Mustard Chicken Tenders With
These tenders and fries are a complete meal but pair nicely with simple sides like coleslaw, corn on the cob, or a green salad. Offer additional dipping sauces like ketchup, ranch, or BBQ sauce for variety. Steamed broccoli or green beans add vegetables.
Top Tips for Perfecting Honey Mustard Chicken Tenders
Use panko breadcrumbs instead of regular for extra crispiness. Don’t skip the cooking spray on top—it’s essential for browning when baking instead of frying. Cut sweet potato fries uniformly so they cook evenly. Soak cut sweet potatoes in cold water for 30 minutes before baking for extra crispy results (pat completely dry afterward). Double the honey mustard sauce recipe—everyone will want extra!
Storing and Reheating Tips
Store chicken tenders and sweet potato fries separately in airtight containers in the refrigerator for up to 3 days. Reheat in a 375°F oven for 10-12 minutes to restore crispiness—microwaving makes them soggy. Sauce keeps refrigerated in a jar for up to one week. Freeze unbaked breaded chicken tenders on a baking sheet until solid, then transfer to freezer bags for up to 3 months. Bake from frozen, adding 5 extra minutes to cooking time.
Recipe 11: One-Pot Creamy Tuscan Tortellini
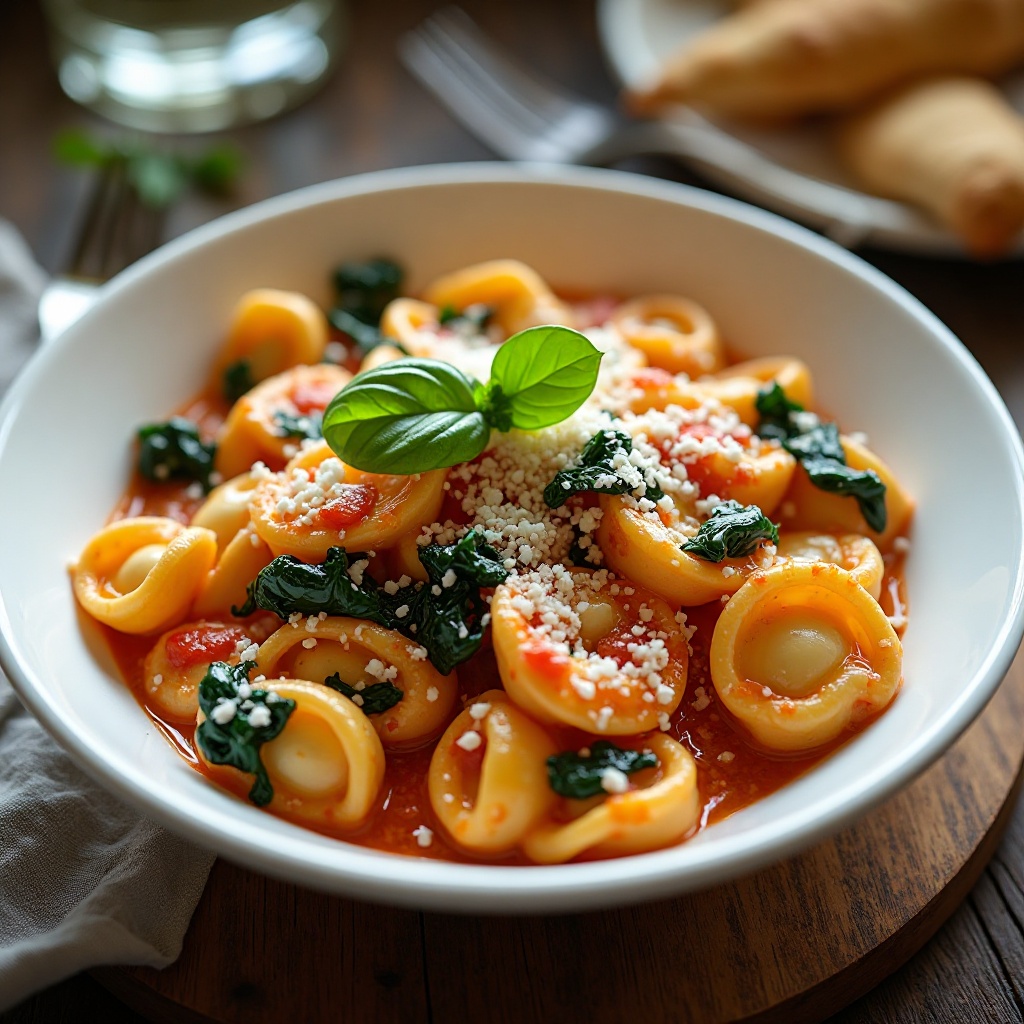
Quick Overview
This restaurant-quality pasta comes together in one pot in under 30 minutes! Cheese tortellini swimming in creamy sun-dried tomato sauce with spinach is pure comfort food that looks fancy enough for company.
Prep Time: 10 minutes
Cook Time: 15 minutes
Total Time: 25 minutes
Servings: 6
Key Ingredients for Creamy Tuscan Tortellini
- 1 pound cheese tortellini (fresh or frozen)
- 2 tablespoons olive oil
- 4 cloves garlic, minced
- 1/2 cup sun-dried tomatoes, chopped
- 3 cups vegetable or chicken broth
- 1 cup heavy cream
- 3 cups fresh spinach
- 1/2 cup grated Parmesan cheese
- 1 teaspoon Italian seasoning
- Salt and pepper to taste
- Fresh basil for garnish
Step-by-Step Instructions
How do I start the sauce?
Heat olive oil in a large, deep skillet or pot over medium heat. Add minced garlic and cook for 30 seconds until fragrant but not browned. Add chopped sun-dried tomatoes and stir for another minute. These add incredible depth of flavor to the dish.
How do I cook the tortellini in the sauce?
Pour in broth and bring to a boil. Add tortellini directly to the pot (no need to pre-cook!) and cook according to package directions, usually 6-8 minutes for fresh and 10-12 for frozen. Stir occasionally to prevent sticking. The tortellini will cook perfectly while absorbing all that delicious flavor.
How do I make the sauce creamy?
Once tortellini are cooked, reduce heat to low. Stir in heavy cream, Italian seasoning, salt, and pepper. Let simmer for 2-3 minutes until sauce thickens slightly. The cream creates that restaurant-style richness everyone loves.
How do I finish the dish?
Add fresh spinach and Parmesan cheese, stirring until spinach wilts (about 1 minute) and cheese melts into the sauce. Taste and adjust seasoning if needed. Serve immediately, garnished with fresh basil and extra Parmesan.
What to Serve Creamy Tuscan Tortellini With
This pasta is quite rich and filling, so lighter sides work best. Garlic bread or breadsticks are perfect for soaking up sauce. A simple green salad with vinaigrette or Caesar dressing provides nice contrast. Roasted asparagus or green beans add color and vegetables.
Top Tips for Perfecting Creamy Tuscan Tortellini
Use good quality cheese tortellini—it makes a difference! Refrigerated fresh tortellini has the best texture, but frozen works fine. Don’t skip the sun-dried tomatoes; they’re key to the Tuscan flavor. For a lighter version, substitute half-and-half for heavy cream (sauce won’t be quite as thick but still delicious). Add cooked chicken or Italian sausage for extra protein. If sauce seems too thick, add extra broth or pasta water to thin.
Storing and Reheating Tips
Store leftovers in an airtight container in the refrigerator for up to 3 days. The pasta will absorb sauce as it sits, so add a splash of cream or broth when reheating. Warm gently on the stovetop over low heat, stirring frequently, or microwave in 1-minute intervals. This dish isn’t ideal for freezing as cream-based sauces can separate when thawed, but if needed, freeze for up to 2 months and whisk vigorously when reheating.
Recipe 12: Teriyaki Chicken Stir-Fry with Spring Vegetables
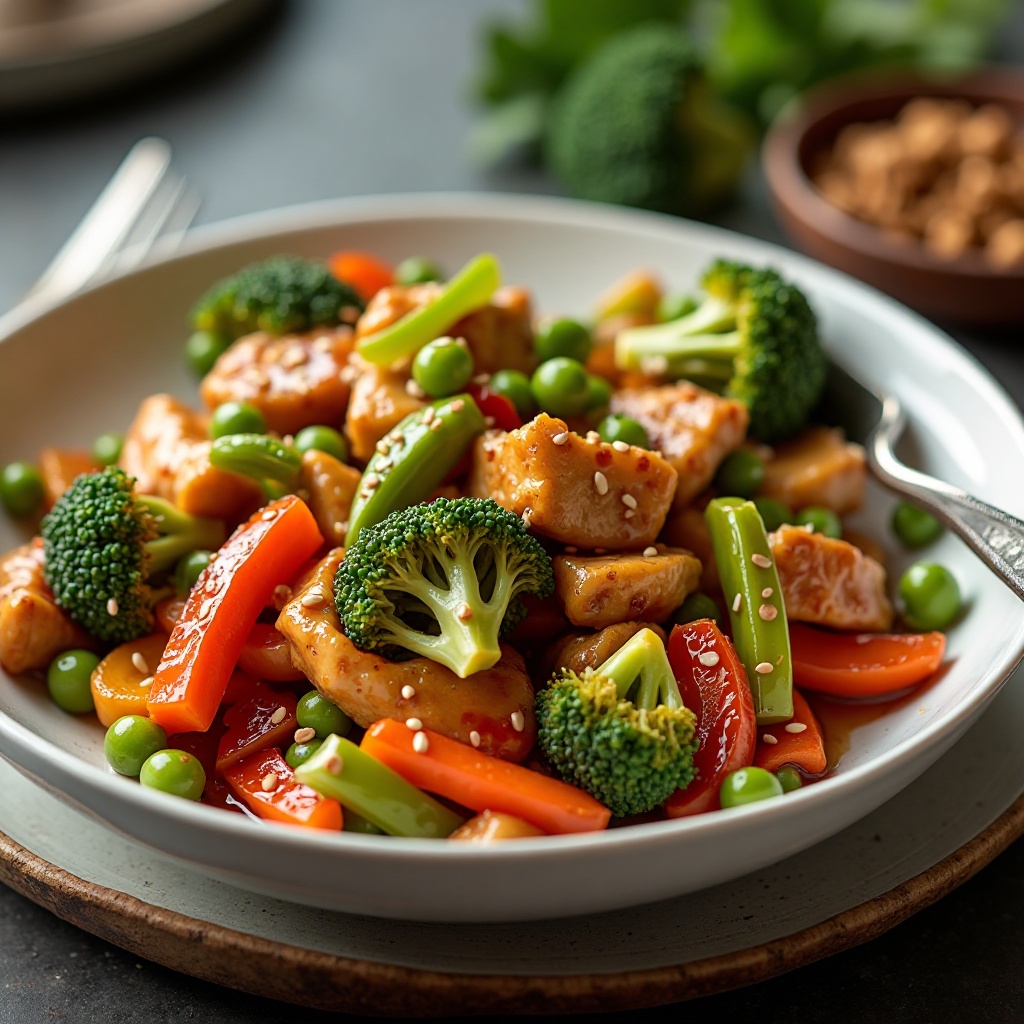
Quick Overview
This better-than-takeout stir-fry features tender chicken and crisp vegetables in a sweet-savory homemade teriyaki sauce. It’s faster than delivery and much healthier!
Prep Time: 15 minutes
Cook Time: 15 minutes
Total Time: 30 minutes
Servings: 4
Key Ingredients for Teriyaki Chicken Stir-Fry
For the Chicken and Vegetables:
- 1.5 pounds chicken breast, sliced into thin strips
- 2 tablespoons vegetable oil
- 2 bell peppers, sliced
- 1 cup snap peas
- 2 medium carrots, julienned
- 1 cup broccoli florets
- 4 green onions, sliced
- Sesame seeds for garnish
For the Teriyaki Sauce:
- 1/2 cup low-sodium soy sauce
- 1/4 cup honey
- 2 tablespoons rice vinegar
- 2 cloves garlic, minced
- 1 teaspoon fresh ginger, grated
- 1 tablespoon cornstarch
- 2 tablespoons water
Step-by-Step Instructions
How do I make the teriyaki sauce?
In a small bowl, whisk together soy sauce, honey, rice vinegar, minced garlic, and grated ginger. In a separate tiny bowl, mix cornstarch with water until smooth (this is called a slurry). Set both aside—you’ll add them to the pan later.
How do I cook the chicken?
Heat 1 tablespoon oil in a large wok or skillet over high heat until shimmering. Add chicken strips in a single layer (work in batches if needed to avoid overcrowding). Cook for 3-4 minutes per side until golden brown and cooked through. Transfer chicken to a plate and set aside.
How do I stir-fry the vegetables?
Add remaining tablespoon of oil to the same pan over high heat. Add carrots and broccoli first since they take longest, cooking for 2 minutes. Add bell peppers and snap peas, cooking for another 2-3 minutes. Vegetables should be tender-crisp and bright in color, not mushy.
How do I bring everything together?
Pour the teriyaki sauce mixture into the pan with vegetables and bring to a simmer. Add the cornstarch slurry, stirring constantly until sauce thickens (about 1 minute). Return chicken to the pan along with sliced green onions, tossing everything together until evenly coated and heated through. Garnish with sesame seeds.
What to Serve Teriyaki Chicken Stir-Fry With
Serve this stir-fry over steamed white rice, brown rice, or fried rice for a complete meal. Quinoa or cauliflower rice are lower-carb options. Add crispy wonton strips or chow mein noodles on top for extra crunch. Egg rolls or pot stickers make great appetizers.
Top Tips for Perfecting Teriyaki Chicken Stir-Fry
Cut chicken and vegetables into similar-sized pieces for even cooking. Have everything prepped before you start cooking—stir-frying moves quickly! Keep the heat high and ingredients moving constantly for that authentic restaurant texture. Use low-sodium soy sauce to control saltiness. Customize vegetables based on what your family likes; mushrooms, zucchini, or baby corn all work well. For meal prep, store components separately and combine when reheating.
Storing and Reheating Tips
Store stir-fry in an airtight container in the refrigerator for up to 4 days. Reheat in a skillet over medium-high heat until warmed through, or microwave in 1-minute intervals, stirring between each. The sauce may need a splash of water or broth to loosen when reheating. This dish doesn’t freeze well as vegetables lose their crisp texture, but if needed, freeze for up to 2 months.
Recipe 13: Mediterranean Chickpea Salad with Pita Bread
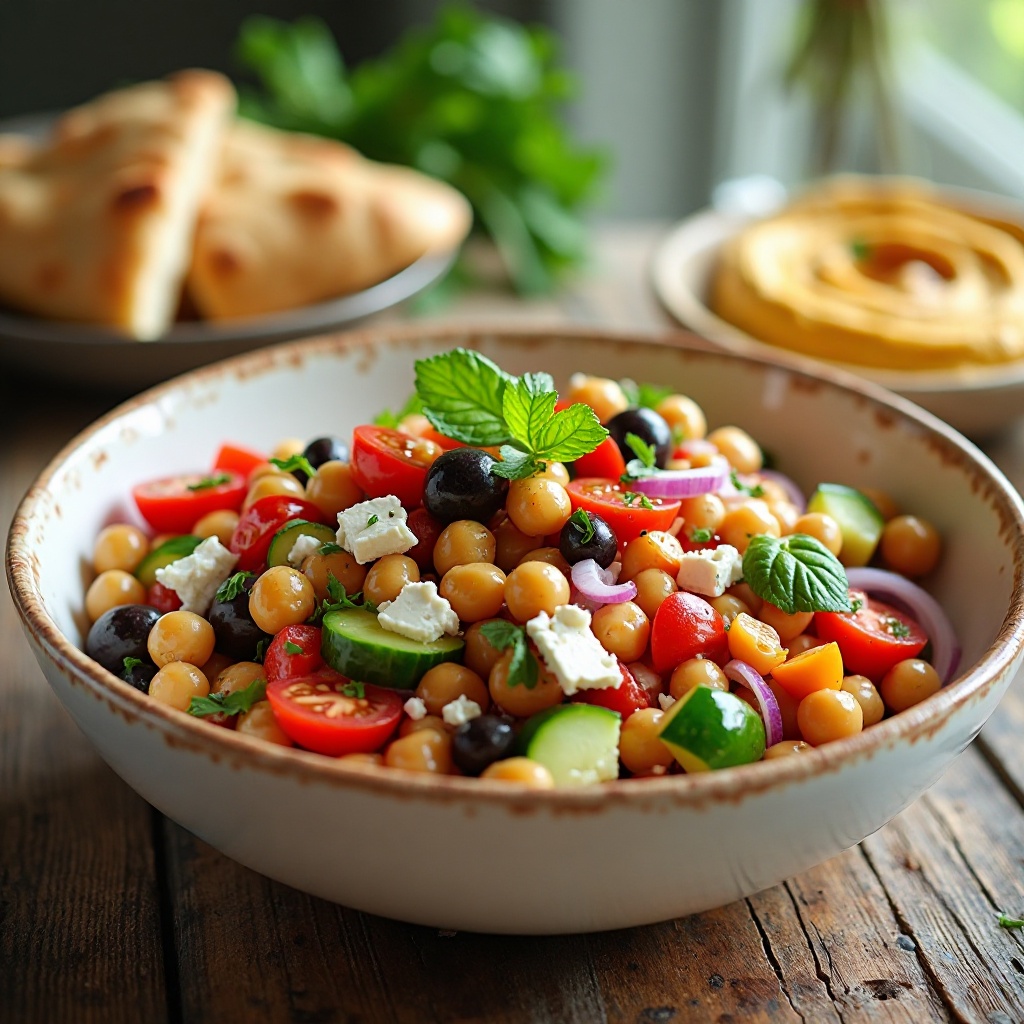
Quick Overview
This refreshing no-cook dinner is perfect for warm spring evenings! Protein-packed chickpeas, crisp vegetables, and tangy feta cheese come together with a simple lemon dressing.
Prep Time: 15 minutes
Cook Time: 0 minutes
Total Time: 15 minutes
Servings: 4
Key Ingredients for Mediterranean Chickpea Salad
For the Salad:
- 2 cans (15 oz each) chickpeas, drained and rinsed
- 2 cups cherry tomatoes, halved
- 1 large cucumber, diced
- 1/2 red onion, finely diced
- 1 cup Kalamata olives (optional)
- 1 cup crumbled feta cheese
- 1/4 cup fresh parsley, chopped
- 1/4 cup fresh mint, chopped
For the Dressing:
- 1/3 cup olive oil
- Juice of 2 lemons
- 2 cloves garlic, minced
- 1 teaspoon dried oregano
- Salt and pepper to taste
For Serving:
- Warm pita bread
- Hummus (optional)
Step-by-Step Instructions
How do I prepare the vegetables?
Drain and rinse chickpeas well, then pat dry with paper towels. Halve cherry tomatoes, dice cucumber into bite-sized pieces, and finely chop red onion. Chop fresh parsley and mint. Having uniform pieces ensures every bite has balanced flavors.
How do I make the lemon dressing?
In a small jar or bowl, combine olive oil, fresh lemon juice, minced garlic, dried oregano, salt, and pepper. Shake or whisk vigorously until emulsified (ingredients are blended together). The acid from the lemon balances the richness of the oil perfectly.
How do I assemble the salad?
In a large bowl, combine chickpeas, tomatoes, cucumber, red onion, olives (if using), and chopped herbs. Pour the dressing over the salad and toss gently until everything is evenly coated. Add crumbled feta cheese and give one more gentle toss.
How do I serve it?
Let the salad sit for 5-10 minutes before serving so flavors can marry together (or refrigerate for up to 2 hours). Serve with warm pita bread for scooping and hummus on the side for dipping.
What to Serve Mediterranean Chickpea Salad With
This salad is filling enough as a main course but also works as a side dish with grilled chicken, fish, or lamb. Serve with tzatziki sauce, hummus, or baba ganoush for variety. Stuffed grape leaves or spanakopita make it a complete Mediterranean feast.
Top Tips for Perfecting Mediterranean Chickpea Salad
Let the salad rest before serving so the chickpeas absorb the dressing flavors. If olives aren’t popular with your family, leave them out—the salad is still delicious! For kids who don’t like raw onion, soak the diced onion in cold water for 10 minutes, then drain and pat dry to mellow the flavor. Make it a meal by stuffing the salad into pita pockets with extra lettuce. Double the dressing recipe—it’s fantastic on other salads too!
Storing and Reheating Tips
This salad actually improves after a day in the refrigerator as flavors meld together. Store in an airtight container for up to 4 days. Add feta cheese fresh each day rather than storing with the salad to prevent it from getting too salty. The salad can be enjoyed cold or at room temperature—no reheating needed! Not suitable for freezing due to fresh vegetables.
Recipe 14: BBQ Chicken Flatbread Pizza
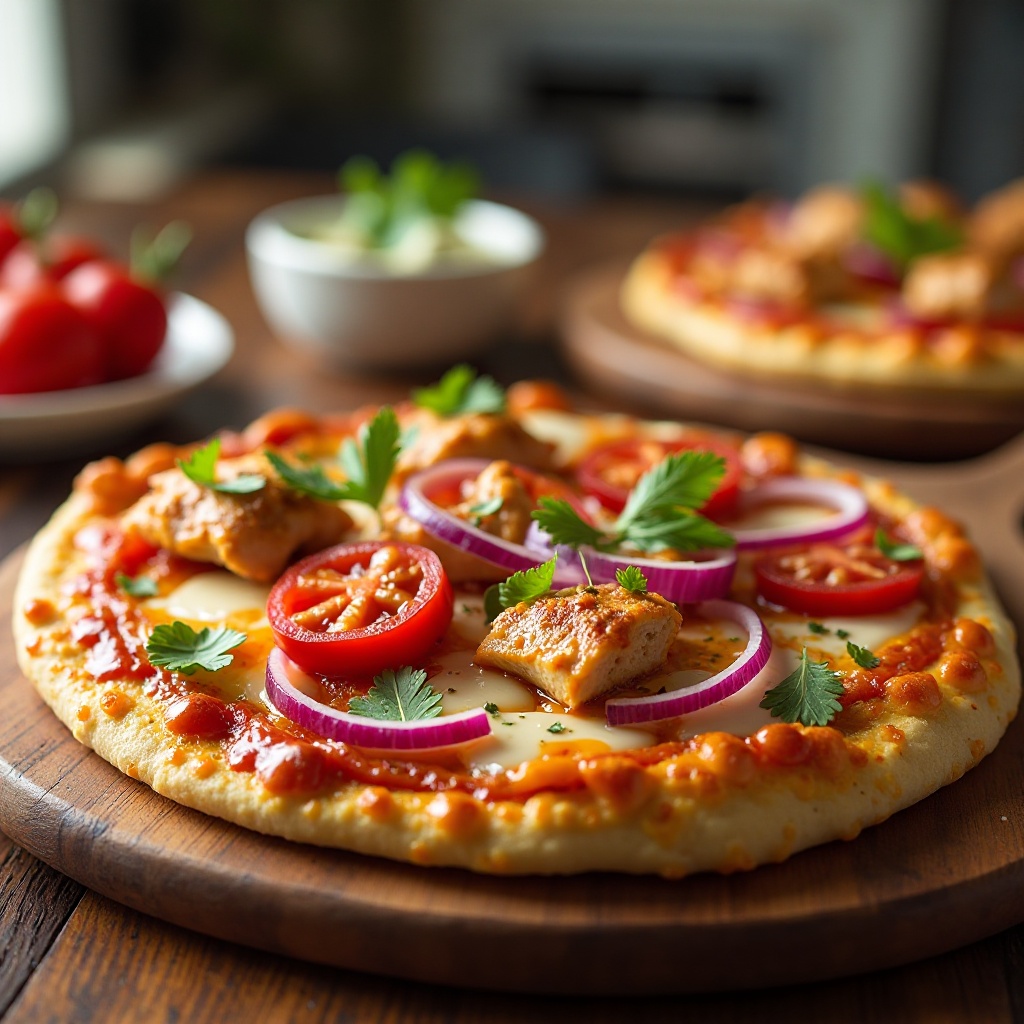
Quick Overview
These individual pizzas use naan or flatbread as the base for super quick assembly! Kids love building their own, and the sweet-tangy BBQ chicken is always a hit.
Prep Time: 15 minutes
Cook Time: 12 minutes
Total Time: 27 minutes
Servings: 4
Key Ingredients for BBQ Chicken Flatbread Pizza
- 4 pieces naan bread or flatbread
- 2 cups cooked chicken, shredded or diced
- 1 cup BBQ sauce, divided
- 2 cups shredded mozzarella cheese
- 1/2 red onion, thinly sliced
- 1 cup cherry tomatoes, halved
- 1/4 cup fresh cilantro, chopped
- Ranch dressing for drizzling (optional)
Step-by-Step Instructions
How do I prepare the chicken?
In a medium bowl, combine cooked chicken with 1/2 cup BBQ sauce, tossing until chicken is evenly coated. Rotisserie chicken works perfectly here and saves significant prep time. The sweet, smoky BBQ flavor is what makes this pizza special!
How do I assemble the pizzas?
Preheat oven to 400°F (200°C) and place naan breads on baking sheets. Spread remaining 1/2 cup BBQ sauce evenly over each flatbread, leaving a small border around the edges. Sprinkle half the mozzarella cheese over the sauce.
How do I add the toppings?
Distribute BBQ chicken evenly among the four flatbreads. Top with sliced red onion and halved cherry tomatoes. Sprinkle remaining mozzarella cheese over everything. This layering ensures cheese on bottom and top for maximum meltiness!
How do I bake the pizzas?
Bake for 10-12 minutes until cheese is melted, bubbly, and starting to brown around the edges. The flatbread should be crispy on the bottom. Remove from oven and let cool for 2-3 minutes. Drizzle with ranch dressing if desired and sprinkle with fresh cilantro before serving.
What to Serve BBQ Chicken Flatbread Pizza With
These pizzas are fairly substantial but pair nicely with a simple green salad, coleslaw, or corn on the cob. Sweet potato fries or regular fries make it feel like a restaurant meal. Fresh fruit or veggie sticks with ranch are great lighter sides.
Top Tips for Perfecting BBQ Chicken Flatbread Pizza
Let kids customize their own pizzas with their favorite toppings—bell peppers, mushrooms, or extra cheese. Use your favorite BBQ sauce; sweet, spicy, or smoky varieties all work. If you don’t have naan, use English muffins, tortillas, or even bagels as the base. Make extra chicken for meal prep—it’s great in salads, tacos, and quesadillas throughout the week. Watch carefully during baking as flatbreads can go from perfect to burnt quickly.
Storing and Reheating Tips
Store leftover pizzas in an airtight container in the refrigerator for up to 3 days. Reheat in a 350°F oven for 8-10 minutes to keep the base crispy, or use a toaster oven. Microwaving makes the bread soggy, so it’s not recommended. Assemble pizzas ahead of time and store unbaked in the refrigerator for up to 24 hours, then bake when ready to eat. Not ideal for freezing as flatbread can become chewy.
Recipe 15: Spring Veggie Frittata
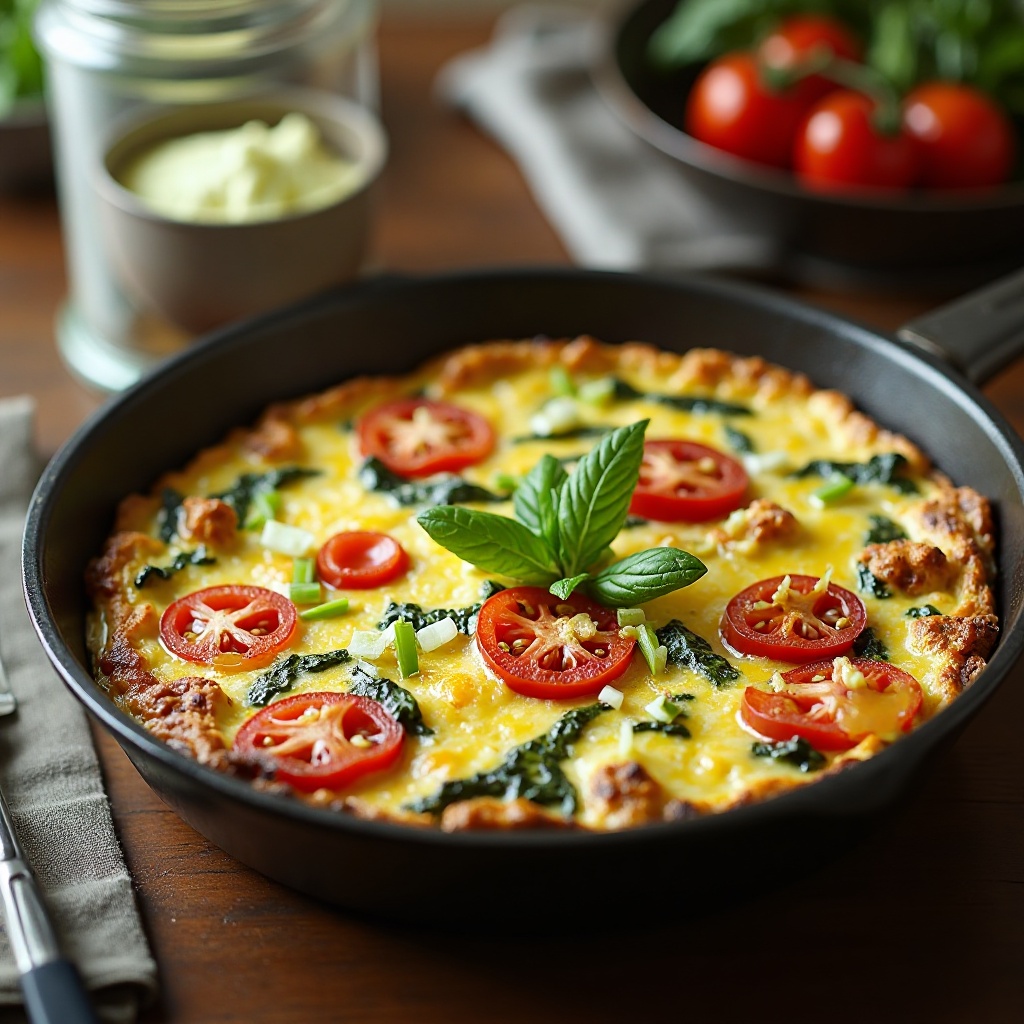
Quick Overview
This Italian-style egg dish is loaded with spring vegetables and cheese, making it perfect for breakfast-for-dinner! It’s naturally gluten-free and can be served hot or at room temperature.
Prep Time: 15 minutes
Cook Time: 25 minutes
Total Time: 40 minutes
Servings: 6
Key Ingredients for Spring Veggie Frittata
- 10 large eggs
- 1/2 cup milk or cream
- 1 cup shredded cheese (cheddar, mozzarella, or Gruyere)
- 2 tablespoons olive oil
- 1 cup asparagus, cut into 1-inch pieces
- 1 cup cherry tomatoes, halved
- 1 cup fresh spinach
- 1/2 red bell pepper, diced
- 4 green onions, sliced
- 3 cloves garlic, minced
- Salt and pepper to taste
- Fresh herbs (basil, parsley, or chives) for garnish
Step-by-Step Instructions
How do I prepare the egg mixture?
Preheat oven to 375°F (190°C). In a large bowl, whisk together eggs, milk, half the cheese, salt, and pepper until well combined and slightly frothy. Set aside while you cook the vegetables.
How do I cook the vegetables?
Heat olive oil in a large oven-safe skillet (10-inch cast iron works perfectly) over medium heat. Add asparagus and bell pepper, cooking for 3-4 minutes until slightly softened. Add cherry tomatoes, spinach, green onions, and garlic, cooking for another 2 minutes until spinach wilts. The vegetables should still have some texture and bright color.
How do I combine and bake?
Spread the cooked vegetables evenly in the skillet. Pour the egg mixture over the vegetables, gently stirring just to distribute ingredients evenly. Sprinkle remaining cheese on top. Let cook undisturbed on the stovetop for 2-3 minutes until edges just start to set.
How do I finish in the oven?
Carefully transfer the skillet to the preheated oven (use oven mitts—the handle is hot!). Bake for 18-20 minutes until the center is set and no longer jiggly when you gently shake the pan. A knife inserted in the center should come out clean. Let rest for 5 minutes before slicing. Garnish with fresh herbs.
What to Serve Spring Veggie Frittata With
Serve warm frittata with toast, English muffins, or crusty bread. A simple side salad makes it lunch-appropriate. Hash browns or roasted potatoes turn it into a hearty brunch spread. Fresh fruit or yogurt parfaits round out the meal nicely.
Top Tips for Perfecting Spring Veggie Frittata
Don’t skip preheating your oven—consistent temperature is key for even cooking. Use an oven-safe skillet; if you’re not sure, wrap the handle in foil to protect it. Customize vegetables based on what’s in season or what your family likes—mushrooms, zucchini, or broccoli all work beautifully. Add cooked bacon, sausage, or ham for a heartier version. Let the frittata rest before cutting to allow it to firm up—cutting too soon results in a messy presentation.
Storing and Reheating Tips
Frittata is delicious cold, at room temperature, or reheated! Store slices in an airtight container in the refrigerator for up to 4 days. Reheat individual slices in the microwave for 30-60 seconds or warm the whole frittata in a 300°F oven for 10 minutes. This is fantastic for meal prep—make Sunday night and enjoy for quick breakfasts or lunches all week. Freeze individual slices wrapped in plastic wrap and foil for up to 2 months; thaw overnight in refrigerator.
Frequently Asked Questions
What are the best spring vegetables for dinner recipes?
The best spring vegetables include asparagus, snap peas, fresh peas, baby carrots, radishes, spring onions, artichokes, and leafy greens like spinach and arugula. These vegetables are at peak freshness during spring and offer bright flavors that need minimal seasoning.
How can I get my kids to eat more vegetables in spring dinners?
Involve kids in meal planning and preparation—they’re more likely to eat what they help make! Roasting vegetables brings out natural sweetness kids love. Mix vegetables into familiar favorites like pasta, rice bowls, and casseroles. Offer fun dipping sauces like ranch or honey mustard. Keep pieces small and cook until tender but still colorful.
Can I prepare spring dinner recipes ahead of time?
Yes! Many spring dinners are perfect for meal prep. Cook grains like quinoa and rice in advance. Chop vegetables and store in airtight containers. Marinate proteins the night before. Casseroles can be assembled ahead and refrigerated until baking time. Many soups and stir-fries taste even better the next day!
What are quick spring dinner ideas for busy weeknights?
Sheet pan dinners, one-pot pastas, stir-fries, and grain bowls are all quick options ready in 30 minutes or less. Using pre-cooked rotisserie chicken, frozen vegetables, and store-bought sauces saves significant time without sacrificing flavor. Simple seasoning like lemon, garlic, and olive oil lets fresh ingredients shine.
Are these spring dinner recipes healthy?
Yes! These recipes emphasize fresh vegetables, lean proteins, whole grains, and reasonable portions. They’re made with wholesome ingredients you can pronounce and control what goes into each dish. Many recipes can be modified to be lighter by using Greek yogurt instead of sour cream, reducing cheese, or baking instead of frying.
Can I freeze spring dinner leftovers?
Most of these recipes freeze well! Casseroles, soups, meatballs, and grain bowls all freeze beautifully for 2-3 months. Avoid freezing dishes with fresh lettuce, cucumber, or cream-based sauces as textures change significantly. Label everything with the date and reheating instructions.
What spring dinner is best for picky eaters?
Chicken tenders, pasta dishes, fried rice, and meatballs tend to be most popular with picky eaters because they feature familiar flavors and textures. Let picky eaters customize their plates or serve deconstructed meals where everyone can choose their own toppings and vegetables.
How do I make spring dinners more flavorful?
Use fresh herbs like basil, parsley, cilantro, and mint which are abundant in spring. Add citrus through lemon juice and zest for brightness. Don’t forget garlic and onions for depth. Quality olive oil, butter, and Parmesan cheese elevate simple dishes. Season with salt and pepper at multiple stages of cooking.
Tips for Avoiding Common Cooking Mistakes
Mistake: Overcrowding the pan when sautéing or roasting vegetables.
Solution: Give vegetables space! Overcrowding creates steam instead of caramelization, resulting in mushy vegetables. Use two pans if needed or cook in batches.
Mistake: Not salting pasta water adequately.
Solution: Pasta water should taste like the sea! Use about 1-2 tablespoons salt per pound of pasta. This seasons the pasta from within and improves overall flavor.
Mistake: Overcooking chicken or fish.
Solution: Use a meat thermometer! Chicken is done at 165°F and fish at 145°F. Remove from heat slightly before target temperature as carryover cooking continues.
Mistake: Cutting vegetables in different sizes.
Solution: Uniform pieces cook evenly. Take an extra minute to cut everything similarly sized, and your entire dish will be ready at the same time.
Mistake: Adding delicate herbs too early.
Solution: Sturdy herbs like rosemary and thyme can handle longer cooking, but basil, parsley, and cilantro should be added at the end to preserve bright flavor and color.
Mistake: Not tasting as you cook.
Solution: Season and taste throughout the cooking process, not just at the end. This allows you to build layers of flavor and adjust seasoning gradually.
Mistake: Skipping the rest time for meat.
Solution: Let chicken, beef, and pork rest 5-10 minutes after cooking. This allows juices to redistribute, resulting in more tender, juicy meat.
Nutritional Information (Approximate per serving for Recipe 1: Lemon Herb Chicken)
| Nutrient | Amount |
|---|---|
| Calories | 285 |
| Total Fat | 9g |
| Saturated Fat | 2g |
| Cholesterol | 95mg |
| Sodium | 420mg |
| Total Carbohydrates | 12g |
| Dietary Fiber | 4g |
| Sugars | 5g |
| Protein | 38g |
| Vitamin A | 85% DV |
| Vitamin C | 45% DV |
| Calcium | 8% DV |
| Iron | 15% DV |
Note: Nutritional information is approximate and will vary based on specific ingredients used and portion sizes. For exact nutritional data, calculate based on your specific brands and amounts.
Final Thoughts
Spring is the perfect time to refresh your dinner routine with these 15 vibrant, family-friendly recipes. Each dish celebrates seasonal produce at its peak while keeping preparation simple enough for busy weeknights.
From quick 15-minute meals to comforting casseroles, these spring dinner ideas prove that healthy, delicious cooking doesn’t have to be complicated.
Remember, the best spring dinners are the ones your family actually enjoys eating together. Don’t be afraid to customize these recipes based on your family’s preferences, dietary needs, and what’s available at your local market.
Get your kids involved in the kitchen—let them pick recipes, help with age-appropriate tasks, and take pride in creating these colorful, flavorful meals. Cooking together creates memories that last far longer than the meal itself.
Which spring dinner idea will you try first? Gather your family around the table, serve up something fresh and delicious, and celebrate this beautiful season together. Happy spring cooking!
Have you tried any of these spring dinner recipes? Share your photos and tag us on Instagram! We love seeing how you make these meals your own. Don’t forget to save this post for easy reference throughout the season.