
10 Delicious Sides for Fish Ideas Everyone Loves
Finding the perfect sides for fish can transform your weeknight dinner into something truly special! Whether youre serving crispy baked salmon, tender grilled tilapia, or golden pan-seared cod, the right accompaniments bring out the best in your seafood.
These ten family-friendly recipes are quick to prepare, bursting with fresh flavors, and loved by both kids and adults alike. From creamy coleslaw to zesty roasted vegetables, each side dish complements fish beautifully without overwhelming its delicate taste. Ready to discover your new favorite pairing?
What Are Sides for Fish?
Ever wondered why fish dinners feel incomplete without the right companions? Sides for fish are carefully chosen dishes that balance flavors, add variety, and make your meal more satisfying. They can be light and refreshing like crisp salads, or hearty and comforting like buttery potatoes.
The secret lies in choosing sides that enhance without competing. Give these recipes a try, and you ll see why they say the perfect side dish is the secret ingredient to any great fish dinner!
This recipe is AI-created and has not been made in our kitchen. We value honesty with our website family, and readers who’ve tried other recipes here often share positive feedback.
Why Youll Love These Sides for Fish
Quick and Budget-Friendly
These sides come together in 30 minutes or less, perfect for busy weeknights. Youll save money by using simple, affordable ingredients that you probably already have in your kitchen. No expensive specialty items or complicated techniques required.
Family-Friendly Flavors
Each recipe has been designed with kids in mind, featuring familiar ingredients and mild flavors that even picky eaters will enjoy. From sweet honey-roasted carrots to creamy mashed potatoes, these sides will have everyone at the table asking for seconds.
Versatile and Customizable
The beauty of these recipes is their flexibility. Swap vegetables based on whats in season, adjust seasonings to your familys taste, and make them your own. They pair wonderfully with any type of fish, from salmon to cod to tilapia.
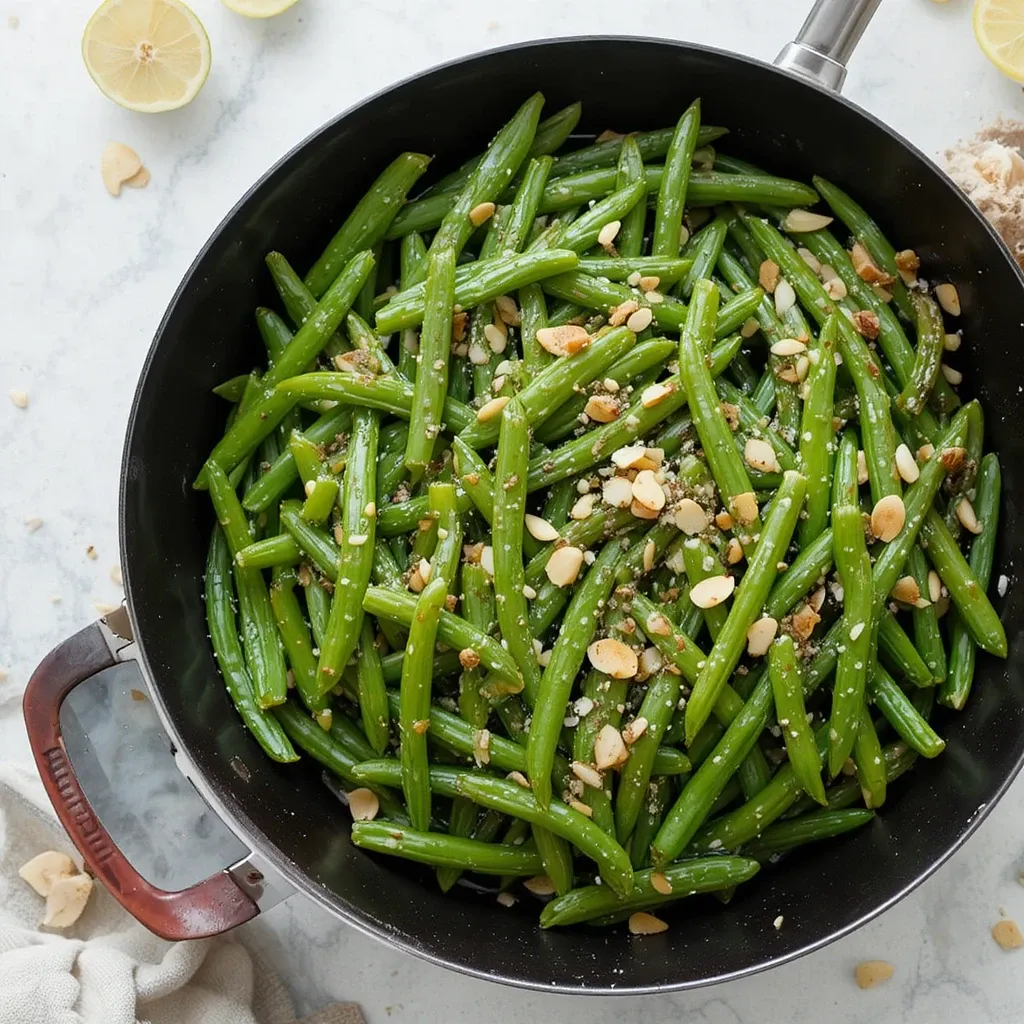
1. Garlic Butter Green Beans
Quick Overview
These tender-crisp green beans are sautéed in rich garlic butter for a side dish thats both elegant and simple. The beans stay bright green and snappy, while the garlic adds a savory depth that complements fish perfectly.
- Prep Time: 5 minutes
- Cook Time: 8 minutes
- Total Time: 13 minutes
- Servings: 4
Key Ingredients for Garlic Butter Green Beans
- 1 pound fresh green beans, trimmed
- 3 tablespoons unsalted butter
- 4 cloves garlic, minced
- ½ teaspoon salt
- ¼ teaspoon black pepper
- 1 tablespoon lemon juice
- 2 tablespoons sliced almonds (optional)
Step-by-Step Instructions
Step 1: Prepare the Green Beans
Wash the green beans thoroughly under cold water. Trim off the stem ends using a sharp knife. You can leave the pointed tips on for a prettier presentation. Pat the beans dry with a clean kitchen towel to remove excess moisture.
Step 2: Blanch the Beans
Bring a large pot of salted water to a rolling boil. Add the green beans and cook for 3-4 minutes until they turn bright green and are slightly tender but still crisp. Drain immediately and rinse with cold water to stop the cooking process. This keeps them vibrant and crunchy.
Step 3: Sauté the Garlic
In a large skillet, melt the butter over medium heat. Add the minced garlic and cook for about 1 minute, stirring constantly. The garlic should become fragrant and lightly golden but not brown, as burnt garlic tastes bitter.
Step 4: Combine and Season
Add the blanched green beans to the skillet with the garlic butter. Toss well to coat every bean. Season with salt and black pepper. Cook for 2-3 minutes, stirring occasionally, until the beans are heated through and coated in the buttery garlic mixture.
Step 5: Finish and Serve
Remove from heat and drizzle with fresh lemon juice. Toss once more. Transfer to a serving dish and sprinkle with sliced almonds if using. Serve immediately alongside your favorite fish dish. These beans are best enjoyed fresh and hot.
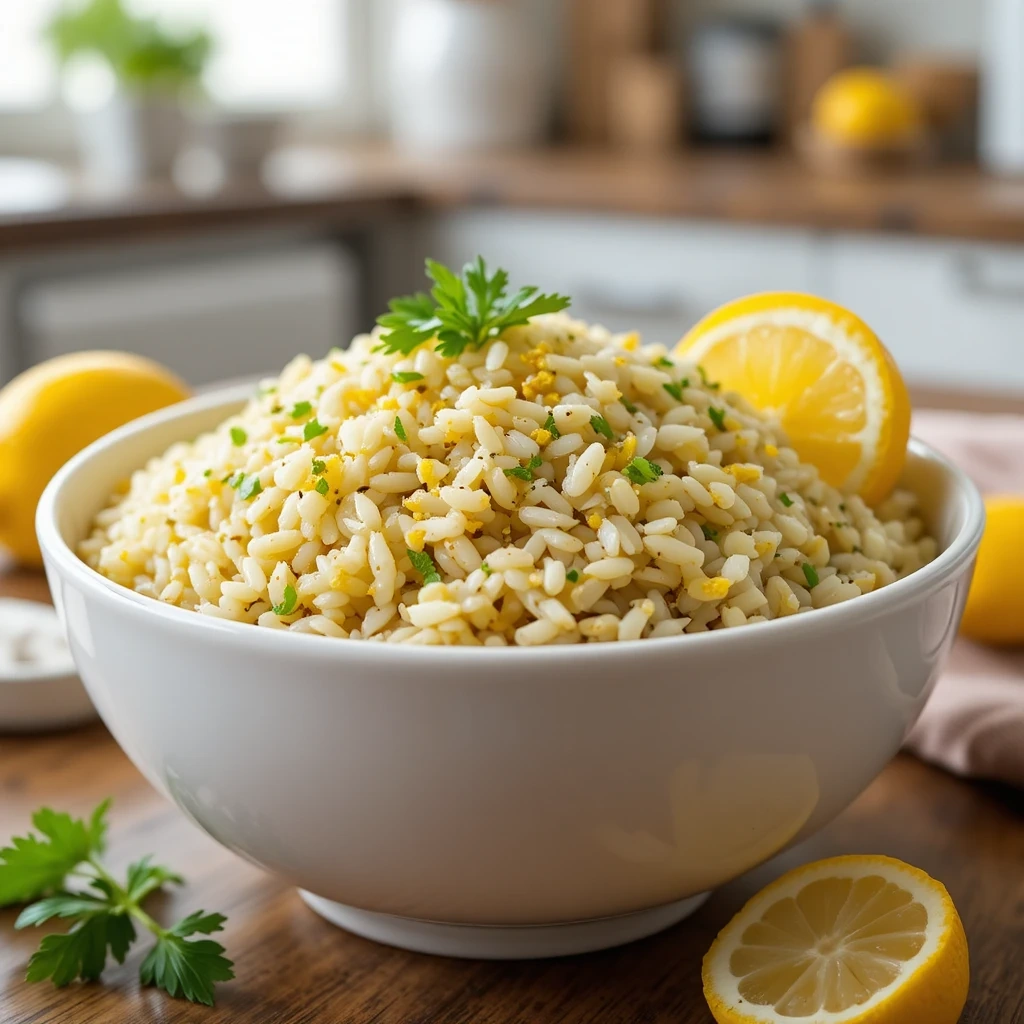
2. Lemon Herb Rice Pilaf
Quick Overview
This fragrant rice pilaf features bright lemon flavor and fresh herbs that complement fish beautifully. Its fluffy, light, and adds a wonderful citrusy note to your meal without being heavy or overpowering.
- Prep Time: 5 minutes
- Cook Time: 20 minutes
- Total Time: 25 minutes
- Servings: 6
Key Ingredients for Lemon Herb Rice Pilaf
- 1½ cups long-grain white rice
- 2 tablespoons butter
- ½ cup diced onion
- 2 cloves garlic, minced
- 3 cups chicken or vegetable broth
- Zest of 1 lemon
- 3 tablespoons fresh lemon juice
- 2 tablespoons chopped fresh parsley
- 1 teaspoon salt
- ¼ teaspoon black pepper
Step-by-Step Instructions
Step 1: Toast the Rice
In a medium saucepan, melt the butter over medium heat. Add the diced onion and cook for 2-3 minutes until softened and translucent. Add the minced garlic and cook for another 30 seconds. Add the rice and stir continuously for 2 minutes until the grains are lightly toasted and coated in butter. This step adds a nutty flavor to the pilaf.
Step 2: Add Liquid and Simmer
Pour in the broth, lemon zest, salt, and pepper. Stir once to combine. Bring the mixture to a boil over high heat. Once boiling, reduce the heat to low, cover with a tight-fitting lid, and simmer for 15-18 minutes without lifting the lid. The rice should absorb all the liquid and become tender.
Step 3: Let It Rest
Remove the saucepan from heat and let it sit, covered, for 5 minutes. This resting time allows the rice to finish cooking with residual heat and ensures every grain is perfectly fluffy.
Step 4: Fluff and Season
Remove the lid and fluff the rice gently with a fork. Drizzle the lemon juice over the rice and sprinkle with fresh chopped parsley. Fold everything together gently. Taste and adjust seasoning if needed. Serve warm as a perfect accompaniment to grilled or baked fish.
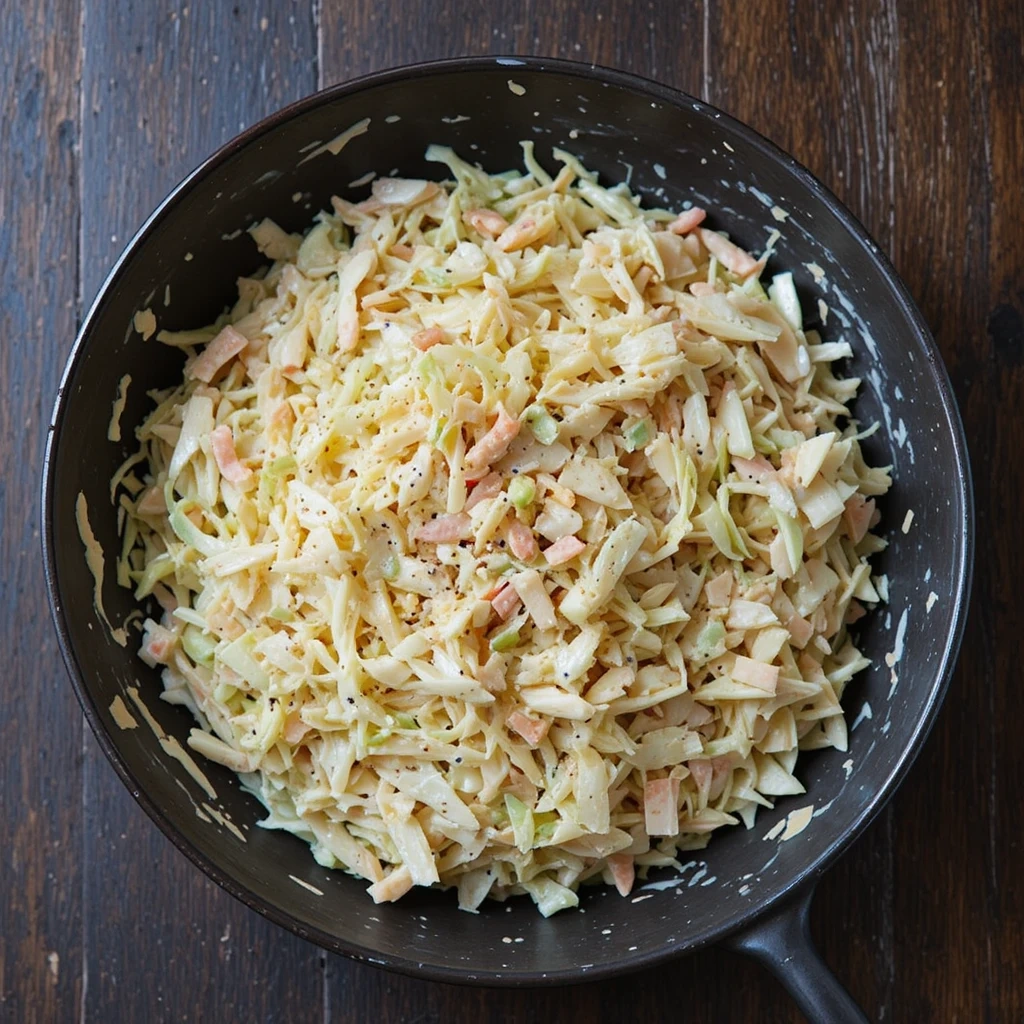
3. Creamy Coleslaw
Quick Overview
This classic creamy coleslaw is crunchy, tangy, and slightly sweet. Its the perfect cooling contrast to warm fish, especially fried or grilled varieties. The creamy dressing brings everything together beautifully.
- Prep Time: 10 minutes
- Chill Time: 30 minutes
- Total Time: 40 minutes
- Servings: 8
Key Ingredients for Creamy Coleslaw
- 1 small head green cabbage, shredded (about 6 cups)
- 1 cup shredded carrots
- ¾ cup mayonnaise
- 2 tablespoons apple cider vinegar
- 2 tablespoons honey
- 1 teaspoon Dijon mustard
- ½ teaspoon salt
- ¼ teaspoon black pepper
- ¼ teaspoon celery seeds (optional)
Step-by-Step Instructions
Step 1: Prepare the Vegetables
Remove the outer leaves from the cabbage and cut it into quarters. Remove the core and slice the cabbage as thinly as possible using a sharp knife or mandoline. Place the shredded cabbage in a large mixing bowl. Add the shredded carrots and toss to combine.
Step 2: Make the Dressing
In a separate bowl, whisk together the mayonnaise, apple cider vinegar, honey, Dijon mustard, salt, pepper, and celery seeds if using. Mix until the dressing is smooth and well combined. Taste and adjust the sweetness or tang by adding more honey or vinegar as needed.
Step 3: Combine and Toss
Pour the dressing over the cabbage and carrots. Using clean hands or two large spoons, toss everything together until all the vegetables are evenly coated with the creamy dressing. Make sure there are no dry spots.
Step 4: Chill and Serve
Cover the bowl with plastic wrap and refrigerate for at least 30 minutes before serving. This chilling time allows the flavors to meld and the cabbage to soften slightly. The coleslaw will stay fresh in the refrigerator for up to 3 days. Give it a quick stir before serving.
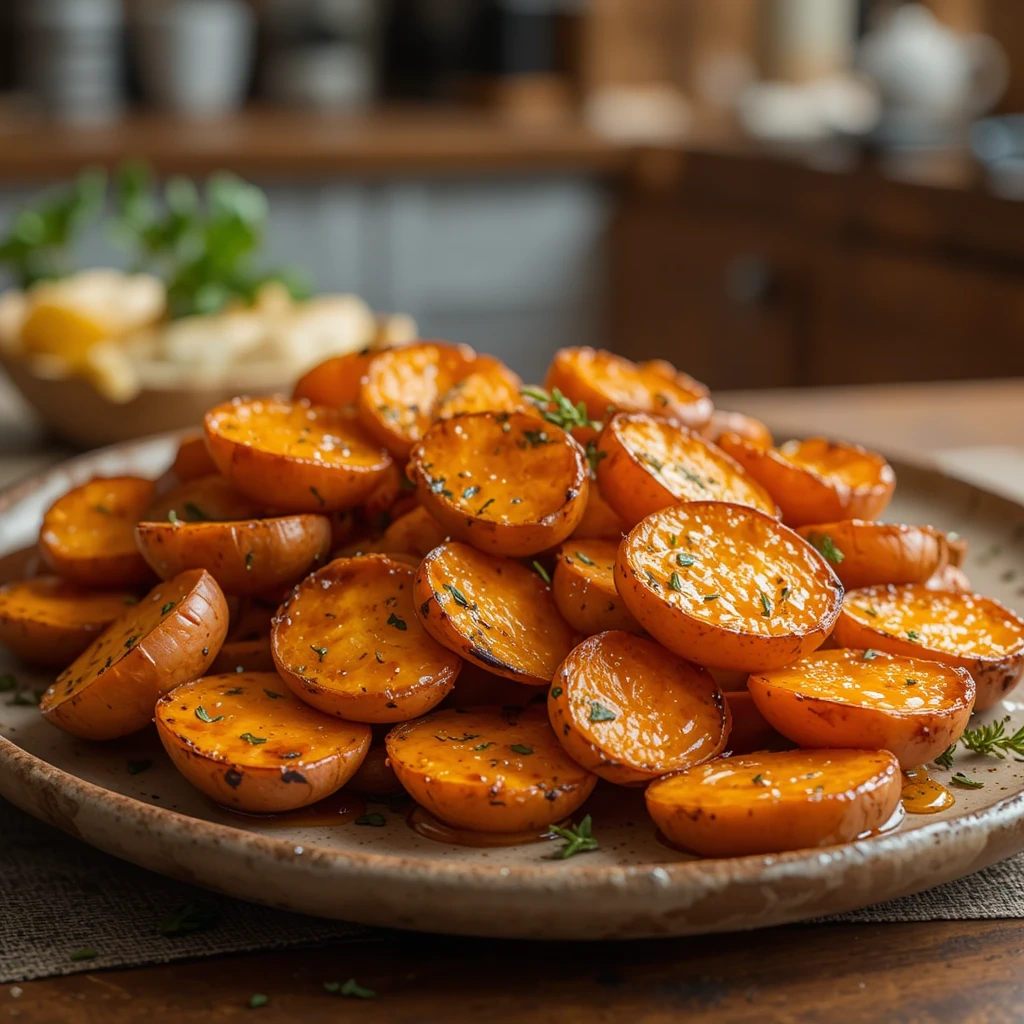
4. Honey Roasted Sweet Potatoes
Quick Overview
These caramelized sweet potatoes are roasted with a touch of honey for natural sweetness. Theyre tender on the inside with crispy, golden edges that kids absolutely love. The mild sweetness pairs wonderfully with savory fish dishes.
- Prep Time: 10 minutes
- Cook Time: 30 minutes
- Total Time: 40 minutes
- Servings: 4
Key Ingredients for Honey Roasted Sweet Potatoes
- 2 large sweet potatoes, peeled
- 3 tablespoons olive oil
- 2 tablespoons honey
- 1 teaspoon cinnamon
- ½ teaspoon salt
- ¼ teaspoon black pepper
- Fresh thyme leaves for garnish (optional)
Step-by-Step Instructions
Step 1: Preheat and Prepare
Preheat your oven to 425°F (220°C). Line a large baking sheet with parchment paper for easy cleanup. Peel the sweet potatoes and cut them into 1-inch cubes, trying to keep the pieces uniform so they cook evenly.
Step 2: Season the Potatoes
Place the sweet potato cubes in a large bowl. Drizzle with olive oil and honey. Sprinkle with cinnamon, salt, and black pepper. Toss everything together with your hands or a large spoon until every piece is evenly coated with the honey-oil mixture.
Step 3: Roast Until Golden
Spread the sweet potatoes in a single layer on the prepared baking sheet. Make sure theyre not crowded, or theyll steam instead of roast. Roast for 25-30 minutes, flipping them halfway through with a spatula. They should be tender when pierced with a fork and have crispy, caramelized edges.
Step 4: Garnish and Serve
Remove from the oven and transfer to a serving platter. Garnish with fresh thyme leaves if desired. Serve hot alongside grilled salmon, baked cod, or any fish dish. These sweet potatoes are so delicious, they might just steal the show!
5. Fresh Cucumber Tomato Salad
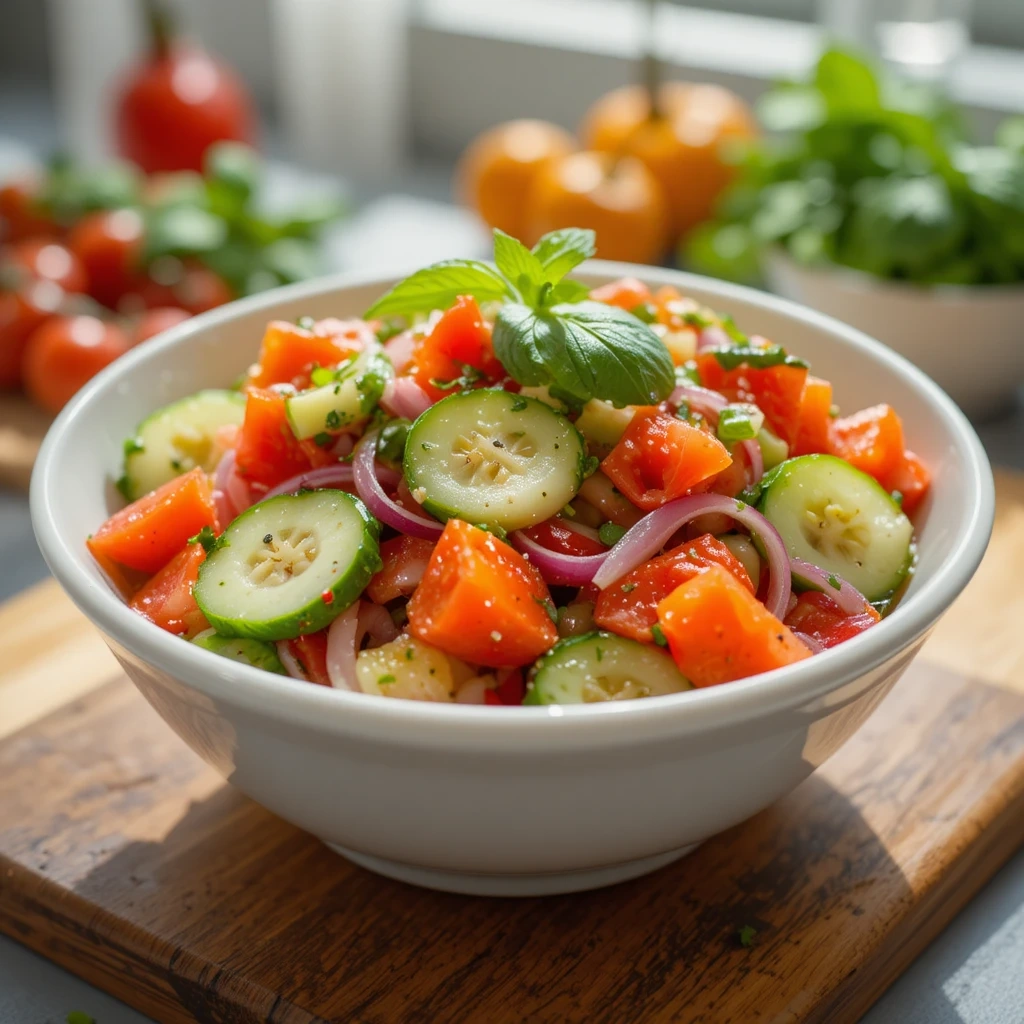
Quick Overview
This light and refreshing salad is bursting with garden-fresh flavors. The crisp cucumbers and juicy tomatoes are dressed in a simple vinaigrette that complements fish without overpowering it. Its the perfect summer side dish.
- Prep Time: 10 minutes
- Chill Time: 15 minutes
- Total Time: 25 minutes
- Servings: 6
Key Ingredients for Fresh Cucumber Tomato Salad
- 2 large cucumbers, sliced
- 3 medium tomatoes, cut into wedges
- ½ red onion, thinly sliced
- ¼ cup fresh basil leaves, chopped
- 3 tablespoons olive oil
- 2 tablespoons red wine vinegar
- 1 teaspoon salt
- ½ teaspoon black pepper
- 1 teaspoon dried oregano
Step-by-Step Instructions
Step 1: Prepare the Vegetables
Wash the cucumbers and tomatoes thoroughly. Slice the cucumbers into ¼-inch thick rounds. Cut each tomato into 6-8 wedges. Thinly slice the red onion into half-moons. If the onion flavor is too strong for your family, you can soak the slices in cold water for 5 minutes, then drain.
Step 2: Combine Vegetables
In a large salad bowl, combine the sliced cucumbers, tomato wedges, and red onion. Add the chopped fresh basil. Toss gently to distribute the vegetables evenly.
Step 3: Make the Dressing
In a small bowl, whisk together the olive oil, red wine vinegar, salt, pepper, and oregano. Whisk vigorously until the dressing is emulsified and well combined. Taste and adjust seasoning as needed.
Step 4: Dress and Serve
Pour the dressing over the vegetables and toss gently to coat. Let the salad sit for 15 minutes before serving to allow the flavors to blend. Serve chilled or at room temperature. This salad pairs beautifully with grilled or baked white fish like tilapia or cod.
6. Creamy Garlic Mashed Potatoes
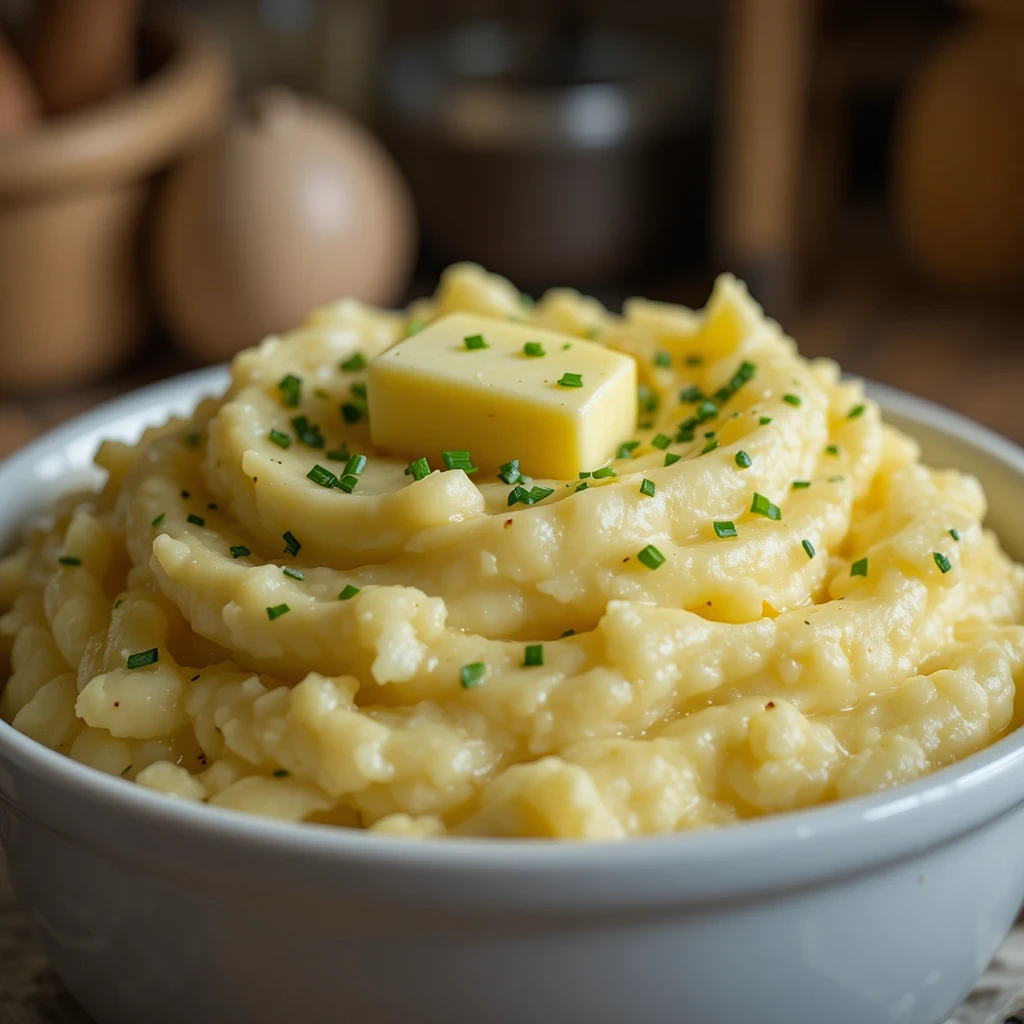
Quick Overview
These ultra-creamy mashed potatoes are infused with roasted garlic for extra flavor. Theyre smooth, buttery, and comforting. Kids love the familiar taste, while adults appreciate the subtle garlic enhancement.
- Prep Time: 10 minutes
- Cook Time: 20 minutes
- Total Time: 30 minutes
- Servings: 6
Key Ingredients for Creamy Garlic Mashed Potatoes
- 2 pounds russet potatoes, peeled and cubed
- 4 cloves garlic, minced
- ½ cup whole milk, warmed
- 4 tablespoons butter
- ¼ cup sour cream
- 1 teaspoon salt
- ¼ teaspoon black pepper
- 2 tablespoons chopped fresh chives
Step-by-Step Instructions
Step 1: Cook the Potatoes
Peel the potatoes and cut them into 1-inch cubes for faster, even cooking. Place them in a large pot and cover with cold water. Add a generous pinch of salt. Bring to a boil over high heat, then reduce to medium and simmer for 15-18 minutes until the potatoes are fork-tender.
Step 2: Sauté the Garlic
While the potatoes cook, melt 1 tablespoon of butter in a small skillet over medium-low heat. Add the minced garlic and cook for 1-2 minutes until fragrant and softened but not browned. Remove from heat and set aside.
Step 3: Drain and Mash
Drain the potatoes thoroughly in a colander. Return them to the pot and let them sit for 1 minute to steam off excess moisture. Add the remaining butter, sour cream, and sautéed garlic. Mash with a potato masher until smooth and creamy.
Step 4: Add Milk and Season
Gradually pour in the warm milk while continuing to mash, adding just enough to reach your desired consistency. Season with salt and pepper. Taste and adjust seasoning. Transfer to a serving bowl and garnish with fresh chopped chives. Serve immediately with baked or grilled fish.
7. Parmesan Roasted Broccoli
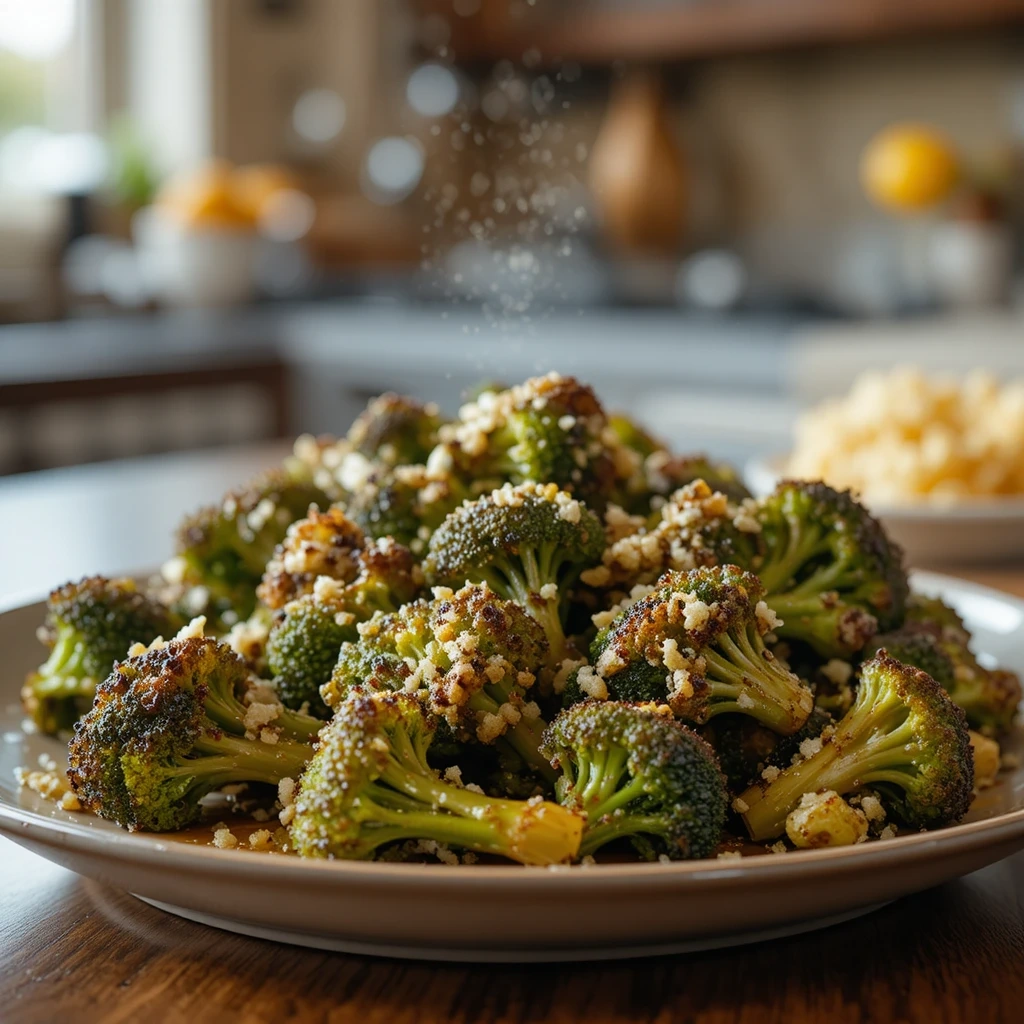
Quick Overview
Roasted broccoli gets crispy, caramelized edges and a nutty flavor that transforms this humble vegetable into something special. The Parmesan adds a savory, cheesy finish that makes it irresistible to kids and adults alike.
- Prep Time: 5 minutes
- Cook Time: 20 minutes
- Total Time: 25 minutes
- Servings: 4
Key Ingredients for Parmesan Roasted Broccoli
- 1 large head broccoli, cut into florets
- 3 tablespoons olive oil
- 3 cloves garlic, minced
- ½ teaspoon salt
- ¼ teaspoon black pepper
- ¼ teaspoon red pepper flakes (optional)
- ½ cup grated Parmesan cheese
- 1 tablespoon lemon juice
Step-by-Step Instructions
Step 1: Prepare and Season
Preheat your oven to 425°F (220°C). Cut the broccoli into bite-sized florets, making sure theyre roughly the same size for even cooking. Place them in a large bowl. Drizzle with olive oil and add the minced garlic, salt, pepper, and red pepper flakes if using. Toss well to coat every piece.
Step 2: Arrange on Baking Sheet
Spread the seasoned broccoli in a single layer on a large baking sheet. Make sure the florets arent touching too much, or theyll steam instead of roast. Line the pan with parchment paper for easier cleanup if desired.
Step 3: Roast Until Crispy
Roast in the preheated oven for 18-20 minutes, stirring once halfway through. The broccoli should be tender and have crispy, lightly charred edges. The stems should be easily pierced with a fork.
Step 4: Add Cheese and Serve
Remove from the oven and immediately sprinkle with grated Parmesan cheese. Drizzle with fresh lemon juice. Toss gently to combine while the broccoli is still hot so the cheese melts slightly. Transfer to a serving dish and serve immediately alongside your fish dish.
8. Butter and Herb Corn on the Cob

Quick Overview
Sweet, juicy corn on the cob is brushed with herb butter for a classic summer side dish. Its simple, kid-friendly, and pairs beautifully with grilled fish. The natural sweetness of corn complements the savory flavors of seafood perfectly.
- Prep Time: 5 minutes
- Cook Time: 10 minutes
- Total Time: 15 minutes
- Servings: 6
Key Ingredients for Butter and Herb Corn on the Cob
- 6 ears fresh corn, husked
- 4 tablespoons butter, softened
- 2 tablespoons chopped fresh parsley
- 1 tablespoon chopped fresh chives
- 1 clove garlic, minced
- ½ teaspoon salt
- ¼ teaspoon black pepper
Step-by-Step Instructions
Step 1: Prepare the Herb Butter
In a small bowl, combine the softened butter, chopped parsley, chives, minced garlic, salt, and pepper. Mix well with a fork until all ingredients are evenly distributed. Set aside at room temperature until ready to use.
Step 2: Boil the Corn
Bring a large pot of water to a rolling boil. Remove all husks and silk from the corn. Carefully add the corn to the boiling water. Cook for 7-10 minutes until the kernels are tender and bright yellow. Fresh corn cooks quickly, so dont overcook it.
Step 3: Drain and Butter
Using tongs, carefully remove the corn from the boiling water and place on a serving platter. While the corn is still hot, brush each ear generously with the herb butter. The heat will melt the butter, allowing it to soak into the kernels.
Step 4: Serve Hot
Serve the corn immediately while its still hot. Provide extra herb butter on the side for those who want more. This corn pairs wonderfully with grilled fish like salmon, swordfish, or mahi-mahi. Its messy, fun, and perfect for casual family dinners.
9. Mediterranean Quinoa Salad
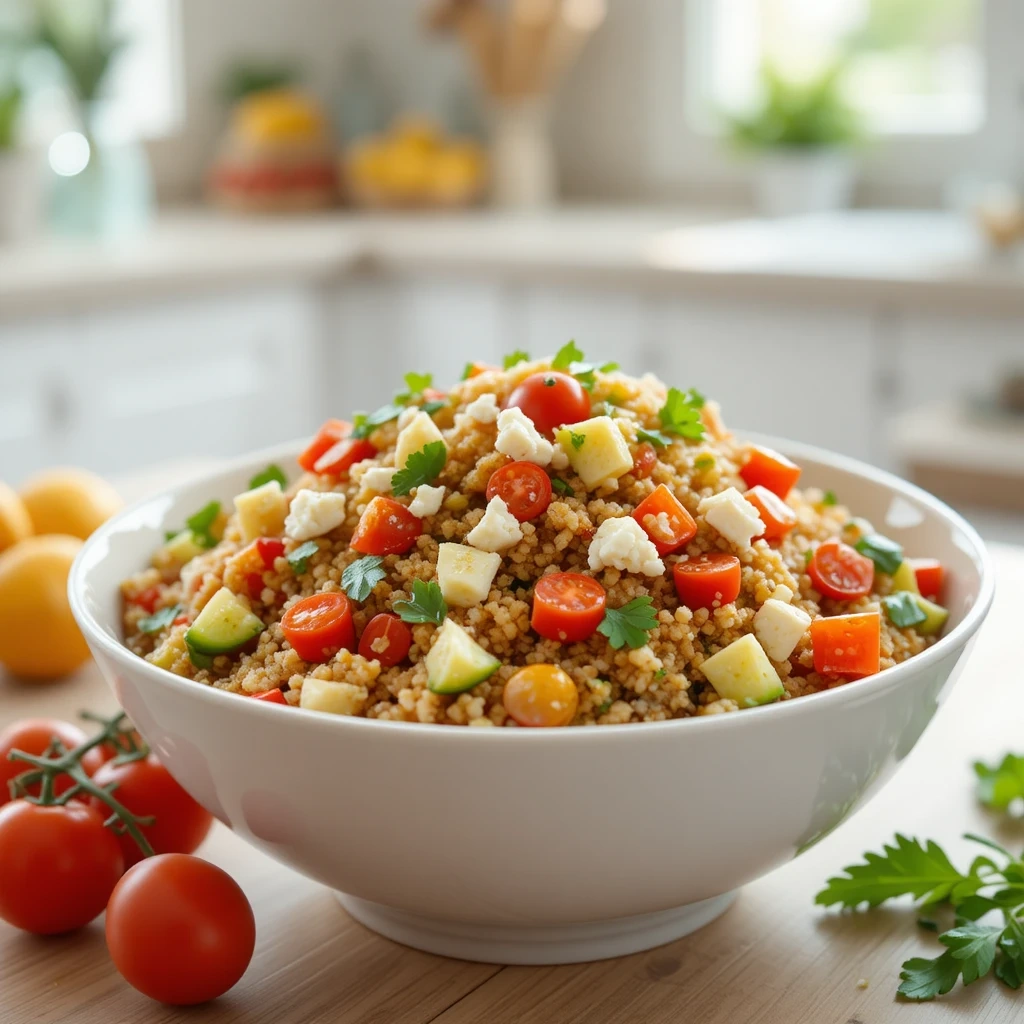
Quick Overview
This protein-packed quinoa salad is loaded with fresh vegetables and tossed in a light lemon vinaigrette. Its healthy, colorful, and refreshing. The Mediterranean flavors complement fish beautifully while adding nutritious variety to your meal.
- Prep Time: 10 minutes
- Cook Time: 15 minutes
- Total Time: 25 minutes
- Servings: 6
Key Ingredients for Mediterranean Quinoa Salad
- 1 cup quinoa, rinsed
- 2 cups water or vegetable broth
- 1 cup cherry tomatoes, halved
- 1 cucumber, diced
- ½ cup diced red bell pepper
- ¼ cup chopped fresh parsley
- ¼ cup crumbled feta cheese (optional)
- 3 tablespoons olive oil
- 2 tablespoons lemon juice
- 1 teaspoon salt
- ½ teaspoon black pepper
Step-by-Step Instructions
Step 1: Cook the Quinoa
Rinse the quinoa thoroughly under cold water using a fine-mesh strainer. In a medium saucepan, combine the quinoa and water or broth. Bring to a boil over high heat, then reduce to low, cover, and simmer for 15 minutes. Remove from heat and let it sit covered for 5 minutes. Fluff with a fork and let cool to room temperature.
Step 2: Prepare the Vegetables
While the quinoa cools, wash and prepare all the vegetables. Cut the cherry tomatoes in half. Dice the cucumber and red bell pepper into small, bite-sized pieces. Chop the fresh parsley. If using feta cheese, crumble it into small chunks.
Step 3: Make the Dressing
In a small bowl, whisk together the olive oil, lemon juice, salt, and black pepper. Whisk until well combined and slightly emulsified. Taste and adjust the seasoning, adding more lemon juice if you want it tangier.
Step 4: Combine Everything
In a large bowl, combine the cooled quinoa, cherry tomatoes, cucumber, red bell pepper, and parsley. Pour the dressing over the salad and toss well to combine. Add the crumbled feta if using and fold in gently. Serve at room temperature or chilled. This salad keeps well in the refrigerator for up to 3 days.
10. Crispy Baked Potato Wedges
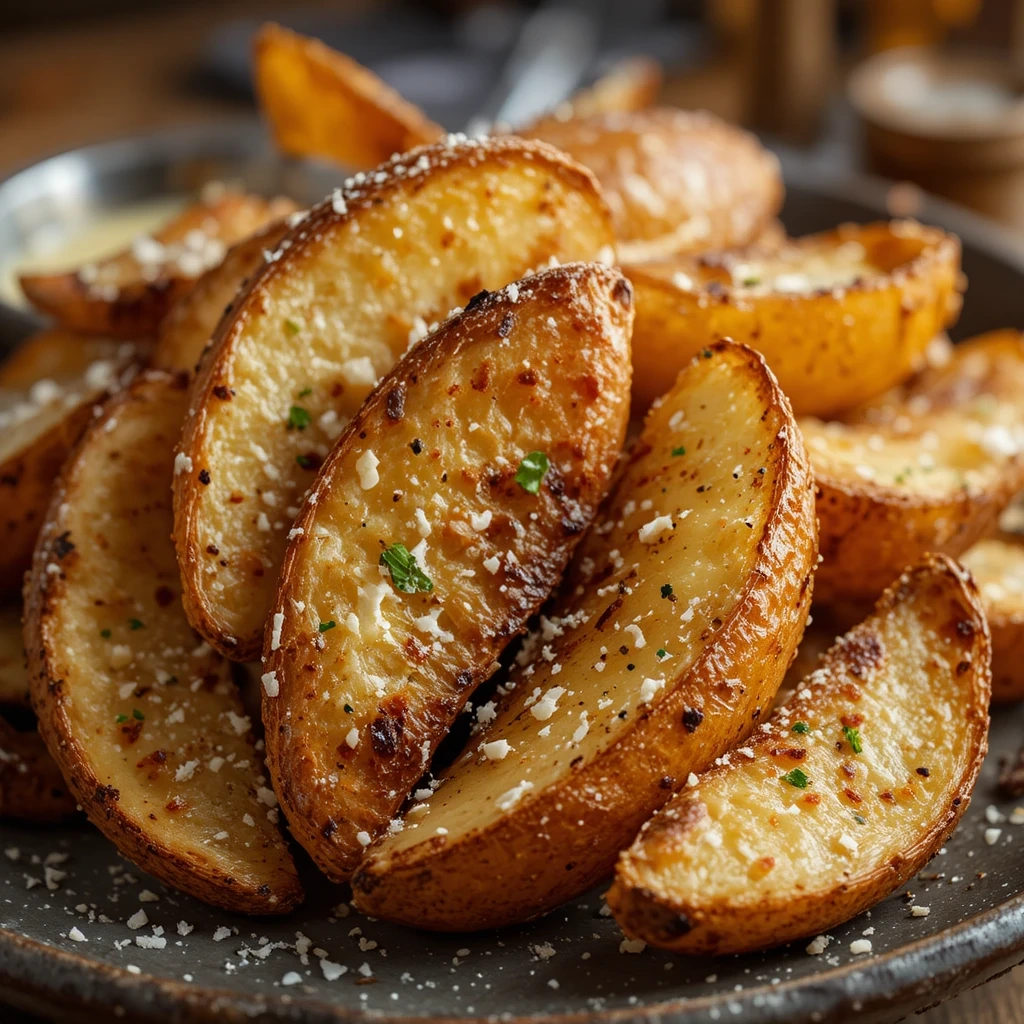
Quick Overview
These golden potato wedges are crispy on the outside and fluffy on the inside. Theyre a healthier alternative to fries and absolutely delicious. Kids love them, and theyre perfect for pairing with fried or baked fish.
- Prep Time: 10 minutes
- Cook Time: 35 minutes
- Total Time: 45 minutes
- Servings: 4
Key Ingredients for Crispy Baked Potato Wedges
- 4 large russet potatoes, scrubbed
- 3 tablespoons olive oil
- 1 teaspoon garlic powder
- 1 teaspoon paprika
- 1 teaspoon salt
- ½ teaspoon black pepper
- ½ teaspoon dried thyme
- 2 tablespoons grated Parmesan cheese (optional)
Step-by-Step Instructions
Step 1: Preheat and Prepare
Preheat your oven to 425°F (220°C). Line two large baking sheets with parchment paper. Scrub the potatoes clean and pat them dry. You can leave the skin on for extra nutrition and texture. Cut each potato in half lengthwise, then cut each half into 3-4 wedges depending on the size of your potatoes.
Step 2: Season the Wedges
Place the potato wedges in a large bowl. Drizzle with olive oil and toss to coat. In a small bowl, mix together the garlic powder, paprika, salt, pepper, and thyme. Sprinkle this seasoning mixture over the potatoes and toss again until every wedge is evenly coated.
Step 3: Arrange and Bake
Arrange the wedges in a single layer on the prepared baking sheets, making sure theyre not overcrowded. Place them cut-side down for maximum crispiness. Bake for 30-35 minutes, flipping halfway through, until the wedges are golden brown and crispy on the outside.
Step 4: Add Final Touch
Remove from the oven and sprinkle with Parmesan cheese if desired while still hot. Let them cool for 2-3 minutes before serving. These wedges are perfect with tartar sauce or a simple garlic aioli. Serve alongside fish and chips, baked cod, or any fried fish dish.
What to Serve Sides for Fish With
These versatile side dishes pair beautifully with virtually any fish preparation. Try them with:
- Baked or grilled salmon for an elegant dinner
- Crispy fish and chips for a casual family meal
- Pan-seared tilapia or cod for a quick weeknight dinner
- Grilled mahi-mahi or swordfish for summer barbecues
- Blackened catfish or snapper for bold, spicy flavors
- Fish tacos with fresh coleslaw and salsa
Mix and match 2-3 sides for a complete meal. Try pairing a starchy side like mashed potatoes or rice pilaf with a fresh vegetable or salad for perfect balance.
Top Tips for Perfecting Sides for Fish
Match Cooking Times
Since fish cooks quickly, choose sides that are ready in about the same time or can be prepared ahead. Rice pilaf can be made while your fish marinates. Salads can be assembled earlier in the day.
Balance Flavors
Pair rich, buttery fish with light, acidic sides like cucumber salad. Match mild white fish with more flavorful sides like garlic mashed potatoes. The contrast creates a more interesting meal.
Dont Overcrowd the Oven
When roasting vegetables or potato wedges, give them space on the baking sheet. Overcrowding causes steaming instead of roasting, and you wont get those crispy, caramelized edges everyone loves.
Fresh Herbs Make a Difference
Whenever possible, use fresh herbs instead of dried. They add bright, vibrant flavors that really elevate these simple sides. Fresh parsley, basil, dill, and chives are particularly good with fish dishes.
Season Generously
Vegetables need more seasoning than you think. Dont be shy with salt, pepper, and other spices. Taste as you go and adjust. Well-seasoned sides make the entire meal more satisfying.
Storing and Reheating Tips
Most of these sides store well and can be made ahead, which is perfect for meal prep or busy weeknights. Heres how to keep them fresh:
Storage Guidelines:
Store cooked sides in airtight containers in the refrigerator for up to 4 days. Salads with dressing stay fresh for 2-3 days. Keep undressed salads up to 5 days and add dressing just before serving. Mashed potatoes and rice pilaf freeze beautifully for up to 3 months in freezer-safe containers.
Reheating Tips:
Reheat roasted vegetables and potato wedges in a 400°F oven for 10-15 minutes to restore crispiness. Microwave mashed potatoes with a splash of milk, stirring every 30 seconds. Warm rice pilaf in the microwave with a damp paper towel over the bowl to prevent drying. Green beans and broccoli are best fresh, but can be quickly reheated in a skillet with a bit of butter.
Salads dont freeze well and should always be served fresh or refrigerated for short periods only.
Frequently Asked Questions
What are the best sides to serve with fried fish?
The classic combination is crispy potato wedges or fries with creamy coleslaw. The cool, crunchy slaw balances the hot, crispy fish perfectly. Add corn on the cob or a fresh cucumber tomato salad for a complete meal.
Can I make these sides ahead of time?
Yes! Coleslaw, cucumber tomato salad, and quinoa salad all taste better when made a few hours ahead. Rice pilaf and mashed potatoes can be reheated easily. Roasted vegetables are best made fresh, but you can prep them in advance and roast just before serving.
What sides go well with grilled salmon?
Grilled salmon pairs beautifully with lemon herb rice pilaf, roasted sweet potatoes, or garlic butter green beans. The citrus flavors complement the rich, fatty salmon perfectly. Add a fresh salad for extra brightness.
Are these side dishes kid-friendly?
Absolutely! Every recipe has been designed with families in mind. The flavors are mild and familiar, using ingredients kids typically enjoy. Potato wedges, corn on the cob, and mashed potatoes are especially popular with children.
How do I keep roasted vegetables from getting soggy?
The key is high heat and proper spacing. Roast at 425°F and make sure vegetables arent crowded on the baking sheet. Pat them dry before roasting and use enough oil to coat them lightly. Dont cover them with foil while cooking.
Can I use frozen vegetables for these recipes?
Fresh vegetables work best for most of these recipes because they have better texture and flavor. However, frozen green beans and broccoli can work in a pinch. Make sure to thaw and pat them completely dry before cooking to avoid excess moisture.
Whats the easiest side dish for fish?
Garlic butter green beans are probably the quickest and easiest, taking just 13 minutes from start to finish. The cucumber tomato salad is also very simple, requiring no cooking at all. Both are perfect for busy weeknights.
How do I prevent garlic from burning?
Use medium-low heat when cooking garlic and watch it carefully. Minced garlic cooks very quickly, usually in about 60 seconds. Remove it from heat as soon as it becomes fragrant and slightly golden. Burnt garlic tastes bitter and should be discarded.
Tips for Avoiding Common Cooking Mistakes
Mistake 1: Not Drying Vegetables Before Roasting
Wet vegetables steam instead of roast, resulting in soggy sides. Always pat vegetables completely dry with paper towels or a clean kitchen towel before adding oil and seasonings. This ensures crispy, caramelized results.
Mistake 2: Using Cold Butter in Mashed Potatoes
Cold butter doesnt incorporate well and can make potatoes gummy. Use room temperature butter and warm milk for the creamiest texture. Add liquids gradually while mashing to control consistency.
Mistake 3: Overcooking Green Beans
Overcooked green beans turn mushy and lose their bright color. Blanch them briefly until just tender-crisp, then immediately shock in ice water. This keeps them vibrant green and perfectly crunchy.
Mistake 4: Not Rinsing Quinoa
Quinoa has a natural coating called saponin that tastes bitter if not removed. Always rinse quinoa thoroughly in a fine-mesh strainer under cold water for at least 30 seconds before cooking.
Mistake 5: Cutting Potatoes Unevenly
When pieces are different sizes, some get overcooked while others stay raw. Take time to cut potatoes uniformly, whether for wedges or cubes. This ensures everything cooks at the same rate and finishes together.
Choose titles that highlight the quick prep time, family-friendly nature, and delicious results to attract more readers to your blog!
Conclusion
These ten sides for fish prove that great accompaniments dont have to be complicated or time-consuming. From creamy mashed potatoes to vibrant roasted vegetables, each recipe brings something special to your fish dinner. The best part? Theyre all budget-friendly, kid-approved, and ready in 45 minutes or less.
Whether youre preparing a fancy grilled salmon for guests or a quick weeknight cod dinner for the family, you now have a collection of reliable sides that will make every meal feel complete. Dont be afraid to mix and match or adapt these recipes to your familys preferences.
Which side dish will you try first? We d love to hear about your favorites in the comments below. Happy cooking, and enjoy your delicious fish dinners with these perfect pairings!
Sample Nutrition Information
Heres approximate nutrition information per serving for Garlic Butter Green Beans:
| Nutrient | Amount Per Serving |
| Calories | 95 kcal |
| Total Fat | 9g |
| Saturated Fat | 5g |
| Carbohydrates | 8g |
| Fiber | 3g |
| Protein | 2g |
| Sodium | 295mg |
Note: Nutrition information is approximate and will vary based on specific ingredients used and portion sizes.