
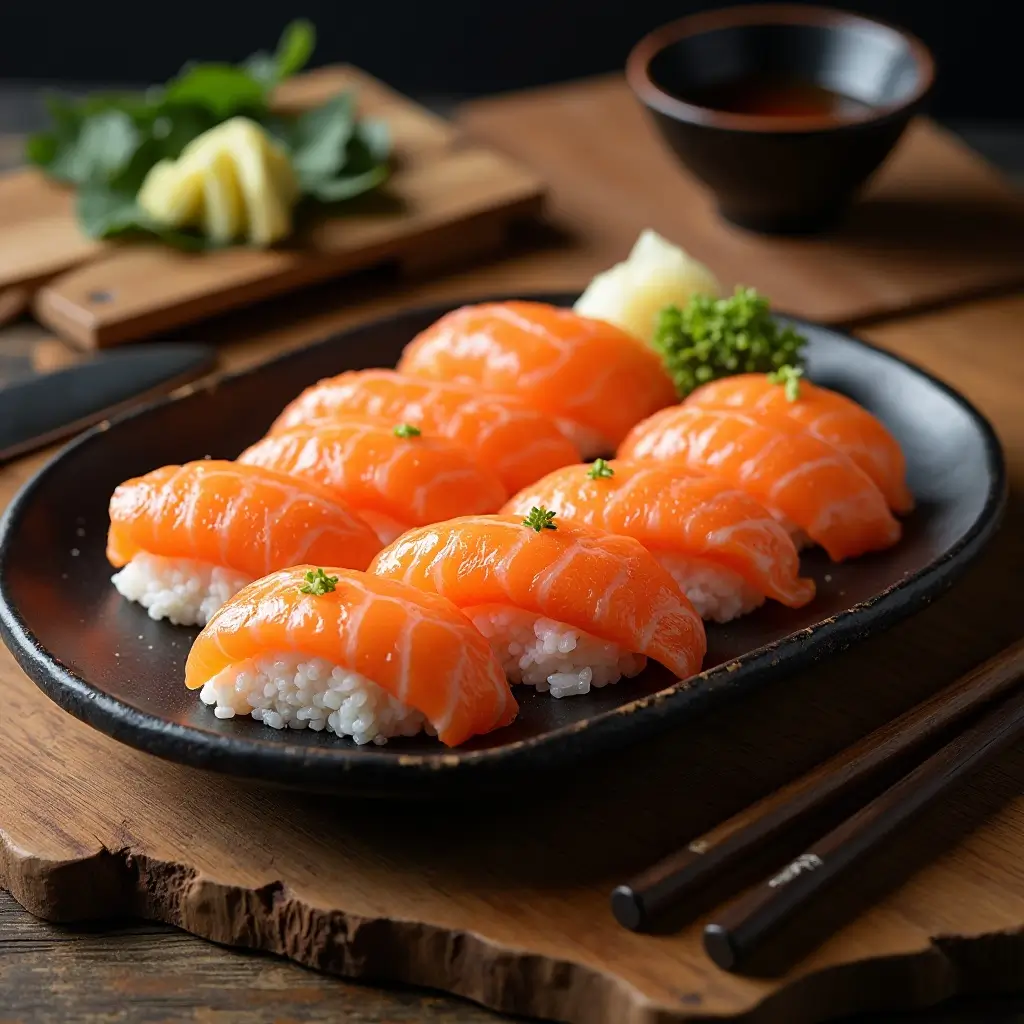
Easy Salmon Nigiri Recipe in 30 Minutes
Imagine biting into a piece of buttery, melt-in-your-mouth salmon nigiri that rivals your favorite sushi restaurant. This isn’t just a dream – it’s totally achievable in your own kitchen! Salmon nigiri represents the perfect harmony of silky-smooth fish and perfectly seasoned sushi rice, creating a culinary experience that’s both elegant and surprisingly simple.
Here’s a fun fact: nigiri means “hand-pressed” in Japanese, referring to the traditional technique of gently shaping rice by hand. What makes this dish truly special is its beautiful simplicity – just two main components that, when done right, create pure magic. This recipe takes just 30 minutes from start to finish, making it perfect for impressing dinner guests or treating your family to something extraordinary.
Table of Contents
Much like our popular California roll recipe, this salmon nigiri proves that homemade sushi doesn’t require years of training. With the right techniques and fresh ingredients, you’ll be crafting restaurant-quality nigiri that will have everyone asking for your secret. Get ready to embark on a delicious journey that will transform your home cooking forever!
What is Salmon Nigiri?
Ever wondered why this beloved sushi is called “nigiri”? The name literally translates to “hand-pressed,” which perfectly describes the gentle art of shaping seasoned rice into small, oval mounds. Think of it as the ultimate finger food – each piece is designed to be picked up with your fingers (yes, it’s actually traditional!) and enjoyed in one perfect bite.
Legend has it that nigiri was invented by a Tokyo street vendor who wanted to create fast, portable sushi for busy workers. Talk about innovation! As they say, “the way to a man’s heart is through his stomach,” and this simple yet sophisticated creation has been winning hearts worldwide for centuries.
Ready to master this timeless technique and impress everyone at your next dinner party? Let’s dive in!
Why You’ll Love This Salmon Nigiri
Fresh, Premium Ingredients at Your Fingertips
The star of this recipe is undoubtedly the salmon – silky, buttery, and incredibly fresh. When you make salmon nigiri at home, you control the quality of every ingredient. You’ll taste the difference that sushi-grade salmon makes, with its rich, clean flavor that melts on your tongue. The perfectly seasoned sushi rice provides the ideal foundation, sticky enough to hold its shape but tender enough to complement the fish beautifully.
Budget-Friendly Luxury
Restaurant salmon nigiri can cost $3-5 per piece, but making it at home brings that cost down to under $1 per piece! You’ll save money while learning an impressive skill that will wow your family and friends. Plus, you can make as many pieces as you want without worrying about the bill adding up.
Customizable and Versatile
What makes this recipe truly special is its versatility. You can adjust the rice seasoning to your taste, try different garnishes like a thin slice of jalapeño or a dot of spicy mayo, and even experiment with other fish varieties once you master the technique. It’s similar to our popular poke bowl recipe in that way – simple base, endless possibilities!
Ready to bring the sushi bar experience to your kitchen? Let’s get started!
How to Make Salmon Nigiri
Quick Overview
This salmon nigiri recipe is surprisingly straightforward and incredibly rewarding. The key lies in two main elements: perfectly seasoned sushi rice and high-quality salmon. You’ll spend about 20 minutes preparing the rice, 10 minutes slicing the fish, and just minutes assembling each piece.
Preparation Time:
- Active prep: 15 minutes
- Rice cooking: 20 minutes
- Assembly: 10 minutes
- Total time: 45 minutes
The result? Restaurant-quality nigiri with a creamy, buttery texture and clean, fresh flavors that will make you never want to order takeout again.
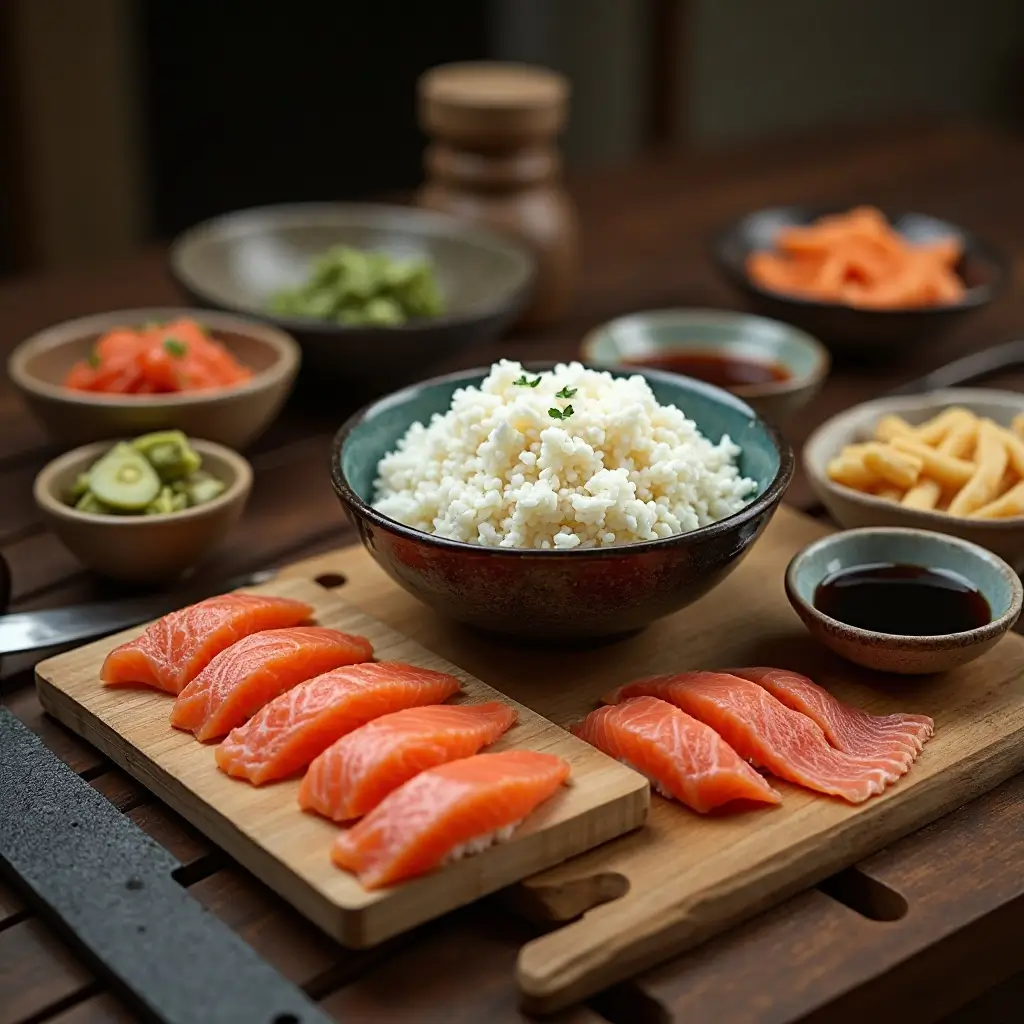
Key Ingredients for Salmon Nigiri
For the Sushi Rice:
- 2 cups short-grain Japanese rice (like Calrose or Koshihikari)
- 2½ cups water
- ⅓ cup rice vinegar
- 3 tablespoons sugar
- 1 teaspoon salt
For the Salmon:
- 1 lb sushi-grade salmon fillet, skin removed
- Wasabi paste (optional)
- Pickled ginger for serving
- Soy sauce for serving
Essential Tools:
- Sharp knife (preferably a sashimi knife)
- Wooden cutting board
- Rice cooker or heavy-bottomed pot
- Wooden spoon or rice paddle
- Small bowl of water with rice vinegar (for hand-dipping)
Step-by-Step Instructions
Step 1: Prepare the Sushi Rice Rinse the rice in cold water until the water runs clear, about 5-7 rinses. This removes excess starch for the perfect texture. Cook the rice in a rice cooker with 2½ cups water, or use the stovetop method by bringing to a boil, then reducing to low heat and simmering covered for 20 minutes.
Step 2: Season the Rice While rice cooks, combine rice vinegar, sugar, and salt in a small saucepan. Heat gently until sugar dissolves, then let cool. Once rice is done, transfer to a large bowl and gradually fold in the vinegar mixture using a wooden spoon. Fan the rice while mixing to cool it quickly and create a glossy finish.
Step 3: Prepare the Salmon Using a sharp knife, slice the salmon against the grain into pieces about 3 inches long, 1 inch wide, and ¼ inch thick. The key is confident, smooth cuts – don’t saw back and forth. Each slice should be uniform for the best presentation.
Step 4: Shape the Rice Wet your hands with the vinegar water to prevent sticking. Take about 1 tablespoon of rice and gently shape it into an oval mound about 2 inches long. The rice should hold together but not be compressed too tightly.
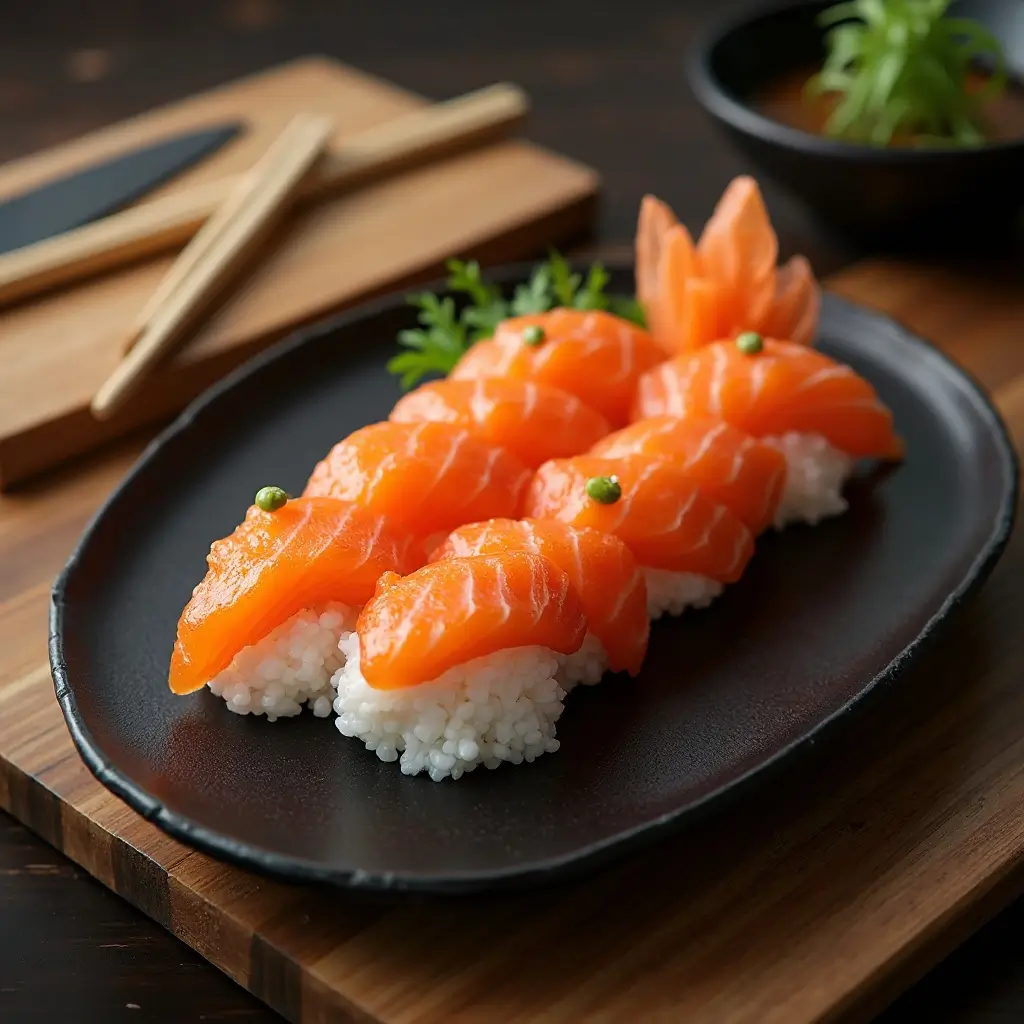
Step 5: Assemble the Nigiri Place a small dab of wasabi on the rice if desired. Drape the salmon slice over the rice, pressing gently to help it adhere. The fish should slightly overhang the rice on both sides for the classic nigiri appearance.
Step 6: Final Touch Arrange on a platter and serve immediately with pickled ginger, additional wasabi, and soy sauce on the side. The nigiri is best enjoyed within 30 minutes of assembly for optimal texture and flavor.
What to Serve Salmon Nigiri With
Salmon nigiri shines brightest when served as part of a complete sushi experience. Start with a light miso soup to cleanse the palate, followed by edamame for a protein-rich appetizer. Cucumber salad with rice vinegar dressing provides a refreshing contrast to the rich salmon.
For drinks, consider green tea or sake for an authentic pairing. Sparkling water with lemon also works wonderfully to cleanse the palate between bites. If you’re creating a full sushi spread, add California rolls or avocado rolls for variety.
Don’t forget the traditional accompaniments: pickled ginger cleanses the palate, wasabi adds heat, and high-quality soy sauce enhances the fish’s natural flavors.
Top Tips for Perfecting Salmon Nigiri
Choosing the Right Salmon
Always use sushi-grade salmon from a reputable fishmonger. Look for bright color, firm texture, and no fishy smell. Norwegian or Scottish salmon typically offers the best flavor and texture for nigiri.
Rice Consistency is Key
The rice should be at body temperature when shaping – not hot, not cold. If it’s too warm, it will make the fish soggy. Too cold, and it won’t hold its shape properly.
Knife Techniques Matter
Keep your knife sharp and clean. Dip the blade in water between cuts to prevent the salmon from sticking. One smooth motion creates cleaner cuts than multiple sawing motions.
Hand Position
When shaping rice, use gentle pressure. Think of it like holding a small bird – firm enough that it doesn’t fly away, but gentle enough not to hurt it.
Timing is Everything
Assemble nigiri just before serving. The rice will begin to harden if left too long, and the fish may lose its optimal texture.
Storing and Reheating Tips
Fresh Consumption: Salmon nigiri is best enjoyed immediately after preparation. The rice and fish combination doesn’t store well once assembled.
Ingredient Storage:
- Prepared sushi rice: Store covered at room temperature for up to 4 hours, or refrigerate for up to 2 days
- Sliced salmon: Use within 24 hours when stored in the refrigerator
- Whole salmon fillet: Keep refrigerated and use within 2 days of purchase
Reheating Guidelines: Never reheat assembled nigiri. If you have leftover rice, let it come to room temperature naturally – never microwave sushi rice as it becomes gummy.
Freezing Options: While not recommended for assembled nigiri, you can freeze sushi rice for up to 1 month. Thaw overnight in the refrigerator and bring to room temperature before use.
Salmon Nigiri Nutrition Information
| Nutrient | Per Piece (2 pieces serving) |
|---|---|
| Salmon Nigiri Calories | 85 |
| Protein | 8g |
| Carbohydrates | 12g |
| Fat | 2g |
| Omega-3 | 400mg |
| Sodium | 95mg |
| Fiber | 0.5g |
Values are approximate and may vary based on ingredients used
Frequently Asked Questions
Can I use regular rice instead of sushi rice?
Short-grain Japanese rice is essential for authentic nigiri. Long-grain rice won’t provide the proper sticky texture needed to hold the nigiri together.
How do I know if salmon is sushi-grade?
Sushi-grade salmon has been frozen at specific temperatures to eliminate parasites. Purchase from reputable fishmongers who specifically label their fish as sushi-grade or sashimi-grade.
Should I eat nigiri with chopsticks or fingers?
Traditionally, nigiri is eaten with fingers! Pick it up gently, dip the fish (not the rice) lightly in soy sauce, and eat in one bite.
Can I make this recipe ahead of time?
Prepare components separately up to a day ahead, but assemble just before serving. The rice can be made earlier and kept at room temperature for up to 4 hours.
What’s the difference between nigiri and sashimi?
Sashimi is just the sliced fish without rice, while nigiri combines the fish with a shaped mound of seasoned sushi rice.
How thin should I slice the salmon?
Aim for slices about ¼ inch thick. This provides the perfect balance of texture and flavor without overpowering the rice.
Pro Chef Secrets for Success
The 45-Degree Rule: When slicing salmon, hold your knife at a 45-degree angle to create beautiful, professional-looking pieces with more surface area.
Temperature Control: Keep your salmon chilled until the moment you slice it. Cold fish is easier to cut cleanly and maintains its shape better.
The Rice Test: Perfect sushi rice should stick together when shaped but separate easily when chewed. If it’s too sticky, you’ve overworked it.
Presentation Matters: Arrange nigiri on a wooden board or ceramic plate with the fish facing the same direction for restaurant-quality presentation.
Variations to Try
Once you master basic salmon nigiri, experiment with these exciting variations:
Spicy Salmon Nigiri: Add a thin layer of spicy mayo between the rice and fish Torched Salmon Nigiri: Lightly torch the salmon surface for a smoky flavor Citrus Salmon Nigiri: Add a thin slice of lemon or lime for brightness Herb-Crusted Salmon Nigiri: Roll the salmon in finely chopped dill or chives
Cultural Appreciation Note
Nigiri represents centuries of Japanese culinary tradition. By making it at home, you’re participating in a beautiful cultural practice that emphasizes respect for ingredients, precision in technique, and the joy of sharing food with others. Take time to appreciate not just the flavors, but the artistry behind each piece.
Ready to impress your family and friends with restaurant-quality salmon nigiri? Save this recipe and share your beautiful creations with us! Don’t forget to try our other sushi recipes for a complete homemade sushi experience.