
Easy Keto Chili Instant Pot Recipe – Ready in 30 Minutes
Picture this: a steaming bowl of hearty, rich chili that’s ready in under 40 minutes, packed with bold flavors, and completely guilt-free for your keto lifestyle. This Keto Chili Instant Pot recipe is everything you crave on a chilly evening—savory ground beef, aromatic spices, and that perfect thickness without a single bean or starchy filler.
I still remember the first time I made this recipe during a busy weeknight; my family couldn’t believe it was keto-friendly! The beauty of using an Instant Pot means no babysitting a simmering pot for hours. It’s similar to my popular Keto Beef Stew, but with that signature chili kick that makes your taste buds dance.
What is Keto Chili Instant Pot?
Now, you might be wondering—isn’t chili traditionally loaded with beans and carbs? Well, this isn’t your grandmother’s chili (though I’m sure hers was delicious!). Keto Chili Instant Pot is a clever adaptation that swaps out high-carb ingredients for low-carb alternatives while keeping all that soul-warming goodness intact.
Why “Instant Pot” in the name? Because this magical pressure cooker transforms raw ingredients into fork-tender perfection in a fraction of the time. As they say, “the way to a man’s heart is through his stomach,” and trust me, this recipe will have everyone asking for seconds. Ready to experience comfort food that fits your macros?
Why You’ll Love This Keto Chili Instant Pot
Rich, Hearty Texture Without the Carbs
The magic of this recipe lies in how it achieves that classic thick, satisfying texture without relying on beans or corn. The combination of ground beef, tomatoes, and a secret ingredient (hint: it involves peppers!) creates a luxurious consistency that coats your spoon perfectly. Each bite delivers layers of smoky, spicy, and savory notes that make you forget you’re eating low-carb.
Budget-Friendly and Meal Prep Perfect
Making chili at home saves you serious money compared to ordering takeout or buying pre-made keto meals. With just a few affordable ingredients—ground beef, canned tomatoes, and basic pantry spices—you can create a massive batch that feeds a family or provides lunches for the entire week. I love making a double batch and freezing portions for those nights when cooking feels impossible.
Customizable Toppings Make It Special
The real fun begins when you set up a topping bar! Shredded cheddar cheese, sour cream, diced avocado, fresh cilantro, sliced jalapeños, and a squeeze of lime transform this chili from simple to spectacular. Everyone can customize their bowl exactly how they like it.
If you enjoyed my Keto Taco Soup recipe, you’ll recognize some of these flavor combinations—but this chili takes it to a whole new level with deeper, more complex spice notes. Go ahead and make this tonight; your Instant Pot is about to become your new best friend!
How to Make Keto Chili Instant Pot
Quick Overview
This Keto Chili Instant Pot delivers restaurant-quality results with minimal effort. The pressure cooking method locks in flavors while tenderizing the meat to perfection.
You’ll love how the spices bloom in the pot, creating an aromatic base that fills your kitchen with mouthwatering scents. The result is a thick, chunky chili with just the right amount of heat and a rich tomato base.
Developed with AI guidance and not personally cooked, this recipe is shared with our effort to be accurate.
Total Time: 35-40 minutes (10 minutes prep, 15 minutes pressure cooking, 10 minutes natural release)
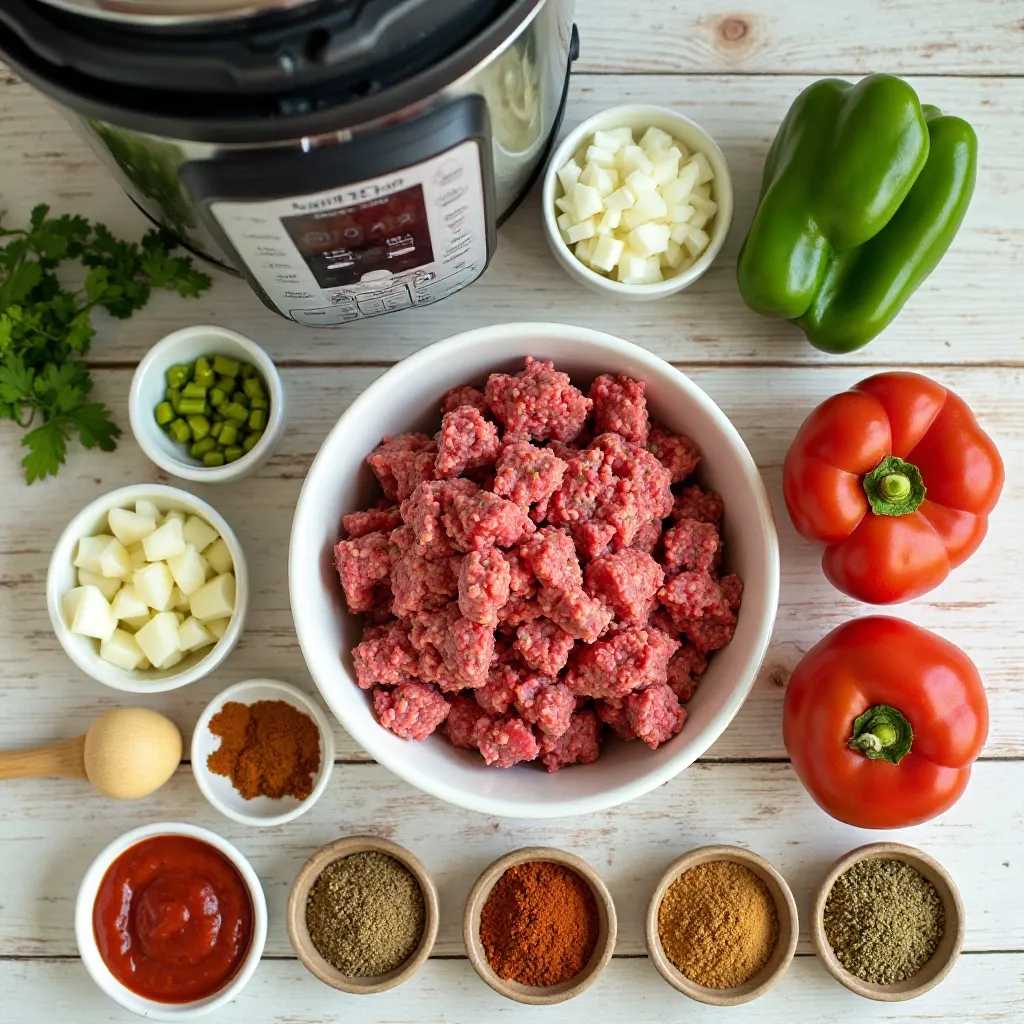
Key Ingredients for Keto Chili Instant Pot
For the Chili Base:
- 2 pounds ground beef (80/20 blend for best flavor)
- 1 medium onion, diced (about 1 cup)
- 1 medium green bell pepper, diced
- 4 cloves garlic, minced
- 1 can (28 oz) crushed tomatoes
- 1 can (14.5 oz) diced tomatoes with green chilies
- 1 cup beef broth (low-sodium preferred)
- 3 tablespoons tomato paste
- 2 tablespoons chili powder
- 1 tablespoon ground cumin
- 1 teaspoon smoked paprika
- 1 teaspoon dried oregano
- ½ teaspoon cayenne pepper (adjust to taste)
- 1 teaspoon sea salt
- ½ teaspoon black pepper
- 2 tablespoons avocado oil
Optional Mix-ins:
- 1 cup diced zucchini (adds bulk without carbs)
- ½ cup diced poblano peppers (for extra depth)
Step-by-Step Instructions
Step 1: Sauté the Aromatics
Turn your Instant Pot to “Sauté” mode and add the avocado oil. Once the oil shimmers (about 2 minutes), add the diced onion and bell pepper. Cook for 4-5 minutes, stirring occasionally, until the vegetables soften and the onion becomes translucent. Add the minced garlic and cook for another 30 seconds until fragrant. This step builds the flavor foundation, so don’t skip it!
Step 2: Brown the Ground Beef
Add the ground beef to the pot, breaking it up with a wooden spoon or spatula. Cook for 5-7 minutes, stirring frequently, until the meat is browned and no longer pink. You want some caramelization here—those browned bits add incredible depth. If there’s excessive fat, you can drain some, but leave a bit for flavor.
Step 3: Add Spices and Tomato Paste
Sprinkle in the chili powder, cumin, smoked paprika, oregano, cayenne pepper, salt, and black pepper. Stir everything together for about 1 minute until the spices coat the meat and become fragrant. Add the tomato paste and mix thoroughly. Cooking the tomato paste for a minute or two removes any raw taste and concentrates its flavor.
Step 4: Add Liquids and Tomatoes
Pour in the crushed tomatoes, diced tomatoes with green chilies, and beef broth. Stir everything together, making sure to scrape up any browned bits stuck to the bottom of the pot (this is called deglazing and prevents the dreaded “burn” notice). The liquid should just cover the ingredients.
Step 5: Pressure Cook
Cancel the “Sauté” mode and secure the lid on your Instant Pot. Make sure the pressure valve is set to “Sealing.” Select “Manual” or “Pressure Cook” mode and set the timer for 15 minutes on high pressure. The pot will take about 10 minutes to come to pressure before the cooking time begins.
Step 6: Natural Release
When the cooking time ends, let the pressure release naturally for 10 minutes. This means you don’t touch anything—just let it sit. After 10 minutes, carefully turn the valve to “Venting” to release any remaining pressure. Once the float valve drops, it’s safe to open the lid.
Step 7: Final Adjustments
Give the chili a good stir. If it looks too thin, turn on “Sauté” mode again and simmer uncovered for 5-10 minutes until it reaches your desired thickness. Taste and adjust seasonings—sometimes I add an extra pinch of salt or a squeeze of lime juice to brighten everything up.
What to Serve Keto Chili Instant Pot With
This versatile chili pairs beautifully with so many keto-friendly options! Here are my favorite serving suggestions:
Low-Carb Sides:
- Cauliflower rice seasoned with lime and cilantro
- Keto cornbread made with almond flour
- Simple green salad with ranch dressing
Toppings Bar Ideas: Set out small bowls of shredded cheddar cheese, sour cream, diced avocado, sliced green onions, fresh cilantro, sliced jalapeños, and lime wedges. Let everyone build their perfect bowl!

Top Tips for Perfecting Keto Chili Instant Pot
Choose the Right Meat Blend
Use 80/20 ground beef instead of extra lean. The fat content keeps the chili moist and flavorful. If you prefer leaner meat, consider adding a tablespoon of butter or extra oil to compensate.
Don’t Skip the Sauté Step
Browning the aromatics and meat develops complex flavors that pressure cooking alone can’t achieve. Those caramelized bits are where the magic happens! Take your time with this step.
Layer Your Spices
Adding spices before pressure cooking allows them to bloom properly. However, some delicate herbs can lose potency, so I sometimes stir in an extra teaspoon of cumin after cooking for a fresher taste.
Control the Heat Level
Start with less cayenne pepper if you’re sensitive to spice. You can always add hot sauce at the table, but you can’t take heat away once it’s cooked in. Conversely, if you love spice, try adding a diced jalapeño or serrano pepper with the aromatics.
Deglaze Thoroughly
Make absolutely sure you scrape up all those browned bits from the bottom of the pot after adding the liquids. Any stuck-on pieces can trigger the burn warning. Use a wooden spoon and be thorough!
Thicken Naturally
If your chili is too thin, resist the urge to add flour or cornstarch (both high-carb). Instead, simmer it uncovered on sauté mode, or add a tablespoon of tomato paste. Some people even blend a portion of the chili and stir it back in for extra thickness.
Make It Ahead
Chili actually tastes better the next day after the flavors meld together. Make it on Sunday for easy weekday meals. The flavors deepen and become more harmonious with time.
Storing and Reheating Tips
Refrigerator Storage: Let the chili cool completely, then transfer to airtight containers. It will stay fresh in the refrigerator for up to 5 days. I like using individual portion containers for grab-and-go lunches.
Freezer Storage: This chili freezes exceptionally well! Portion it into freezer-safe containers or heavy-duty freezer bags, leaving about an inch of space at the top for expansion. Label with the date and freeze for up to 3 months. Pro tip: freeze in flat bags that stack easily and thaw quickly.
Thawing: For best results, thaw frozen chili in the refrigerator overnight. If you’re in a hurry, you can thaw it in the microwave using the defrost setting, stirring occasionally.
Reheating on Stovetop: Place chili in a pot over medium heat, stirring occasionally until heated through (about 8-10 minutes). Add a splash of beef broth or water if it’s too thick.
Reheating in Microwave: Transfer a portion to a microwave-safe bowl, cover loosely, and heat on high for 2-3 minutes, stirring halfway through. Add 30-second intervals if needed.
Reheating in Instant Pot: Place frozen or refrigerated chili in the pot with a splash of liquid. Use the “Sauté” function and stir until heated through, or pressure cook frozen chili on high for 5 minutes with quick release.
Frequently Asked Questions
Can I use ground turkey instead of ground beef?
Absolutely! Ground turkey works wonderfully in this recipe, though it will result in a slightly lighter flavor. I recommend using 85/15 ground turkey (not extra lean) to maintain moisture. You might want to add an extra tablespoon of oil and consider adding a teaspoon of beef bouillon for deeper flavor.
How can I make this chili spicier?
There are several ways to increase the heat! Add more cayenne pepper, include fresh jalapeños or serrano peppers with the aromatics, use hot chili powder instead of regular, or stir in some sugar-free hot sauce after cooking. I love adding a chopped chipotle pepper in adobo sauce for smoky heat.
Is this recipe truly keto-friendly?
Yes! Each serving contains approximately 8-10 net carbs, depending on your exact ingredients and portion size. The tomatoes contribute most of the carbs, but they’re essential for authentic chili flavor. If you need lower carbs, reduce the tomatoes by half and add extra beef broth.
Can I double this recipe?
You can, but be careful not to exceed your Instant Pot’s maximum fill line (usually two-thirds full). For larger batches, I recommend making two separate pots or using a bigger Instant Pot model. The cooking time stays the same—pressure cooking doesn’t increase with volume.
Why does my Instant Pot show a “burn” warning?
This usually happens when there’s not enough liquid or food is stuck to the bottom. Make sure to deglaze thoroughly after browning the meat, scraping up all stuck bits. Also, ensure your tomato paste is well-mixed and not sitting in clumps on the bottom.
Can I use fresh tomatoes instead of canned?
While you can, I don’t recommend it. Fresh tomatoes contain less concentrated flavor and more water, which can make your chili bland and thin. If you must use fresh, you’ll need about 4-5 pounds, and you should peel and dice them first.
What if I don’t have an Instant Pot?
You can make this on the stovetop! Follow the same steps but simmer covered on low heat for 45-60 minutes, stirring occasionally. You can also use a slow cooker—brown the meat and aromatics first, then transfer everything to the slow cooker and cook on low for 6-8 hours.
How do I reduce the acidity from tomatoes?
If the chili tastes too acidic, stir in ½ teaspoon of baking soda after cooking (it will fizz briefly). Alternatively, add a tablespoon of butter or a teaspoon of sugar substitute like erythritol to balance the flavors.
Tips for Avoiding Common Mistakes
Mistake #1: Overcrowding the Instant Pot
Don’t fill your pot beyond the two-thirds line. Pressure cookers need space for steam to build properly. An overfilled pot can result in uneven cooking and potential safety issues.
Mistake #2: Using Extra Lean Meat
While it seems healthier, extra lean ground beef (90/10 or higher) produces dry, crumbly chili. The fat is necessary for flavor and moisture. Stick with 80/20 ground beef for the best results.
Mistake #3: Adding Dairy During Pressure Cooking
Never add sour cream, cream cheese, or heavy cream before pressure cooking—they’ll separate and curdle. Always stir in dairy products after cooking is complete and the pressure has been released.
Mistake #4: Not Adjusting Spices After Cooking
Pressure cooking can mellow spices. Always taste your chili after cooking and adjust seasonings as needed. I usually add a bit more cumin and a squeeze of lime at the end.
Mistake #5: Quick Releasing Too Soon
Letting the pressure release naturally for at least 10 minutes prevents the meat from becoming tough and keeps liquids from splattering everywhere. Be patient!
Mistake #6: Forgetting to Deglaze
Those stuck brown bits aren’t just a cleaning hassle—they can trigger the burn warning. After browning meat, add your liquid and thoroughly scrape the bottom with a wooden spoon.
Mistake #7: Not Letting Flavors Meld
Chili always tastes better after sitting for a few hours or overnight. If possible, make it ahead and reheat before serving for maximum flavor development.
Nutrition Information
| Nutrient | Per Serving (1.5 cups) |
|---|---|
| Calories | 385 |
| Total Fat | 24g |
| Saturated Fat | 9g |
| Protein | 32g |
| Total Carbohydrates | 14g |
| Dietary Fiber | 4g |
| Net Carbohydrates | 10g |
| Sodium | 680mg |
| Potassium | 890mg |
Nutritional values are approximate and based on 8 servings. Values may vary depending on specific brands and ingredients used.
Final Thoughts
This Keto Chili Instant Pot recipe has become a staple in my house, and I hope it becomes one in yours too! There’s something incredibly comforting about a bowl of hearty chili that doesn’t derail your health goals. The Instant Pot makes it accessible for busy weeknights, while the depth of flavor makes it worthy of weekend gatherings.
What I love most is how forgiving this recipe is. Forgot to buy bell peppers? No problem. Want to add more vegetables? Go for it. Prefer it spicier or milder? Easy to adjust. That’s the beauty of a well-balanced base recipe—it’s a starting point for your own creativity.
Don’t forget to top your bowl generously with all those delicious keto-friendly toppings. The cool sour cream against the warm, spicy chili, the creamy avocado, the sharp cheddar—it’s a symphony of textures and flavors in every bite.
Make a big batch this weekend, and thank yourself all week long when you have delicious, nutritious meals ready to go. Your Instant Pot is waiting!
Have you tried this recipe? I’d love to hear how it turned out! Leave a comment below and let me know what toppings you used. Happy cooking!