
Keto Chili Dog Casserole – The Ultimate Low-Carb Comfort Food Recipe
Transform your favorite ballpark treat into a low-carb masterpiece! This Keto Chili Dog Casserole combines all the flavors you love—smoky hot dogs, rich homemade chili, and melted cheese—without the bun. It’s incredibly simple, budget-friendly, and perfect for busy weeknights when you need something the whole family will devour.
What is Keto Chili Dog Casserole?
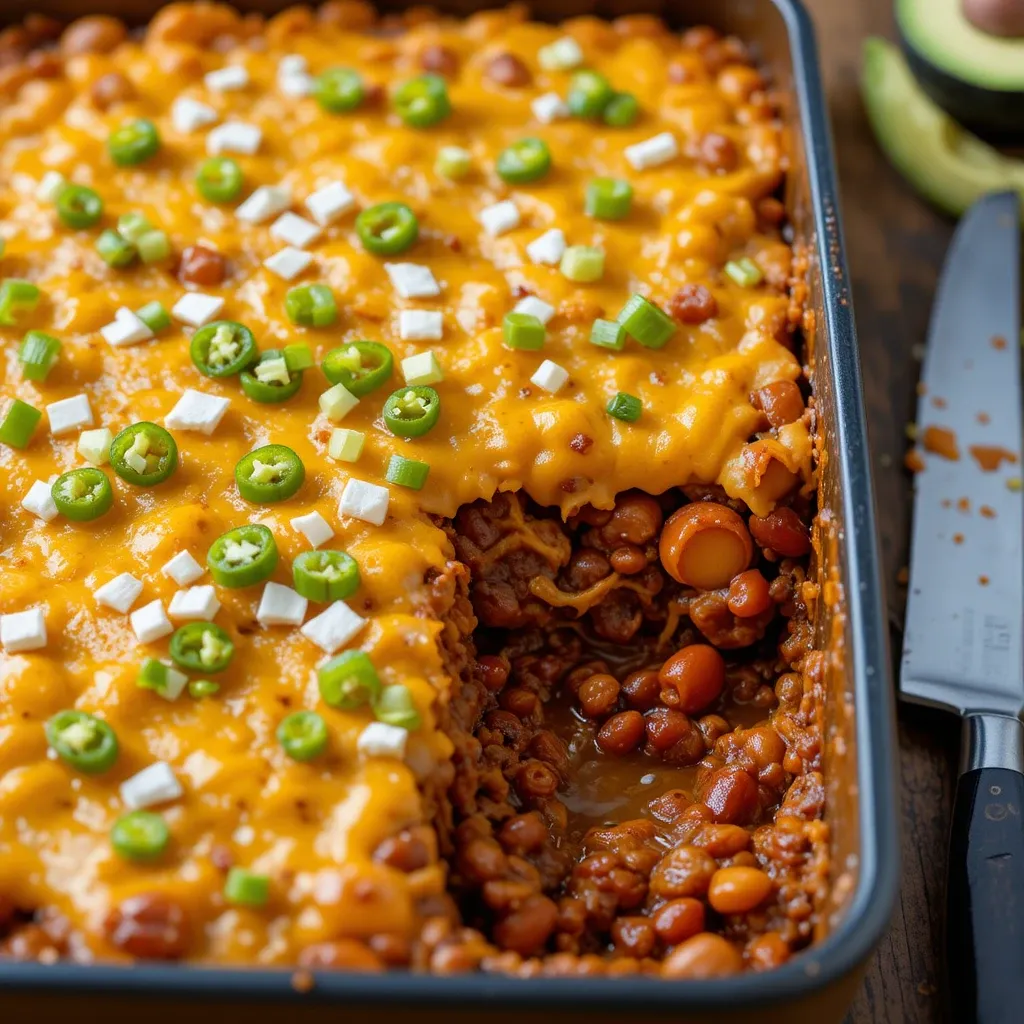
This casserole layers beef hot dogs with hearty, beanless chili and topped with gooey melted cheddar cheese. Unlike traditional chili dogs that leave you feeling heavy, this keto version keeps you satisfied while staying on track with your low-carb goals. It’s comfort food that actually supports your health!
Why You’ll Love This Recipe
Quick and Easy: With just 15 minutes of prep and 20 minutes in the oven, dinner is ready in under 40 minutes.
Budget-Friendly: Feeds 6-8 people for under $20—that’s less than $3 per serving! Ground beef and hot dogs are affordable proteins that stretch your dollar.
Kid-Approved: Even picky eaters love this one. It tastes like classic chili dogs without any “diet food” vibes.
Customizable: Top with sour cream, jalapeños, diced onions, avocado, sugar-free ketchup, or mustard. Everyone can make it their own!
Meal Prep Magic: Leftovers taste even better the next day and freeze beautifully for up to 3 months.
Recipe Overview
Prep Time: 15 minutes
Cook Time: 35-40 minutes (15 min stovetop + 20 min baking)
Total Time: 50-55 minutes
Servings: 6-8 people
Not personally tested, this recipe was created with AI guidance, and we do our best to ensure accuracy.
Ingredients
For the Chili:
- 1½ pounds ground beef (80/20 blend recommended)
- 1 small onion, diced
- 1 bell pepper, diced (any color)
- 3 cloves garlic, minced
- 1 can (14.5 oz) diced tomatoes, undrained
- 1 can (8 oz) tomato sauce
- 2 tablespoons tomato paste
- 2 tablespoons chili powder
- 1 teaspoon ground cumin
- 1 teaspoon paprika
- ½ teaspoon dried oregano
- ¼ teaspoon cayenne pepper (optional, for heat)
- ½ teaspoon salt (or to taste)
- ½ teaspoon black pepper
- ½ cup beef broth
For the Casserole:
- 8-10 all-beef hot dogs (look for zero or very low carb options)
- 2 cups shredded cheddar cheese, divided
Optional Toppings:
- Sour cream
- Sliced jalapeños
- Diced onions
- Shredded lettuce
- Avocado slices
- Sugar-free ketchup
- Yellow mustard
- Chopped green onions

Step-by-Step Instructions
Step 1: Preheat and Prep
Preheat your oven to 350°F (177°C). Grease a 9×13 inch baking dish with butter or cooking spray. Dice your onion and bell pepper, and mince your garlic. Having everything ready makes the process smooth.
Step 2: Make the Chili
Heat a large skillet or pot over medium-high heat. Add the ground beef and cook for 5-6 minutes, breaking it apart with a wooden spoon until browned. Don’t drain all the fat—leave about 2 tablespoons for flavor.
Add the diced onion and bell pepper to the beef. Cook for 3-4 minutes until softened. Add the minced garlic and cook for 30 seconds until fragrant.
Stir in the diced tomatoes (with juices), tomato sauce, tomato paste, chili powder, cumin, paprika, oregano, cayenne (if using), salt, pepper, and beef broth. Mix thoroughly.
Bring the mixture to a boil, then reduce heat to medium-low. Let it simmer for 15-20 minutes, stirring occasionally, until the chili thickens nicely. The longer it simmers, the better the flavors develop. Taste and adjust seasonings as needed.
Step 3: Prepare the Hot Dogs
While your chili simmers, slice the hot dogs. You have two options:
- Sliced: Cut into ½-inch rounds for easier eating
- Split lengthwise: Cut each hot dog in half lengthwise for a more traditional presentation
If you have time, brown the hot dog pieces in a skillet with 1 tablespoon butter for 3-4 minutes. This adds delicious flavor, but you can skip it if you’re short on time.
Step 4: Assemble the Casserole
Arrange the hot dogs in a single layer at the bottom of your greased baking dish. If using split hot dogs, place them cut-side up.
Pour the hot chili mixture evenly over the hot dogs, covering them completely.
Sprinkle the shredded cheddar cheese generously over the top—use all 2 cups for that irresistible golden, bubbly finish.
Step 5: Bake
Place the casserole in the preheated oven and bake for 15-20 minutes, until the cheese is melted, bubbly, and starting to turn golden brown around the edges. The casserole should be heated through completely.
For an extra-crispy cheese top, place under the broiler for the last 2-3 minutes of baking. Watch it closely to prevent burning!
Step 6: Serve
Remove from the oven and let rest for 5 minutes. This allows everything to set slightly for easier serving. Scoop generous portions into bowls and let everyone add their favorite toppings.
What to Serve It With
This casserole is hearty enough to be a complete meal, but these sides complement it beautifully:
- Fresh Green Salad: Baby spinach, cucumber, cherry tomatoes, and avocado with ranch dressing adds crisp freshness
- Cauliflower Rice: Soaks up extra chili sauce without adding carbs
- Keto Coleslaw: Cool, creamy slaw with tangy vinegar cuts through the richness
- Roasted Vegetables: Broccoli, green beans, or Brussels sprouts with garlic butter
- Keto Cornbread: If you want to go all out with comfort food
Drinks: Unsweetened iced tea, sparkling water with lime, or diet soda all pair wonderfully.
Top Tips for Success
Choose Quality Hot Dogs
Read those labels! Look for all-beef hot dogs with zero carbs and minimal fillers. Brands like Hebrew National, Applegate Farms, and Boar’s Head make excellent keto-friendly options. Better quality hot dogs = better tasting casserole.
Don’t Skip the Simmer
Let your chili simmer for the full 15-20 minutes. This develops deep, complex flavors. If you skip this step, your chili will taste flat. Low and slow wins the race!
Prevent Watery Chili
Make sure your chili isn’t too thin. If it looks soupy after simmering, let it reduce for a few more minutes uncovered. You want thick, scoopable chili, not soup. This prevents a soggy casserole.
Add More Veggies (Optional)
Want to sneak in extra nutrition? Add diced zucchini or mushrooms when you sauté the onions and peppers. Your kids won’t even notice!
Make It Your Own
- Swap ground turkey or chicken for the beef if you prefer lighter meat
- Use pepper jack cheese for extra spice
- Mix in cream cheese with the chili for extra richness
- Add a layer of fresh spinach—it wilts during baking
Get That Perfect Cheese Top
For golden, slightly crispy cheese, place the casserole under the broiler for 2-3 minutes at the end. Watch it closely—broilers work fast! You want bubbly perfection, not burnt cheese.
Storage and Reheating
Refrigerator Storage
Let the casserole cool completely to room temperature. Cover tightly with plastic wrap or aluminum foil, or transfer individual portions to airtight containers. Store in the refrigerator for up to 4 days.
Freezer Instructions
This casserole freezes wonderfully! Cut into individual portions and wrap each piece tightly in plastic wrap, then place in freezer-safe containers or bags. It’ll stay fresh for up to 3 months. Label with the date.
To freeze the entire casserole, wrap the whole dish in plastic wrap, then add a layer of foil for extra protection against freezer burn.
Reheating
Oven method (best results): Reheat at 325°F for 15-20 minutes for the whole casserole, or 10-12 minutes for individual portions. Cover with foil to prevent the top from drying out.
Microwave method: Heat individual portions on 70% power for 2-3 minutes, stirring halfway through. The microwave works in a pinch, but the oven gives you that freshly-baked texture.
From frozen: Thaw overnight in the fridge first for even heating.
Pro tip: Add a tablespoon of water or broth when reheating to restore moisture. Top with fresh cheese during the last few minutes of reheating for that just-baked look.
Nutrition Information
Per Serving (1/8 of recipe):
- Calories: 476
- Total Fat: 39g
- Saturated Fat: 17g
- Protein: 25g
- Total Carbs: 6g
- Fiber: 1.5g
- Net Carbs: 4.5g
- Sugar: 3g
- Sodium: 1015mg
- Cholesterol: 105mg
Note: Nutrition information is estimated and will vary based on specific brands and ingredients used. These values are based on tested recipes using standard keto-friendly ingredients.
Frequently Asked Questions
Can I make this casserole ahead of time?
Absolutely! You can prepare the chili up to 3 days in advance and store it in the refrigerator. When ready to serve, assemble the casserole with hot dogs and cheese, then bake as directed. The entire assembled casserole can also be refrigerated for up to 24 hours before baking—just add 5-10 minutes to the baking time if starting cold.
What if I don’t have beef broth?
You can substitute chicken broth or vegetable broth. For a richer flavor, use water mixed with a beef bouillon cube. In a pinch, just use water, though the flavor won’t be quite as deep.
Can I use turkey or chicken hot dogs?
Yes, but check the carb counts carefully! Turkey and chicken hot dogs often contain more fillers and added sugars than all-beef varieties. If you find a quality low-carb option, it will work fine. The flavor will be slightly different—less rich and smoky—but still delicious.
How do I know when the casserole is done?
The cheese should be melted, bubbly, and golden brown. The casserole should be heated through completely—you can insert a knife in the center to check that it’s hot all the way through.
Is this recipe kid-friendly?
Definitely! Kids love hot dogs and chili, and the casserole format makes it fun. If your kids are sensitive to spice, reduce or omit the cayenne pepper and use mild chili powder. Let them add their own toppings—kids love being involved!
Can I add beans?
Traditional keto avoids beans due to their higher carb content. However, if you want to add them for non-keto family members, black soybeans are a low-carb option with only 1 net carb per serving. You can also make half the casserole with beans and half without.
Can I double this recipe?
Yes! Use two 9×13 inch pans or one extra-large roasting pan. The baking temperature stays the same, but you may need to add 5-10 minutes to the baking time. This recipe is perfect for potlucks, game day parties, or weekly meal prep.
What’s the best way to slice clean portions?
Let the casserole rest for 5 minutes after baking—this helps it set. Use a sharp knife or large spoon to scoop out portions. This isn’t a firm casserole that slices into perfect squares, so serving it in bowls works best.
Common Mistakes to Avoid
Using Watery Chili
Excess liquid makes your casserole soupy. Always simmer your chili until it’s thick and scoopable. If using canned tomatoes, you can drain some liquid if needed. A thick chili is essential!
Not Seasoning Enough
Ground beef needs generous seasoning. Taste your chili before assembling and adjust the spices. Don’t be shy—bold flavors make this dish shine. You can always use less cayenne if you’re sensitive to heat, but don’t skimp on the other seasonings.
Skipping the Chili Simmer Time
Resist the urge to rush! That 15-20 minute simmer is crucial for developing deep flavors. The spices bloom, tomatoes break down, and everything melds together. Skipping this creates flat, one-dimensional flavor.
Forgetting to Grease the Pan
An ungreased pan means your casserole will stick stubbornly. Use plenty of butter or cooking spray, getting into all the corners. Your future self will thank you!
Using High-Carb Hot Dogs
Some hot dogs contain fillers, sugars, and starches that add unwanted carbs. Always read the label and choose hot dogs with 0-1g carbs per serving. All-beef hot dogs with minimal ingredients work best.
Make It Even Better
Want to take this casserole to the next level? Try these variations:
Chili Cheese Dog Wraps: Wrap hot dogs in low-carb tortillas before placing in the baking dish. Pour chili and cheese over the top.
Loaded Chili Dog Casserole: Add layers of sour cream mixed with cream cheese between the hot dogs and chili.
BBQ Twist: Mix 2 tablespoons of sugar-free BBQ sauce into your chili for a sweet and tangy flavor.
Breakfast Version: Use breakfast sausages instead of hot dogs and add a layer of scrambled eggs under the chili.
Pizza Style: Add Italian seasonings to the chili and use mozzarella cheese instead of cheddar.
Final Thoughts
This Keto Chili Dog Casserole proves that eating low-carb doesn’t mean giving up comfort food. It’s hearty, satisfying, budget-friendly, and brings everyone to the table with smiles. The combination of smoky hot dogs, rich chili, and gooey cheese creates pure magic in every bite.
The best part? It’s genuinely simple to make using straightforward techniques and common ingredients. Whether you’re feeding your family on a busy weeknight or hosting game day, this casserole delivers every single time. And those leftovers? They might taste even better the next day when all the flavors have had time to mingle.
So grab your ingredients, preheat that oven, and get ready to create something truly special. Your taste buds will thank you, your family will request seconds, and you’ll feel great knowing you created a delicious meal that supports your health goals.
Happy cooking! Don’t forget to snap a photo before everyone digs in—this casserole disappears fast!