
How To Prepare Salmon For Sushi
Picture this: silky, buttery salmon that melts in your mouth, perfectly prepared for the ultimate sushi experience. Learning how to prepare salmon for sushi at home might seem intimidating, but it’s surprisingly simple once you know the secrets.
Did you know that salmon wasn’t traditionally used in Japanese sushi until the 1980s? Norwegian seafood companies introduced it to Japan, and now it’s one of the most beloved sushi varieties worldwide! This guide will transform you from a sushi novice to a confident home chef who can create restaurant-quality salmon sushi.
Unlike our popular California Roll Tutorial, this recipe focuses on the art of preparing the star ingredient itself. Get ready to impress your family and friends with perfectly prepared salmon that rivals your favorite sushi restaurant!
Table of Contents
What is Salmon Sushi Preparation?
Ever wondered why some salmon tastes like heaven while others fall flat? The secret lies in proper preparation! How to prepare salmon for sushi isn’t just about slicing fish – it’s an art form that combines food safety, technique, and presentation. Think of it like preparing a canvas for a masterpiece painting.
The Japanese have a saying: “The knife is the soul of sushi,” and nowhere is this more true than with salmon preparation.
As they say, the way to a man’s heart is through his stomach, and perfectly prepared salmon sushi is guaranteed to steal hearts! Ready to master this essential skill and create sushi magic in your own kitchen?
Why You’ll Love This Salmon Sushi Preparation:
The Ultimate Buttery Texture
Learning how to prepare salmon for sushi properly unlocks that signature buttery, melt-in-your-mouth texture that makes great sushi unforgettable. The key lies in selecting the right grade of salmon and using proper cutting techniques that preserve the fish’s natural oils and delicate structure.
Cost-Effective Home Dining
Making sushi at home saves you serious money compared to restaurant prices. A single piece of salmon sushi can cost $3-5 at restaurants, but preparing it yourself reduces the cost to under $1 per piece. You’ll get the same quality while controlling every aspect of preparation.
Fresh, Clean Flavors
When you prepare salmon for sushi at home, you control the freshness and quality. The clean, oceanic flavor of properly prepared salmon pairs beautifully with wasabi, pickled ginger, and soy sauce. Unlike our Spicy Tuna Roll recipe, salmon’s natural flavor shines without heavy seasonings.
Ready to create restaurant-quality salmon sushi in your own kitchen? Let’s dive into the preparation process!
How to Make Perfect Salmon Sushi Preparation:
Quick Overview
This salmon preparation method focuses on three essential elements: safety, technique, and presentation. The process is surprisingly straightforward and takes about 30 minutes from start to finish.
Total Time: 30 minutes Prep Time: 25 minutes Cutting Time: 5 minutes Skill Level: Beginner to Intermediate
Key Ingredients for Salmon Sushi Preparation:
For the Salmon:
- 1 lb sushi-grade salmon fillet (skin removed)
- 2 tablespoons coarse sea salt
- 1 tablespoon sugar
- 1 sheet nori (seaweed), optional
For Serving:
- Wasabi paste
- Pickled ginger
- Soy sauce
- Prepared sushi rice
Essential Tools:
- Sharp sashimi knife or very sharp chef’s knife
- Cutting board
- Paper towels
- Plastic wrap
Step-by-Step Instructions:
Step 1: Inspect and Clean the Salmon
Start by carefully examining your sushi-grade salmon fillet. Look for any remaining bones, scales, or dark spots. Remove any pin bones using tweezers or needle-nose pliers. Pat the salmon completely dry with paper towels. This step is crucial for proper preparation.
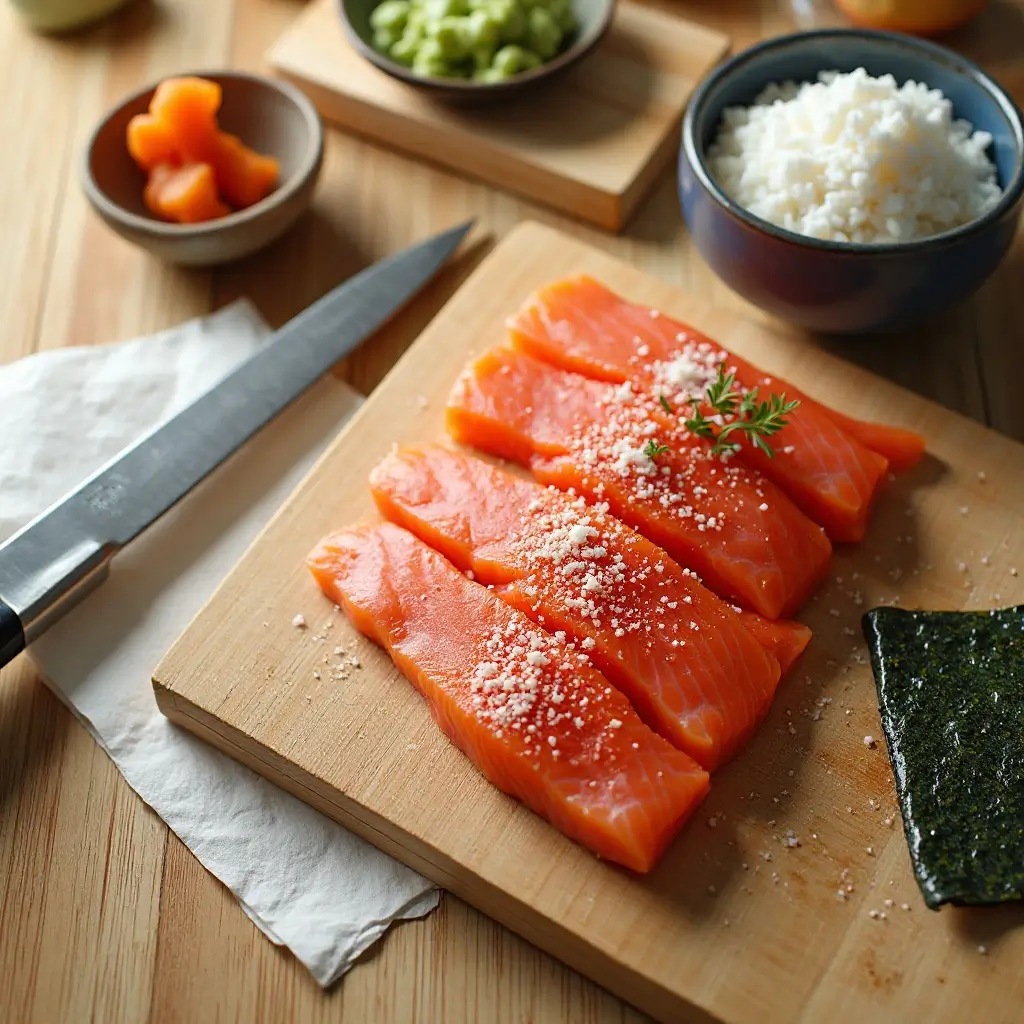
Step 2: Create the Cure (Optional but Recommended)
Mix the coarse sea salt and sugar in a small bowl. This light cure will firm up the salmon’s texture and enhance its flavor. Sprinkle the mixture evenly over both sides of the salmon fillet. Let it sit for 15-20 minutes at room temperature.
Step 3: Rinse and Dry
After curing, rinse the salmon thoroughly under cold water to remove all salt and sugar. Pat completely dry with paper towels. The salmon should feel firmer to the touch now.
Step 4: Prepare for Cutting
Place the salmon on a clean cutting board. If your fillet is large, cut it into manageable sections about 3-4 inches wide. This makes the slicing process much easier and more controlled.
Step 5: Master the Cutting Technique
Hold your knife at a 45-degree angle to the salmon. Start from the tail end and slice in one smooth motion, pulling the knife toward you. Each slice should be about 1/4 inch thick. Don’t saw back and forth – use one clean cut for each piece.
Step 6: Check Your Slices
Perfect salmon slices should be translucent around the edges with a clean, smooth surface. If you see rough or torn edges, your knife might need sharpening or your technique needs adjustment.
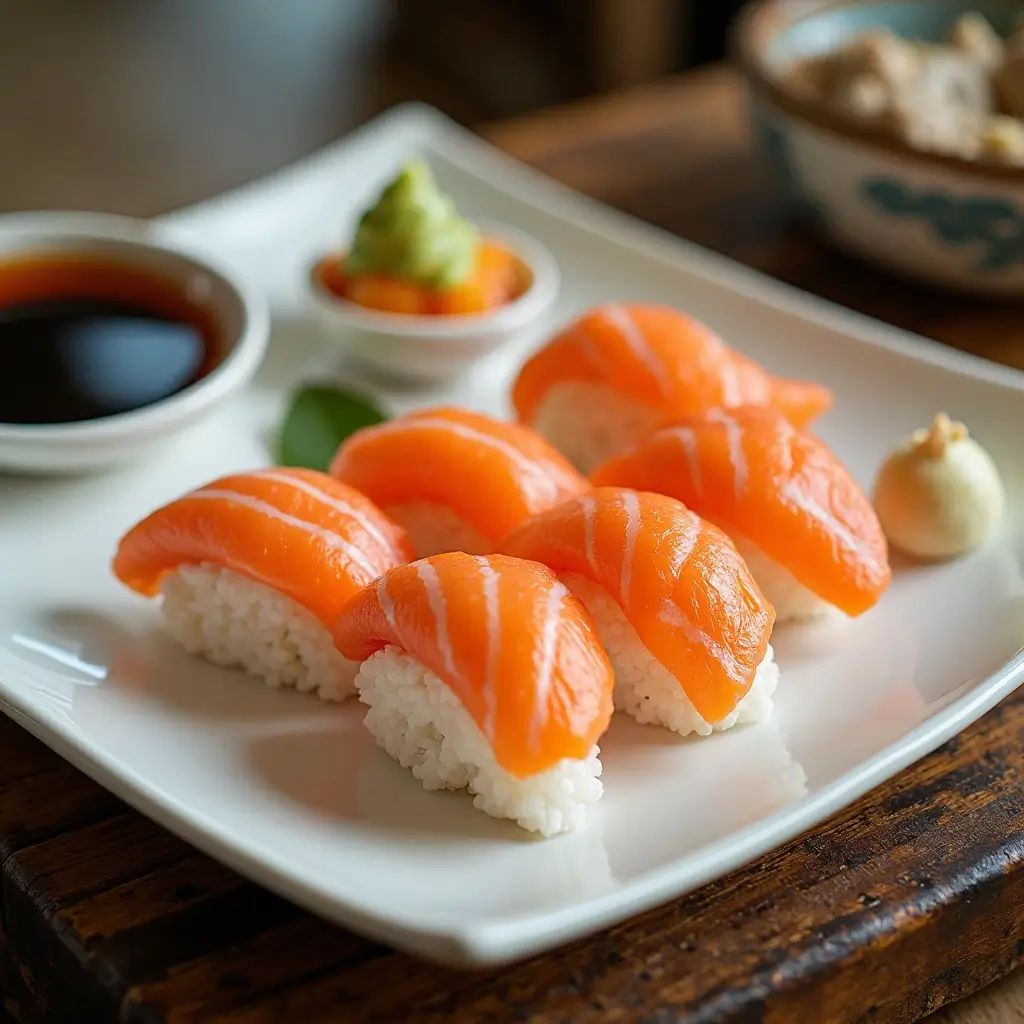
Step 7: Final Preparation
Arrange your salmon slices on a clean plate. Cover with plastic wrap and refrigerate until ready to use. Use within 2 hours for best quality and safety.
What to Serve Salmon Sushi With:
Traditional Accompaniments:
- Wasabi and pickled ginger for palate cleansing
- High-quality soy sauce for dipping
- Warm sake or green tea
Modern Pairings:
- Cucumber salad with rice vinegar dressing
- Miso soup as a warming starter
- Edamame for added protein
Top Tips for Perfecting Salmon Sushi Preparation:
Choose the Right Salmon
Always buy sushi-grade salmon from reputable fishmongers. Look for bright color, firm texture, and a clean ocean smell. Avoid any salmon with a fishy odor or slimy texture.
Knife Maintenance is Key
Keep your knife extremely sharp. A dull knife will tear the salmon instead of cleanly slicing it. Consider investing in a proper sashimi knife for best results.
Temperature Control
Work with cold salmon but not frozen. Take it out of the refrigerator 10 minutes before slicing to make cutting easier while keeping it food-safe.
Practice Your Technique
Don’t be discouraged if your first attempts aren’t perfect. Salmon preparation is a skill that improves with practice. Start with less expensive fish to practice your technique.
Timing Matters
Cut salmon just before serving for the best texture and flavor. Pre-cut salmon can become mushy and lose its appealing appearance.
Storing and Reheating Tips:
Storage Guidelines: Fresh salmon prepared for sushi should be used within 24 hours of purchase. Store cut salmon in the refrigerator covered with plastic wrap, but use within 2 hours of cutting for optimal safety and quality.
Freezing Options: While not ideal, you can freeze prepared salmon for up to 1 month. Wrap tightly in plastic wrap and aluminum foil. Thaw slowly in the refrigerator overnight before use.
Food Safety Notes: Always follow proper food safety guidelines when handling raw fish. Use separate cutting boards for fish and other ingredients. Wash hands thoroughly before and after handling raw salmon.
Leftover Ideas: If you have leftover prepared salmon, consider making salmon poke bowls, salmon salad, or cooking it lightly for cooked sushi options.
Nutritional Information
| Nutrient | Per 3 oz Serving |
|---|---|
| Calories | 175 |
| Protein | 25g |
| Fat | 8g |
| Omega-3 | 1.2g |
| Sodium | 85mg |
| Vitamin D | 360 IU |
Common Mistakes to Avoid
Using Regular Salmon: Never use regular grocery store salmon for sushi. Only sushi-grade fish has been properly frozen to eliminate parasites.
Dull Knives: A dull knife will mangle your beautiful salmon. Invest in proper knife maintenance or have your knives professionally sharpened.
Overhandling: The more you handle salmon, the more its texture breaks down. Work quickly and handle minimally.
Wrong Cutting Angle: Cutting straight down creates tough, chewy pieces. Always cut at an angle for tender, properly textured sushi.
Frequently Asked Questions
What makes salmon “sushi-grade”?
Sushi-grade salmon has been frozen at specific temperatures to eliminate parasites and is handled according to strict safety standards. Regular salmon from the grocery store is not safe for raw consumption.
Can I prepare salmon sushi ahead of time?
It’s best to cut salmon just before serving. However, you can prepare the cured salmon up to 4 hours ahead and store it whole in the refrigerator before slicing.
What’s the best type of salmon for sushi?
Atlantic salmon is most commonly used for sushi due to its rich flavor and buttery texture. King salmon (Chinook) is also excellent but more expensive.
How do I know if my salmon is fresh enough?
Fresh salmon should have bright color, firm texture, and smell like the ocean – not fishy. If you’re unsure, ask your fishmonger about the arrival date.
Can I use frozen salmon for sushi?
Yes, but only if it’s been properly frozen for sushi use. In fact, proper freezing is required to make salmon safe for raw consumption.
Final Thoughts
Mastering how to prepare salmon for sushi opens up a world of culinary possibilities in your home kitchen. With the right technique, quality ingredients, and a little practice, you’ll be creating restaurant-quality sushi that impresses everyone who tries it. Remember, the key to perfect salmon sushi lies in respecting the ingredient, maintaining proper food safety, and practicing your knife skills.
Start with small amounts until you perfect your technique, and don’t be afraid to experiment with different types of sushi-grade salmon to find your favorite. Soon, you’ll be the go-to sushi chef in your friend group, creating memorable dining experiences right at home.
Ready to take your sushi game to the next level? Grab some sushi-grade salmon and start practicing these techniques today!