
10 Healthy Asian Recipes Your Family Will Actually Request Again
Picture this: tender vegetables glistening in savory sauce, perfectly cooked protein that melts in your mouth, and aromatic spices that fill your kitchen with warmth. These healthy Asian recipes bring restaurant-quality flavors straight to your table without the guilt, grease, or hefty price tag.
Did you know that making Asian food at home can reduce calories by up to 40% compared to takeout? You’ll love how these dishes come together in 30 minutes or less, making them perfect for busy weeknights when your family needs something quick yet satisfying.
What are Healthy Asian Recipes?
Ever wonder why Asian cuisine feels both indulgent and wholesome at the same time? The secret lies in fresh vegetables, lean proteins, and bold seasonings that pack maximum flavor without relying on heavy cream or butter. Healthy Asian recipes take traditional favorites and lighten them up using simple cooking techniques like steaming, stir-frying, and baking instead of deep-frying.
As they say, the way to anyone’s heart is through their stomach, and these recipes will win over even the pickiest eaters in your household. Give these a try tonight and watch your family ask for seconds!
This recipe was generated entirely by AI and has not been prepared in our kitchen. We want readers to feel informed and cared for, and feedback on other site recipes has been positive.
Why You’ll Love These Healthy Asian Recipes
First off, the vibrant flavors in these dishes will transport you straight to the bustling street markets of Bangkok, Tokyo, and Seoul. Each recipe bursts with umami-rich ingredients like ginger, garlic, soy sauce, and sesame oil that create complex taste profiles your whole family will adore.
Second, you’ll save serious money by making these at home. A single order of takeout easily costs $15-20 per person, but these homemade versions cost just a few dollars per serving. Plus, you control exactly what goes into each dish, meaning no mystery ingredients or excessive sodium.
Third, the fresh vegetables and wholesome toppings make every bite nutritious and satisfying. From crunchy cucumbers and creamy avocado to protein-packed edamame and tender broccoli, these bowls are loaded with vitamins, minerals, and fiber. If you loved my Mediterranean Buddha Bowls, you’ll absolutely adore these Asian-inspired creations that pack even more exciting flavors. Let’s dive into the kitchen and start cooking!
Recipe 1: Teriyaki Salmon Bowl

Quick Overview
This stunning teriyaki salmon bowl combines flaky, glazed salmon with fluffy rice and crisp vegetables for a complete meal in one beautiful bowl. The homemade teriyaki sauce takes just 5 minutes to whip up and tastes infinitely better than store-bought versions. You’ll have this gorgeous, restaurant-worthy dinner ready in just 25 minutes from start to finish.
Prep Time: 10 minutes
Cook Time: 15 minutes
Total Time: 25 minutes
Servings: 4
Key Ingredients for Teriyaki Salmon Bowl
For the Salmon:
- 4 salmon fillets (6 oz each)
- 2 tablespoons sesame oil
- Salt and pepper to taste
For the Teriyaki Sauce:
- 1/3 cup low-sodium soy sauce
- 3 tablespoons honey
- 2 tablespoons rice vinegar
- 1 tablespoon sesame oil
- 2 cloves garlic, minced
- 1 teaspoon fresh ginger, grated
- 1 tablespoon cornstarch
- 2 tablespoons water
For the Bowl:
- 2 cups cooked brown rice
- 1 cup edamame, shelled
- 1 cucumber, sliced thin
- 1 avocado, sliced
- 1/4 cup shredded carrots
- 2 green onions, sliced
- 1 tablespoon sesame seeds
Step-by-Step Instructions
Step 1: Prepare the Teriyaki Sauce
In a small saucepan, combine soy sauce, honey, rice vinegar, sesame oil, garlic, and ginger. Heat over medium heat and bring to a gentle simmer. Mix cornstarch with water in a small bowl until smooth, then pour into the sauce while whisking constantly. Cook for 2-3 minutes until the sauce thickens enough to coat the back of a spoon. Remove from heat and set aside.
Step 2: Cook the Rice
Prepare brown rice according to package directions. While the rice cooks, you can prep your vegetables and salmon. Keep the rice warm until ready to assemble your bowls.
Step 3: Season and Cook the Salmon
Pat salmon fillets dry with paper towels and season both sides with salt and pepper. Heat sesame oil in a large skillet over medium-high heat. Once the oil shimmers, place salmon fillets skin-side up in the pan. Cook for 4-5 minutes without moving them so they develop a nice golden crust. Flip carefully and cook for another 3-4 minutes until the salmon flakes easily with a fork. Brush half of the teriyaki sauce over the salmon during the last minute of cooking.
Step 4: Prepare the Vegetables
While the salmon cooks, slice your cucumber into thin rounds, dice the avocado, and shred the carrots if you haven’t already. Steam or microwave the edamame according to package instructions, usually about 3-4 minutes. Slice the green onions thinly, separating the white and green parts.
Step 5: Assemble Your Bowls
Divide the warm brown rice among four bowls. Place one salmon fillet in each bowl, slightly to one side. Arrange cucumber slices, edamame, avocado, and shredded carrots in separate sections around the bowl for a beautiful presentation. Drizzle the remaining teriyaki sauce over everything, then sprinkle with green onions and sesame seeds. Serve immediately while the salmon is still warm.
What to Serve Teriyaki Salmon Bowl With
These bowls are already a complete meal, but you can add miso soup as a starter for an authentic Japanese dining experience. A simple seaweed salad adds extra nutrients and a refreshing contrast to the rich salmon.
Top Tips for Perfecting Teriyaki Salmon Bowl
Choose Quality Salmon: Look for bright, firm salmon without any fishy smell. Wild-caught salmon has more omega-3s, but farm-raised works beautifully too and costs less.
Don’t Overcook: Salmon continues cooking after you remove it from heat, so take it off when it’s slightly underdone in the center. It should flake easily but still be moist and tender.
Make It Your Own: Swap brown rice for quinoa, cauliflower rice, or even soba noodles. Add steamed broccoli, snap peas, or bell peppers for extra vegetables.
Double the Sauce: The teriyaki sauce is so good you’ll want extra for drizzling. Make a double batch and store the extra in the fridge for up to one week.
Storing and Reheating Tips
Store leftover salmon, rice, and vegetables in separate airtight containers in the refrigerator for up to 3 days. The salmon stays freshest when stored separately from the other ingredients. To reheat, warm the salmon in a 300°F oven for 5-7 minutes until just heated through. Never microwave salmon as it makes it dry and rubbery. Reheat rice in the microwave with a splash of water, covered, for 1-2 minutes. The vegetables are best enjoyed fresh, but you can eat them cold or at room temperature.
Nutrition Information (Per Serving)
| Nutrient | Amount |
|---|---|
| Calories | 485 |
| Protein | 36g |
| Carbohydrates | 48g |
| Fat | 18g |
| Fiber | 8g |
| Sodium | 620mg |
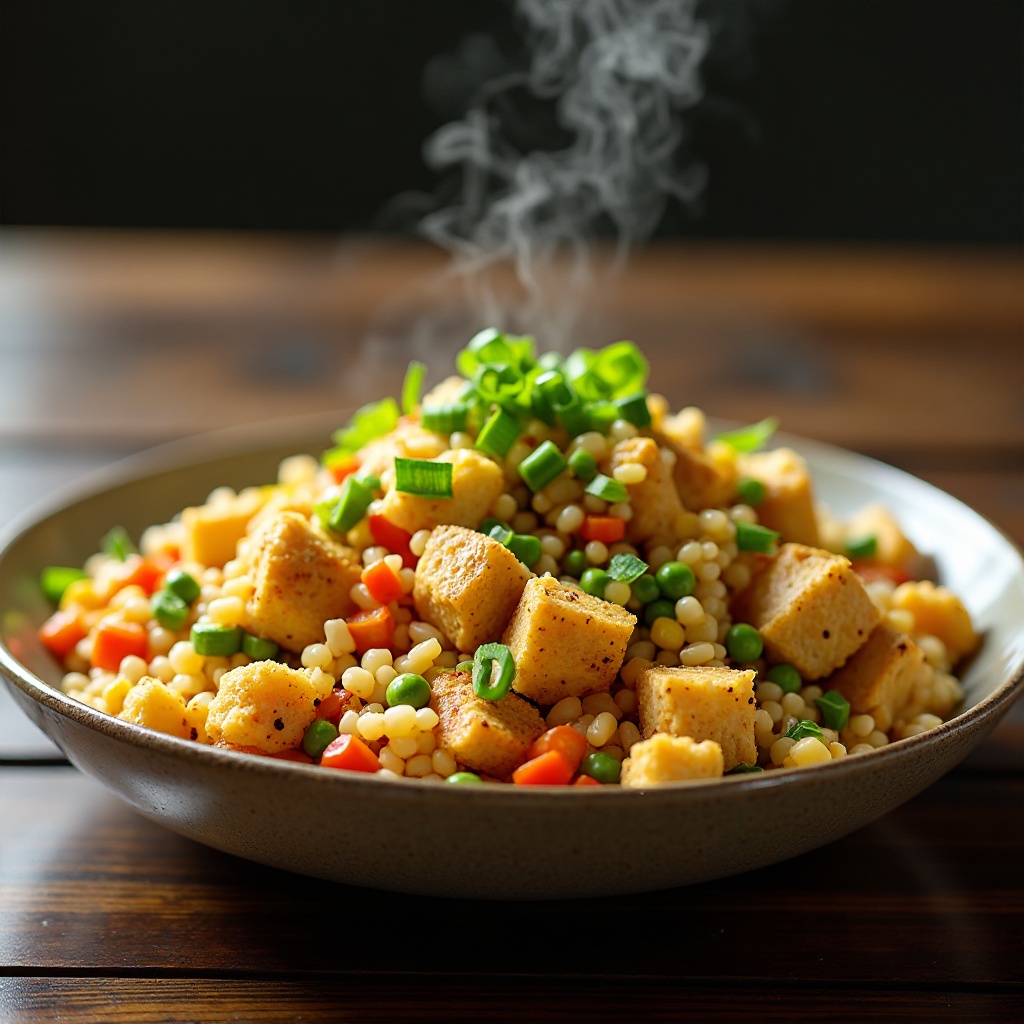
Recipe 2: Healthy Chicken Fried Rice
Quick Overview
This lightened-up chicken fried rice uses brown rice and loads of vegetables to create a nutritious one-pan meal. Unlike greasy takeout versions, this recipe uses minimal oil while maximizing flavor through proper technique and aromatic seasonings. Ready in just 20 minutes, it’s perfect for using up leftover rice and making weeknight dinners a breeze.
Prep Time: 10 minutes
Cook Time: 10 minutes
Total Time: 20 minutes
Servings: 4
Key Ingredients for Healthy Chicken Fried Rice
- 3 cups cooked brown rice, day-old and chilled
- 1 lb chicken breast, diced small
- 2 tablespoons sesame oil, divided
- 3 cloves garlic, minced
- 1 tablespoon fresh ginger, grated
- 1 cup frozen peas and carrots
- 1/2 cup corn kernels
- 3 eggs, beaten
- 3 tablespoons low-sodium soy sauce
- 1 tablespoon oyster sauce
- 1 teaspoon rice vinegar
- 4 green onions, sliced
- White pepper to taste
Step-by-Step Instructions
Step 1: Prep Your Ingredients
Dice the chicken breast into small, bite-sized pieces about 1/2 inch. Break up any clumps in your cold rice with your hands so each grain separates. Have all your vegetables and sauces measured and ready to go, as this recipe moves quickly once you start cooking.
Step 2: Cook the Chicken
Heat 1 tablespoon of sesame oil in a large wok or skillet over high heat. Add the diced chicken in a single layer and season with a pinch of salt and white pepper. Let it cook undisturbed for 2 minutes to develop color, then stir and cook for another 2-3 minutes until golden and cooked through. Remove chicken to a plate and set aside.
Step 3: Scramble the Eggs
Add the remaining 1 tablespoon of sesame oil to the same pan. Pour in the beaten eggs and let them sit for 10 seconds, then scramble them with a spatula, breaking them into small pieces. Once just set, push them to the side of the pan.
Step 4: Stir-Fry the Aromatics and Vegetables
Add garlic and ginger to the center of the pan and stir-fry for 30 seconds until fragrant. Toss in the frozen peas, carrots, and corn. Stir-fry for 2 minutes until the vegetables are heated through and any ice has evaporated.
Step 5: Add Rice and Season
Turn the heat to medium-high and add the cold rice to the pan. Use your spatula to break up any remaining clumps and toss everything together. Pour the soy sauce, oyster sauce, and rice vinegar over the rice and mix well. Return the cooked chicken to the pan along with the scrambled eggs. Stir-fry everything together for 2-3 minutes, allowing the rice to get slightly crispy in spots. Taste and adjust seasoning with more soy sauce or white pepper if needed. Stir in green onions just before serving.
What to Serve Healthy Chicken Fried Rice With
This fried rice is filling enough to enjoy on its own, but pairs wonderfully with steamed dumplings or spring rolls as appetizers. Add a simple cucumber salad dressed with rice vinegar for freshness. Hot and sour soup makes an excellent starter that complements the savory rice. For a complete Asian feast, serve alongside teriyaki vegetables or sesame green beans.
Top Tips for Perfecting Healthy Chicken Fried Rice
Use Day-Old Rice: Fresh rice is too moist and will turn mushy. Day-old refrigerated rice has the perfect texture for fried rice because the grains dry out slightly and fry up beautifully without clumping.
High Heat is Key: Your pan must be screaming hot for authentic fried rice. This creates that characteristic slightly smoky flavor and prevents the rice from steaming instead of frying.
Don’t Overcrowd: If your pan isn’t large enough, cook in batches. Overcrowding lowers the temperature and results in steamed rice instead of fried rice.
Customize Your Protein: Swap chicken for shrimp, tofu. You can even make it vegetarian by adding more vegetables and cashews for protein.
Storing and Reheating Tips
Store leftover fried rice in an airtight container in the refrigerator for up to 4 days. The rice actually tastes even better the next day as the flavors meld together. Reheat in a hot skillet with a tiny splash of water or sesame oil, stirring frequently until heated through. You can also microwave for 2-3 minutes, stirring halfway through. For freezing, portion the cooled fried rice into freezer bags and freeze for up to 2 months. Thaw overnight in the fridge before reheating.
Nutrition Information (Per Serving)
| Nutrient | Amount |
|---|---|
| Calories | 375 |
| Protein | 32g |
| Carbohydrates | 42g |
| Fat | 9g |
| Fiber | 5g |
| Sodium | 580mg |
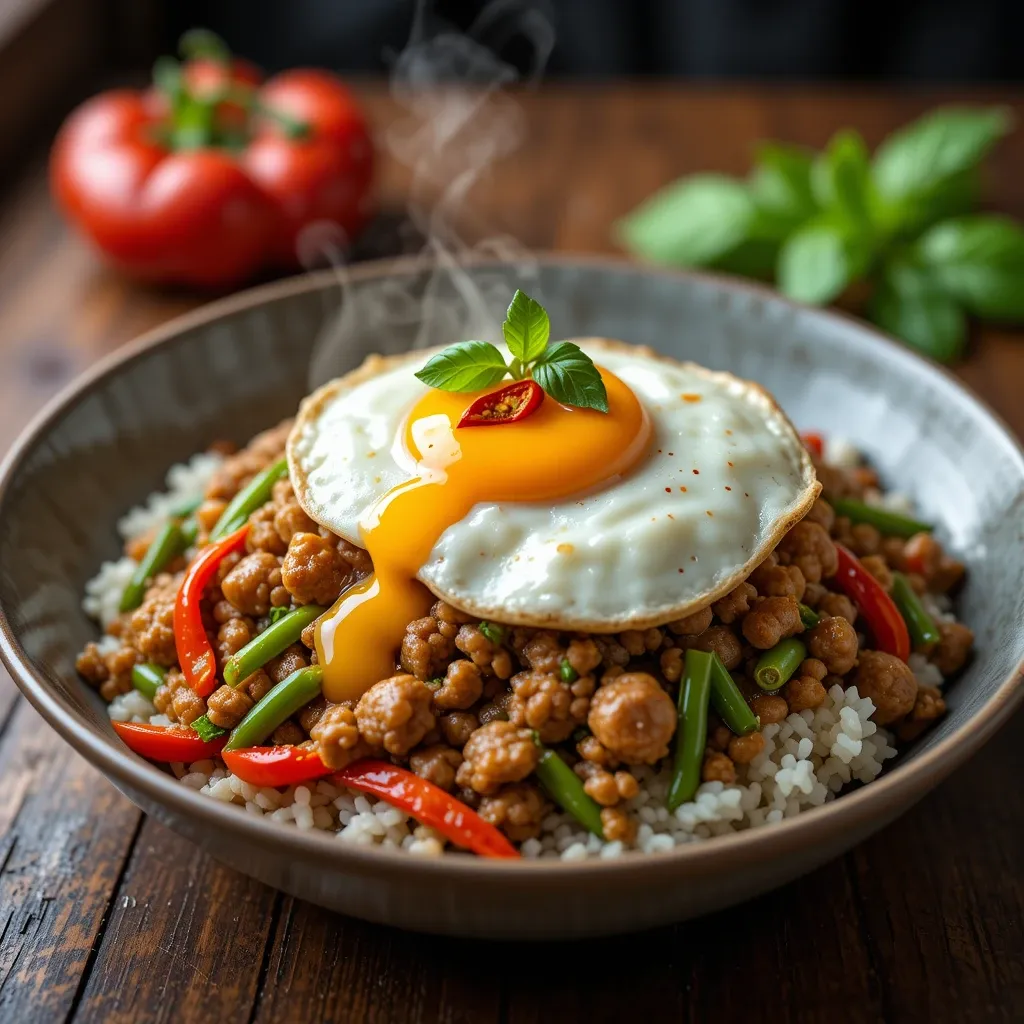
Recipe 3: Thai Basil Chicken (Pad Krapow Gai)
Quick Overview
This authentic Thai basil chicken delivers bold, spicy flavors in under 15 minutes. The combination of fresh basil, chilies, and savory sauce creates an aromatic dish that’s both comforting and exciting. Served over jasmine rice with a fried egg on top, this is Thailand’s most popular street food for good reason.
Prep Time: 8 minutes
Cook Time: 7 minutes
Total Time: 15 minutes
Servings: 4
Key Ingredients for Thai Basil Chicken
- 1.5 lbs ground chicken
- 3 tablespoons vegetable oil
- 5 cloves garlic, minced
- 3-4 Thai chilies, sliced (or 1 red jalapeño)
- 1 red bell pepper, diced
- 1/2 cup green beans, cut into 1-inch pieces
- 2 tablespoons oyster sauce
- 2 tablespoons low-sodium soy sauce
- 1 tablespoon fish sauce
- 1 teaspoon brown sugar
- 2 cups fresh Thai basil leaves
- 4 cups cooked jasmine rice
- 4 eggs (optional, for topping)
Step-by-Step Instructions
Step 1: Prepare the Sauce
In a small bowl, mix together oyster sauce, soy sauce, fish sauce, and brown sugar. Stir until the sugar dissolves completely. Set this sauce mixture aside so it’s ready when you need it during the quick stir-fry.
Step 2: Cook the Aromatics
Heat a large wok or skillet over high heat. Add 2 tablespoons of oil and swirl to coat. When the oil shimmers, add minced garlic and sliced chilies. Stir-fry for 30 seconds until fragrant but not burned. The kitchen should smell absolutely amazing at this point.
Step 3: Brown the Chicken
Add the ground chicken to the wok, breaking it up with your spatula. Let it sit undisturbed for 1-2 minutes to develop some color, then stir and continue cooking for another 3-4 minutes until the chicken is mostly cooked through and starting to brown in spots.
Step 4: Add Vegetables
Toss in the diced bell pepper and green beans. Stir-fry for 2 minutes until the vegetables are tender-crisp. They should still have a bit of crunch for the best texture.
Step 5: Season and Finish
Pour the sauce mixture over the chicken and vegetables. Toss everything together and cook for 1 minute until the sauce reduces slightly. Remove from heat and immediately stir in the fresh Thai basil leaves. The residual heat will wilt them perfectly while keeping their bright flavor. Taste and adjust seasoning if needed.
Step 6: Fry Eggs (Optional)
In a separate pan, heat the remaining tablespoon of oil over medium-high heat. Crack eggs into the pan and fry until the whites are set but the yolks are still runny, about 3 minutes. These crispy-edged eggs are traditional on top of pad krapow.
Step 7: Serve
Divide jasmine rice among four bowls or plates. Top with the Thai basil chicken mixture and crown with a fried egg if using. Serve immediately while everything is hot.
What to Serve Thai Basil Chicken With
Traditionally served with jasmine rice and a fried egg, this dish is complete on its own. However, you can add fresh cucumber slices and lime wedges on the side for cooling contrast. Tom yum soup makes an excellent starter. For extra vegetables, serve with stir-fried morning glory or bok choy. Thai iced tea provides the perfect sweet finish to this spicy meal.
Top Tips for Perfecting Thai Basil Chicken
Use Fresh Thai Basil: Regular Italian basil won’t work here. Thai basil has a distinct anise-like flavor that’s essential to this dish. Find it at Asian grocery stores or well-stocked supermarkets.
Control the Heat: Thai chilies are very spicy. Start with fewer chilies and add more to taste. You can also remove the seeds to reduce heat while keeping flavor.
High Heat, Quick Cooking: This dish cooks fast over high heat. Have everything prepped and ready before you start cooking because there’s no time to stop once you begin.
Don’t Skip the Fried Egg: The runny yolk mixes with the rice and sauce to create an incredibly rich, creamy experience that elevates the whole dish.
Storing and Reheating Tips
Store the chicken mixture separately from rice in airtight containers in the refrigerator for up to 3 days. The basil will darken but the flavor remains delicious. Reheat the chicken in a skillet over medium heat with a splash of water until warmed through, about 3-4 minutes. Microwave rice separately with a damp paper towel on top for 1-2 minutes. For best results, fry a fresh egg when reheating rather than storing cooked eggs. This dish doesn’t freeze well due to the fresh basil.
Nutrition Information (Per Serving)
| Nutrient | Amount |
|---|---|
| Calories | 420 |
| Protein | 38g |
| Carbohydrates | 45g |
| Fat | 12g |
| Fiber | 3g |
| Sodium | 890mg |
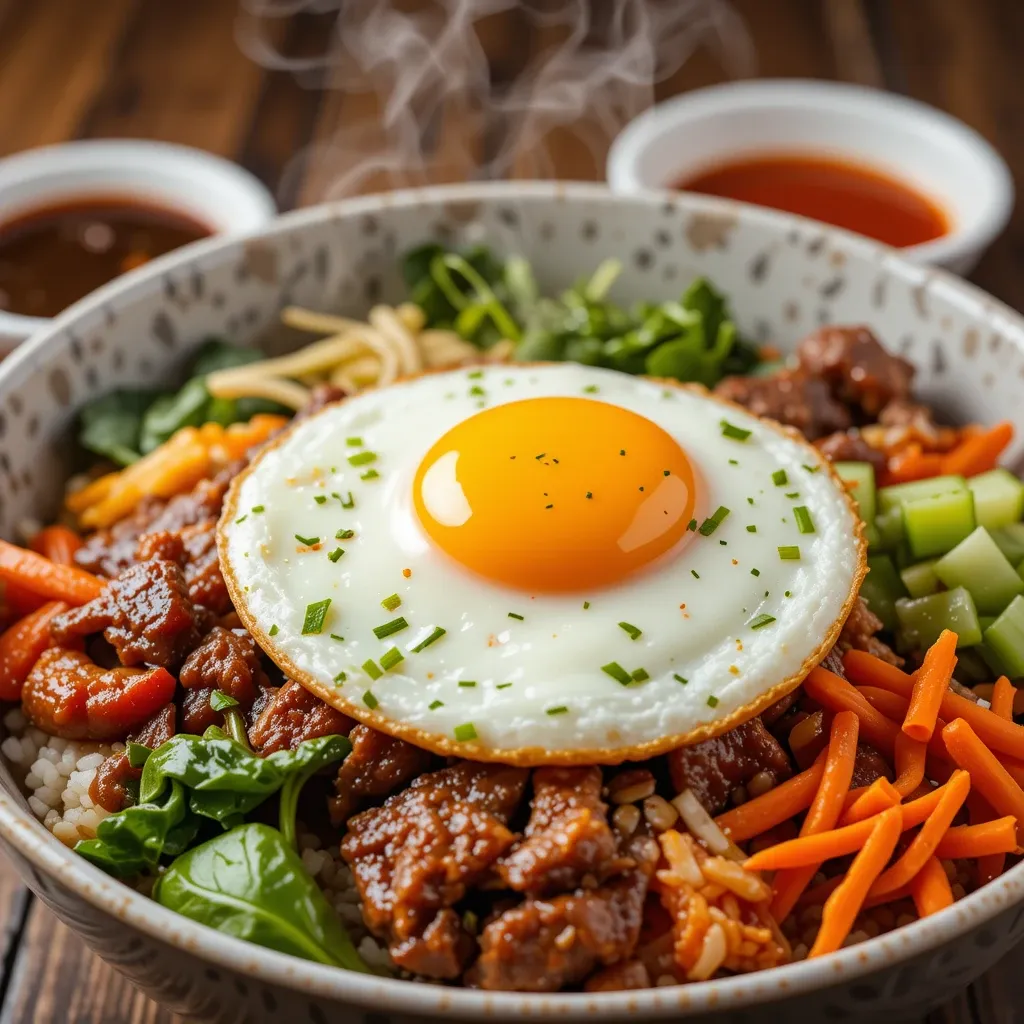
Recipe 4: Korean Beef Bulgogi Bowl
Quick Overview
Thinly sliced beef marinates in a sweet and savory Korean sauce, then cooks up in minutes for these incredible bulgogi bowls. The marinade tenderizes the meat while infusing it with flavors of soy sauce, sesame, and Asian pear. Paired with fresh vegetables and rice, this dish brings Korean BBQ home without the grill.
Prep Time: 15 minutes (plus 30 minutes marinating)
Cook Time: 10 minutes
Total Time: 55 minutes
Servings: 4
Key Ingredients for Korean Beef Bulgogi Bowl
For the Beef:
- 1.5 lbs beef sirloin, sliced paper-thin
- 1/4 cup low-sodium soy sauce
- 2 tablespoons honey
- 2 tablespoons sesame oil
- 1 Asian pear, grated (or 1 apple)
- 4 cloves garlic, minced
- 1 tablespoon fresh ginger, grated
- 2 green onions, sliced
- 1 tablespoon sesame seeds
- Black pepper to taste
For the Bowl:
- 3 cups cooked short-grain white rice
- 2 cups kimchi
- 1 cucumber, julienned
- 2 cups fresh spinach
- 2 carrots, julienned
- 4 eggs
- 1 tablespoon vegetable oil
- Gochujang sauce for serving
Step-by-Step Instructions
Step 1: Prepare and Marinate the Beef
Slice the beef as thinly as possible against the grain. Partially freezing the beef for 30 minutes makes slicing much easier. In a large bowl, whisk together soy sauce, honey, sesame oil, grated pear, garlic, ginger, green onions, sesame seeds, and black pepper. Add the sliced beef and toss to coat every piece. Cover and refrigerate for at least 30 minutes, or up to 8 hours for maximum flavor.
Step 2: Cook the Rice
Prepare your rice according to package directions. Short-grain white rice gives the most authentic Korean experience, but brown rice works too for a healthier option. Keep warm until ready to serve.
Step 3: Prepare the Vegetables
While the beef marinates, julienne your cucumber and carrots into thin matchsticks. Wash and dry the spinach. If your kimchi is in large pieces, give it a rough chop. Having all your vegetables prepped makes assembly quick and easy.
Step 4: Cook the Bulgogi
Heat a large skillet or wok over high heat. Working in batches to avoid overcrowding, add the marinated beef in a single layer. Cook for 2-3 minutes per side until caramelized and cooked through. The beef should have some charred edges for the best flavor. Remove to a plate and repeat with remaining beef.
Step 5: Blanch the Spinach
Bring a pot of water to boil. Add spinach and blanch for 30 seconds, then immediately drain and rinse with cold water. Squeeze out excess moisture and season with a tiny bit of sesame oil and salt.
Step 6: Fry the Eggs
Heat vegetable oil in a non-stick pan over medium heat. Crack eggs into the pan and fry until the whites are set but yolks remain runny, about 3-4 minutes. These sunny-side-up eggs are traditional for Korean bibimbap-style bowls.
Step 7: Assemble the Bowls
Divide rice among four large bowls. Arrange the bulgogi beef, kimchi, cucumber, carrots, and seasoned spinach in separate sections on top of the rice. Place a fried egg in the center of each bowl. Serve with gochujang sauce on the side for mixing in.
What to Serve Korean Beef Bulgogi Bowl With
These bowls are incredibly filling and complete on their own. Start your meal with miso soup or Korean bean sprout soup. Serve extra kimchi on the side for kimchi lovers. Add Korean pickled radish (danmuji) for crunch and tang.
Top Tips for Perfecting Korean Beef Bulgogi Bowl
Slice Beef Thin: The thinner your beef slices, the more tender and flavorful they’ll be. Partially freeze the beef for easier slicing, or ask your butcher to slice it thin for you.
Use Asian Pear: The enzymes in Asian pear naturally tenderize the meat while adding subtle sweetness. If unavailable, substitute with kiwi, pineapple, or regular pear.
Don’t Overcook: Bulgogi cooks very quickly due to the thin slices. Overcooking makes it tough and dry. Cook over high heat until just done with nice caramelization.
Mix Everything Together: Before eating, mix all the components together with the rice, egg yolk, and gochujang. This creates the perfect blend of flavors and textures in every bite.
Storing and Reheating Tips
Store cooked bulgogi, rice, and prepared vegetables in separate airtight containers in the refrigerator for up to 3 days. The beef stays most tender when stored in its cooking juices. Reheat beef in a skillet over medium heat for 2-3 minutes, or microwave for 1 minute. Rice reheats well in the microwave with a splash of water. Keep vegetables fresh and serve cold or at room temperature. Fry fresh eggs when ready to serve. The marinated raw beef can be frozen for up to 3 months; thaw in the refrigerator before cooking.
Nutrition Information (Per Serving)
| Nutrient | Amount |
|---|---|
| Calories | 520 |
| Protein | 42g |
| Carbohydrates | 52g |
| Fat | 16g |
| Fiber | 4g |
| Sodium | 780mg |
Recipe 5: Vietnamese Spring Rolls (Gỏi Cuốn)

Quick Overview
These fresh Vietnamese spring rolls are light, healthy, and bursting with flavor. Rice paper wraps encase crisp vegetables, herbs, shrimp, and rice noodles for a refreshing meal or appetizer. Paired with peanut dipping sauce, they’re addictively delicious and surprisingly easy to make once you get the hang of rolling.
Prep Time: 25 minutes
Cook Time: 5 minutes
Total Time: 30 minutes
Servings: 4 (makes 12 rolls)
Key Ingredients for Vietnamese Spring Rolls
For the Rolls:
- 12 rice paper wrappers (8-inch round)
- 24 medium shrimp, cooked and peeled
- 2 oz rice vermicelli noodles
- 2 cups mixed lettuce leaves
- 1 large carrot, julienned
- 1 cucumber, julienned
- 1 cup fresh mint leaves
- 1 cup fresh cilantro
- 1 cup fresh Thai basil
- 12 chives (optional)
For Peanut Sauce:
- 1/3 cup creamy peanut butter
- 2 tablespoons hoisin sauce
- 2 tablespoons low-sodium soy sauce
- 1 tablespoon lime juice
- 1 teaspoon honey
- 1 clove garlic, minced
- 2-3 tablespoons warm water
- 1 tablespoon crushed peanuts
Step-by-Step Instructions
Step 1: Prepare the Filling Ingredients
Cook rice vermicelli noodles according to package directions, usually just 3-4 minutes in boiling water. Drain and rinse with cold water. Cut each cooked shrimp in half lengthwise. Wash and dry all herbs and vegetables. Julienne carrots and cucumber into thin matchsticks. Arrange all ingredients on a large plate or cutting board for easy access during rolling.
Step 2: Make the Peanut Sauce
In a medium bowl, whisk together peanut butter, hoisin sauce, soy sauce, lime juice, honey, and minced garlic. Add warm water one tablespoon at a time until you reach a dipping consistency that’s thick but pourable. Stir in crushed peanuts. Taste and adjust seasoning with more lime juice or honey if needed. Set aside.
Step 3: Prepare Your Rolling Station
Fill a large shallow dish or pie plate with warm water. Have a damp kitchen towel ready on your work surface, or use a damp cutting board. Lay out all your filling ingredients within easy reach. Rolling takes practice, so don’t worry if your first few aren’t perfect.
Step 4: Soften the Rice Paper
Dip one rice paper wrapper into the warm water for 2-3 seconds, just until it begins to soften. Don’t soak it completely or it will tear. Lay the wrapper on your damp surface. It will continue softening as you work, becoming pliable in about 10-15 seconds.
Step 5: Fill and Roll
On the bottom third of the wrapper nearest you, layer a few lettuce leaves. Top with a small handful of noodles, some carrot and cucumber sticks, and several herb leaves. Don’t overfill or it won’t roll properly. Fold the bottom of the wrapper up over the filling, then fold in the sides like a burrito. Place 4 shrimp halves cut-side down in a row across the top of the rice paper. Roll tightly away from you, encasing all the filling. The shrimp will show through the translucent wrapper, creating a beautiful presentation. If using chives, tuck one through the roll as you finish. Place seam-side down on a plate.
Step 6: Continue Rolling
Repeat with remaining wrappers and filling. Work one at a time, as rice paper wrappers dry out quickly. If the wrappers stick together, separate them gently. Cover finished rolls with a damp towel to keep them from drying out until ready to serve.
What to Serve Vietnamese Spring Rolls With
These spring rolls shine as an appetizer before a Vietnamese meal. Serve them alongside Vietnamese pho or bun bowls for a complete feast. For variety, offer both peanut sauce and nuoc cham (Vietnamese fish sauce dipping sauce). Pair with Vietnamese iced coffee for an authentic experience. They also make excellent light lunch paired with a simple Asian-style salad.
Top Tips for Perfecting Vietnamese Spring Rolls
Don’t Oversoak: The rice paper should still feel slightly firm when you remove it from water. It continues softening as you work and will be perfectly pliable by the time you finish rolling.
Practice Makes Perfect: Your first few rolls might look wonky, but you’ll quickly get the hang of it. Keep trying and don’t get discouraged.
Keep Them Moist: Cover finished rolls with a damp towel so they don’t dry out and crack. Serve within 2-3 hours for best texture.
Customize Your Fillings: Try adding mango slices, avocado, grilled chicken, or tofu. The beauty of spring rolls is their versatility.
Storing and Reheating Tips
Fresh spring rolls are best enjoyed the day they’re made. Store them in an airtight container lined with damp paper towels for up to 8 hours in the refrigerator. The rice paper may become slightly chewy, but they’ll still taste delicious. Do not freeze spring rolls as the rice paper becomes tough and unpleasant. Make the peanut sauce up to 3 days ahead and store in the refrigerator. Stir well before serving and thin with water if needed. You can prep all the filling ingredients a day ahead to make rolling faster.
Nutrition Information (Per Serving, 3 rolls)
| Nutrient | Amount |
|---|---|
| Calories | 285 |
| Protein | 18g |
| Carbohydrates | 38g |
| Fat | 7g |
| Fiber | 4g |
| Sodium | 520mg |
Recipe 6: Japanese Miso Soup with Tofu

Quick Overview
This authentic Japanese miso soup comes together in just 10 minutes for a warming, probiotic-rich start to any meal. Silken tofu and wakame seaweed float in savory miso broth, creating a deeply satisfying bowl that’s both comforting and healthy. It’s the perfect side dish or light meal when you need something quick and nourishing.
Prep Time: 5 minutes
Cook Time: 5 minutes
Total Time: 10 minutes
Servings: 4
Key Ingredients for Japanese Miso Soup
- 4 cups dashi broth (or vegetable broth)
- 3 tablespoons miso paste (white or red)
- 8 oz silken tofu, cubed
- 2 tablespoons dried wakame seaweed
- 2 green onions, sliced thin
- 1 tablespoon dried bonito flakes (optional)
Step-by-Step Instructions
Step 1: Prepare the Ingredients
Cut silken tofu into small 1/2-inch cubes, being gentle as it’s very delicate. Slice green onions thinly on a diagonal. Measure out your miso paste and wakame seaweed. Having everything ready makes the cooking process smooth and quick.
Step 2: Heat the Broth
In a medium saucepan, bring dashi or vegetable broth to a gentle simmer over medium heat. Don’t let it come to a rolling boil, as boiling can destroy some of the beneficial probiotics in the miso paste. You want small bubbles breaking the surface.
Step 3: Add Wakame
Drop the dried wakame seaweed into the simmering broth. It will rehydrate and expand in about 1-2 minutes. Dried wakame looks like small dark flakes but swells to several times its size when hydrated, so a little goes a long way.
Step 4: Dissolve the Miso
Place miso paste in a small bowl or ladle. Add a few tablespoons of the hot broth and whisk until the miso dissolves completely and becomes smooth with no lumps. This prevents clumps of miso from forming in your soup. Pour the dissolved miso back into the pot and stir gently. Turn off the heat immediately after adding miso to preserve its beneficial enzymes.
Step 5: Add Tofu and Serve
Gently slide the tofu cubes into the soup and let them warm through for 1 minute. Ladle the soup into bowls and garnish with sliced green onions and bonito flakes if using. Serve immediately while hot.
What to Serve Japanese Miso Soup With
Miso soup is traditionally served as a starter before sushi, teriyaki dishes, or any Japanese meal. It pairs beautifully with steamed rice and grilled fish. Serve alongside vegetable tempura or gyoza dumplings for a complete Japanese dinner. The soup also makes a comforting light lunch on its own with some onigiri rice balls. For breakfast, the Japanese often enjoy miso soup with grilled salmon and rice.
Top Tips for Perfecting Japanese Miso Soup
Don’t Boil After Adding Miso: High heat destroys the beneficial probiotics in miso paste. Always add miso at the end and remove from heat immediately.
Choose Your Miso: White miso is mild and slightly sweet, perfect for beginners. Red miso is stronger and saltier with deeper flavor. Yellow miso falls somewhere in between.
Use Real Dashi: Instant dashi powder works in a pinch, but homemade dashi or quality dashi packets create richer, more authentic flavor.
Keep It Simple: Traditional miso soup is minimalist. Besides tofu and wakame, you can add mushrooms or greens, but don’t overload it with ingredients.
Storing and Reheating Tips
Miso soup is best fresh but can be refrigerated in an airtight container for up to 2 days. The tofu may break down slightly and the wakame will absorb more liquid. To reheat, warm gently over low heat without boiling, stirring carefully to avoid breaking up the tofu. If the soup has thickened, add a splash of water or broth. Don’t freeze miso soup as the tofu texture becomes grainy and unpleasant when thawed. For meal prep, store the broth separately and add fresh tofu and wakame when reheating.
Nutrition Information (Per Serving)
| Nutrient | Amount |
|---|---|
| Calories | 65 |
| Protein | 5g |
| Carbohydrates | 6g |
| Fat | 2g |
| Fiber | 1g |
| Sodium | 640mg |
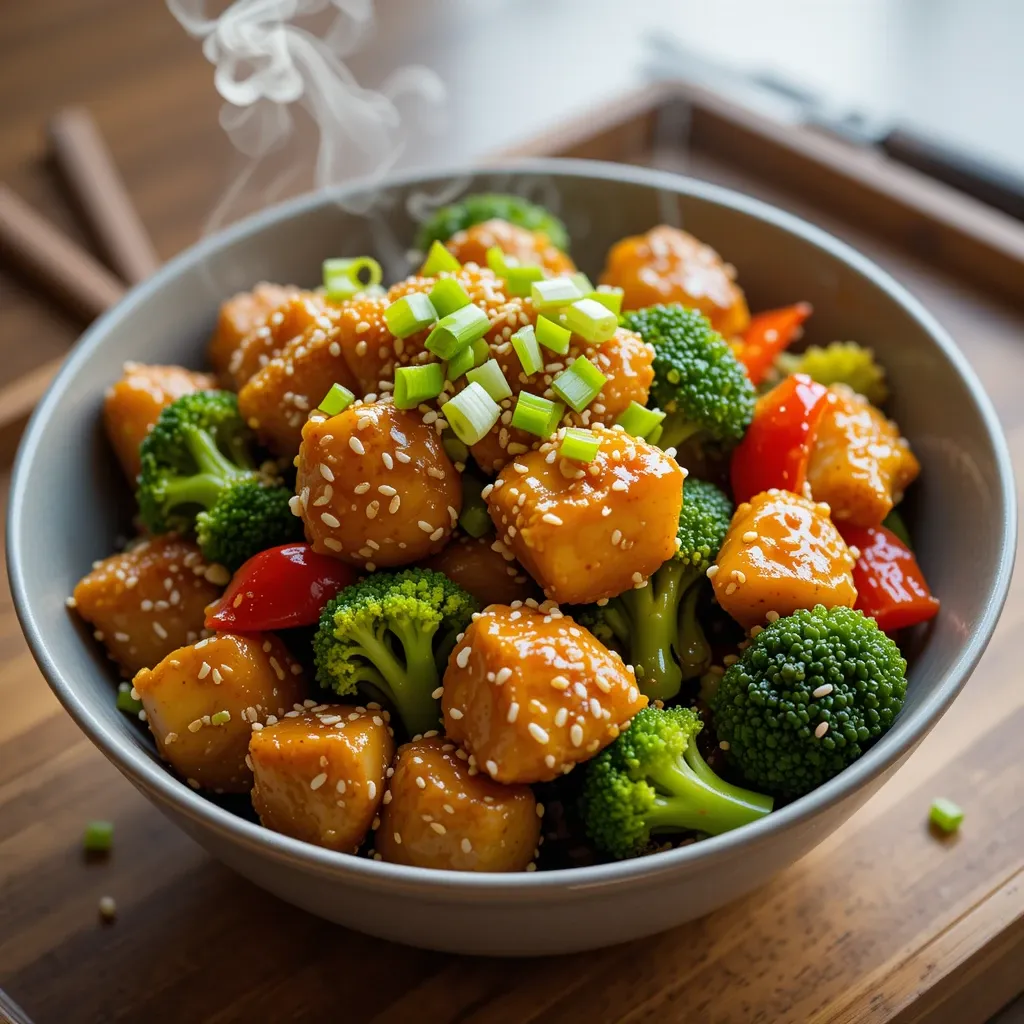
Recipe 7: Honey Sesame Chicken
Quick Overview
This healthy baked version of honey sesame chicken gives you all the sweet, sticky goodness without deep frying. Tender chicken pieces are coated in a light cornstarch coating, baked until crispy, then tossed in homemade honey sesame sauce. With vegetables mixed right in, it’s a complete meal that’s ready in 35 minutes.
Prep Time: 15 minutes
Cook Time: 20 minutes
Total Time: 35 minutes
Servings: 4
Key Ingredients for Honey Sesame Chicken
For the Chicken:
- 1.5 lbs boneless skinless chicken thighs, cut into chunks
- 1/3 cup cornstarch
- 1/2 teaspoon salt
- 1/4 teaspoon black pepper
- 2 tablespoons vegetable oil
- 2 tablespoons sesame seeds
For the Sauce:
- 1/4 cup honey
- 3 tablespoons low-sodium soy sauce
- 2 tablespoons rice vinegar
- 1 tablespoon sesame oil
- 3 cloves garlic, minced
- 1 teaspoon fresh ginger, grated
- 1/4 teaspoon red pepper flakes
- 1 tablespoon cornstarch
- 2 tablespoons water
For the Vegetables:
- 2 cups broccoli florets
- 1 red bell pepper, cut into chunks
- 2 green onions, sliced
Step-by-Step Instructions
Step 1: Prepare the Chicken
Preheat your oven to 425°F and line a large baking sheet with parchment paper. Cut chicken thighs into bite-sized chunks, about 1.5 inches each. Pat them completely dry with paper towels, as any moisture prevents the coating from getting crispy.
Step 2: Coat the Chicken
In a large bowl, combine cornstarch, salt, and black pepper. Add the chicken pieces and toss until every piece is evenly coated with the cornstarch mixture. Spread the coated chicken in a single layer on your prepared baking sheet, making sure pieces don’t touch. Drizzle with vegetable oil.
Step 3: Bake the Chicken
Bake for 18-20 minutes, flipping the pieces halfway through, until the chicken is golden brown, crispy, and cooked through to 165°F internal temperature. The coating should be crispy and the chicken should have nice color.
Step 4: Make the Sauce
While the chicken bakes, prepare the sauce. In a medium saucepan over medium heat, combine honey, soy sauce, rice vinegar, sesame oil, garlic, ginger, and red pepper flakes. Bring to a simmer. In a small bowl, mix cornstarch with water until smooth, then pour into the sauce while whisking constantly. Cook for 2-3 minutes until the sauce thickens enough to coat the back of a spoon. Remove from heat.
Step 5: Prepare the Vegetables
Steam or blanch the broccoli florets for 3-4 minutes until tender-crisp and bright green. You can also microwave them with 2 tablespoons of water in a covered bowl for 2-3 minutes. The bell pepper can be added raw or lightly sautéed if you prefer softer vegetables.
Step 6: Combine Everything
Transfer the crispy baked chicken to a large bowl. Pour the honey sesame sauce over the chicken and toss to coat every piece thoroughly. Add the broccoli and bell pepper and toss again. Sprinkle with sesame seeds and sliced green onions. Serve immediately while the chicken is still crispy.
What to Serve Honey Sesame Chicken With
Serve this sweet and savory chicken over steamed jasmine rice or brown rice to soak up the delicious sauce. For a low-carb option, try cauliflower rice or zucchini noodles. Add extra steamed vegetables like snap peas or bok choy on the side. Egg drop soup or hot and sour soup makes a perfect starter. For a complete Asian-inspired meal, serve with vegetable spring rolls or crab rangoon.
Top Tips for Perfecting Honey Sesame Chicken
Use Chicken Thighs: Dark meat stays juicier and more flavorful than chicken breast. If you prefer white meat, reduce baking time by 2-3 minutes to prevent drying out.
Don’t Skip Drying: Patting the chicken completely dry is crucial for getting a crispy coating. Any moisture will make the cornstarch coating soggy instead of crispy.
Watch the Sauce: The sauce can go from perfect to burned quickly. Keep the heat at medium and stir frequently while thickening.
Toss at the Last Minute: Add the sauce right before serving to keep the chicken coating as crispy as possible. The longer it sits in sauce, the softer it becomes.
Storing and Reheating Tips
Store leftover chicken and sauce in an airtight container in the refrigerator for up to 3 days. Keep in mind that the crispy coating will soften as it sits in the sauce. To reheat and restore some crispiness, spread the chicken on a baking sheet and reheat in a 375°F oven for 8-10 minutes. Alternatively, reheat in a skillet over medium heat for 5-6 minutes, stirring occasionally. Microwave reheating works but won’t restore crispiness. The sauce can be made up to 5 days ahead and stored separately. This dish doesn’t freeze well due to the coating.
Nutrition Information (Per Serving)
| Nutrient | Amount |
|---|---|
| Calories | 395 |
| Protein | 34g |
| Carbohydrates | 38g |
| Fat | 13g |
| Fiber | 3g |
| Sodium | 650mg |
Recipe 8: Singapore Noodles
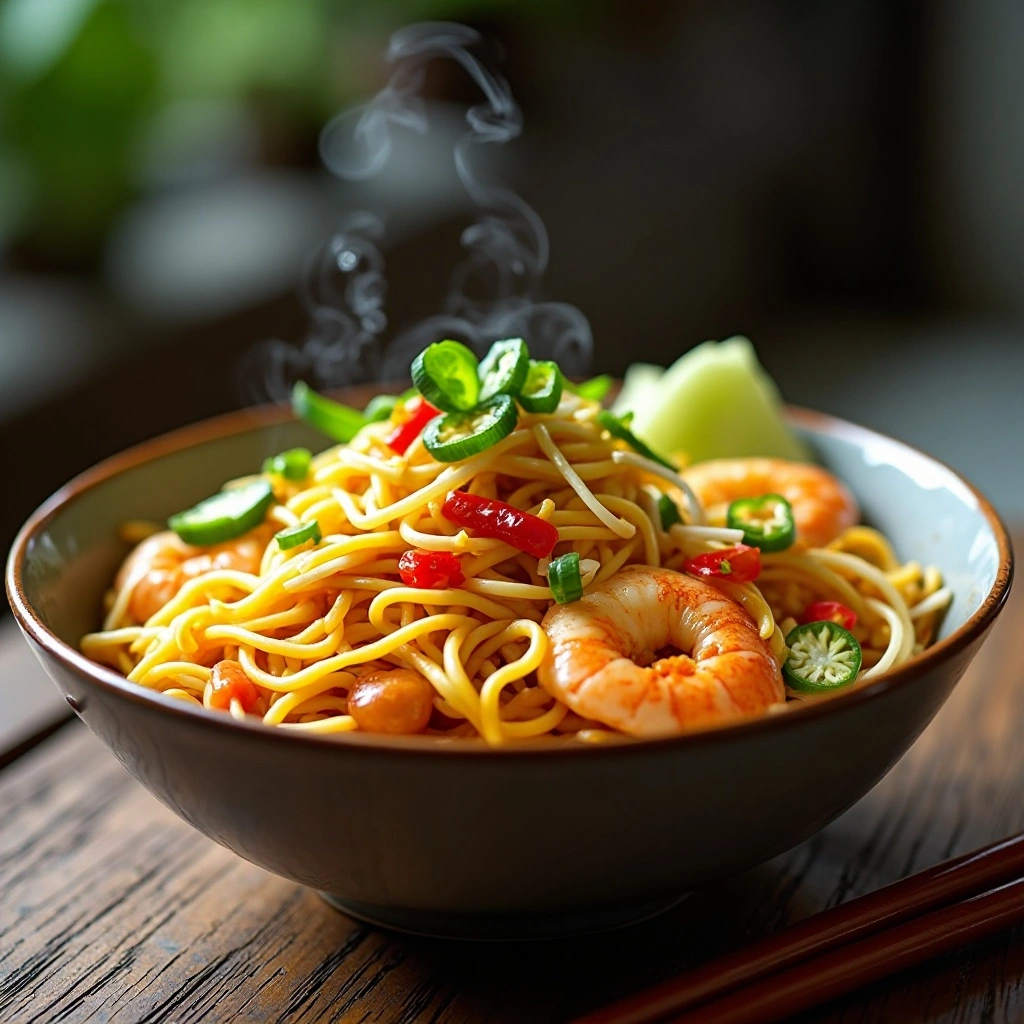
Quick Overview
These vibrant curry-flavored rice noodles are loaded with shrimp, vegetables, and scrambled eggs for a complete one-pan meal. Despite the name, Singapore noodles are actually a Cantonese creation that’s become wildly popular worldwide. The curry powder gives them a distinctive yellow color and aromatic flavor that’s absolutely addictive.
Prep Time: 15 minutes
Cook Time: 12 minutes
Total Time: 27 minutes
Servings: 4
Key Ingredients for Singapore Noodles
- 8 oz dried rice vermicelli noodles
- 12 oz medium shrimp, peeled and deveined
- 3 tablespoons vegetable oil, divided
- 3 eggs, beaten
- 1 onion, sliced thin
- 1 red bell pepper, julienned
- 2 cups bean sprouts
- 3 cloves garlic, minced
- 2 tablespoons curry powder
- 3 tablespoons low-sodium soy sauce
- 1 tablespoon oyster sauce
- 1 teaspoon sesame oil
- 4 green onions, cut into 2-inch pieces
- 1/2 teaspoon sugar
- White pepper to taste
Step-by-Step Instructions
Step 1: Prepare the Noodles
Place rice vermicelli in a large bowl and cover with warm water. Let them soak for 8-10 minutes until softened and pliable but not mushy. They should still have a slight bite. Drain well and set aside. Don’t oversoak or they’ll become too soft and break apart during stir-frying.
Step 2: Prepare the Ingredients
While noodles soak, pat shrimp dry and season lightly with salt and white pepper. Slice onion and bell pepper thinly. Beat eggs in a small bowl. Have all ingredients prepped and within reach, as this dish cooks very quickly once you start.
Step 3: Scramble the Eggs
Heat 1 tablespoon of oil in a large wok or skillet over medium-high heat. Pour in beaten eggs and scramble until just set, breaking them into small pieces. Remove eggs to a plate and set aside.
Step 4: Cook the Shrimp
Add another tablespoon of oil to the same wok over high heat. Add shrimp in a single layer and cook for 1-2 minutes per side until pink and just cooked through. Remove to the plate with the eggs.
Step 5: Stir-Fry the Aromatics and Vegetables
Add the remaining tablespoon of oil to the wok. Toss in sliced onion and stir-fry for 2 minutes until starting to soften. Add minced garlic and curry powder, stirring constantly for 30 seconds until fragrant. Add bell pepper and stir-fry for 1 minute.
Step 6: Add Noodles and Season
Add the drained rice noodles to the wok. Pour in soy sauce, oyster sauce, sesame oil, and sugar. Using tongs or two spatulas, toss everything together for 2-3 minutes, making sure the curry powder coats all the noodles evenly. The noodles should turn a beautiful golden yellow color.
Step 7: Finish the Dish
Return the shrimp and scrambled eggs to the wok. Add bean sprouts and green onion pieces. Toss everything together for 1-2 minutes until heated through. The bean sprouts should still be slightly crunchy. Taste and adjust seasoning with more soy sauce or white pepper if needed. Serve immediately.
What to Serve Singapore Noodles With
Singapore noodles are a complete meal on their own with protein, vegetables, and carbs all in one dish. For a fuller meal, start with wonton soup or Chinese hot and sour soup. Add crispy vegetable spring rolls or steamed dumplings as appetizers. A simple cucumber salad dressed with rice vinegar provides refreshing contrast. For dessert, try fresh fruit or mango pudding to cleanse the palate.
Top Tips for Perfecting Singapore Noodles
Don’t Oversoak Noodles: Rice vermicelli becomes mushy very easily. Soak just until pliable, then drain immediately. They’ll continue softening with the residual heat during stir-frying.
High Heat is Essential: Your wok must be very hot for proper stir-frying. This prevents the noodles from steaming and creates the characteristic slightly smoky flavor.
Use Good Curry Powder: The curry powder is the star of this dish, so use a quality blend. Madras curry powder works particularly well for authentic flavor.
Work Quickly: Have everything prepped before you start cooking. Once you begin stir-frying, everything happens fast and there’s no time to stop and chop vegetables.
Storing and Reheating Tips
Store leftover Singapore noodles in an airtight container in the refrigerator for up to 3 days. The noodles will absorb more sauce and soften further as they sit. To reheat, add a splash of water or chicken broth to prevent drying out. Reheat in a hot wok or skillet, tossing frequently, for 3-4 minutes until heated through. You can also microwave for 2-3 minutes, stirring halfway through, though the texture won’t be as good. The shrimp may become slightly rubbery when reheated. This dish doesn’t freeze well due to the delicate noodles and shrimp.
Nutrition Information (Per Serving)
| Nutrient | Amount |
|---|---|
| Calories | 410 |
| Protein | 24g |
| Carbohydrates | 52g |
| Fat | 12g |
| Fiber | 4g |
| Sodium | 720mg |
Recipe 9: Vegetable Pad Thai
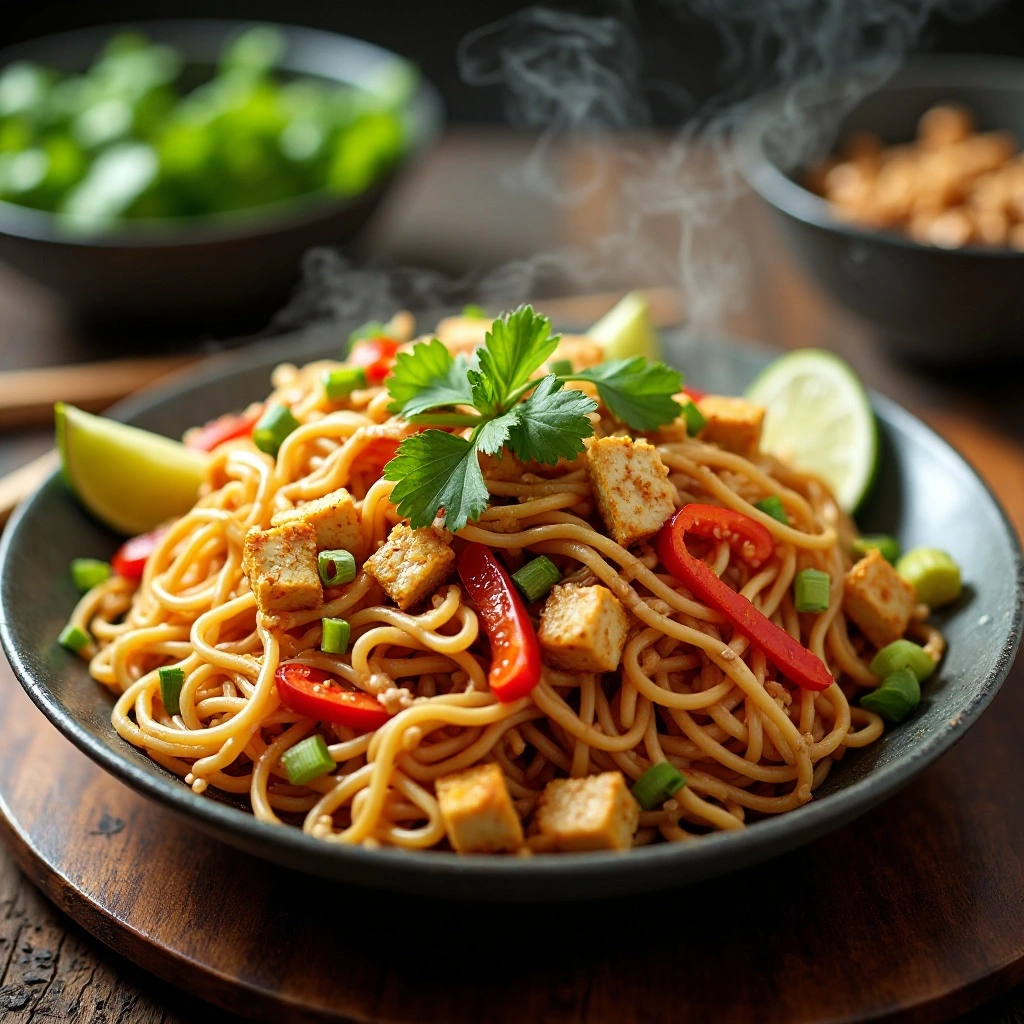
Quick Overview
This vegetarian version of Thailand’s most famous noodle dish proves you don’t need meat or shrimp for incredible flavor. Chewy rice noodles toss with crispy vegetables, scrambled eggs, and that signature sweet-salty-sour tamarind sauce. Topped with crunchy peanuts and fresh lime, it’s restaurant-quality pad thai you can make at home in 30 minutes.
Prep Time: 15 minutes
Cook Time: 15 minutes
Total Time: 30 minutes
Servings: 4
Key Ingredients for Vegetable Pad Thai
For the Noodles:
- 8 oz flat rice noodles (pad thai width)
- 3 tablespoons vegetable oil, divided
- 3 eggs, beaten
- 1 block (14 oz) extra-firm tofu, pressed and cubed
- 3 cloves garlic, minced
- 1/2 cup shallots, sliced thin
- 2 cups bean sprouts
- 1 red bell pepper, sliced thin
- 3 green onions, cut into 2-inch pieces
For the Sauce:
- 3 tablespoons tamarind paste
- 3 tablespoons brown sugar
- 3 tablespoons fish sauce (or soy sauce for vegetarian)
- 1 tablespoon lime juice
- 1 teaspoon sriracha (optional)
For Serving:
- 1/2 cup roasted peanuts, crushed
- Lime wedges
- Fresh cilantro
- Extra bean sprouts
Step-by-Step Instructions
Step 1: Soak the Noodles
Place rice noodles in a large bowl and cover with warm water. Soak for 25-30 minutes until pliable and softened. You should be able to bend them without breaking. Drain thoroughly and set aside. Don’t soak too long or they’ll become mushy.
Step 2: Make the Pad Thai Sauce
In a small bowl, whisk together tamarind paste, brown sugar, fish sauce, lime juice, and sriracha if using. Stir until the sugar dissolves completely. The sauce should taste sweet, salty, and tangy all at once. Adjust to your preference and set aside.
Step 3: Press and Cook the Tofu
If you haven’t already, press the tofu by wrapping it in paper towels and placing something heavy on top for 10 minutes to remove excess water. Cut into small cubes. Heat 1 tablespoon of oil in a large wok or skillet over medium-high heat. Add tofu cubes and cook for 5-7 minutes, stirring occasionally, until golden brown and crispy on all sides. Remove to a plate.
Step 4: Scramble the Eggs
Add another tablespoon of oil to the wok. Pour in beaten eggs and let them sit for a few seconds, then scramble into small pieces. Push to one side of the wok.
Step 5: Stir-Fry Aromatics and Vegetables
Add the remaining oil to the wok. Add minced garlic and sliced shallots, stir-frying for 1 minute until fragrant. Toss in bell pepper slices and stir-fry for 2 minutes until slightly softened but still crisp.
Step 6: Add Noodles and Sauce
Add the drained rice noodles to the wok. Pour the pad thai sauce over the noodles and toss everything together using tongs or two spatulas. Cook for 3-4 minutes, tossing frequently, until the noodles absorb the sauce and become slightly sticky. If the noodles seem dry, add a tablespoon or two of water.
Step 7: Finish and Serve
Return the crispy tofu to the wok along with bean sprouts and green onions. Toss everything together for 1-2 minutes until heated through. The bean sprouts should still be crunchy. Transfer to serving plates and top with crushed peanuts, fresh cilantro, and lime wedges. Serve immediately with extra bean sprouts on the side.
What to Serve Vegetable Pad Thai With
Pad thai is substantial enough to serve as a complete meal. Start with Thai coconut soup (tom kha) or clear broth with vegetables. Add fresh spring rolls or vegetable samosas as appetizers. For sides, try Thai cucumber salad or papaya salad for refreshing crunch. Thai iced tea or fresh coconut water makes the perfect beverage pairing. Finish with mango sticky rice or fresh fruit for dessert.
Top Tips for Perfecting Vegetable Pad Thai
Use Tamarind Paste: Real tamarind paste gives authentic sweet-sour flavor that can’t be replicated. Find it in Asian grocery stores or well-stocked supermarkets.
Don’t Overcook Noodles: Rice noodles should be slightly firm when you soak them. They’ll finish cooking in the wok with the sauce and soften to the perfect texture.
High Heat, Quick Cooking: Like all stir-fries, pad thai needs high heat and constant movement. This prevents the noodles from sticking and creates the characteristic slightly charred flavor.
Fresh is Best: Pad thai is best enjoyed immediately while the noodles are still slightly chewy and the vegetables are crisp. It doesn’t sit well.
Storing and Reheating Tips
Store leftover pad thai in an airtight container in the refrigerator for up to 2 days. The noodles will continue absorbing sauce and soften considerably. To reheat, add a splash of water and reheat in a hot wok or skillet for 3-4 minutes, tossing frequently. You can also microwave for 2 minutes, stirring halfway through. The texture won’t be as good as fresh, but the flavor remains delicious. Add fresh bean sprouts, peanuts, and lime juice when reheating to brighten up the flavors. Don’t freeze pad thai as the noodles become gummy and unpleasant when thawed.
Nutrition Information (Per Serving)
| Nutrient | Amount |
|---|---|
| Calories | 445 |
| Protein | 18g |
| Carbohydrates | 58g |
| Fat | 16g |
| Fiber | 5g |
| Sodium | 890mg |
Recipe 10: Chinese Steamed Dumplings (Potstickers)
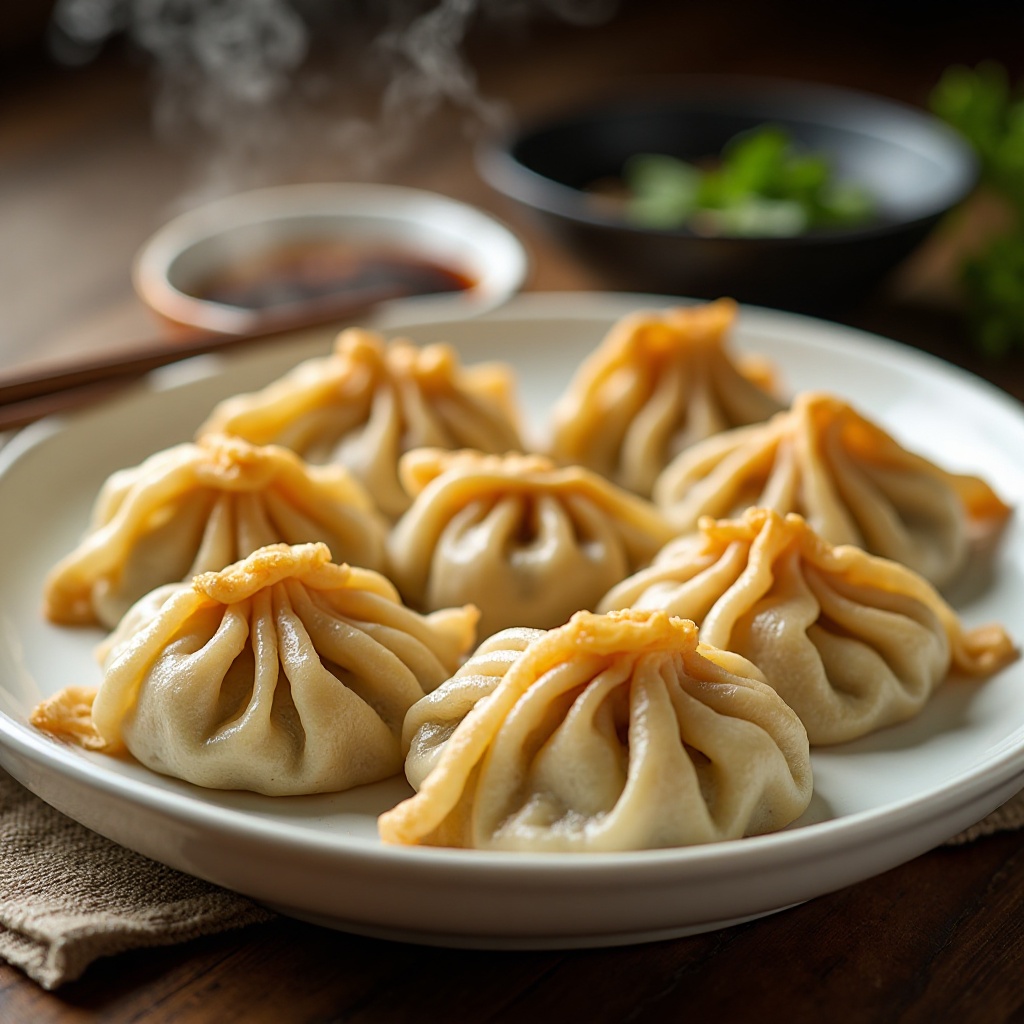
Quick Overview
These homemade steamed dumplings are surprisingly easy once you get the folding technique down. cabbage filling wrapped in tender wrappers, then steamed and pan-fried until golden and crispy on the bottom. Making dumplings is a fun activity to do with family, and they freeze beautifully for quick meals later.
Prep Time: 45 minutes
Cook Time: 15 minutes
Total Time: 60 minutes
Servings: 4 (makes about 30 dumplings)
Key Ingredients for Chinese Steamed Dumplings
For the Filling:
- 2 cups napa cabbage, finely chopped
- 3 green onions, minced
- 2 cloves garlic, minced
- 1 tablespoon fresh ginger, grated
- 2 tablespoons low-sodium soy sauce
- 1 tablespoon sesame oil
- 1 teaspoon rice vinegar
- 1/2 teaspoon white pepper
- 1/2 teaspoon salt
For the Dumplings:
- 30-35 round dumpling wrappers
- 2 tablespoons vegetable oil
- 1 cup water
For the Dipping Sauce:
- 3 tablespoons low-sodium soy sauce
- 1 tablespoon rice vinegar
- 1 teaspoon sesame oil
- 1 teaspoon chili oil (optional)
- 1 green onion, sliced thin
Step-by-Step Instructions
Step 1: Prepare the Cabbage
Finely chop the napa cabbage and place in a large bowl. Sprinkle with 1 teaspoon of salt and mix well. Let it sit for 10 minutes to draw out moisture. After 10 minutes, squeeze the cabbage firmly in your hands or in a clean kitchen towel to remove as much liquid as possible. This is crucial for preventing soggy dumplings.
Step 2: Make the Filling
In a large bowl, combine the squeezed cabbage, minced green onions, garlic, ginger, soy sauce, sesame oil, rice vinegar, white pepper, and salt. Mix everything together in one direction (clockwise or counterclockwise) for about 2 minutes. This develops the texture and helps bind the filling. The mixture should look sticky and hold together well.
Step 3: Fold the Dumplings
Set up your dumpling-making station with wrappers, filling, a small bowl of water, and a plate dusted with flour. Place one wrapper in your palm and add about 1 tablespoon of filling to the center. Don’t overfill or they’ll burst. Dip your finger in water and wet the edge of the wrapper all the way around.
Fold the wrapper in half to create a half-moon shape, pressing the edges together at the top center. Starting from one side, make 4-5 small pleats, pressing each pleat firmly as you work your way around. The bottom should remain smooth while the top is pleated. Place the finished dumpling on your floured plate and repeat.
Step 4: Make the Dipping Sauce
While you’re folding dumplings, mix together soy sauce, rice vinegar, sesame oil, chili oil if using, and sliced green onions in a small bowl. Set aside for the flavors to meld.
Step 5: Steam-Fry the Dumplings
Heat 1 tablespoon of vegetable oil in a large non-stick skillet with a lid over medium-high heat. Arrange dumplings in the pan in a single layer, flat-side down, not touching each other. Let them cook undisturbed for 2-3 minutes until the bottoms turn golden brown and crispy. Pour 1/2 cup of water into the pan (it will sputter, so be careful) and immediately cover with the lid. Reduce heat to medium and steam for 8-10 minutes until the wrappers become translucent and the filling is cooked through.
Step 6: Finish and Serve
Remove the lid and let any remaining water evaporate. Drizzle a little more oil around the edges of the pan and cook for another 1-2 minutes to crisp up the bottoms again. Remove dumplings to a serving plate. Repeat with remaining dumplings. Serve hot with the dipping sauce.
Top Tips for Perfecting Chinese Steamed Dumplings
Remove Cabbage Moisture: This is the most important step. Wet cabbage makes soggy dumplings that fall apart. Squeeze it thoroughly until no more liquid comes out.
Don’t Overfill: Use about 1 tablespoon of filling per dumpling. Overfilled dumplings won’t seal properly and will burst during cooking.
Keep Wrappers Covered: Dumpling wrappers dry out quickly. Keep unused wrappers covered with a damp towel while you work.
Freeze for Later: Freeze uncooked dumplings on a baking sheet until solid, then transfer to freezer bags. Cook from frozen, adding 3-4 extra minutes to the steaming time.
Storing and Reheating Tips
Uncooked dumplings freeze beautifully for up to 3 months. Arrange them on a parchment-lined baking sheet without touching, freeze until solid (about 2 hours), then transfer to freezer bags. Cook directly from frozen, adding 3-4 minutes to the cooking time. Cooked dumplings can be refrigerated in an airtight container for up to 3 days. Reheat in a hot skillet with a little oil for 3-4 minutes until warmed through and crispy on the bottom. Don’t microwave as they become rubbery. The dipping sauce keeps in the refrigerator for up to one week.
Nutrition Information (Per Serving, 7-8 dumplings)
| Nutrient | Amount |
|---|---|
| Calories | 380 |
| Protein | 28g |
| Carbohydrates | 35g |
| Fat | 15g |
| Fiber | 2g |
| Sodium | 760mg |
Frequently Asked Questions About Healthy Asian Recipes
Are Asian recipes actually healthy?
Yes! Many traditional Asian recipes emphasize vegetables, lean proteins, whole grains, and minimal oil. The key is making them at home where you control ingredients and cooking methods. Restaurant and takeout versions often contain excessive sodium, sugar, and oil that you can easily reduce when cooking yourself.
Can I make Asian food without special ingredients?
Absolutely. While authentic ingredients enhance flavor, you can make delicious Asian-inspired meals with supermarket staples. Soy sauce, garlic, ginger, sesame oil, and rice vinegar are widely available and go a long way. Start with basic recipes and expand your pantry over time.
How do I reduce sodium in Asian recipes?
Use low-sodium soy sauce and reduce the amount called for in recipes. Increase other flavors like garlic, ginger, citrus, and fresh herbs to compensate. Rinse canned vegetables and make your own sauces instead of using bottled versions which are typically very high in sodium.
What’s the healthiest Asian cuisine?
Vietnamese and Japanese cuisines tend to be among the healthiest, emphasizing fresh vegetables, seafood, fermented foods, and light cooking methods like steaming. However, all Asian cuisines offer healthy options when you choose dishes rich in vegetables and lean proteins.
Can I meal prep these Asian recipes?
Many of these recipes work wonderfully for meal prep! Fried rice, bulgogi bowls, teriyaki salmon, and dumplings all store and reheat well. Prep components separately and assemble when ready to eat for the best texture and freshness.
What rice is healthiest for Asian recipes?
Brown rice provides more fiber, vitamins, and minerals than white rice. However, white rice is traditional and perfectly fine in moderation. Cauliflower rice offers a low-carb option, while quinoa adds protein and nutrients.
How can I make Asian food less oily?
Use non-stick pans to reduce oil needed for cooking. Bake instead of fry when possible. Blot excess oil from cooked foods with paper towels. Steam, blanch, or stir-fry with broth instead of oil for ultra-light cooking.
Are rice noodles healthier than regular pasta?
Rice noodles and wheat pasta have similar calories and carbohydrates. Rice noodles are naturally gluten-free, making them suitable for those with gluten sensitivities. Both can be part of a healthy diet in appropriate portions.
Top Tips for Avoiding Common Mistakes in Asian Cooking
Not Prepping Ingredients Before Cooking
Asian cooking, especially stir-frying, happens quickly over high heat. Have everything measured, chopped, and within reach before you start cooking. Once the action begins, there’s no time to stop and prepare ingredients.
Using the Wrong Heat Level
Most Asian cooking requires high heat to achieve authentic flavors and textures. Low heat results in steamed, soggy food instead of crispy, flavorful dishes. Preheat your wok or pan until very hot before adding ingredients.
Overcrowding the Pan
Adding too much food at once lowers the pan temperature, causing ingredients to steam rather than sear. Cook in batches if necessary, especially when stir-frying meat or vegetables. Each piece should have contact with the hot surface.
Not Draining Vegetables Properly
Excess moisture is the enemy of crispy stir-fries and fresh spring rolls. Pat vegetables completely dry after washing. Squeeze moisture from ingredients like cabbage or tofu before cooking.
Using Stale or Low-Quality Spices
Fresh garlic, ginger, and quality spices make all the difference in Asian cooking. Old, dried-out aromatics lack the punch needed for vibrant flavors. Buy small amounts of fresh spices and replace them regularly.
Overcooking Delicate Proteins
Shrimp, fish, and thinly sliced meat cook in minutes. Overcooked seafood becomes rubbery and tough. Remove proteins from heat when they’re just done, as they’ll continue cooking from residual heat.
Not Tasting and Adjusting
Recipes are guidelines, but your palate is the final judge. Taste as you cook and adjust seasonings to your preference. Asian cooking is about balancing sweet, salty, sour, and spicy flavors.
Skipping the Mise en Place
This French term meaning “everything in its place” is crucial for Asian cooking. Have all ingredients prepped, measured, and organized before you start. This prevents burning garlic while you search for the soy sauce.
Final Thoughts
I hope these 10 healthy Asian recipes inspire you to spend more time in your kitchen and less time waiting for delivery. Each dish brings something special to the table, whether it’s the quick weeknight convenience of fried rice, the fresh lightness of Vietnamese spring rolls, or the bold flavors of Thai basil chicken.
The beauty of Asian cooking lies in its versatility and adaptability. Don’t be afraid to experiment with different vegetables, proteins, and spice levels to match your family’s preferences. Start with one or two recipes that appeal to you most, then gradually expand your repertoire as you gain confidence.
Remember that cooking is a skill that improves with practice. Your first spring rolls might be wonky, your fried rice might stick to the pan, or your dumplings might not fold perfectly. That’s completely normal! Each time you cook these recipes, you’ll get faster, more confident, and better at achieving the flavors and textures you love.
Making healthy Asian food at home isn’t just about saving money or eating better. It’s about bringing your family together around delicious food, learning new techniques, and discovering flavors that excite your palate. It’s about that satisfying moment when you taste your homemade teriyaki sauce and realize it’s better than anything you could order.
So grab your wok, stock up on soy sauce and sesame oil, and start your Asian cooking adventure today. Your kitchen is about to smell amazing, your family is about to be impressed, and your tastebuds are in for a treat. Which recipe will you try first? I’d love to hear how they turn out for you!