
20 Easy Ground Beef Recipes for Busy Weeknights Family Favorites
There’s something magical about ground beef – it’s affordable, cooks quickly, and transforms into endless comfort food favorites. Whether you’re feeding hungry teenagers after practice or need a last-minute dinner solution, these 20 ground beef recipes will become your kitchen lifesavers.
From sizzling skillet meals to hearty casseroles, each recipe delivers big flavor without the fuss. Fun fact: Americans consume over 50 pounds of beef per year, and ground beef tops the list! These recipes prove why it’s a staple in kitchens worldwide, offering versatility that few ingredients can match.
What Are Ground Beef Recipes?
Ever wonder why ground beef recipes dominate family dinner tables everywhere? It’s simple – ground beef is the ultimate blank canvas for flavor! Whether you call it mince, hamburger meat, or ground chuck, this versatile protein adapts to virtually any cuisine.
From Italian meatballs to Mexican tacos, Asian stir-fries to classic American burgers, ground beef plays along beautifully. As the saying goes, “the way to a man’s heart is through his stomach,” and these recipes prove that ground beef is the shortcut! Ready to discover which of these 20 recipes will become your new weeknight hero?
This recipe was generated entirely by AI and has not been cooked in our kitchen. We want our readers to feel informed and supported, and many have shared good feedback from other recipes here
Why You’ll Love These Ground Beef Recipes
Budget-Friendly Brilliance: Ground beef delivers premium taste without the premium price tag. While a fancy steak might set you back $15-20 per pound, quality ground beef costs a fraction of that, making these recipes perfect for feeding families without breaking the bank. You’ll save even more by cooking at home instead of ordering takeout – a homemade burger costs about $2 compared to $10+ at restaurants!
Quick & Easy Cooking: Most ground beef recipes cook in 30 minutes or less. The meat browns quickly, absorbs seasonings beautifully, and doesn’t require any special techniques. Whether you’re a kitchen novice or a seasoned cook, you’ll appreciate how forgiving and straightforward these recipes are.
Endless Flavor Possibilities: From smoky and spicy to creamy and comforting, ground beef embraces every flavor profile. Top your creations with melted cheese, fresh herbs, tangy sauces, or crunchy vegetables. Each recipe in this collection offers something unique, ensuring you’ll never get bored with dinner again!
1. Classic Beef Tacos

These crispy, flavorful tacos bring restaurant-quality Mexican food to your kitchen in just 20 minutes!
Quick Overview
Classic beef tacos feature seasoned ground beef nestled in crispy shells with fresh toppings. The perfectly spiced meat combines with cool lettuce, juicy tomatoes, and melted cheese for a flavor explosion in every bite.
Prep Time: 10 minutes
Cook Time: 10 minutes
Total Time: 20 minutes
Servings: 4-6
Key Ingredients for Classic Beef Tacos
- 1 pound ground beef (80/20 blend)
- 1 packet taco seasoning (or homemade blend)
- ½ cup water
- 8-12 taco shells
- 1 cup shredded lettuce
- 1 cup diced tomatoes
- 1 cup shredded cheddar cheese
- ½ cup sour cream
- Salsa for serving
Step-by-Step Instructions
Step 1: Heat a large skillet over medium-high heat. Add the ground beef and break it apart with a wooden spoon. Cook for 6-8 minutes, stirring occasionally, until the meat is browned and no pink remains.
Step 2: Drain excess fat from the skillet, leaving about 1 tablespoon for flavor. Return the skillet to the heat.
Step 3: Sprinkle the taco seasoning over the cooked beef and stir to coat evenly. Pour in the water and stir well.
Step 4: Reduce heat to medium and simmer for 3-4 minutes, stirring occasionally, until the sauce thickens and coats the meat perfectly.
Step 5: While the meat simmers, prepare your taco shells according to package directions and arrange your toppings in separate bowls.
Step 6: Fill each taco shell with the seasoned beef, then top with lettuce, tomatoes, cheese, sour cream, and salsa to taste.
What to Serve Classic Beef Tacos With
Pair these tacos with Mexican rice, refried beans, or a fresh corn salad. Tortilla chips with guacamole make an excellent starter, while churros or flan offer a sweet finish. An ice-cold limeade or horchata complements the spicy flavors perfectly.
Top Tips for Perfecting Classic Beef Tacos
Don’t skip draining the fat – excess grease makes tacos soggy and unhealthy. For extra flavor, toast your taco shells in the oven for 2-3 minutes before filling. Make your own taco seasoning by mixing chili powder, cumin, paprika, garlic powder, onion powder, and cayenne to control sodium and freshness. If your taco shells break easily, warm them slightly first – this makes them more pliable.
Storing and Reheating Tips
Store leftover taco meat in an airtight container in the refrigerator for up to 4 days. Reheat in a skillet over medium heat with a splash of water to restore moisture. For longer storage, freeze the cooked meat in freezer bags for up to 3 months. Keep toppings separate and assemble tacos fresh for the best texture.
2. Hearty Beef Chili
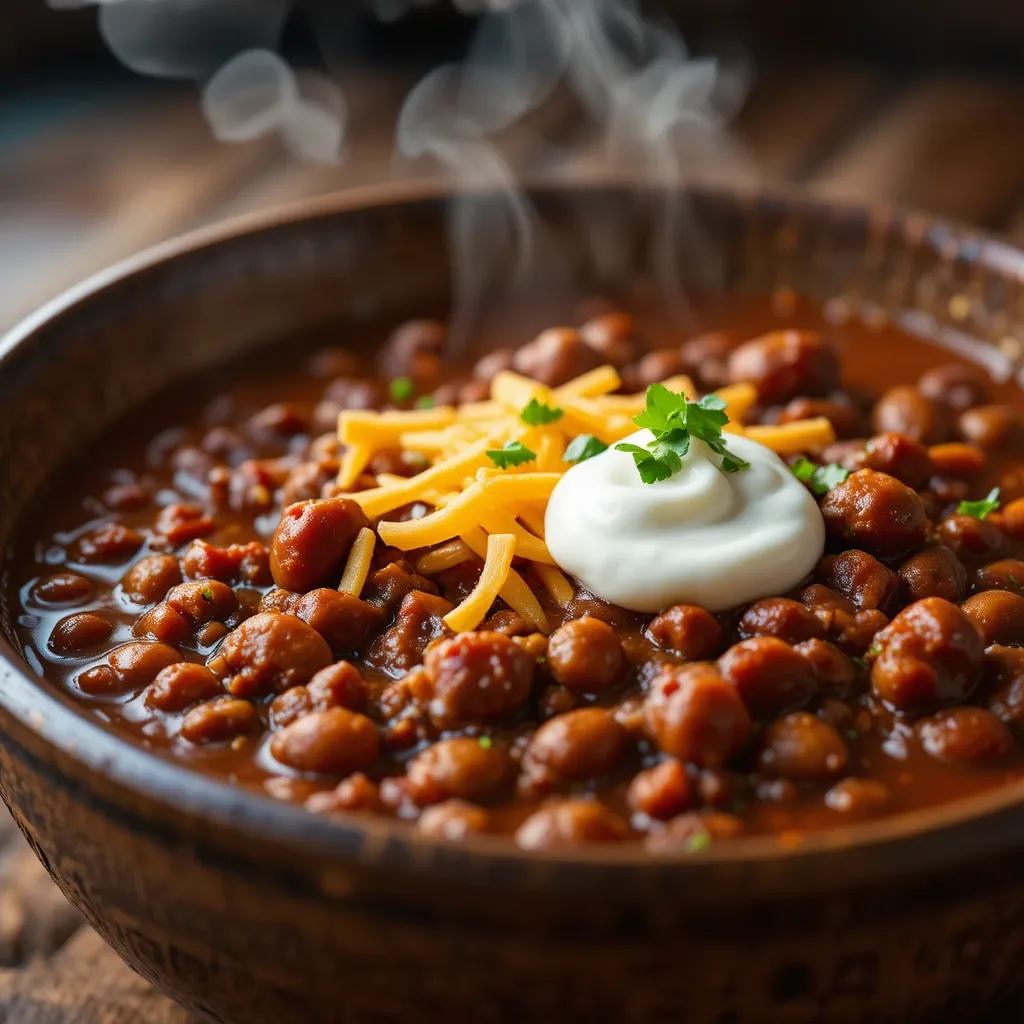
This rich, warming chili combines tender ground beef with beans and tomatoes for the ultimate comfort food.
Quick Overview
Hearty beef chili features slow-simmered ground beef in a thick, flavorful tomato-based sauce with kidney beans and warming spices. Each spoonful delivers deep, complex flavors that develop as it cooks.
Prep Time: 15 minutes
Cook Time: 45 minutes
Total Time: 60 minutes
Servings: 6-8
Key Ingredients for Hearty Beef Chili
- 2 pounds ground beef
- 1 large onion, diced
- 4 cloves garlic, minced
- 2 cans (15 oz each) kidney beans, drained
- 1 can (28 oz) crushed tomatoes
- 1 can (6 oz) tomato paste
- 2 tablespoons chili powder
- 1 tablespoon cumin
- 1 teaspoon paprika
- 2 cups beef broth
- Salt and pepper to taste
- Optional: jalapeños, corn
Step-by-Step Instructions
Step 1: In a large Dutch oven or heavy pot, cook the ground beef over medium-high heat for 8-10 minutes, breaking it into small crumbles as it browns. Drain excess fat.
Step 2: Add the diced onion to the pot and cook for 5 minutes until softened and translucent. Add the minced garlic and cook for 1 minute until fragrant.
Step 3: Stir in the chili powder, cumin, and paprika. Cook for 1 minute to toast the spices and release their oils.
Step 4: Add the crushed tomatoes, tomato paste, kidney beans, and beef broth. Stir everything together until well combined.
Step 5: Bring the mixture to a boil, then reduce heat to low. Cover partially and simmer for 30-40 minutes, stirring occasionally. The chili should thicken and the flavors will meld beautifully.
Step 6: Taste and adjust seasoning with salt and pepper. For extra heat, add diced jalapeños or hot sauce to taste.
What to Serve Hearty Beef Chili With
Serve this chili with warm cornbread, crackers, or over baked potatoes for a filling meal. Top with shredded cheese, sour cream, diced onions, or fresh cilantro. A crisp green salad or coleslaw provides a refreshing contrast to the rich chili.
Top Tips for Perfecting Hearty Beef Chili
The longer chili simmers, the better it tastes – if time allows, let it cook for 1-2 hours on low heat. For a thicker consistency, mash some of the beans against the side of the pot. Adding a tablespoon of cocoa powder or a small piece of dark chocolate enhances the depth of flavor. Make it ahead – chili tastes even better the next day after flavors have married overnight.
Storing and Reheating Tips
Refrigerate chili in airtight containers for up to 5 days. Reheat on the stovetop over medium heat, adding a splash of broth if it’s too thick. Chili freezes beautifully for up to 4 months – cool completely before freezing in portion-sized containers. Thaw overnight in the refrigerator before reheating.
3. Savory Beef Meatballs

Tender, juicy meatballs with Italian seasoning make a versatile dish perfect for pasta, sandwiches, or appetizers.
Quick Overview
These savory beef meatballs feature a perfect blend of ground beef, breadcrumbs, and Italian herbs. They’re baked until golden brown, creating a crispy exterior while staying moist and tender inside.
Prep Time: 15 minutes
Cook Time: 20 minutes
Total Time: 35 minutes
Servings: 24 meatballs
Key Ingredients for Savory Beef Meatballs
- 1.5 pounds ground beef
- ½ cup breadcrumbs
- ¼ cup milk
- 1 egg, beaten
- ¼ cup grated Parmesan cheese
- 3 cloves garlic, minced
- 2 tablespoons fresh parsley, chopped
- 1 teaspoon Italian seasoning
- 1 teaspoon salt
- ½ teaspoon black pepper
Step-by-Step Instructions
Step 1: Preheat your oven to 400°F (200°C). Line a large baking sheet with parchment paper or lightly grease it with cooking spray.
Step 2: In a small bowl, soak the breadcrumbs in milk for 5 minutes. This keeps the meatballs tender and prevents them from drying out.
Step 3: In a large mixing bowl, combine the ground beef, soaked breadcrumbs, beaten egg, Parmesan cheese, minced garlic, parsley, Italian seasoning, salt, and pepper. Mix gently with your hands until just combined – don’t overmix or the meatballs will be tough.
Step 4: Using a cookie scoop or your hands, form the mixture into 24 evenly-sized balls, about 1.5 inches in diameter. Place them on the prepared baking sheet, spacing them about 1 inch apart.
Step 5: Bake for 18-22 minutes, until the meatballs are golden brown and cooked through. The internal temperature should reach 160°F.
Step 6: Let the meatballs rest for 5 minutes before serving. This allows the juices to redistribute, keeping them extra moist.
What to Serve Savory Beef Meatballs With
Serve these meatballs over spaghetti with marinara sauce, tuck them into hoagie rolls for meatball subs, or serve as appetizers with toothpicks and dipping sauce. They also pair wonderfully with mashed potatoes, rice pilaf, or a fresh Caesar salad.
Top Tips for Perfecting Savory Beef Meatballs
Use your hands to mix the meat – it distributes ingredients more evenly than a spoon. Don’t skip the milk-soaked breadcrumbs; they create a tender texture called a “panade.” For uniform cooking, make all meatballs the same size using a cookie scoop. If making ahead, brown the meatballs and finish cooking them in sauce for extra flavor.
Storing and Reheating Tips
Store cooked meatballs in the refrigerator for up to 4 days in an airtight container. Reheat in sauce on the stovetop or microwave with a damp paper towel covering to prevent drying. Freeze cooked meatballs on a baking sheet until solid, then transfer to freezer bags for up to 3 months. Thaw in the refrigerator overnight before reheating.
4. Beef and Rice Skillet
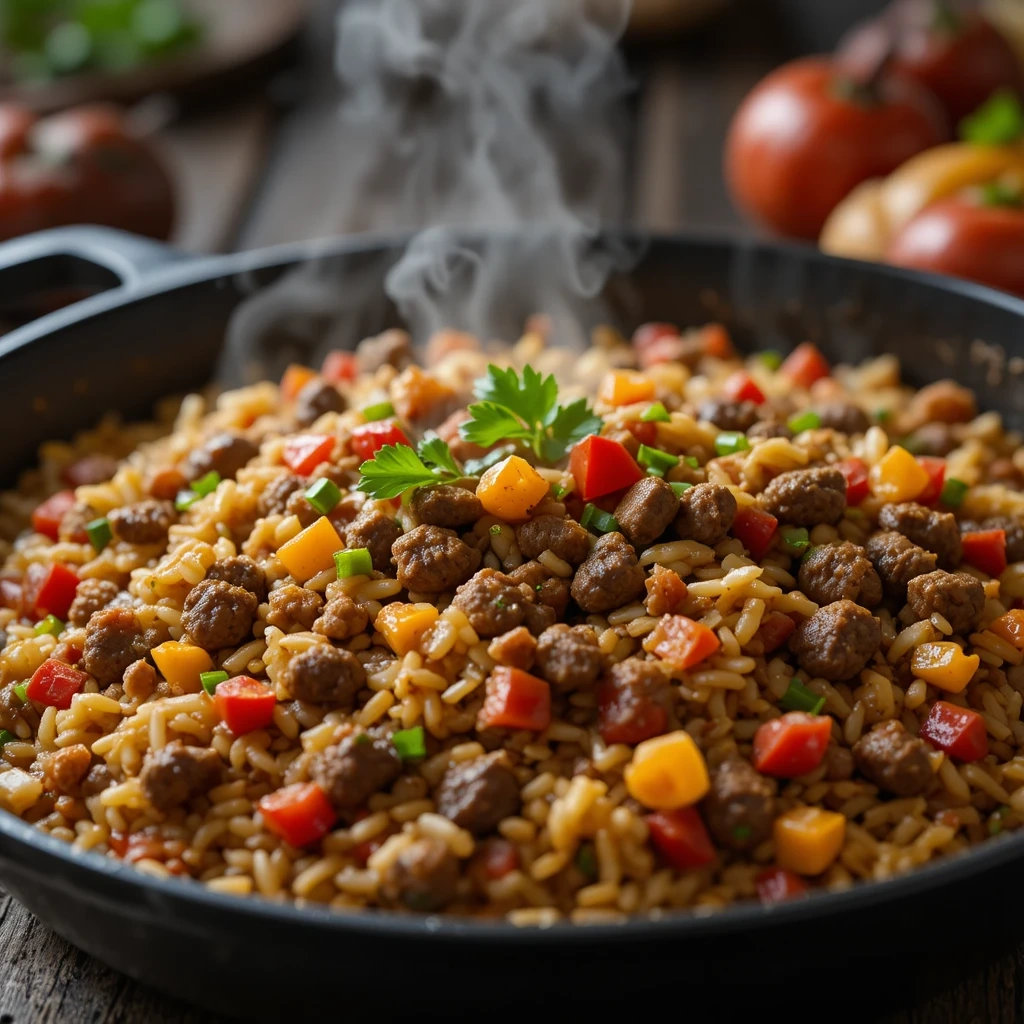
This one-pan wonder combines seasoned ground beef with fluffy rice and vegetables for a complete meal.
Quick Overview
The beef and rice skillet features savory ground beef cooked with aromatic vegetables and rice in a single pan. Everything cooks together, allowing the rice to absorb all the meaty, flavorful juices.
Prep Time: 10 minutes
Cook Time: 25 minutes
Total Time: 35 minutes
Servings: 4-6
Key Ingredients for Beef and Rice Skillet
- 1 pound ground beef
- 1 cup long-grain white rice
- 1 onion, diced
- 1 bell pepper, diced
- 2 cups beef broth
- 1 can (14.5 oz) diced tomatoes
- 2 cloves garlic, minced
- 1 teaspoon paprika
- ½ teaspoon cumin
- Salt and pepper to taste
- Fresh parsley for garnish
Step-by-Step Instructions
Step 1: In a large skillet with a lid, brown the ground beef over medium-high heat for 6-8 minutes, breaking it into crumbles. Drain any excess fat.
Step 2: Add the diced onion and bell pepper to the skillet. Cook for 4-5 minutes until the vegetables soften and the onion becomes translucent.
Step 3: Stir in the minced garlic, paprika, and cumin. Cook for 1 minute until fragrant.
Step 4: Add the uncooked rice to the skillet and stir to coat it with the meat and vegetable mixture. Toast the rice for 1-2 minutes.
Step 5: Pour in the beef broth and diced tomatoes with their juices. Stir well and bring to a boil.
Step 6: Once boiling, reduce heat to low, cover the skillet tightly, and simmer for 18-20 minutes without lifting the lid. The rice should absorb all the liquid and become tender.
Step 7: Remove from heat and let stand covered for 5 minutes. Fluff with a fork and garnish with fresh parsley before serving.
What to Serve Beef and Rice Skillet With
This dish is already a complete meal, but you can add a simple side salad or garlic bread. Steamed broccoli or green beans complement the flavors nicely. For extra freshness, serve with sliced avocado or a dollop of sour cream.
Top Tips for Perfecting Beef and Rice Skillet
Don’t lift the lid while the rice cooks – steam escapes and prevents proper cooking. Use long-grain rice for the best texture; short-grain rice becomes too sticky. If the rice isn’t tender after 20 minutes, add ¼ cup more broth and cook for 5 more minutes. For extra flavor, use homemade beef stock instead of store-bought broth.
Storing and Reheating Tips
Store leftovers in an airtight container in the refrigerator for up to 4 days. Reheat in the microwave with a splash of water or broth to restore moisture. This dish doesn’t freeze well because rice can become mushy, but it makes excellent next-day lunches.
5. Beef Shepherd’s Pie
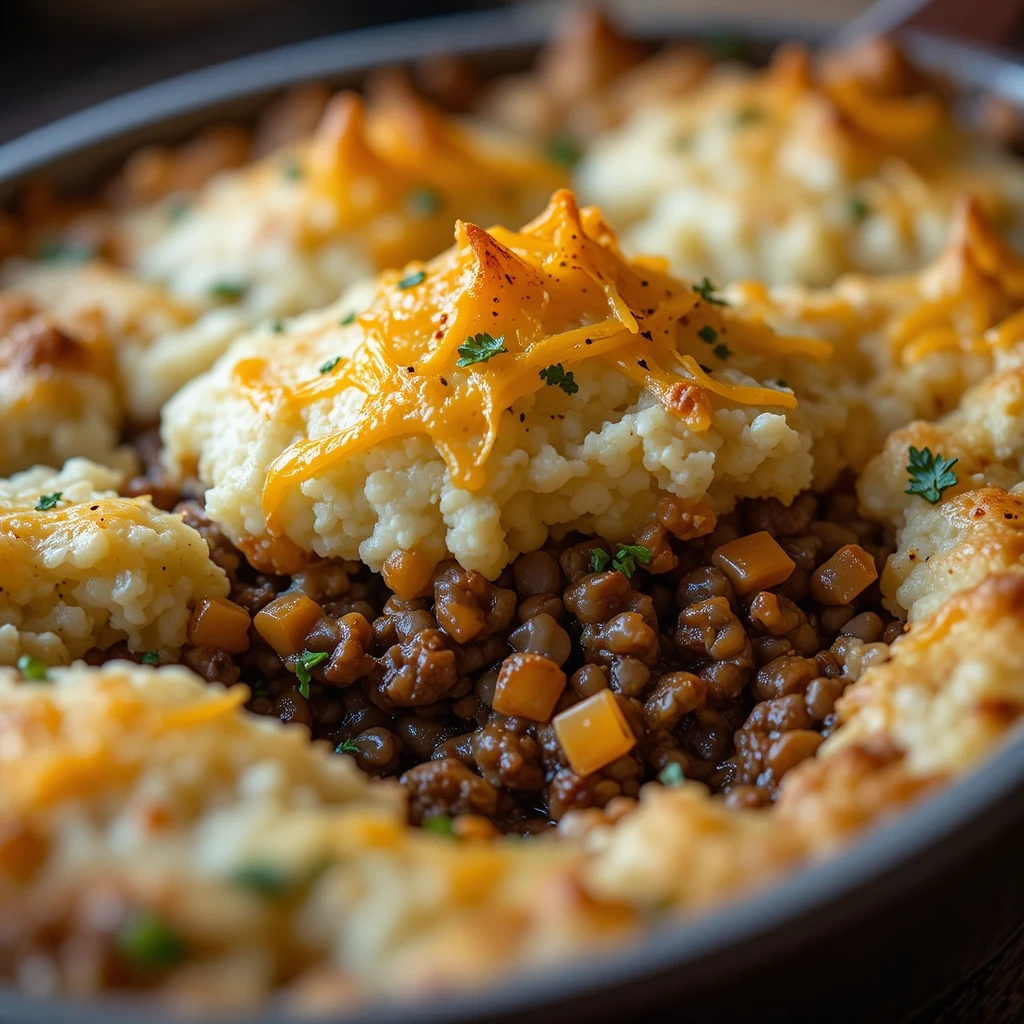
This British classic layers savory ground beef and vegetables beneath a blanket of creamy mashed potatoes.
Quick Overview
Shepherd’s pie features a rich beef and vegetable filling topped with fluffy mashed potatoes and baked until golden. The combination of textures and flavors creates ultimate comfort food.
Prep Time: 20 minutes
Cook Time: 35 minutes
Total Time: 55 minutes
Servings: 6-8
Key Ingredients for Beef Shepherd’s Pie
- 2 pounds ground beef
- 1 onion, diced
- 2 carrots, diced
- 1 cup frozen peas
- 2 cloves garlic, minced
- 2 tablespoons tomato paste
- 1 cup beef broth
- 2 tablespoons Worcestershire sauce
- 3 pounds potatoes, peeled and cubed
- ½ cup milk
- 4 tablespoons butter
- 1 cup shredded cheddar cheese
- Salt and pepper to taste
Step-by-Step Instructions
Step 1: Boil the cubed potatoes in salted water for 15-20 minutes until fork-tender. Drain and mash with milk and butter until smooth and creamy. Season with salt and pepper. Set aside.
Step 2: While potatoes cook, brown the ground beef in a large oven-safe skillet over medium-high heat for 8 minutes. Drain excess fat.
Step 3: Add the diced onion and carrots to the beef. Cook for 5-6 minutes until vegetables soften.
Step 4: Stir in the garlic and tomato paste. Cook for 1 minute, then add the Worcestershire sauce and beef broth.
Step 5: Bring to a simmer and cook for 8-10 minutes until the sauce thickens slightly. Stir in the frozen peas and cook for 2 more minutes. Taste and adjust seasoning.
Step 6: Preheat your broiler to high. Spread the mashed potatoes evenly over the beef mixture, creating peaks with a fork. Sprinkle cheese over the top.
Step 7: Broil for 3-5 minutes until the top is golden brown and crispy. Watch carefully to prevent burning.
Step 8: Let rest for 10 minutes before serving. This allows the filling to set for easier serving.
What to Serve Beef Shepherd’s Pie With
Shepherd’s pie is a complete meal on its own, but a simple green salad or steamed green beans makes a nice accompaniment. Crusty bread is perfect for soaking up the gravy. A light vegetable soup can serve as a starter.
Top Tips for Perfecting Beef Shepherd’s Pie
Make sure your mashed potatoes are thick, not runny – thin potatoes will sink into the meat mixture. Use russet potatoes for the fluffiest mash. For extra flavor, add fresh thyme or rosemary to the beef filling. Create texture on the potato topping with a fork – the peaks get crispy and delicious under the broiler.
Storing and Reheating Tips
Cover leftovers tightly and refrigerate for up to 4 days. Reheat individual portions in the microwave or the whole dish in a 350°F oven until heated through. This freezes beautifully – cool completely, cover tightly with plastic wrap and foil, and freeze for up to 3 months. Thaw overnight in the refrigerator before reheating.
6. Beef Stuffed Peppers

Colorful bell peppers filled with seasoned ground beef, rice, and melted cheese make an impressive yet easy dinner.
Quick Overview
Stuffed peppers combine tender bell peppers filled with a savory mixture of ground beef, rice, tomatoes, and cheese. They’re baked until the peppers are soft and the filling is bubbly and delicious.
Prep Time: 15 minutes
Cook Time: 35 minutes
Total Time: 50 minutes
Servings: 4-6
Key Ingredients for Beef Stuffed Peppers
- 6 large bell peppers (any color)
- 1 pound ground beef
- 1 cup cooked rice
- 1 can (14.5 oz) diced tomatoes
- 1 small onion, diced
- 2 cloves garlic, minced
- 1 teaspoon Italian seasoning
- 1.5 cups shredded mozzarella cheese
- ½ cup tomato sauce
- Salt and pepper to taste
- Fresh basil for garnish
Step-by-Step Instructions
Step 1: Preheat your oven to 375°F (190°C). Cut the tops off the bell peppers and remove seeds and membranes. If needed, trim the bottoms slightly so they stand upright, but don’t cut through.
Step 2: Arrange the peppers in a baking dish just large enough to hold them snugly. This helps them stay upright during baking.
Step 3: In a large skillet, brown the ground beef over medium-high heat for 6-8 minutes. Drain excess fat.
Step 4: Add the diced onion to the beef and cook for 4 minutes until softened. Add the garlic and cook for 1 minute more.
Step 5: Stir in the cooked rice, diced tomatoes, Italian seasoning, salt, and pepper. Cook for 3-4 minutes until heated through. Remove from heat and stir in 1 cup of the shredded mozzarella.
Step 6: Spoon the beef mixture into each pepper, packing it in gently. Pour the tomato sauce into the bottom of the baking dish around the peppers.
Step 7: Cover the dish with foil and bake for 25 minutes. Remove the foil, top each pepper with remaining cheese, and bake uncovered for 10 more minutes until the cheese melts and the peppers are tender.
Step 8: Let rest for 5 minutes before serving. Garnish with fresh basil.
What to Serve Beef Stuffed Peppers With
These stuffed peppers pair beautifully with a simple garden salad, garlic bread, or roasted vegetables. A side of Caesar salad or coleslaw adds freshness. For a heartier meal, serve with cheesy garlic bread or breadsticks.
Top Tips for Perfecting Beef Stuffed Peppers
Choose peppers that are similar in size for even cooking. If your peppers tip over, use a muffin tin to hold them upright. Parboil the peppers for 3 minutes before stuffing if you prefer them very soft. Use leftover rice to save time, or substitute quinoa or cauliflower rice for a low-carb option.
Storing and Reheating Tips
Store stuffed peppers in an airtight container in the refrigerator for up to 4 days. Reheat in the microwave or in a covered dish in a 350°F oven until warmed through. These freeze well – wrap individually in plastic wrap and foil, freeze for up to 3 months, then thaw overnight before reheating.
7. Beef Spaghetti Bolognese
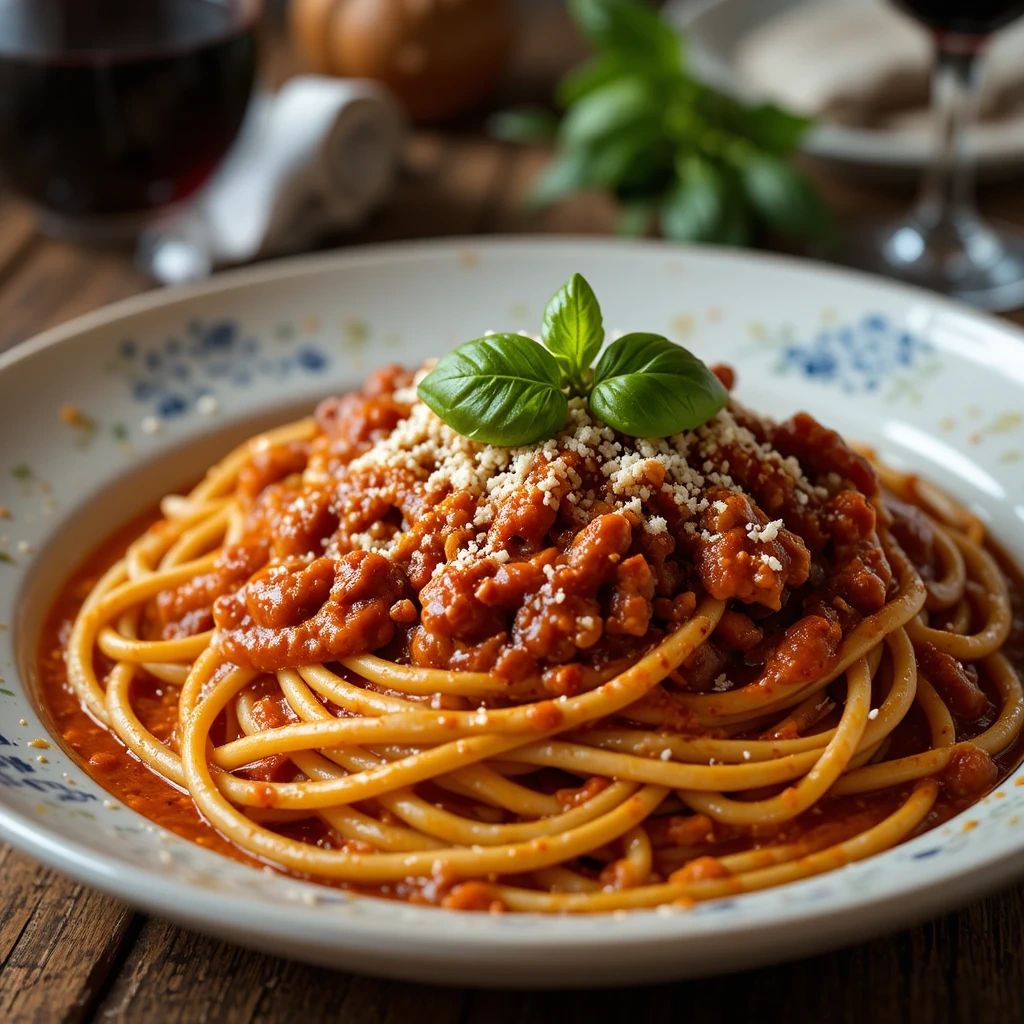
This authentic Italian sauce combines ground beef with tomatoes, herbs, meaty pasta sauce.
Quick Overview
Spaghetti Bolognese features a slow-simmered meat sauce with deep, complex flavors from tomatoes, herbs, and aromatic vegetables. The sauce clings beautifully to pasta for an authentic Italian experience.
Prep Time: 15 minutes
Cook Time: 45 minutes
Total Time: 60 minutes
Servings: 6
Key Ingredients for Beef Spaghetti Bolognese
- 1 pound ground beef
- 1 onion, finely diced
- 2 carrots, finely diced
- 2 celery stalks, finely diced
- 4 cloves garlic, minced
- 1 can (28 oz) crushed tomatoes
- 2 tablespoons tomato paste
- 1 cup beef broth
- 2 bay leaves
- 1 teaspoon dried oregano
- 1 teaspoon dried basil
- 1 pound spaghetti
- Parmesan cheese for serving
- Salt and pepper to taste
Step-by-Step Instructions
Step 1: Heat a large, deep skillet or Dutch oven over medium-high heat. Add the ground beef and cook for 8-10 minutes, breaking it into small pieces, until deeply browned. Don’t drain – the fat adds flavor.
Step 2: Add the diced onion, carrots, and celery (this mixture is called soffritto). Cook for 8-10 minutes, stirring occasionally, until the vegetables soften and begin to caramelize.
Step 3: Add the minced garlic and tomato paste. Cook for 2 minutes, stirring constantly, until the tomato paste darkens slightly.
Step 4: Pour in the crushed tomatoes and beef broth. Add the bay leaves, oregano, and basil. Stir well to combine.
Step 5: Bring to a gentle simmer, then reduce heat to low. Simmer uncovered for 30-40 minutes, stirring occasionally. The sauce should thicken and the flavors will deepen beautifully. Taste and season with salt and pepper.
Step 6: Meanwhile, cook the spaghetti according to package directions in salted boiling water. Drain, reserving ½ cup pasta water.
Step 7: Remove bay leaves from the sauce. Toss the cooked pasta with the Bolognese sauce, adding reserved pasta water if needed to help the sauce coat the noodles.
Step 8: Serve immediately with freshly grated Parmesan cheese.
What to Serve Beef Spaghetti Bolognese With
Serve with garlic bread or focaccia to soak up the sauce. A classic Caesar salad or Italian chopped salad provides a fresh contrast. Finish the meal with tiramisu or gelato for an authentic Italian dinner experience.
Top Tips for Perfecting Beef Spaghetti Bolognese
The key to authentic Bolognese is the slow simmer – don’t rush it. For even richer flavor, add a splash of whole milk near the end of cooking. Finely dice the vegetables so they melt into the sauce. Make the sauce a day ahead; the flavors improve overnight. Save time by making a double batch and freezing half.
Storing and Reheating Tips
Store the sauce separately from pasta in airtight containers for up to 5 days in the refrigerator. Reheat gently on the stovetop, adding a splash of broth if too thick. The sauce freezes beautifully for up to 4 months – freeze in portion-sized containers for easy weeknight dinners. Thaw overnight in the refrigerator before reheating.
8. Beef Burrito Bowls
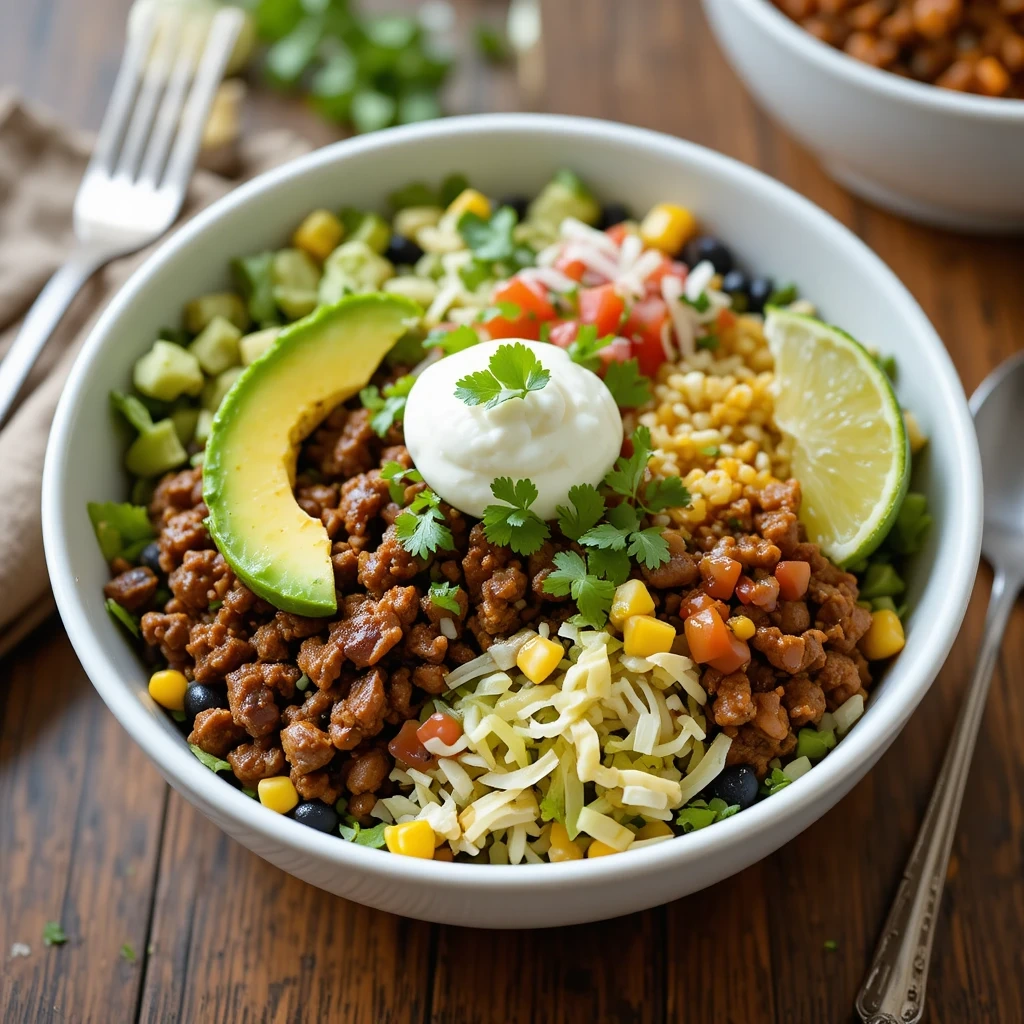
These customizable bowls feature seasoned ground beef over rice with fresh toppings for a healthier burrito alternative.
Quick Overview
Burrito bowls layer cilantro-lime rice with spiced ground beef and your choice of toppings. They deliver all the flavors of a burrito without the tortilla, making them lighter and easier to customize.
Prep Time: 15 minutes
Cook Time: 20 minutes
Total Time: 35 minutes
Servings: 4
Key Ingredients for Beef Burrito Bowls
- 1 pound ground beef
- 2 cups cooked white or brown rice
- 1 tablespoon taco seasoning
- 1 can (15 oz) black beans, drained
- 1 cup corn kernels
- 1 cup pico de gallo or salsa
- 1 cup shredded lettuce
- 1 avocado, sliced
- ½ cup sour cream
- 1 cup shredded cheese
- Lime wedges
- Fresh cilantro
- Salt and pepper
Step-by-Step Instructions
Step 1: Cook the rice according to package directions. Once done, stir in fresh lime juice (from 1 lime) and chopped cilantro. Set aside.
Step 2: In a large skillet over medium-high heat, brown the ground beef for 6-8 minutes, breaking it into crumbles. Drain excess fat.
Step 3: Add the taco seasoning and ¼ cup water to the beef. Stir and simmer for 3-4 minutes until the sauce thickens and coats the meat.
Step 4: In a small saucepan, heat the black beans with a pinch of cumin until warmed through. If using canned corn, heat it as well, or use it cold for a fresh crunch.
Step 5: To assemble the bowls, divide the cilantro-lime rice among 4 bowls as the base.
Step 6: Add portions of seasoned beef, black beans, corn, lettuce, pico de gallo, and any other desired toppings to each bowl.
Step 7: Top with sliced avocado, a dollop of sour cream, shredded cheese, and fresh cilantro. Serve with lime wedges for squeezing.
Top Tips for Perfecting Beef Burrito Bowls
Prep all ingredients before assembling for a beautiful presentation. Use brown rice for extra fiber and nutrition. Let everyone customize their own bowl – set up a burrito bar with all the toppings. For meal prep, store components separately and assemble when ready to eat. Warm your bowls in the oven for a few minutes to keep everything at the perfect temperature.
Storing and Reheating Tips
Store each component separately in airtight containers for up to 4 days. The rice, beef, and beans can be reheated, but keep fresh toppings like lettuce, avocado, and sour cream cold. Assemble bowls fresh when ready to eat. The beef and rice freeze well for up to 3 months, but fresh toppings should always be added after reheating.
9. Classic Beef Hamburgers

Juicy, flavorful homemade burgers beat any restaurant version with the perfect ratio of meat to toppings.
Quick Overview
Classic beef hamburgers feature seasoned ground beef patties grilled or pan-fried to perfection. Simple seasonings let the quality beef shine through, while toppings add flavor and texture.
Prep Time: 10 minutes
Cook Time: 10 minutes
Total Time: 20 minutes
Servings: 4
Key Ingredients for Classic Beef Hamburgers
- 1.5 pounds ground beef (80/20 blend)
- 1 teaspoon salt
- ½ teaspoon black pepper
- ½ teaspoon garlic powder
- 4 hamburger buns
- 4 slices cheese (optional)
- Lettuce leaves
- Sliced tomatoes
- Sliced onions
- Pickles
- Ketchup, mustard, mayo
Step-by-Step Instructions
Step 1: In a large bowl, gently combine the ground beef with salt, pepper, and garlic powder. Don’t overmix – this makes tough burgers.
Step 2: Divide the meat into 4 equal portions (about 6 ounces each). Shape into patties slightly larger than your buns, as they’ll shrink during cooking. Make a small indentation in the center of each patty with your thumb – this prevents bulging.
Step 3: Preheat a grill or large skillet over medium-high heat. If using a skillet, add a small amount of oil.
Step 4: Place the patties on the grill or in the skillet. Cook for 4-5 minutes without moving them – this creates a nice crust.
Step 5: Flip the burgers and cook for another 4-5 minutes for medium doneness. If adding cheese, place it on during the last minute of cooking and cover to melt.
Step 6: Remove burgers from heat and let rest for 2-3 minutes. Meanwhile, toast the buns on the grill or in a skillet until lightly golden.
Step 7: Assemble your burgers: spread condiments on the buns, add the patty, then layer with lettuce, tomato, onion, and pickles.
What to Serve Classic Beef Hamburgers With
Serve with classic French fries, sweet potato fries, or potato chips. Coleslaw and baked beans are traditional barbecue sides. For a lighter option, serve with a green salad or grilled vegetables. Don’t forget ice-cold sodas or milkshakes!
Top Tips for Perfecting Classic Beef Hamburgers
Use 80/20 ground beef for the juiciest burgers – leaner meat dries out. Don’t press down on burgers while cooking; this squeezes out delicious juices. Let meat come to room temperature before cooking for more even results. Season generously – meat needs salt. For cheeseburgers, cover the pan after adding cheese to help it melt perfectly.
Storing and Reheating Tips
Raw patties can be refrigerated for up to 2 days or frozen for 3 months with parchment paper between layers. Cooked burgers last 3-4 days in the refrigerator but don’t freeze well as they become dry. Reheat gently in a covered skillet with a splash of water. For best results, always add fresh toppings after reheating.
10. Beef Enchiladas
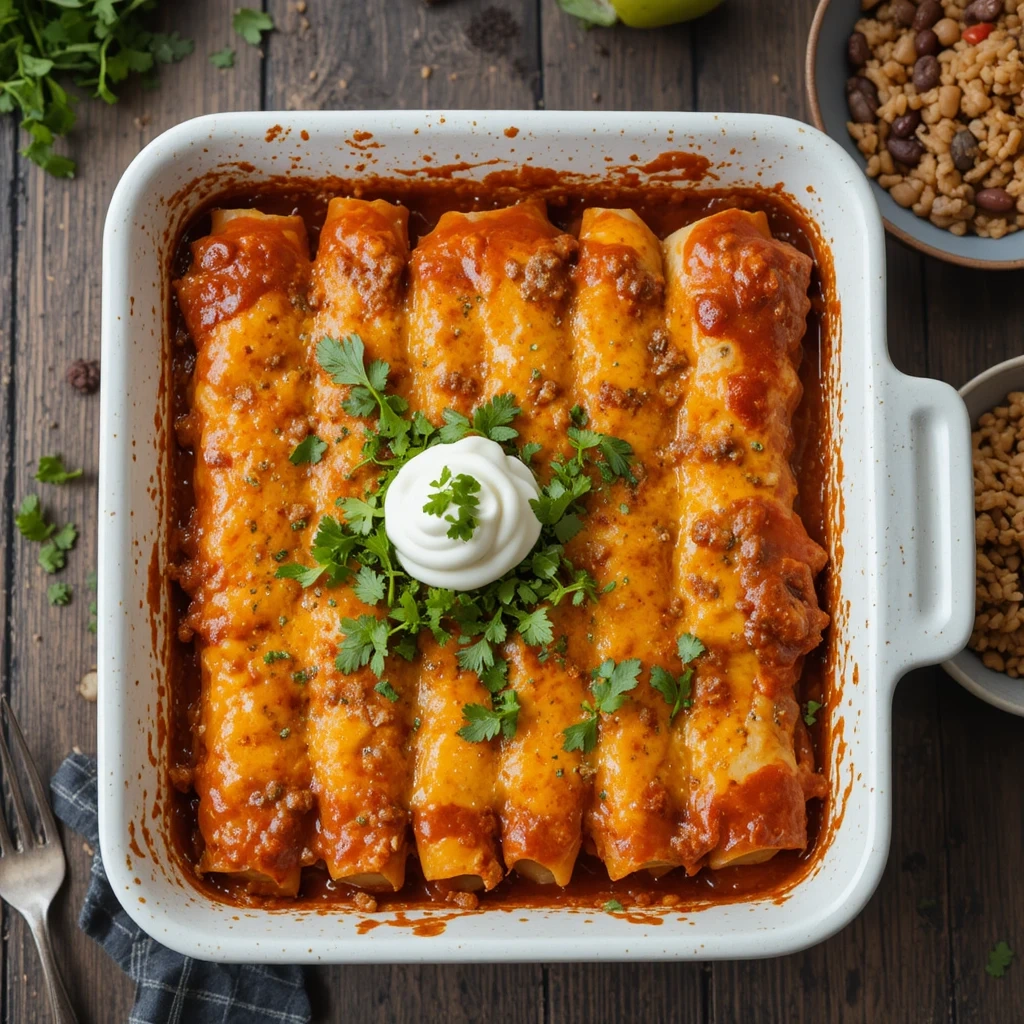
These cheesy, saucy rolled tortillas filled with seasoned beef deliver authentic Mexican comfort food.
Quick Overview
Beef enchiladas feature flour or corn tortillas wrapped around spiced ground beef, smothered in enchilada sauce, and topped with melted cheese. They’re baked until bubbly and golden for maximum comfort.
Prep Time: 20 minutes
Cook Time: 25 minutes
Total Time: 45 minutes
Servings: 6 (12 enchiladas)
Key Ingredients for Beef Enchiladas
- 1 pound ground beef
- 12 flour or corn tortillas
- 2 cups red enchilada sauce
- 2 cups shredded Mexican cheese blend
- 1 small onion, diced
- 2 cloves garlic, minced
- 1 teaspoon cumin
- 1 teaspoon chili powder
- ½ cup sour cream
- Fresh cilantro
- Salt and pepper
Step-by-Step Instructions
Step 1: Preheat your oven to 350°F (175°C). Lightly grease a 9×13 inch baking dish.
Step 2: In a large skillet over medium-high heat, cook the ground beef for 6-8 minutes until browned. Drain excess fat.
Step 3: Add the diced onion to the beef and cook for 4 minutes until softened. Add garlic, cumin, and chili powder, cooking for 1 minute more. Season with salt and pepper.
Step 4: Spread ½ cup of enchilada sauce across the bottom of the prepared baking dish.
Step 5: Warm the tortillas in the microwave for 30 seconds wrapped in a damp paper towel – this makes them pliable and prevents tearing.
Step 6: Place about ⅓ cup of the beef mixture down the center of each tortilla. Sprinkle with a small amount of cheese, then roll tightly.
Step 7: Place each rolled enchilada seam-side down in the baking dish. Repeat with remaining tortillas.
Step 8: Pour the remaining enchilada sauce over the rolled tortillas, making sure they’re completely covered. Sprinkle the remaining cheese evenly over the top.
Step 9: Bake for 20-25 minutes until the cheese is melted and bubbly. Let rest for 5 minutes before serving.
Step 10: Garnish with sour cream and fresh cilantro.
What to Serve Beef Enchiladas With
Serve with Mexican rice, refried beans, or black beans. A fresh salad with lime vinaigrette cuts through the richness. Chips and guacamole make excellent starters, while churros or flan provide a sweet ending.
Top Tips for Perfecting Beef Enchiladas
Warm tortillas are essential – cold tortillas crack when rolled. Use corn tortillas for authentic flavor, flour for easier rolling. Don’t overfill enchiladas or they’ll be difficult to roll and may burst. Make your own enchilada sauce for superior flavor. For extra richness, add a layer of sour cream between the tortillas and the sauce.
Storing and Reheating Tips
Cover tightly and refrigerate for up to 4 days. Reheat covered in a 350°F oven until warmed through, or microwave individual portions. These freeze beautifully – assemble but don’t bake, cover tightly with plastic and foil, and freeze for up to 3 months. Bake from frozen at 350°F for 45-50 minutes, covered for the first 30 minutes.
11. Beef Lasagna

Layers of pasta, rich meat sauce, and creamy cheese create this iconic Italian-American comfort food.
Quick Overview
Beef lasagna features alternating layers of pasta, savory ground beef sauce, ricotta cheese mixture, and mozzarella. Baked until golden and bubbly, it’s the ultimate crowd-pleasing casserole.
Prep Time: 30 minutes
Cook Time: 45 minutes
Total Time: 1 hour 15 minutes
Servings: 8-10
Key Ingredients for Beef Lasagna
- 1 pound ground beef
- 1 pound lasagna noodles
- 1 jar (24 oz) marinara sauce
- 15 oz ricotta cheese
- 2 cups shredded mozzarella cheese
- ½ cup grated Parmesan cheese
- 1 egg
- 1 onion, diced
- 3 cloves garlic, minced
- 2 tablespoons fresh basil
- 1 teaspoon Italian seasoning
- Salt and pepper
Step-by-Step Instructions
Step 1: Preheat your oven to 375°F (190°C). Cook the lasagna noodles according to package directions until al dente. Drain and lay flat on a clean kitchen towel to prevent sticking.
Step 2: In a large skillet, brown the ground beef over medium-high heat for 8 minutes. Add the diced onion and cook for 5 minutes more. Add garlic and cook for 1 minute.
Step 3: Stir the marinara sauce and Italian seasoning into the beef mixture. Simmer for 10 minutes to blend flavors. Season with salt and pepper.
Step 4: In a medium bowl, combine the ricotta cheese, egg, half the Parmesan, 1 tablespoon basil, salt, and pepper. Mix until smooth.
Step 5: Spread 1 cup of meat sauce across the bottom of a 9×13 inch baking dish.
Step 6: Layer 4 lasagna noodles over the sauce, overlapping slightly. Spread half the ricotta mixture over the noodles, then add ⅓ of the remaining meat sauce and ⅓ of the mozzarella.
Step 7: Repeat the layering: noodles, remaining ricotta mixture, half the remaining meat sauce, and half the remaining mozzarella.
Step 8: Add a final layer of noodles, top with the remaining meat sauce, mozzarella, and Parmesan.
Step 9: Cover with foil (spray the underside with cooking spray to prevent cheese from sticking) and bake for 25 minutes.
Step 10: Remove foil and bake for 20 more minutes until the cheese is golden and bubbly. Let rest for 15 minutes before cutting – this allows the layers to set.
What to Serve Beef Lasagna With
Serve with garlic bread, a fresh green salad, and roasted vegetables. A simple Caesar salad or antipasto platter makes a nice starter. Finish with tiramisu or Italian cookies.
Top Tips for Perfecting Beef Lasagna
Don’t skip the resting time – lasagna needs to set for clean slices. Use no-boil noodles to save time; they work perfectly. For extra flavor, add a layer of sautéed spinach or mushrooms. Make lasagna a day ahead – the flavors improve overnight and it’s easier to slice when cold, then reheated.
Storing and Reheating Tips
Refrigerate covered for up to 5 days. Reheat individual portions in the microwave or the whole dish covered in a 350°F oven until heated through. Lasagna freezes beautifully – assemble but don’t bake, wrap tightly in plastic wrap and foil, freeze for up to 3 months. Bake from frozen, covered, at 375°F for 90 minutes, then uncovered for 15 minutes.
12. Beef Nachos

Loaded nachos piled high with seasoned beef, melted cheese, and fresh toppings make the ultimate shareable snack.
Quick Overview
Beef nachos feature crispy tortilla chips layered with seasoned ground beef and cheese, then baked until melty. Fresh toppings add color, crunch, and cooling contrast to the warm, cheesy base.
Prep Time: 10 minutes
Cook Time: 15 minutes
Total Time: 25 minutes
Servings: 4-6
Key Ingredients for Beef Nachos
- 1 pound ground beef
- 1 large bag tortilla chips
- 2 cups shredded cheddar cheese
- 1 tablespoon taco seasoning
- 1 can (15 oz) refried beans
- 1 cup pico de gallo
- ½ cup sour cream
- ½ cup guacamole
- Sliced jalapeños
- Chopped cilantro
- Lime wedges
Step-by-Step Instructions
Step 1: Preheat your oven to 400°F (200°C). Line a large baking sheet with parchment paper or foil.
Step 2: In a skillet over medium-high heat, brown the ground beef for 6-8 minutes. Drain excess fat.
Step 3: Add the taco seasoning and ¼ cup water to the beef. Simmer for 3-4 minutes until the sauce thickens.
Step 4: Spread half the tortilla chips across the prepared baking sheet in an even layer.
Step 5: Dollop half the refried beans over the chips (warm the beans first to make them easier to spread). Sprinkle with half the seasoned beef and half the cheese.
Step 6: Add another layer of chips, beans, beef, and cheese.
Step 7: Bake for 8-10 minutes until the cheese is completely melted and bubbly.
Step 8: Remove from oven and immediately top with pico de gallo, dollops of sour cream and guacamole, jalapeños, and cilantro. Serve with lime wedges.
Top Tips for Perfecting Beef Nachos
Layer your ingredients – don’t just pile everything on top or you’ll have bare chips on the bottom. Use thick, sturdy chips that won’t get soggy. Add cheese to both layers so every chip gets some melty goodness. Serve immediately while chips are still crispy. For extra indulgence, drizzle with queso sauce before adding fresh toppings.
Storing and Reheating Tips
Nachos are best enjoyed immediately – they don’t store well as chips become soggy. However, you can store the beef and prepare fresh toppings, then assemble new nachos when ready to eat. Leftover seasoned beef keeps for 4 days refrigerated or 3 months frozen.
13. Beef and Potato Casserole
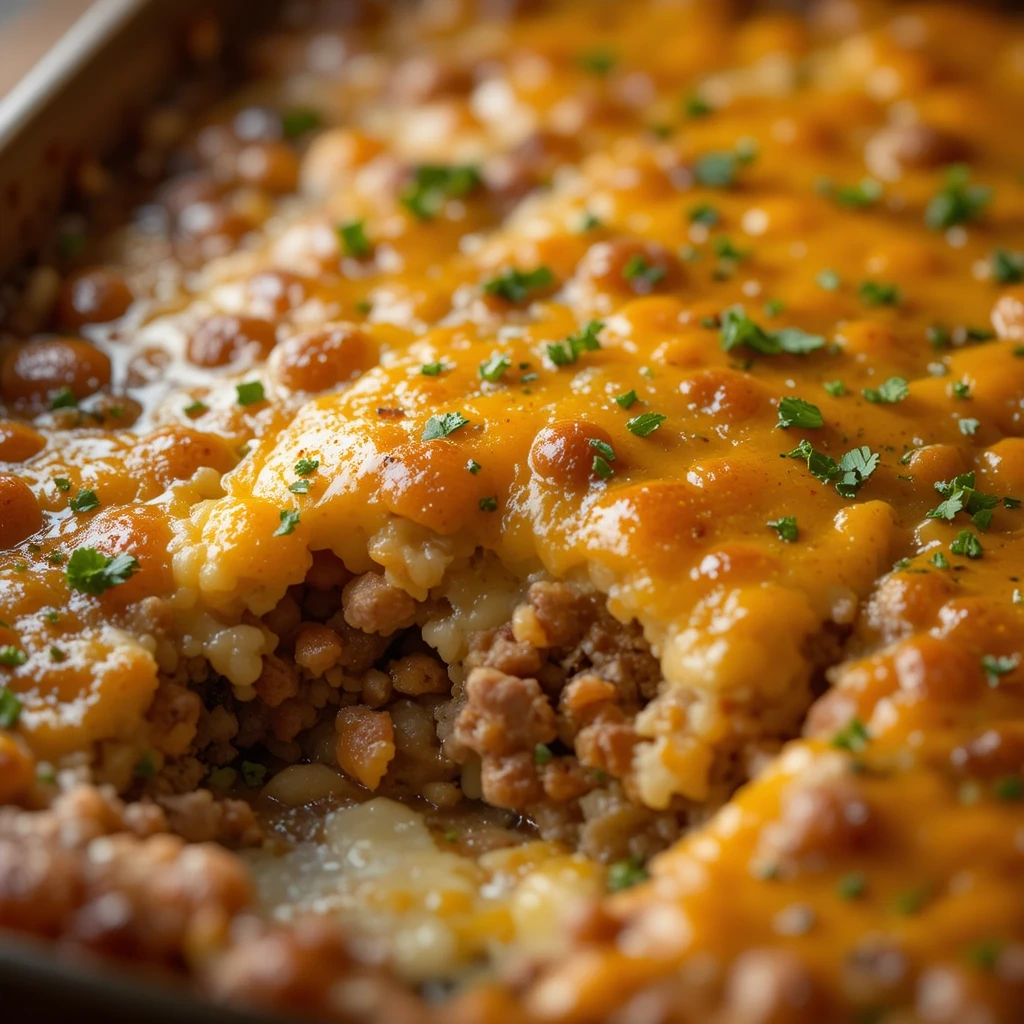
This hearty casserole combines ground beef, tender potatoes, and cheese in one comforting dish.
Quick Overview
Beef and potato casserole layers seasoned ground beef with sliced potatoes and cheese, all baked together until golden and bubbling. It’s like a deconstructed shepherd’s pie with crispy edges.
Prep Time: 20 minutes
Cook Time: 60 minutes
Total Time: 1 hour 20 minutes
Servings: 6-8
Key Ingredients for Beef and Potato Casserole
- 2 pounds ground beef
- 6 large potatoes, peeled and thinly sliced
- 2 cups shredded cheddar cheese
- 1 can cream of mushroom soup
- 1 cup milk
- 1 onion, diced
- 2 cloves garlic, minced
- 1 teaspoon paprika
- Salt and pepper to taste
- Fresh parsley for garnish
Step-by-Step Instructions
Step 1: Preheat your oven to 350°F (175°C). Grease a 9×13 inch baking dish.
Step 2: In a large skillet, brown the ground beef over medium-high heat for 8 minutes. Add the diced onion and cook for 5 minutes until softened. Add garlic and cook for 1 minute. Drain excess fat and season with salt, pepper, and paprika.
Step 3: In a bowl, whisk together the cream of mushroom soup and milk until smooth.
Step 4: Layer half the sliced potatoes in the bottom of the prepared baking dish. Season with salt and pepper.
Step 5: Spread the cooked beef mixture evenly over the potatoes. Sprinkle with half the cheese.
Step 6: Layer the remaining potatoes over the beef and cheese. Pour the soup mixture evenly over everything.
Step 7: Cover tightly with foil and bake for 45 minutes.
Step 8: Remove foil, sprinkle with remaining cheese, and bake uncovered for 15 more minutes until the potatoes are tender and the top is golden brown.
Step 9: Let rest for 10 minutes before serving. Garnish with fresh parsley.
What to Serve Beef and Potato Casserole With
This hearty casserole pairs well with a simple green salad, steamed green beans, or roasted vegetables. Dinner rolls or biscuits are perfect for soaking up the creamy sauce. A light coleslaw adds refreshing crunch.
Top Tips for Perfecting Beef and Potato Casserole
Slice potatoes uniformly using a mandoline for even cooking. Don’t skip the foil cover – it steams the potatoes perfectly. For extra flavor, add a layer of sautéed mushrooms or bell peppers. Use sharp cheddar for more intense cheese flavor. Test potato tenderness with a knife before removing from the oven.
Storing and Reheating Tips
Cover and refrigerate for up to 4 days. Reheat in a covered dish at 350°F until warmed through, or microwave individual portions. This casserole freezes well – cool completely, wrap tightly, and freeze for up to 3 months. Thaw overnight in the refrigerator before reheating.
14. Beef Sloppy Joes
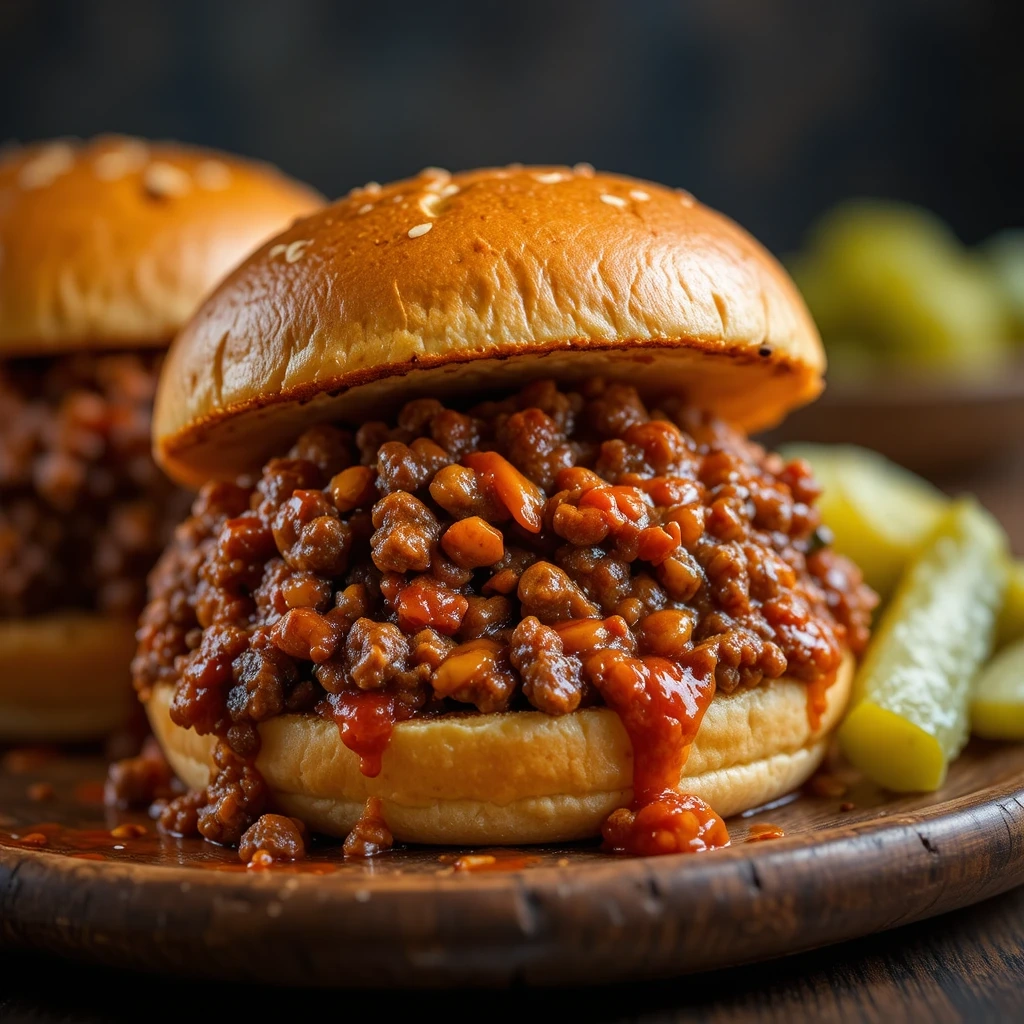
This messy, delicious sandwich features sweet and tangy ground beef sauce served on soft buns.
Quick Overview
Sloppy Joes combine ground beef in a slightly sweet tomato-based sauce with tangy undertones. Served on hamburger buns, they’re nostalgic, kid-friendly, and ready in 20 minutes.
Prep Time: 5 minutes
Cook Time: 15 minutes
Total Time: 20 minutes
Servings: 6
Key Ingredients for Beef Sloppy Joes
- 1.5 pounds ground beef
- 1 small onion, diced
- 1 bell pepper, diced
- 2 cloves garlic, minced
- 1 cup ketchup
- 2 tablespoons brown sugar
- 1 tablespoon Worcestershire sauce
- 1 tablespoon mustard
- ½ cup water
- 6 hamburger buns
- Salt and pepper
- Pickles for serving
Step-by-Step Instructions
Step 1: In a large skillet over medium-high heat, brown the ground beef for 6-8 minutes, breaking it into small crumbles. Drain most of the fat, leaving about 1 tablespoon.
Step 2: Add the diced onion and bell pepper to the skillet. Cook for 4-5 minutes until the vegetables soften.
Step 3: Stir in the minced garlic and cook for 1 minute until fragrant.
Step 4: Add the ketchup, brown sugar, Worcestershire sauce, mustard, and water. Stir well to combine.
Step 5: Bring the mixture to a simmer and cook for 8-10 minutes, stirring occasionally, until the sauce thickens to your desired consistency. The mixture should be thick but still saucy.
Step 6: Taste and adjust seasoning with salt and pepper. For more tang, add extra mustard; for more sweetness, add more brown sugar.
Step 7: Toast the hamburger buns in a skillet or oven until lightly golden.
Step 8: Spoon the beef mixture generously onto the bottom buns, top with the bun tops, and serve immediately with pickles.
What to Serve Beef Sloppy Joes With
Classic sides include potato chips, French fries, or tater tots. Coleslaw provides a cool, crunchy contrast to the warm sandwich. Mac and cheese or baked beans are traditional accompaniments. For vegetables, serve carrot sticks or a simple garden salad.
Top Tips for Perfecting Beef Sloppy Joes
Don’t overcook the sauce – it should be thick but saucy, not dry. Adjust sweetness to your preference; some like it sweeter, others prefer more tang. For a thicker sauce, simmer longer; for thinner, add more water. Toast the buns to prevent them from getting soggy. Make the meat mixture ahead and reheat when ready to serve.
Storing and Reheating Tips
Store the beef mixture separately from buns in an airtight container for up to 4 days in the refrigerator. Reheat on the stovetop over medium heat, adding a splash of water if needed. The mixture freezes beautifully for up to 3 months. Thaw overnight in the refrigerator and reheat before serving on fresh buns.
15. Beef Quesadillas

Crispy tortillas filled with seasoned beef and melted cheese create these satisfying Mexican favorites.
Quick Overview
Beef quesadillas feature flour tortillas stuffed with spiced ground beef and cheese, then pan-fried until golden and crispy. They’re quick to make and endlessly customizable with your favorite fillings.
Prep Time: 10 minutes
Cook Time: 15 minutes
Total Time: 25 minutes
Servings: 4
Key Ingredients for Beef Quesadillas
- 1 pound ground beef
- 8 large flour tortillas
- 2 cups shredded cheese (cheddar or Mexican blend)
- 1 tablespoon taco seasoning
- 1 small onion, diced
- 1 bell pepper, diced (optional)
- Sour cream for serving
- Salsa for serving
- Guacamole for serving
- Vegetable oil for cooking
Step-by-Step Instructions
Step 1: In a large skillet over medium-high heat, brown the ground beef for 6-8 minutes. Add the diced onion and bell pepper (if using) and cook for 4 minutes more. Drain excess fat.
Step 2: Add the taco seasoning and 2 tablespoons of water to the beef. Stir and cook for 2 minutes until the sauce thickens. Remove from heat.
Step 3: Wipe out the skillet and return it to medium heat. Add a small amount of oil.
Step 4: Place one tortilla in the skillet. Sprinkle ½ cup of cheese evenly over half of the tortilla.
Step 5: Spoon about ¼ cup of the beef mixture over the cheese, staying on one half of the tortilla.
Step 6: Fold the tortilla in half to create a half-moon shape. Press down gently with a spatula.
Step 7: Cook for 2-3 minutes until the bottom is golden brown and crispy. Flip carefully and cook the other side for 2-3 minutes until golden and the cheese is melted.
Step 8: Transfer to a cutting board and let rest for 1 minute before cutting into wedges. Repeat with remaining tortillas.
Step 9: Serve hot with sour cream, salsa, and guacamole on the side.
What to Serve Beef Quesadillas With
Serve with Mexican rice, black beans, or a fresh salad. Chips and queso make a great starter.
Top Tips for Perfecting Beef Quesadillas
Don’t overfill or the quesadilla will be difficult to flip and may burst. Use medium heat – too high and the outside burns before the cheese melts. Let quesadillas rest before cutting so the cheese sets slightly. For extra crispy quesadillas, use a light coating of oil on both sides. Add beans, corn, or jalapeños for variation.
Storing and Reheating Tips
Store cooked quesadillas in the refrigerator for up to 3 days, separated by parchment paper. Reheat in a dry skillet over medium heat until warm and crispy, or in a 350°F oven for 10 minutes. Store the beef mixture separately for up to 4 days and assemble fresh quesadillas when needed. The beef freezes well for up to 3 months.
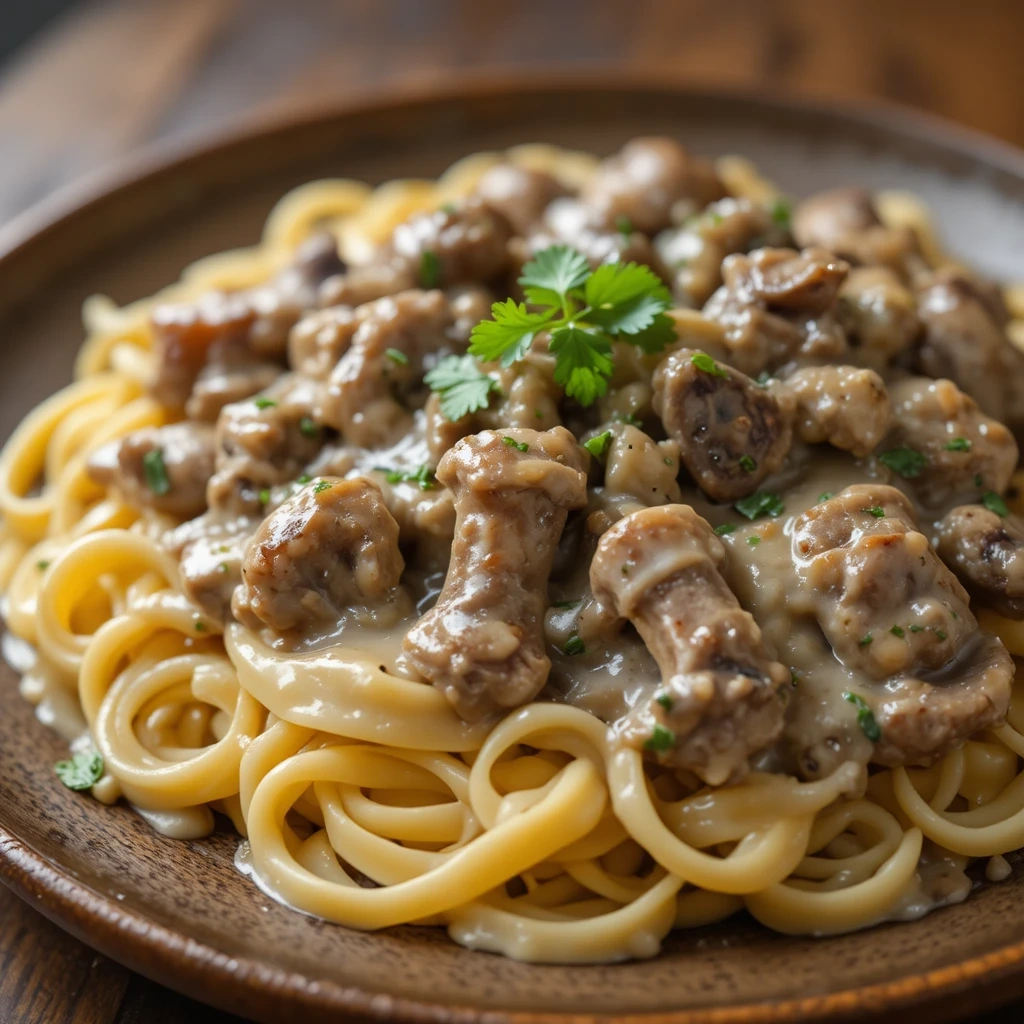
16. Beef Stroganoff
This creamy Russian-inspired dish combines tender beef with mushrooms in a rich sour cream sauce.
Quick Overview
Beef stroganoff features seasoned ground beef and sautéed mushrooms in a luxurious sour cream sauce served over egg noodles. It’s comfort food elevated with sophisticated flavors.
Prep Time: 10 minutes
Cook Time: 25 minutes
Total Time: 35 minutes
Servings: 4-6
Key Ingredients for Beef Stroganoff
- 1.5 pounds ground beef
- 8 oz egg noodles
- 8 oz mushrooms, sliced
- 1 onion, diced
- 3 cloves garlic, minced
- 2 tablespoons butter
- 2 tablespoons flour
- 2 cups beef broth
- 1 cup sour cream
- 1 tablespoon Worcestershire sauce
- 1 teaspoon Dijon mustard
- Fresh parsley
- Salt and pepper
Step-by-Step Instructions
Step 1: Cook the egg noodles according to package directions. Drain and set aside.
Step 2: In a large skillet over medium-high heat, brown the ground beef for 8 minutes. Season with salt and pepper. Transfer to a plate, leaving some fat in the pan.
Step 3: Add butter to the skillet. Once melted, add the sliced mushrooms and cook for 5 minutes until golden brown. Add the diced onion and cook for 3 minutes more.
Step 4: Stir in the minced garlic and cook for 1 minute until fragrant.
Step 5: Sprinkle the flour over the vegetables and stir for 1 minute to cook the raw flour taste out.
Step 6: Gradually pour in the beef broth while stirring constantly to prevent lumps. Add the Worcestershire sauce and Dijon mustard.
Step 7: Bring to a simmer and cook for 5 minutes until the sauce thickens slightly.
Step 8: Return the cooked beef to the skillet. Remove from heat and stir in the sour cream. Don’t boil after adding sour cream or it may curdle.
Step 9: Taste and adjust seasoning with salt and pepper. Serve over the egg noodles, garnished with fresh parsley.
What to Serve Beef Stroganoff With
Serve with a simple green salad, roasted asparagus, or green beans. Crusty bread is perfect for soaking up the creamy sauce. For a Russian-inspired meal, add pickled vegetables or beets on the side.
Top Tips for Perfecting Beef Stroganoff
Don’t boil the sauce after adding sour cream – gentle heat prevents curdling. Use full-fat sour cream for the richest, most stable sauce. For deeper flavor, use a mix of mushroom varieties like cremini and shiitake. If the sauce is too thick, thin with a little beef broth; if too thin, simmer longer before adding sour cream.
Storing and Reheating Tips
Store in an airtight container in the refrigerator for up to 3 days. Reheat gently over low heat on the stovetop, adding a splash of broth to thin if needed. Avoid high heat to prevent the sour cream from separating. This dish doesn’t freeze well due to the sour cream, but you can freeze the beef and mushroom base before adding the sour cream.
17. Beef Cabbage Rolls

These European-inspired rolls feature seasoned beef and rice wrapped in tender cabbage leaves and simmered in tomato sauce.
Quick Overview
Cabbage rolls combine ground beef mixed with rice, wrapped in blanched cabbage leaves, and baked in tomato sauce. They’re tender, flavorful, and deeply comforting.
Prep Time: 30 minutes
Cook Time: 60 minutes
Total Time: 1 hour 30 minutes
Servings: 6 (12 rolls)
Key Ingredients for Beef Cabbage Rolls
- 1 large head green cabbage
- 1.5 pounds ground beef
- 1 cup cooked rice
- 1 egg
- 1 onion, finely diced
- 2 cloves garlic, minced
- 1 can (28 oz) crushed tomatoes
- 1 can (8 oz) tomato sauce
- 2 tablespoons brown sugar
- 1 tablespoon lemon juice
- 1 teaspoon paprika
- Salt and pepper
- Fresh dill or parsley
Step-by-Step Instructions
Step 1: Bring a large pot of salted water to boil. Carefully cut the core from the cabbage. Place the whole head in the boiling water for 2-3 minutes until the outer leaves soften. Remove leaves as they become pliable. You need about 12 large leaves.
Step 2: In a large bowl, combine the ground beef, cooked rice, egg, half the diced onion, garlic, paprika, salt, and pepper. Mix gently until combined.
Step 3: Lay a cabbage leaf flat and cut out the thick vein from the center. Place about ⅓ cup of filling near the bottom of the leaf.
Step 4: Fold the sides of the leaf over the filling, then roll up from the bottom to create a tight package. Repeat with remaining leaves and filling.
Step 5: In a bowl, mix the crushed tomatoes, tomato sauce, remaining onion, brown sugar, and lemon juice.
Step 6: Spread ½ cup of the tomato mixture on the bottom of a large Dutch oven or deep baking dish.
Step 7: Arrange the cabbage rolls seam-side down in the pot, packing them snugly. Pour the remaining tomato sauce over the rolls.
Step 8: Cover and bake at 350°F (175°C) for 60 minutes, or simmer on the stovetop over low heat for the same time.
Step 9: Let rest for 10 minutes. Garnish with fresh dill or parsley before serving.
What to Serve Beef Cabbage Rolls With
Serve with sour cream, crusty bread, or mashed potatoes. A simple cucumber salad or pickled vegetables provides a refreshing contrast. For a complete Eastern European meal, add rye bread and a beet salad.
Top Tips for Perfecting Beef Cabbage Rolls
Blanch the whole cabbage head to remove leaves easily without tearing. If leaves tear, overlap two smaller leaves. Don’t overfill the rolls or they’ll burst during cooking. The brown sugar and lemon juice balance the tomatoes perfectly – don’t skip them. Make these ahead; they taste even better the next day.
Storing and Reheating Tips
Refrigerate in an airtight container for up to 5 days. Reheat gently in a covered pot on the stovetop or in the oven at 350°F. These freeze beautifully – arrange in a freezer-safe container with sauce, freeze for up to 3 months, then thaw overnight and reheat.
18. Beef and Bean Burritos

These hefty, handheld meals wrap seasoned beef, beans, rice, and toppings in large flour tortillas.
Quick Overview
Beef and bean burritos combine all your favorite Mexican flavors in one portable package. Seasoned beef, creamy beans, fluffy rice, and melted cheese wrapped tightly in a warm tortilla.
Prep Time: 15 minutes
Cook Time: 15 minutes
Total Time: 30 minutes
Servings: 6 burritos
Key Ingredients for Beef and Bean Burritos
- 1 pound ground beef
- 6 large flour tortillas (burrito size)
- 1 can (16 oz) refried beans
- 2 cups cooked rice
- 1.5 cups shredded cheese
- 1 tablespoon taco seasoning
- 1 cup salsa
- ½ cup sour cream
- Shredded lettuce
- Diced tomatoes
- Hot sauce (optional)
Step-by-Step Instructions
Step 1: In a large skillet over medium-high heat, brown the ground beef for 6-8 minutes. Drain excess fat.
Step 2: Add taco seasoning and ¼ cup water to the beef. Stir and simmer for 3-4 minutes until the sauce thickens.
Step 3: Warm the refried beans in a small saucepan over low heat, stirring occasionally.
Step 4: Warm the tortillas in the microwave for 20-30 seconds wrapped in a damp paper towel, or on a dry skillet for a few seconds per side.
Step 5: To assemble, lay a tortilla flat. Spread a line of refried beans down the center, leaving 2 inches at each end.
Step 6: Add rice, seasoned beef, cheese, lettuce, tomatoes, salsa, and sour cream in lines on top of the beans.
Step 7: Fold the ends of the tortilla inward, then fold one side over the filling and roll tightly to create a sealed burrito.
Step 8: Optional: Heat a dry skillet over medium heat and place the burrito seam-side down. Cook for 2 minutes per side to create a crispy exterior.
Step 9: Cut in half diagonally and serve with extra salsa, sour cream, and hot sauce.
Top Tips for Perfecting Beef and Bean Burritos
Warm tortillas are essential for rolling without tearing. Don’t overfill – you won’t be able to close them properly. Place heavier ingredients like beans and rice first, then lighter toppings. For meal prep, assemble burritos, wrap in foil, and refrigerate or freeze. Pan-fry assembled burritos for a crispy “California-style” burrito.
Storing and Reheating Tips
Wrap assembled burritos individually in foil and refrigerate for up to 3 days. Reheat in a 350°F oven for 20 minutes. For freezing, wrap tightly in plastic wrap then foil, freeze for up to 3 months. Reheat from frozen in the oven at 350°F for 30-40 minutes. Keep fresh toppings like lettuce and sour cream separate for best quality.
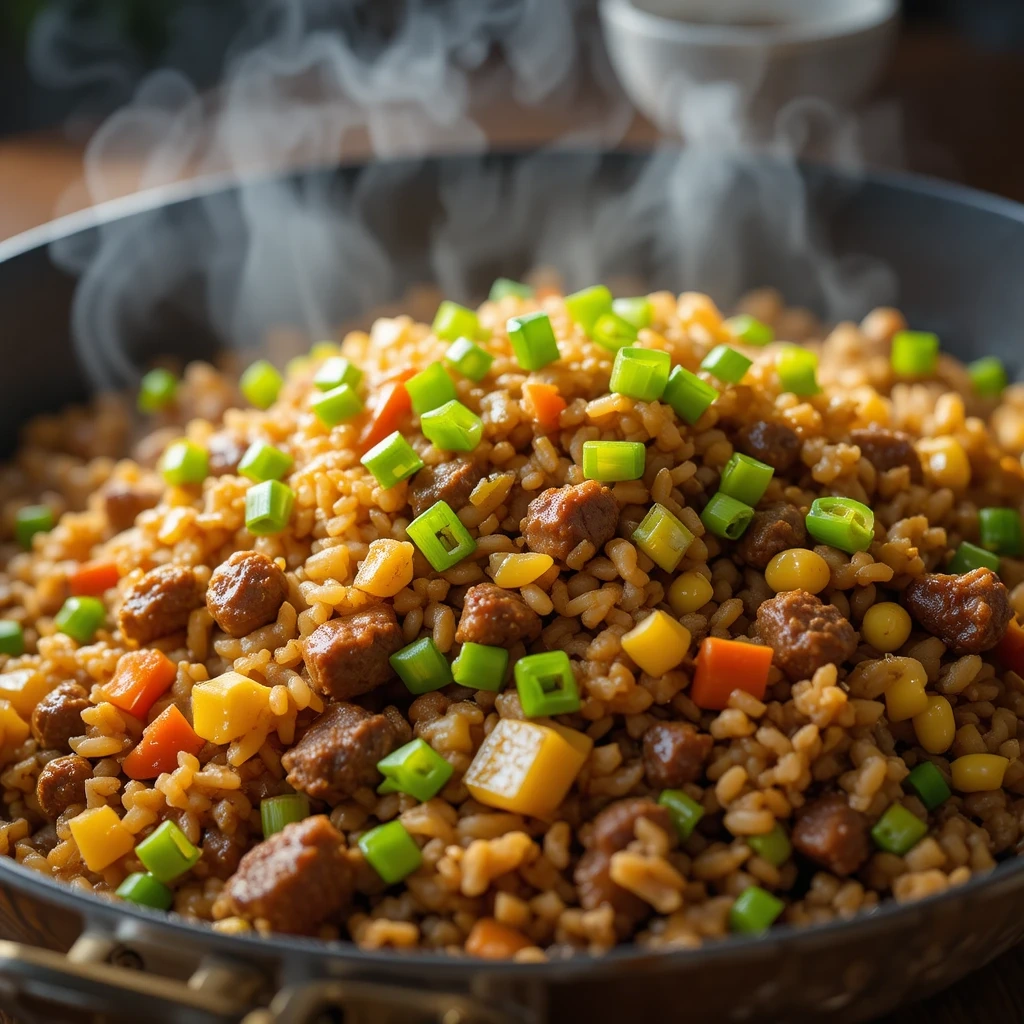
19. Beef Fried Rice
This Asian-inspired one-pan meal transforms leftover rice into a flavorful dish packed with beef and vegetables.
Quick Overview
Beef fried rice features crispy rice stir-fried with seasoned ground beef, vegetables, and eggs in savory soy sauce. It’s a complete meal that comes together in one pan in under 20 minutes.
Prep Time: 10 minutes
Cook Time: 15 minutes
Total Time: 25 minutes
Servings: 4
Key Ingredients for Beef Fried Rice
- 1 pound ground beef
- 4 cups cold cooked rice (day-old works best)
- 2 eggs, beaten
- 1 cup frozen mixed vegetables (peas, carrots, corn)
- 3 green onions, sliced
- 3 cloves garlic, minced
- 1 tablespoon fresh ginger, minced
- 3 tablespoons soy sauce
- 1 tablespoon sesame oil
- 2 tablespoons vegetable oil
- Salt and pepper
Step-by-Step Instructions
Step 1: Heat 1 tablespoon vegetable oil in a large wok or skillet over high heat. Add the ground beef and cook for 6-8 minutes, breaking it into small pieces, until browned and crispy. Season with salt and pepper. Transfer to a plate.
Step 2: Add the remaining tablespoon of oil to the pan. Pour in the beaten eggs and scramble quickly until just set, about 1 minute. Transfer to the plate with the beef.
Step 3: Add the garlic and ginger to the pan and stir-fry for 30 seconds until fragrant.
Step 4: Add the cold rice to the pan, breaking up any clumps. Stir-fry for 3-4 minutes, pressing the rice against the pan to create crispy bits.
Step 5: Add the frozen vegetables and stir-fry for2 minutes until heated through.
Step 6: Return the beef and eggs to the pan. Pour the soy sauce and sesame oil over everything.
Step 7: Stir-fry everything together for 2 minutes, tossing constantly to combine and heat through.
Step 8: Add the sliced green onions, toss once more, and serve immediately.
What to Serve Beef Fried Rice With
Fried rice is a complete meal, but you can serve it with egg rolls, spring rolls, or dumplings as appetizers. A simple cucumber salad or Asian slaw adds freshness. Hot and sour soup or egg drop soup make excellent starters.
Top Tips for Perfecting Beef Fried Rice
Use day-old refrigerated rice – fresh rice is too moist and becomes mushy. If using fresh rice, spread it on a baking sheet to cool and dry before using. High heat is essential for that restaurant-quality flavor and texture. Don’t stir constantly; let the rice sit for 30 seconds between stirring to develop crispy bits. Customize with other vegetables like bell peppers, mushrooms, or broccoli.
Storing and Reheating Tips
Store in an airtight container in the refrigerator for up to 4 days. Reheat in a skillet over medium-high heat with a splash of water or oil, or microwave until hot. This dish doesn’t freeze well as the rice texture deteriorates, but the beef can be frozen separately for up to 3 months.
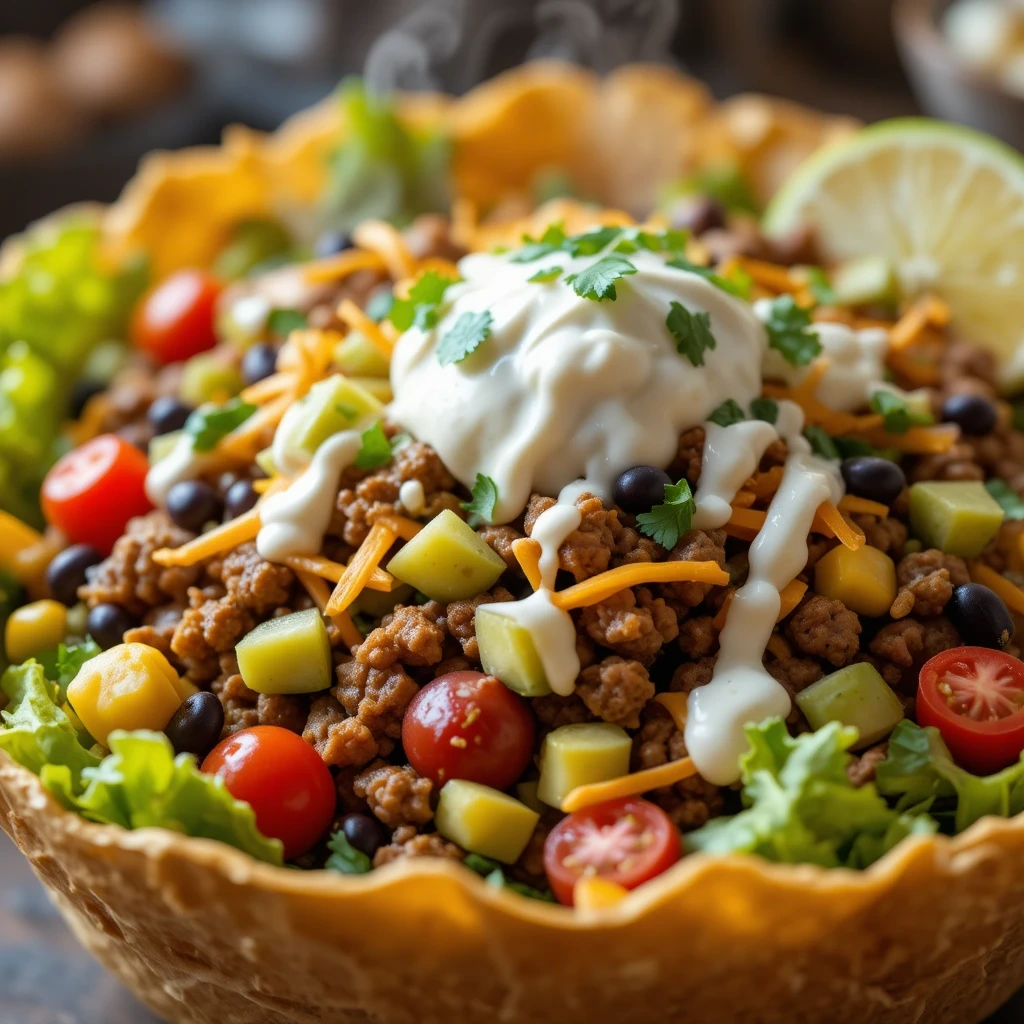
20. Beef Taco Salad
This Tex-Mex favorite combines all the flavors of tacos in a fresh, crunchy salad bowl.
Quick Overview
Beef taco salad features seasoned ground beef over crisp lettuce with all your favorite taco toppings. Served in an edible tortilla bowl or on its own, it’s lighter than tacos but just as satisfying.
Prep Time: 15 minutes
Cook Time: 10 minutes
Total Time: 25 minutes
Servings: 4
Key Ingredients for Beef Taco Salad
- 1 pound ground beef
- 6 cups romaine lettuce, chopped
- 1 tablespoon taco seasoning
- 1 cup cherry tomatoes, halved
- 1 cup shredded cheddar cheese
- 1 cup black beans, drained and rinsed
- 1 cup corn kernels
- 1 avocado, diced
- ½ cup sour cream
- ½ cup salsa
- Tortilla strips or crushed chips
- Fresh cilantro
- Lime wedges
Step-by-Step Instructions
Step 1: In a large skillet over medium-high heat, cook the ground beef for 6-8 minutes until browned. Drain excess fat.
Step 2: Add the taco seasoning and ¼ cup water to the beef. Stir and simmer for 3-4 minutes until the sauce thickens. Let cool slightly.
Step 3: While the beef cools, prepare your salad ingredients. Chop the lettuce and arrange it in a large serving bowl or divide among 4 individual bowls.
Step 4: Top the lettuce with the seasoned beef, spreading it evenly.
Step 5: Arrange the tomatoes, cheese, black beans, corn, and avocado over the beef in sections for a colorful presentation.
Step 6: In a small bowl, mix the sour cream and salsa together to create a creamy dressing.
Step 7: Drizzle the dressing over the salad or serve it on the side.
Step 8: Top with tortilla strips or crushed chips for crunch. Garnish with fresh cilantro and serve with lime wedges.
What to Serve Beef Taco Salad With
Taco salad is a complete meal, but you can serve tortilla chips with guacamole or queso on the side. A cup of tortilla soup or Mexican bean soup makes a nice starter. For drinks, try limeade, iced tea, or margaritas.
Top Tips for Perfecting Beef Taco Salad
Let the beef cool for 5 minutes before adding to the salad – hot meat wilts the lettuce. Prep all ingredients before assembling for the freshest salad. For meal prep, store components separately and assemble when ready to eat. Make edible tortilla bowls by draping large tortillas over oven-safe bowls and baking at 350°F for 10 minutes. Add pickled jalapeños for heat and tang.
Storing and Reheating Tips
Store components separately in airtight containers for up to 3 days. The seasoned beef can be refrigerated for 4 days or frozen for 3 months. Assemble salads fresh when ready to eat – assembled salads don’t store well as lettuce wilts. Keep dressing separate until serving to maintain crispness.
Frequently Asked Questions
How do I know when ground beef is fully cooked?
Ground beef is fully cooked when it’s browned throughout with no pink remaining and reaches an internal temperature of 160°F. Break the meat into small crumbles while cooking to ensure even browning. The meat should release clear juices rather than pink or red ones. Using a meat thermometer is the most reliable way to check doneness.
Can I use lean ground beef instead of 80/20?
Yes, you can use lean ground beef (90/10 or 93/7), but your dishes will be less juicy and flavorful. Lean beef works best for recipes with sauces or added moisture like chili, Bolognese, or tacos. For burgers and meatballs, stick with 80/20 for the best texture and flavor. If using lean beef, you may need to add a small amount of oil to prevent sticking.
How do I drain ground beef properly?
After browning, push the meat to one side of the skillet and tilt the pan slightly so fat pools on the empty side. Spoon out the fat and discard it, or use a turkey baster for easier removal. Never pour fat down your drain as it can clog pipes. For extra lean results, transfer meat to a colander lined with paper towels to absorb excess fat.
Can I freeze cooked ground beef dishes?
Most ground beef dishes freeze beautifully for 2-3 months. Cool completely before freezing in airtight containers or freezer bags. Chili, Bolognese sauce, taco meat, meatballs, and casseroles all freeze well. Dishes with dairy (stroganoff, cream-based sauces) may separate slightly when thawed but can be stirred back together. Always label containers with contents and date.
What’s the best way to season ground beef?
Season ground beef after browning for the best flavor distribution. Basic seasoning includes salt, pepper, and garlic powder. For Mexican dishes, add cumin and chili powder. For Italian recipes, use oregano, basil, and fennel. Don’t over-season; you can always add more but can’t remove it. Taste as you go and adjust seasonings at the end of cooking.
How long can I keep cooked ground beef in the refrigerator?
Cooked ground beef stays fresh in the refrigerator for 3-4 days when stored in an airtight container. Make sure to refrigerate within 2 hours of cooking. If the beef develops an off smell, slimy texture, or unusual color, discard it. For longer storage, freeze portions for up to 3 months.
Can I make ground beef recipes ahead of time?
Many ground beef recipes taste even better the next day as flavors meld. Chili, Bolognese, taco meat, and casseroles are perfect make-ahead options. Prepare the dish, cool completely, and refrigerate. Reheat gently before serving. Some dishes like lasagna and enchiladas can be assembled unbaked, refrigerated overnight, then baked fresh.
Nutrition Information
| Nutrient | Per Serving (Average) |
|---|---|
| Calories | 350-450 |
| Protein | 25-30g |
| Carbohydrates | 25-35g |
| Fat | 15-25g |
| Fiber | 3-5g |
| Sodium | 600-900mg |
Note: Nutritional values vary significantly based on specific recipes, portion sizes, and ingredient choices. Values shown are approximate averages across the 20 recipes.
Tips for Avoiding Common Ground Beef Cooking Mistakes
Don’t Overcrowd the Pan: When browning ground beef, give it space. Overcrowding creates steam instead of a nice brown crust. Cook in batches if necessary. The fond (brown bits) that form during proper browning add tremendous flavor to your dishes.
Avoid Moving Meat Too Much: Let ground beef sit undisturbed for 2-3 minutes before stirring. This allows proper browning and crust formation. Constantly stirring creates grey, steamed meat instead of flavorful brown crumbles.
Don’t Press Down on Cooking Meat: Resist the urge to press ground beef with your spatula while it cooks. This squeezes out flavorful juices and fat, resulting in dry, tough meat. Let it cook naturally for juicier results.
Never Overmix Meatball or Burger Mixtures: Handle ground beef gently when forming burgers or meatballs. Overmixing develops the proteins too much, creating dense, tough meat instead of tender patties. Mix just until ingredients are barely combined.
Don’t Skip the Resting Time: After cooking burgers or meatballs, let them rest for 3-5 minutes. This allows juices to redistribute throughout the meat. Cutting immediately causes all the juices to run out, leaving you with dry meat.
Avoid Using Cold Meat for Burgers: Let ground beef sit at room temperature for 15-20 minutes before forming burger patties. Cold meat cooks unevenly, with a raw center and overcooked exterior. Room temperature meat cooks evenly throughout.
Don’t Forget to Season Adequately: Ground beef needs generous seasoning. Always season both sides of burgers before cooking, and don’t be shy with salt and pepper in mixed dishes. Under-seasoned beef tastes bland no matter how well it’s cooked.
Never Use High Heat for Slow-Cooked Dishes: Dishes like chili and Bolognese need low, slow simmering to develop deep flavors. High heat cooks the meat too quickly without allowing flavors to meld. Patience creates the best results.
Final Thoughts
Ground beef truly is the unsung hero of weeknight cooking. These 20 recipes prove that with one versatile ingredient, you can create everything from comforting classics to international favorites. Whether you’re craving the familiar warmth of meatballs and spaghetti, the bold flavors of Mexican tacos, or the hearty satisfaction of shepherd’s pie, ground beef delivers every time.
The beauty of these recipes lies in their flexibility. Most can be prepared in 30 minutes or less, making them perfect for busy schedules. They’re budget-friendly, feeding families without straining wallets. And they’re incredibly adaptable – swap ingredients based on what’s in your pantry, adjust seasonings to match your family’s preferences, and make these recipes truly your own.
Start with the classics like tacos and burgers, then branch out to try enchiladas, stir-fries, and casseroles. Keep a few pounds of ground beef in your freezer and you’ll always be prepared for dinner, no matter how hectic the day becomes. With these recipes in your arsenal, you’ll never have to wonder “what’s for dinner?” again.
Happy cooking, and may your kitchen always smell like delicious ground beef sizzling on the stove!