
15 Dinner Bowls Recipes Your Family Will Beg For Every Week
Dinner bowls are the ultimate weeknight solution—colorful, customizable, and incredibly satisfying. These one-bowl wonders combine proteins, grains, vegetables, and delicious sauces into perfectly balanced meals that the whole family will love.
Whether you’re craving something creamy, spicy, or fresh, these 15 dinner bowl recipes offer endless variety without the fuss. Similar to our popular sheet pan dinners, these bowls make cooking simple and cleanup even easier. Get ready to discover your new favorite way to enjoy dinner!
What Are Dinner Bowls?
Ever wonder why dinner bowls have taken over our kitchens and Instagram feeds? These beautiful creations are essentially complete meals served in a single bowl, combining all your favorite flavors and textures in one place. They say the way to a person’s heart is through their stomach, and dinner bowls definitely prove that true!
From vibrant Buddha bowls to hearty burrito bowls, these meals are as fun to make as they are to eat. Ready to bowl over your family with these amazing recipes?
This recipe is fully AI-written and untested in our kitchen. We share it with care, and readers who’ve cooked other recipes from our site often report encouraging outcomes.
Why You’ll Love These Dinner Bowl Recipes
Restaurant-Quality Meals at Home These dinner bowls bring the excitement of your favorite restaurants straight to your kitchen. Each recipe delivers bold flavors and beautiful presentation without the hefty price tag. You’ll save money while enjoying fresh, wholesome ingredients that you control from start to finish.
Endless Customization Options The beauty of dinner bowls lies in their flexibility. Mix and match proteins, swap vegetables based on what’s in season, and adjust spice levels to suit every family member’s taste. Just like our popular stir-fry recipes, these bowls adapt to your preferences and dietary needs effortlessly.
Quick Assembly, Maximum Flavor Most of these bowls come together in 30 minutes or less, making them perfect for busy weeknights. The combination of textures—crispy, creamy, crunchy, and tender—creates a satisfying eating experience that keeps everyone coming back for seconds.
Recipe 1: Teriyaki Chicken Bowl
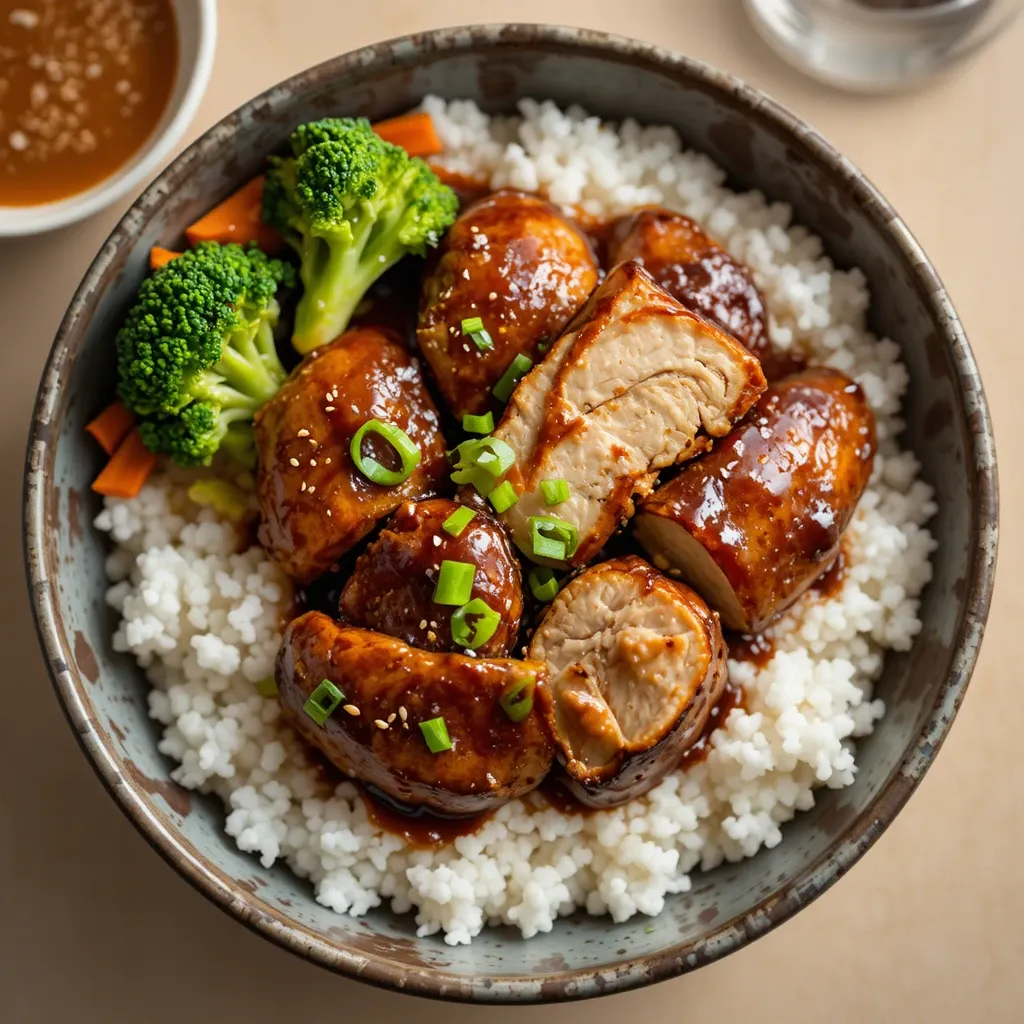
This Asian-inspired bowl features tender chicken glazed in homemade teriyaki sauce, served over fluffy rice with crisp vegetables. It’s sweet, savory, and absolutely addictive.
Quick Overview
This teriyaki chicken bowl delivers restaurant-quality flavor in just 25 minutes. The glossy teriyaki sauce coats juicy chicken pieces perfectly, while steamed broccoli and carrots add color and crunch. This family-friendly meal is naturally kid-approved and makes excellent leftovers.
Preparation Time: 10 minutes
Cooking Time: 15 minutes
Total Time: 25 minutes
Servings: 4
Key Ingredients for Teriyaki Chicken Bowl
- 1.5 pounds boneless chicken thighs, cut into bite-sized pieces
- 3 cups cooked white or brown rice
- 2 cups broccoli florets
- 1 large carrot, sliced
- 3 tablespoons soy sauce
- 2 tablespoons honey
- 1 tablespoon rice vinegar
- 2 teaspoons cornstarch
- 2 cloves garlic, minced
- 1 teaspoon fresh ginger, grated
- 2 tablespoons vegetable oil
- Sesame seeds for garnish
- Green onions, sliced
Step-by-Step Instructions
Step 1: Prepare the Teriyaki Sauce In a small bowl, whisk together soy sauce, honey, rice vinegar, cornstarch, garlic, and ginger until smooth. Set aside to let flavors blend.
Step 2: Cook the Chicken Heat vegetable oil in a large skillet over medium-high heat. Add chicken pieces in a single layer and cook for 5-6 minutes, stirring occasionally, until golden brown and cooked through.
Step 3: Add the Sauce Pour the teriyaki sauce over the cooked chicken. Stir continuously for 2-3 minutes until the sauce thickens and coats the chicken with a beautiful glaze.
Step 4: Steam the Vegetables While the chicken cooks, steam broccoli and carrots for 4-5 minutes until tender-crisp. You want them bright and slightly crunchy, not mushy.
Step 5: Assemble Your Bowls Divide rice among four bowls. Top with teriyaki chicken, steamed vegetables, sesame seeds, and green onions. Serve immediately while everything is warm.
What to Serve Teriyaki Chicken Bowl With
Pair this bowl with a simple cucumber salad dressed in rice vinegar, or add a side of edamame for extra protein. A cup of green tea complements the flavors beautifully.
Top Tips for Perfecting Teriyaki Chicken Bowl
Choose the Right Chicken Chicken thighs stay juicier and more flavorful than breasts. If using breasts, don’t overcook them—165°F is perfect.
Make It Gluten-Free Substitute tamari or coconut aminos for regular soy sauce. The flavor remains delicious without the gluten.
Get That Perfect Glaze Don’t skip the cornstarch—it creates that signature glossy teriyaki coating. If the sauce seems too thick, add a tablespoon of water.
Storing and Reheating Tips
Store components separately in airtight containers in the refrigerator for up to 4 days. Keep the sauce with the chicken to prevent it from drying out. Reheat chicken in a skillet over medium heat for best results, or microwave for 1-2 minutes. The rice and vegetables reheat well in the microwave for 60-90 seconds.
Recipe 2: Mexican Burrito Bowl
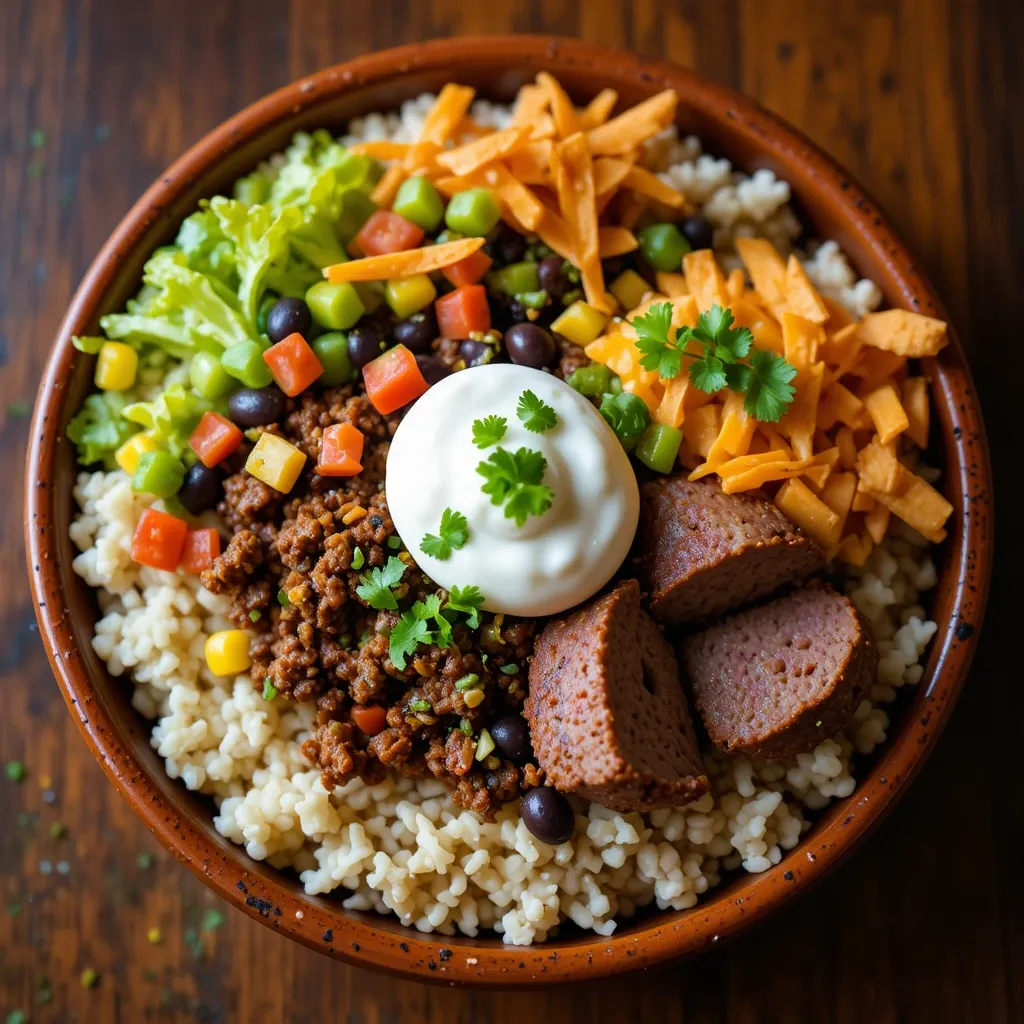
A colorful fiesta in a bowl featuring seasoned ground beef, black beans, rice, and all your favorite toppings. This crowd-pleaser rivals any restaurant burrito bowl.
Quick Overview
This Mexican burrito bowl is loaded with seasoned beef, fluffy cilantro lime rice, black beans, and fresh toppings. It’s a complete meal that satisfies everyone from picky eaters to adventurous foodies. The best part? You control the heat level and toppings.
Preparation Time: 15 minutes
Cooking Time: 20 minutes
Total Time: 35 minutes
Servings: 4-6
Key Ingredients for Mexican Burrito Bowl
- 1 pound ground beef (or ground turkey)
- 2 cups cooked white rice
- 1 can (15 oz) black beans, drained and rinsed
- 1 cup corn kernels (fresh or frozen)
- 1 tablespoon chili powder
- 1 teaspoon cumin
- 1 teaspoon paprika
- 1/2 teaspoon garlic powder
- Salt and pepper to taste
- 1 cup shredded lettuce
- 1 cup diced tomatoes
- 1 cup shredded cheddar cheese
- 1/2 cup sour cream
- Fresh cilantro, chopped
- Juice of 2 limes
Step-by-Step Instructions
Step 1: Make Cilantro Lime Rice Mix cooked rice with lime juice and chopped cilantro. Fluff with a fork and keep warm.
Step 2: Season and Cook the Beef In a large skillet over medium-high heat, cook ground beef until browned, breaking it into crumbles. Drain excess fat, then add chili powder, cumin, paprika, garlic powder, salt, and pepper. Stir well and cook for 2 more minutes.
Step 3: Warm the Beans and Corn In a small saucepan, warm black beans and corn over medium heat until heated through, about 3-4 minutes.
Step 4: Prepare Fresh Toppings While everything cooks, dice tomatoes, shred lettuce, and gather all your favorite toppings.
Step 5: Build Your Burrito Bowls Start with cilantro lime rice as the base. Add seasoned beef, black beans, and corn. Top with lettuce, tomatoes, cheese, sour cream, and extra cilantro. Add a squeeze of lime juice before serving.
What to Serve Mexican Burrito Bowl With
Serve with tortilla chips and homemade guacamole, or add a side of Mexican street corn. A refreshing agua fresca or limeade makes the perfect beverage pairing.
Top Tips for Perfecting Mexican Burrito Bowl
Make It Healthier Use ground turkey or chicken instead of beef, and replace sour cream with Greek yogurt for a protein boost.
Meal Prep Friendly Cook all the components at once and store them separately. Everyone can build their own bowl throughout the week.
Adjust the Spice Add diced jalapeños or hot sauce for heat lovers, or keep it mild for kids by using less chili powder.
Storing and Reheating Tips
Store each component in separate airtight containers in the refrigerator for up to 5 days. The meat, rice, and beans reheat beautifully. Keep fresh toppings separate and add them when serving. Reheat the rice, beans, and meat together in the microwave for 2 minutes, stirring halfway through.
Recipe 3: Mediterranean Chicken Bowl
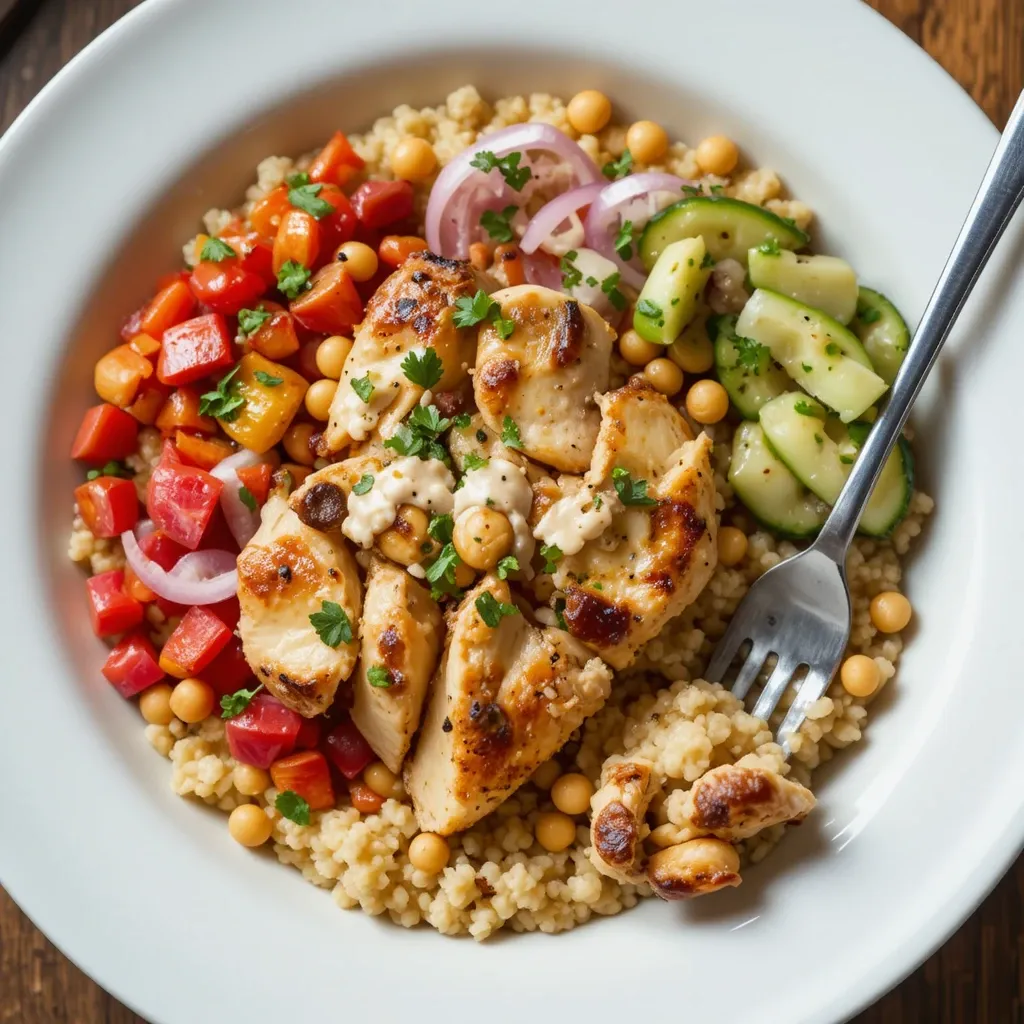
Transport yourself to the Mediterranean with this vibrant bowl featuring herb-marinated chicken, fluffy couscous, and fresh vegetables drizzled with creamy tahini sauce.
Quick Overview
This Mediterranean bowl combines tender marinated chicken with pearl couscous, crispy chickpeas, cucumber, tomatoes, and a dreamy tahini dressing. It’s light yet satisfying, packed with bright flavors that feel like sunshine on a plate. Perfect for meal prep too!
Preparation Time: 20 minutes (plus marinating time)
Cooking Time: 15 minutes
Total Time: 35 minutes
Servings: 4
Key Ingredients for Mediterranean Chicken Bowl
- 1.5 pounds chicken breast, cut into strips
- 3 tablespoons olive oil
- 2 teaspoons dried oregano
- 1 teaspoon paprika
- 3 cloves garlic, minced
- Juice of 1 lemon
- 2 cups cooked pearl couscous
- 1 can (15 oz) chickpeas, drained and roasted
- 1 cup cherry tomatoes, halved
- 1 cucumber, diced
- 1/2 red onion, thinly sliced
- 1/4 cup tahini
- 2 tablespoons water
- Fresh parsley, chopped
- Salt and pepper to taste
Step-by-Step Instructions
Step 1: Marinate the Chicken Combine olive oil, oregano, paprika, garlic, lemon juice, salt, and pepper in a bowl. Add chicken strips and toss to coat. Marinate for at least 15 minutes or up to 2 hours in the refrigerator.
Step 2: Roast the Chickpeas Preheat oven to 400°F. Spread drained chickpeas on a baking sheet, drizzle with olive oil, and season with salt. Roast for 20 minutes until crispy and golden.
Step 3: Cook the Chicken Heat a large skillet over medium-high heat. Cook marinated chicken strips for 6-7 minutes, flipping once, until golden brown and cooked through.
Step 4: Make Tahini Sauce Whisk together tahini, water, a squeeze of lemon juice, and a pinch of salt. Add more water if needed to reach a drizzling consistency.
Step 5: Assemble Your Bowls Place couscous in bowls. Top with sliced chicken, roasted chickpeas, tomatoes, cucumber, and red onion. Drizzle generously with tahini sauce and sprinkle with fresh parsley.
What to Serve Mediterranean Chicken Bowl With
Serve with warm pita bread and hummus on the side. A Greek salad or tzatziki sauce makes an excellent accompaniment. For drinks, try iced mint tea or sparkling water with lemon.
Top Tips for Perfecting Mediterranean Chicken Bowl
Don’t Skip the Marinating The longer the chicken marinates, the more flavorful it becomes. Even 15 minutes makes a difference.
Make the Chickpeas Extra Crispy Pat chickpeas completely dry before roasting. The drier they are, the crispier they’ll get.
Customize Your Vegetables Add roasted red peppers, kalamata olives, or feta cheese for extra Mediterranean flair.
Storing and Reheating Tips
Store components separately for up to 4 days in the refrigerator. Keep the tahini sauce in a small jar and shake before using. The chicken reheats well in a skillet or microwave. The vegetables are best enjoyed fresh, so add them just before eating. The roasted chickpeas may lose crispiness when stored but are still delicious.
Recipe 4: Thai Peanut Noodle Bowl
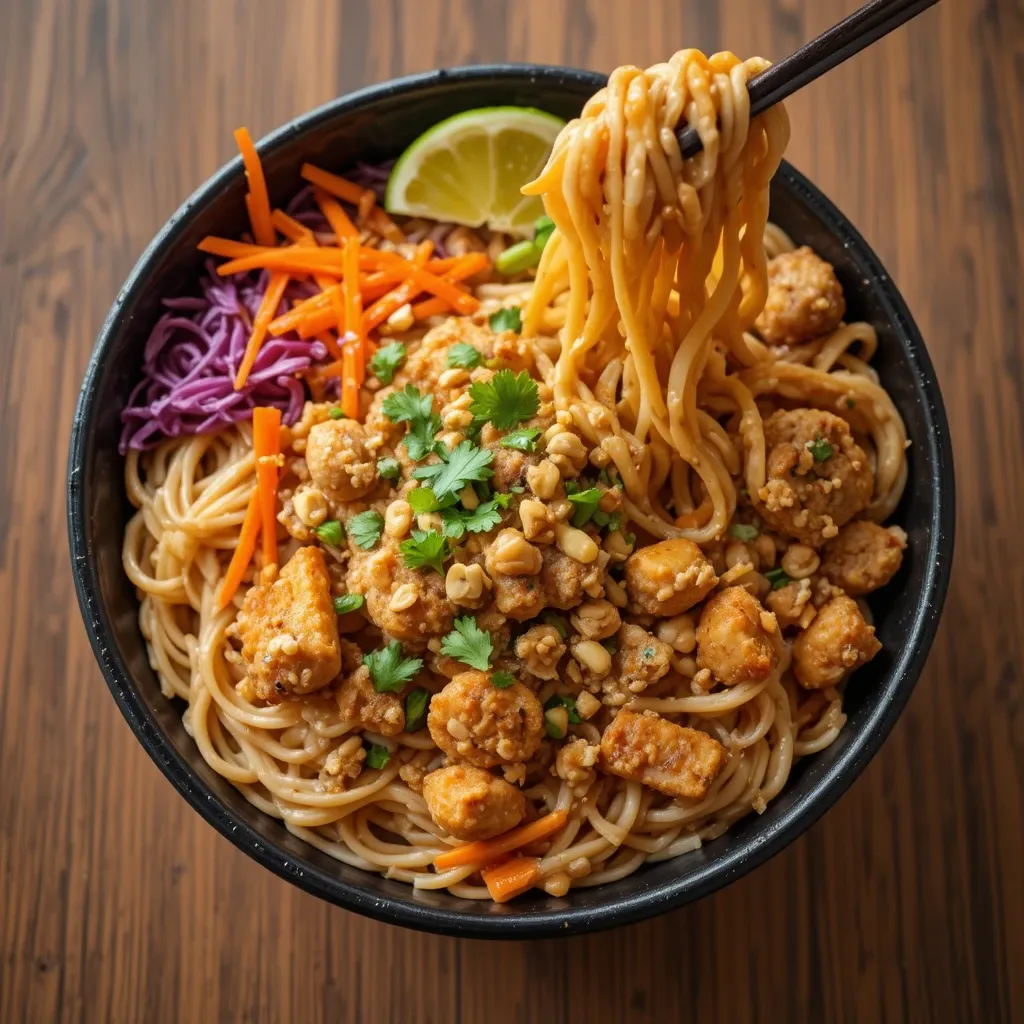
This Thai-inspired bowl features tender noodles tossed in creamy peanut sauce with colorful vegetables and your choice of protein. It’s rich, satisfying, and incredibly flavorful.
Quick Overview
Silky noodles coated in a luscious homemade peanut sauce create the base for this addictive bowl. Fresh vegetables add crunch while the peanut sauce brings everything together with its sweet, savory, and slightly spicy flavor. Ready in just 20 minutes!
Preparation Time: 10 minutes
Cooking Time: 10 minutes
Total Time: 20 minutes
Servings: 4
Key Ingredients for Thai Peanut Noodle Bowl
- 8 oz rice noodles or spaghetti
- 1/3 cup natural peanut butter
- 3 tablespoons soy sauce
- 2 tablespoons honey
- 2 tablespoons rice vinegar
- 1 tablespoon sesame oil
- 1 teaspoon sriracha (optional)
- 2 cloves garlic, minced
- 1 red bell pepper, thinly sliced
- 1 cup shredded carrots
- 1 cup purple cabbage, shredded
- 2 cups cooked chicken, shrimp, or tofu
- Crushed peanuts for topping
- Fresh cilantro and lime wedges
Step-by-Step Instructions
Step 1: Cook the Noodles Prepare noodles according to package directions. Drain and rinse with cold water to stop cooking. Set aside.
Step 2: Make the Peanut Sauce In a medium bowl, whisk together peanut butter, soy sauce, honey, rice vinegar, sesame oil, sriracha, and garlic. If the sauce is too thick, add warm water one tablespoon at a time until it reaches a pourable consistency.
Step 3: Prepare the Vegetables Slice bell pepper, shred carrots and cabbage, and chop cilantro. Having everything prepped makes assembly quick and easy.
Step 4: Toss Everything Together Add noodles to a large bowl. Pour half the peanut sauce over noodles and toss to coat evenly. Add vegetables and protein, then toss again gently.
Step 5: Serve and Garnish Divide noodles among bowls. Top with crushed peanuts, fresh cilantro, and additional peanut sauce. Serve with lime wedges for squeezing.
What to Serve Thai Peanut Noodle Bowl With
These noodles are a complete meal on their own, but spring rolls or edamame make great sides. For dessert, try mango sticky rice or fresh fruit.
Top Tips for Perfecting Thai Peanut Noodle Bowl
Choose Quality Peanut Butter Natural peanut butter without added sugar works best. It creates a more authentic, less sweet sauce.
Don’t Overcook the Noodles Slightly al dente noodles hold up better when tossed with sauce. Overcooked noodles become mushy.
Make It Ahead This bowl tastes even better the next day as flavors meld. Store with extra sauce on the side to add when reheating.
Storing and Reheating Tips
Store in an airtight container in the refrigerator for up to 4 days. The noodles may absorb the sauce, so keep extra peanut sauce separate to add when serving. These bowls are delicious served cold, at room temperature, or gently reheated. Microwave for 60-90 seconds or enjoy as a cold noodle salad.
Recipe 5: Korean Beef Bowl (Bulgogi-Style)
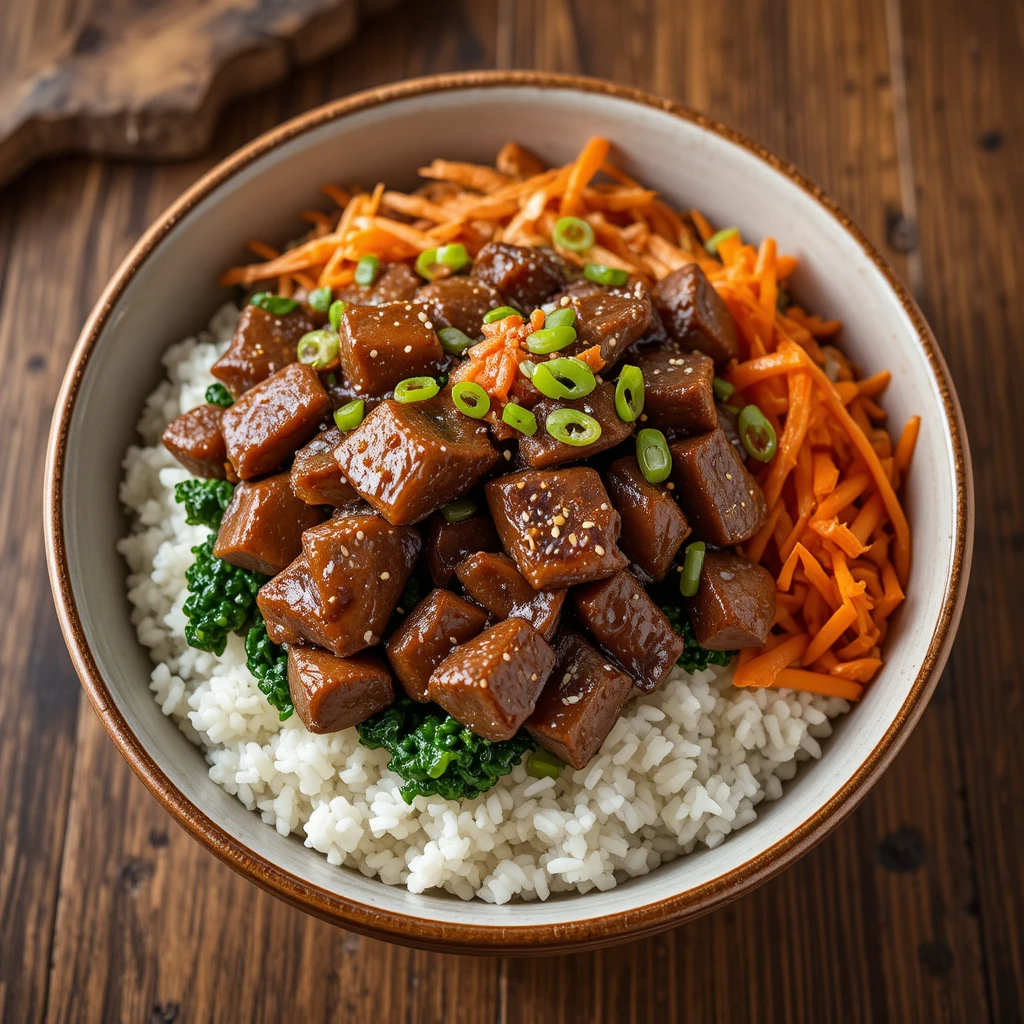
This Korean-inspired bowl features sweet and savory marinated beef served over rice with kimchi and pickled vegetables. It’s a flavor explosion that’s surprisingly simple to make.
Quick Overview
Thinly sliced beef marinates in a sweet soy-based sauce, then cooks in minutes for a caramelized, tender result. Combined with steamed rice and tangy kimchi, this bowl offers complex flavors without complicated techniques. Kids love it, adults crave it!
Preparation Time: 15 minutes (plus marinating)
Cooking Time: 10 minutes
Total Time: 25 minutes
Servings: 4
Key Ingredients for Korean Beef Bowl
- 1.5 pounds beef sirloin or ribeye, thinly sliced
- 4 tablespoons soy sauce
- 2 tablespoons brown sugar
- 1 tablespoon sesame oil
- 4 cloves garlic, minced
- 1 tablespoon grated ginger
- 3 cups cooked short-grain rice
- 2 cups spinach
- 1 cup kimchi (store-bought)
- 2 carrots, julienned
- 2 green onions, sliced
- Sesame seeds for garnish
- 1 tablespoon vegetable oil
Step-by-Step Instructions
Step 1: Marinate the Beef Mix soy sauce, brown sugar, sesame oil, garlic, ginger, Add sliced beef and toss to coat thoroughly. Marinate for 30 minutes at room temperature or up to 4 hours refrigerated.
Step 2: Prepare the Vegetables Blanch spinach in boiling water for 30 seconds, then drain and squeeze out excess water. Julienne carrots and slice green onions.
Step 3: Cook the Beef Heat vegetable oil in a large skillet or wok over high heat. Working in batches to avoid overcrowding, cook beef slices for 2-3 minutes until caramelized and cooked through. Don’t stir too much—let them sear.
Step 4: Quick-Pickle the Carrots Toss julienned carrots with a splash of rice vinegar and a pinch of sugar. Let sit while you assemble the bowls.
Step 5: Build Your Bowls Place rice in bowls. Arrange beef, spinach, pickled carrots, and kimchi in sections on top. Garnish with green onions and sesame seeds. Mix everything together before eating.
What to Serve Korean Beef Bowl With
Serve with miso soup or Korean egg drop soup. Cucumber salad or seasoned bean sprouts make refreshing side dishes. For a complete Korean meal experience, add steamed dumplings.
Top Tips for Perfecting Korean Beef Bowl
Slice Beef Paper-Thin Partially freeze beef for 30 minutes before slicing. This makes it much easier to cut thin, even pieces.
Use High Heat The beef should sizzle and caramelize, not steam. High heat and working in batches ensures proper browning.
Balance Your Bowl The combination of sweet beef, tangy kimchi, and neutral rice creates perfect harmony. Don’t skip any component.
Storing and Reheating Tips
Store beef and rice separately from vegetables in airtight containers for up to 3 days. The beef reheats beautifully in a hot skillet for 2 minutes. Rice can be microwaved with a damp paper towel on top to prevent drying. Keep kimchi and fresh vegetables separate until serving to maintain their texture.
Recipe 6: Greek Lamb Bowl
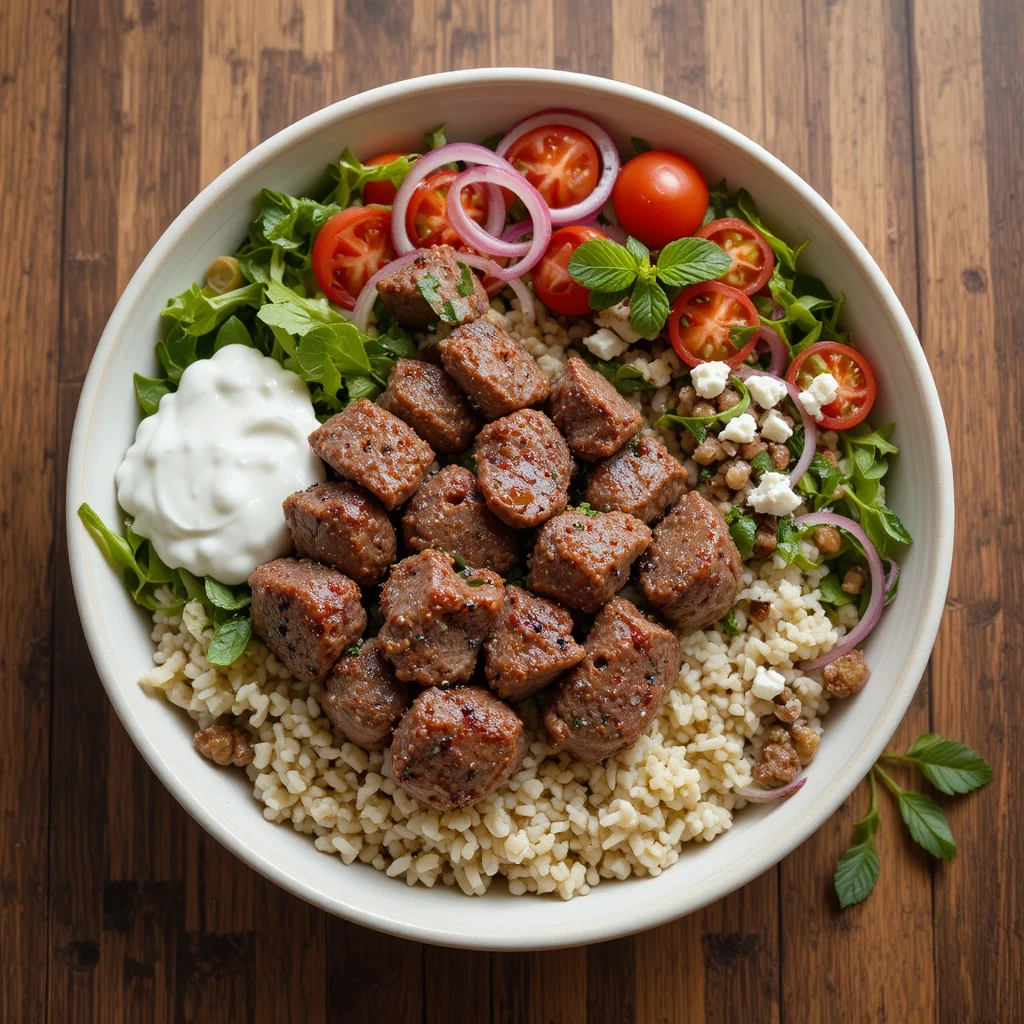
This Mediterranean-inspired bowl showcases seasoned ground lamb with herbed rice, fresh vegetables, and cooling tzatziki sauce. It’s an elegant yet easy dinner option.
Quick Overview
Aromatic lamb seasoned with warm spices pairs beautifully with fluffy herb-infused rice and crisp vegetables. The homemade tzatziki sauce adds a cooling element that balances the rich lamb perfectly. This restaurant-quality bowl comes together in about 30 minutes.
Preparation Time: 15 minutes
Cooking Time: 15 minutes
Total Time: 30 minutes
Servings: 4
Key Ingredients for Greek Lamb Bowl
- 1 pound ground lamb
- 2 teaspoons dried oregano
- 1 teaspoon cumin
- 1/2 teaspoon cinnamon
- 3 cloves garlic, minced
- 3 cups cooked rice
- 1 cup plain yogurt
- 1/2 cucumber, grated and squeezed dry
- 1 tablespoon fresh dill, chopped
- 2 tablespoons lemon juice
- 1 cup cherry tomatoes, halved
- 1/2 red onion, thinly sliced
- Mixed greens
- Crumbled feta cheese (optional)
- Fresh mint leaves
- Salt and pepper to taste
Step-by-Step Instructions
Step 1: Make Tzatziki Sauce Combine yogurt, grated cucumber, dill, one clove minced garlic, lemon juice, salt, and pepper in a bowl. Mix well and refrigerate until serving.
Step 2: Season and Cook Lamb Heat a large skillet over medium-high heat. Add ground lamb and cook, breaking it apart with a spoon. When browned, add remaining garlic, oregano, cumin, cinnamon, salt, and pepper. Cook for 3-4 minutes until fragrant and fully cooked.
Step 3: Prepare Fresh Components Chop mint, halve tomatoes, slice red onion, and wash greens while the lamb cooks.
Step 4: Season the Rice Fluff cooked rice with a fork and stir in a bit of olive oil, salt, and fresh herbs if desired.
Step 5: Assemble Your Greek Bowls Start with rice, add seasoned lamb, then top with mixed greens, tomatoes, red onion, and feta cheese. Drizzle generously with tzatziki sauce and garnish with fresh mint.
What to Serve Greek Lamb Bowl With
Serve with warm pita bread for scooping and extra tzatziki on the side. Greek lemon potatoes or roasted vegetables make excellent additions. A glass of sparkling water with lemon complements the meal perfectly.
Top Tips for Perfecting Greek Lamb Bowl
Remove Excess Fat Ground lamb can be fatty. Drain excess fat after browning to keep the bowl from becoming greasy.
Make Tzatziki in Advance Tzatziki tastes better after the flavors meld for a few hours. Make it in the morning for dinner.
Substitute Ground Beef If lamb isn’t your preference, ground beef or turkey works wonderfully with the same seasonings.
Storing and Reheating Tips
Store lamb, rice, and tzatziki in separate containers in the refrigerator for up to 4 days. Keep fresh vegetables separate until assembly. Reheat lamb and rice together in the microwave for 90 seconds or in a skillet over medium heat. The tzatziki should stay cold and is best added fresh to the warm bowl.
Recipe 7: Honey Garlic Shrimp Bowl
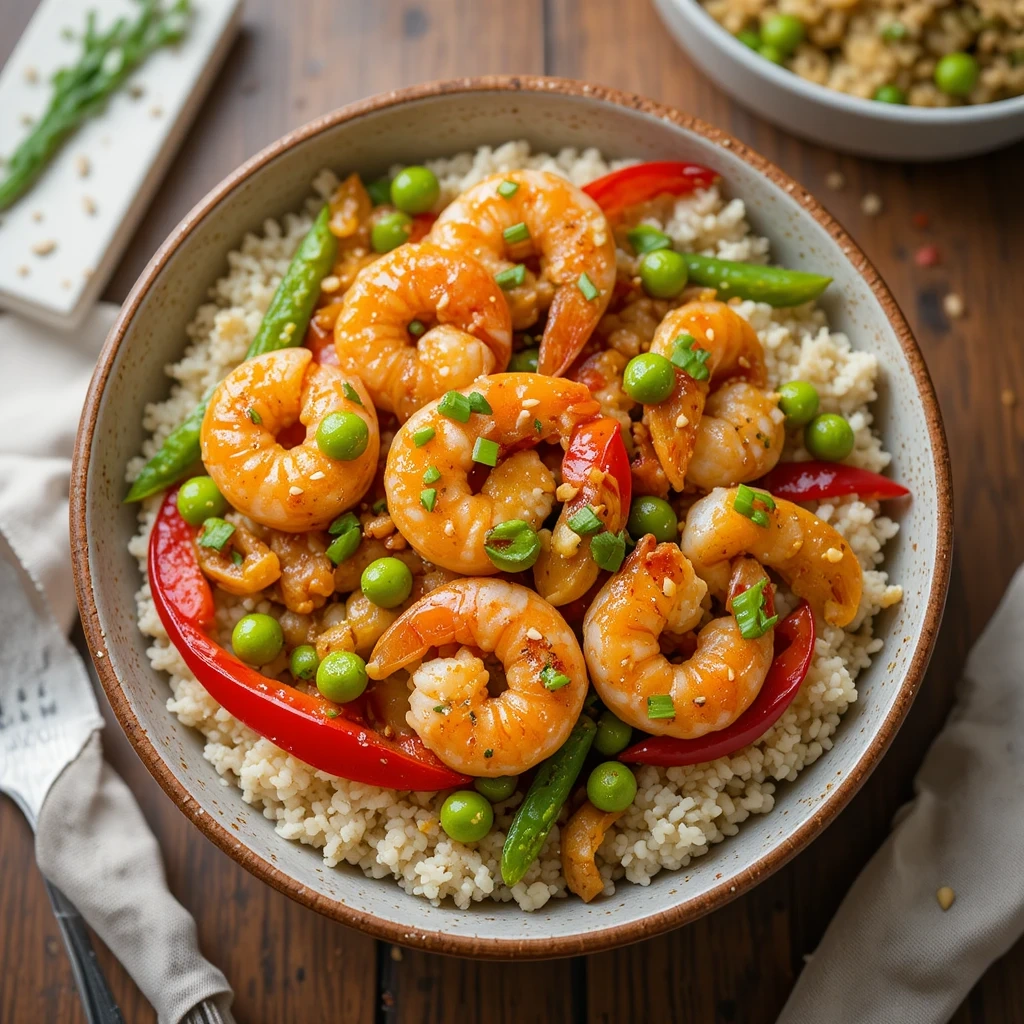
Sweet, sticky honey garlic sauce coats plump shrimp in this quick and delicious bowl. Paired with vegetables and rice, it’s a restaurant-worthy meal at home.
Quick Overview
Juicy shrimp cook in just minutes before being tossed in a glossy honey garlic sauce that’s both sweet and savory. This protein-packed bowl comes together faster than ordering takeout and tastes infinitely better. Perfect for seafood lovers and quick weeknight dinners.
Preparation Time: 10 minutes
Cooking Time: 10 minutes
Total Time: 20 minutes
Servings: 4
Key Ingredients for Honey Garlic Shrimp Bowl
- 1.5 pounds large shrimp, peeled and deveined
- 3 tablespoons honey
- 3 tablespoons soy sauce
- 4 cloves garlic, minced
- 1 tablespoon lime juice
- 1 teaspoon cornstarch
- 2 tablespoons butter
- 3 cups cooked jasmine rice
- 2 cups snap peas
- 1 red bell pepper, sliced
- 1 cup edamame
- Green onions, sliced
- Sesame seeds
- Red pepper flakes (optional)
Step-by-Step Instructions
Step 1: Prepare the Sauce Whisk together honey, soy sauce, minced garlic, lime juice, and cornstarch in a small bowl. Set aside.
Step 2: Cook the Vegetables In a large skillet or wok, sauté snap peas, bell pepper, and edamame in a bit of oil for 3-4 minutes until tender-crisp. Remove and set aside.
Step 3: Cook the Shrimp In the same skillet, melt butter over medium-high heat. Add shrimp in a single layer and cook for 2 minutes per side until pink and opaque.
Step 4: Add the Sauce Pour the honey garlic sauce over the cooked shrimp. Toss to coat and cook for 1-2 minutes until the sauce thickens and becomes glossy.
Step 5: Assemble the Bowls Divide rice among bowls. Top with honey garlic shrimp and sautéed vegetables. Garnish with green onions, sesame seeds, and red pepper flakes if desired.
What to Serve Honey Garlic Shrimp Bowl With
This bowl pairs wonderfully with a simple cucumber salad or seaweed salad. Miso soup makes a great starter, and fortune cookies provide a fun ending to the meal.
Top Tips for Perfecting Honey Garlic Shrimp Bowl
Don’t Overcook the Shrimp Shrimp cook incredibly fast. Remove them from heat as soon as they turn pink to keep them tender and juicy.
Pat Shrimp Dry Dry shrimp sear better and absorb the sauce more effectively. Use paper towels to remove excess moisture.
Adjust Sweetness If you prefer less sweet, reduce honey to 2 tablespoons. Add a splash of rice vinegar for more tang.
Storing and Reheating Tips
Store in an airtight container in the refrigerator for up to 2 days. Shrimp can become rubbery when reheated, so this bowl is best enjoyed fresh. If you must reheat, do so gently in a skillet over low heat for 1-2 minutes, just until warmed through. The rice reheats well in the microwave.
Recipe 8: Southwest Chicken Bowl
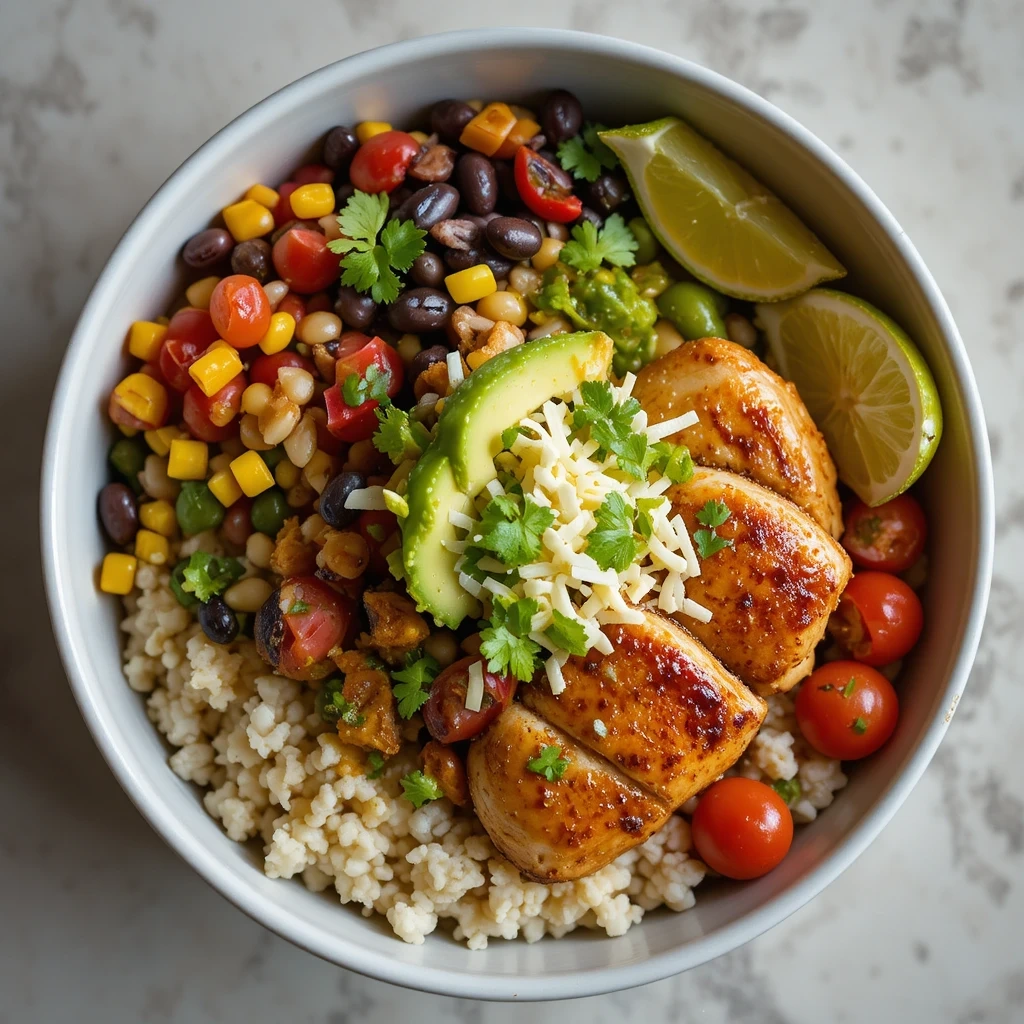
This Tex-Mex inspired bowl features spiced chicken, corn, black beans, and avocado with a zesty lime dressing. It’s fresh, filling, and family-friendly.
Quick Overview
Tender chicken seasoned with smoky southwestern spices sits atop cilantro lime rice alongside black beans, roasted corn, and creamy avocado. This colorful bowl delivers big flavors with wholesome ingredients that kids actually enjoy. Customizable toppings mean everyone gets exactly what they want.
Preparation Time: 15 minutes
Cooking Time: 20 minutes
Total Time: 35 minutes
Servings: 4
Key Ingredients for Southwest Chicken Bowl
- 1.5 pounds chicken breast, diced
- 2 teaspoons chili powder
- 1 teaspoon cumin
- 1 teaspoon smoked paprika
- 1/2 teaspoon garlic powder
- 3 cups cooked rice
- 1 can (15 oz) black beans, drained
- 1.5 cups corn kernels
- 2 avocados, sliced
- 1 cup cherry tomatoes, halved
- 1/2 cup shredded cheddar cheese
- Fresh cilantro
- Lime wedges
- 2 tablespoons olive oil
- Salt and pepper
Step-by-Step Instructions
Step 1: Season the Chicken Toss diced chicken with chili powder, cumin, smoked paprika, garlic powder, salt, and pepper until evenly coated.
Step 2: Cook the Chicken Heat olive oil in a large skillet over medium-high heat. Add seasoned chicken and cook for 8-10 minutes, stirring occasionally, until golden and cooked through.
Step 3: Roast the Corn In a separate pan, cook corn kernels over high heat for 5 minutes until slightly charred and golden. This adds wonderful smoky flavor.
Step 4: Warm the Beans Heat black beans in a small saucepan with a pinch of cumin until warmed through.
Step 5: Build Your Southwest Bowls Place cilantro lime rice in bowls. Add chicken, black beans, roasted corn, tomatoes, and avocado slices. Top with cheese and fresh cilantro. Serve with lime wedges for squeezing.
What to Serve Southwest Chicken Bowl With
Serve with tortilla chips and salsa or a simple side salad. Cornbread makes a delicious accompaniment, and churros or tres leches cake work perfectly for dessert.
Top Tips for Perfecting Southwest Chicken Bowl
Make It Spicier Add diced jalapeños, hot sauce, or cayenne pepper to the chicken seasoning for extra heat.
Batch Cook for the Week Cook a large batch of seasoned chicken and use it for bowls, tacos, salads, and wraps throughout the week.
Choose Ripe Avocados Ripe avocados should yield slightly to gentle pressure. If firm, let them sit at room temperature for a day or two.
Storing and Reheating Tips
Store components separately in the refrigerator for up to 4 days. Keep avocado slices with a squeeze of lime juice to prevent browning, or add fresh avocado when serving. The chicken, rice, and beans reheat well together in the microwave for 2 minutes. Add fresh toppings after reheating for the best texture and flavor.
Recipe 9: Sesame Ginger Tofu Bowl
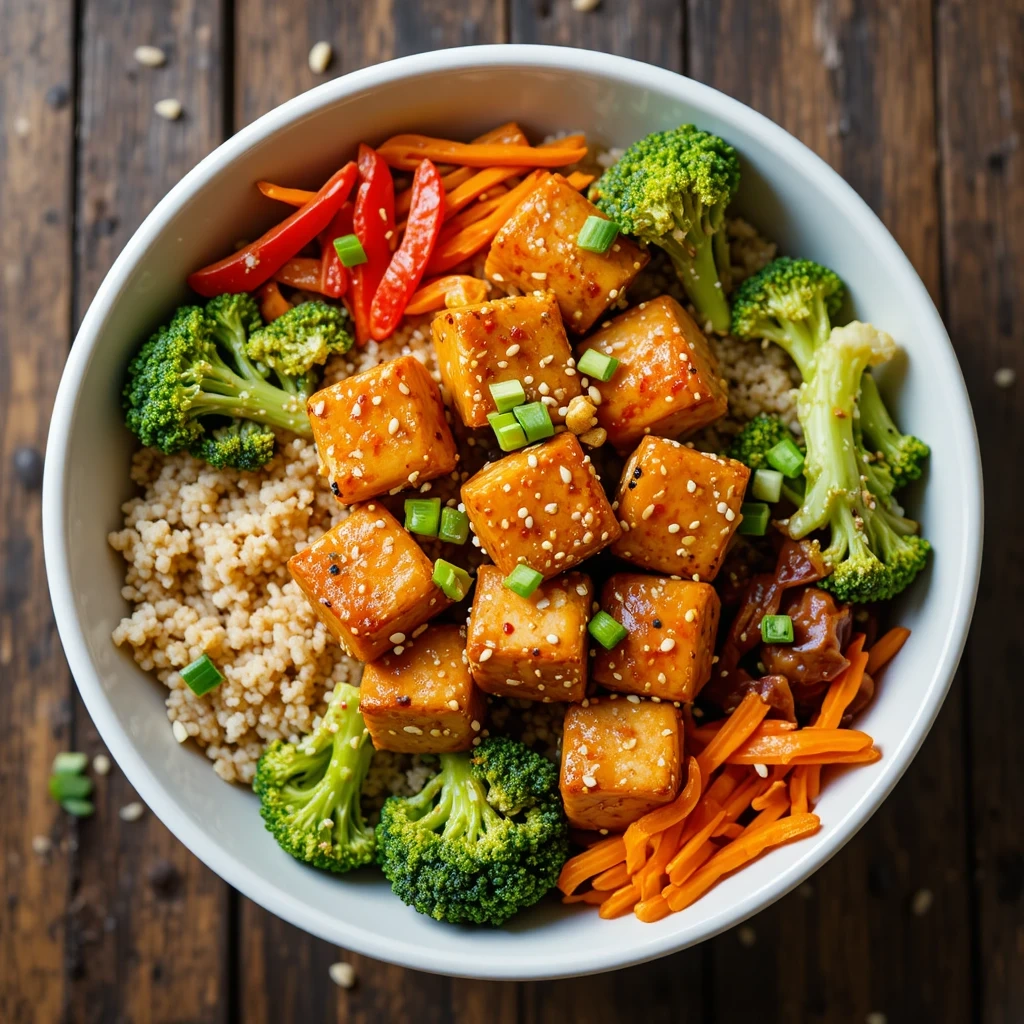
This vegetarian bowl showcases crispy tofu in a sweet and tangy sesame ginger sauce. It’s plant-based, protein-packed, and absolutely delicious.
Quick Overview
Extra-firm tofu becomes golden and crispy, then gets coated in a glossy sesame ginger sauce that’s finger-licking good. Combined with fresh vegetables and fluffy rice, this bowl proves that meatless meals can be exciting and satisfying. Even meat-lovers will ask for seconds!
Preparation Time: 15 minutes
Cooking Time: 20 minutes
Total Time: 35 minutes
Servings: 4
Key Ingredients for Sesame Ginger Tofu Bowl
- 14 oz extra-firm tofu, pressed and cubed
- 3 tablespoons soy sauce
- 2 tablespoons rice vinegar
- 2 tablespoons honey or maple syrup
- 1 tablespoon sesame oil
- 2 teaspoons fresh ginger, grated
- 2 cloves garlic, minced
- 1 teaspoon cornstarch
- 3 cups cooked brown rice
- 2 cups broccoli florets
- 1 red bell pepper, sliced
- 1 cup shredded carrots
- Sesame seeds
- Green onions, sliced
- 3 tablespoons vegetable oil
Step-by-Step Instructions
Step 1: Press and Cube Tofu Press tofu between paper towels with a heavy object on top for 15 minutes to remove excess moisture. Cut into 1-inch cubes.
Step 2: Make the Sesame Ginger Sauce Whisk together soy sauce, rice vinegar, honey, sesame oil, ginger, garlic, and cornstarch in a bowl. Set aside.
Step 3: Crisp the Tofu Heat vegetable oil in a large non-stick skillet over medium-high heat. Add tofu cubes in a single layer and cook for 3-4 minutes per side until golden and crispy on all sides.
Step 4: Add Sauce to Tofu Pour sauce over crispy tofu and toss gently for 2 minutes until the sauce thickens and coats each piece beautifully.
Step 5: Prepare Vegetables While tofu cooks, steam or sauté broccoli, bell pepper, and carrots until tender-crisp, about 5 minutes.
Step 6: Assemble Bowls Place brown rice in bowls. Add sesame ginger tofu and vegetables. Garnish with sesame seeds and green onions.
What to Serve Sesame Ginger Tofu Bowl With
Serve with vegetable spring rolls or edamame as a starter. A cup of hot green tea pairs beautifully with this Asian-inspired bowl.
Top Tips for Perfecting Sesame Ginger Tofu Bowl
Press Tofu Thoroughly Well-pressed tofu becomes much crispier and absorbs sauce better. Don’t skip this step for best results.
Use High Heat The key to crispy tofu is high heat and not moving it too often. Let each side develop a golden crust before flipping.
Customize Your Vegetables Use whatever vegetables you have on hand. Bok choy, mushrooms, and snap peas all work wonderfully.
Storing and Reheating Tips
Store tofu and vegetables separately from rice in airtight containers for up to 4 days. The tofu will lose some crispiness when stored but remains delicious. Reheat in a hot skillet to restore crispiness, or microwave for 90 seconds if you don’t mind softer texture. The rice and vegetables reheat well in the microwave.
Recipe 10: Mongolian Beef Bowl
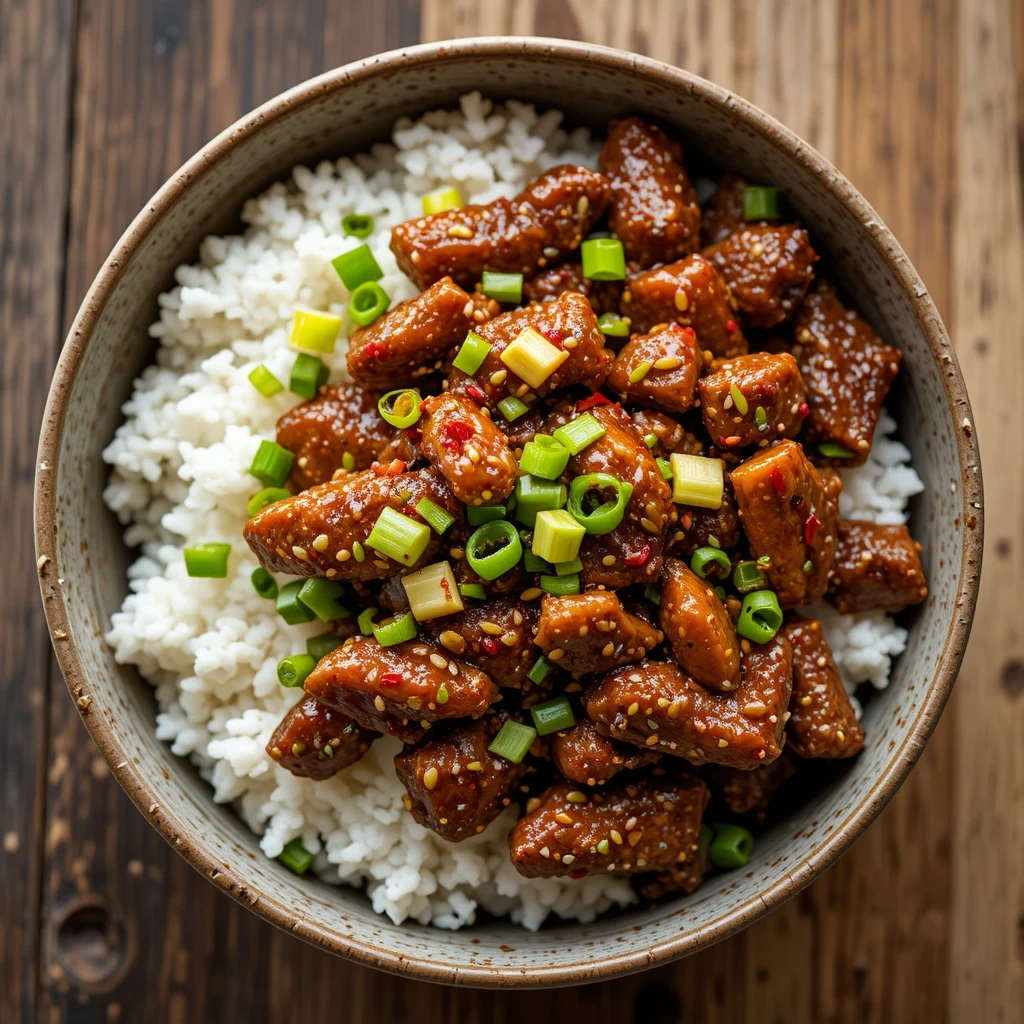
This takeout favorite features tender beef strips in a sweet and savory sauce with scallions. It’s better than restaurant quality and ready in under 30 minutes.
Quick Overview
Thinly sliced beef becomes melt-in-your-mouth tender when cooked quickly in a hot wok, then gets coated in a rich brown sugar and soy sauce glaze. The scallions add freshness and a bit of bite. This bowl satisfies those Chinese takeout cravings without the wait or expense.
Preparation Time: 10 minutes
Cooking Time: 15 minutes
Total Time: 25 minutes
Servings: 4
Key Ingredients for Mongolian Beef Bowl
- 1.5 pounds flank steak, thinly sliced against the grain
- 1/4 cup cornstarch
- 3 tablespoons vegetable oil
- 5 cloves garlic, minced
- 1/2 cup soy sauce
- 1/2 cup water
- 2/3 cup brown sugar
- 1 teaspoon fresh ginger, grated
- 6 green onions, cut into 2-inch pieces
- 3 cups cooked white rice
- Red pepper flakes (optional)
- Sesame seeds for garnish
Step-by-Step Instructions
Step 1: Coat the Beef Place beef slices in a bowl and toss with cornstarch until evenly coated. This creates a velvety texture and helps the sauce cling.
Step 2: Make the Sauce Combine soy sauce, water, brown sugar, and ginger in a bowl. Stir until sugar dissolves.
Step 3: Sear the Beef Heat oil in a large wok or skillet over high heat. Working in batches, sear beef slices for 2-3 minutes until browned. Remove and set aside.
Step 4: Cook Aromatics and Sauce In the same pan, add a bit more oil if needed. Sauté garlic for 30 seconds until fragrant. Pour in the sauce and bring to a simmer.
Step 5: Combine Everything Return beef to the pan along with green onions. Toss everything together and cook for 2-3 minutes until the sauce thickens and coats the beef beautifully.
Step 6: Serve Over Rice Divide rice among bowls and top with Mongolian beef. Garnish with sesame seeds and red pepper flakes if desired.
What to Serve Mongolian Beef Bowl With
Serve with egg drop soup or hot and sour soup. Steamed dumplings or vegetable spring rolls make excellent appetizers. For sides, try stir-fried bok choy or Chinese broccoli.
Top Tips for Perfecting Mongolian Beef Bowl
Slice Beef Properly Always slice against the grain for tender beef. Partially freezing the meat for 20 minutes makes slicing easier.
Control the Heat High heat is crucial for proper searing. If the heat is too low, the beef will steam instead of brown.
Watch the Sugar The sauce can burn if left unattended. Stir frequently once you add the beef back to the pan.
Storing and Reheating Tips
Store in an airtight container in the refrigerator for up to 3 days. The beef stays tender when reheated. Warm in a skillet over medium heat for 3-4 minutes, stirring occasionally. You can also microwave for 90 seconds, though the texture won’t be quite as good. Store rice separately and reheat with a damp paper towel on top.
Recipe 11: Hawaiian Poke Bowl
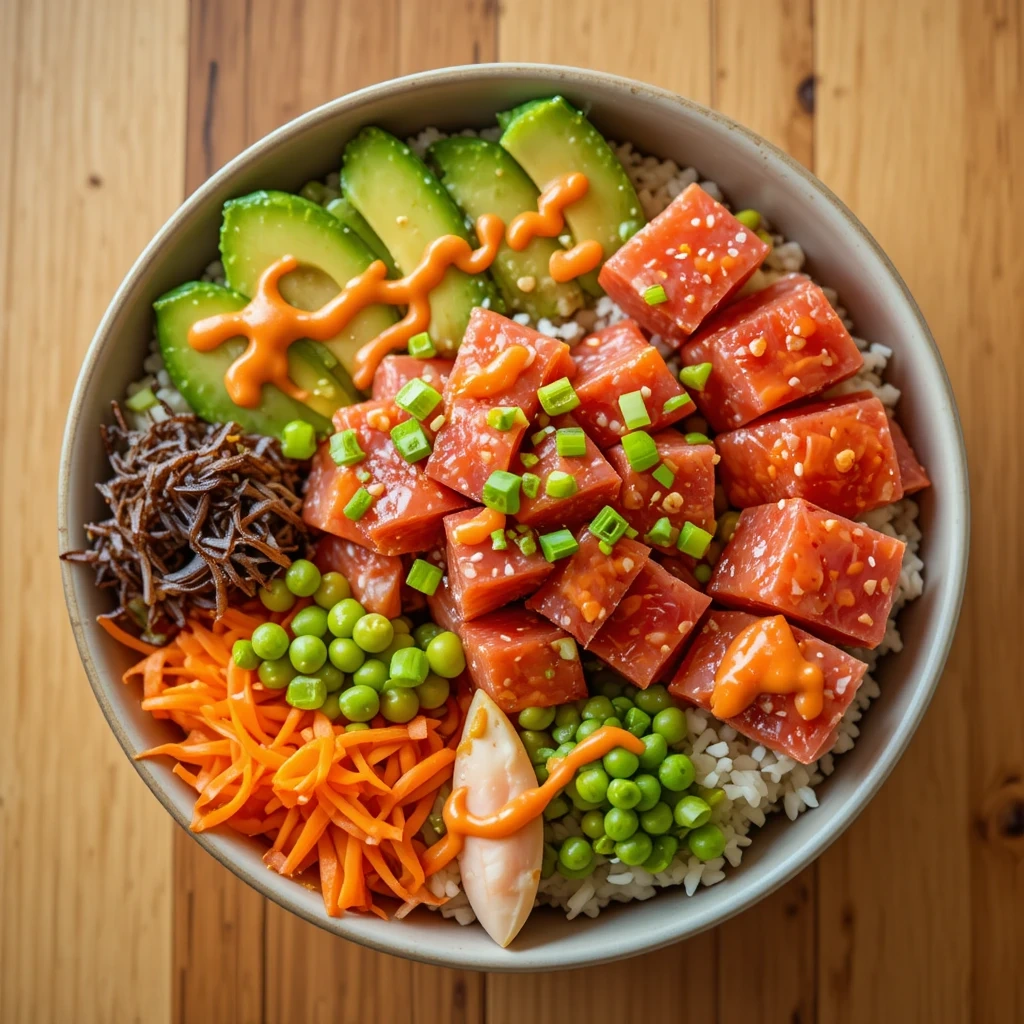
This fresh and vibrant bowl features marinated raw fish, rice, and colorful toppings. It’s light, healthy, and brings island vibes to your dinner table.
Quick Overview
Sushi-grade fish marinated in soy sauce and sesame oil creates the star of this bowl. Combined with creamy avocado, crunchy vegetables, and sticky rice, it’s a refreshing meal that feels special yet simple. Perfect for warm evenings when you want something light but satisfying.
Preparation Time: 20 minutes (plus marinating)
Cooking Time: 0 minutes
Total Time: 20 minutes
Servings: 4
Key Ingredients for Hawaiian Poke Bowl
- 1 pound sushi-grade tuna or salmon, cut into cubes
- 3 tablespoons soy sauce
- 1 tablespoon sesame oil
- 1 teaspoon rice vinegar
- 1/2 teaspoon grated ginger
- 3 cups cooked sushi rice
- 2 avocados, sliced
- 1 cucumber, diced
- 1 cup edamame
- 1/2 cup shredded carrots
- Seaweed salad (optional)
- Sesame seeds
- Green onions, sliced
- Sriracha mayo (optional)
Step-by-Step Instructions
Step 1: Marinate the Fish Cut fish into bite-sized cubes. Combine with soy sauce, sesame oil, rice vinegar, and ginger. Gently toss and refrigerate for 15-30 minutes.
Step 2: Prepare Sushi Rice Cook sushi rice according to package directions. While still warm, season with a bit of rice vinegar and sugar. Let cool slightly.
Step 3: Prep All Toppings Slice avocado, dice cucumber, and prepare all garnishes while the fish marinates.
Step 4: Make Sriracha Mayo If using, mix mayonnaise with sriracha to taste. Transfer to a squeeze bottle or small bowl for drizzling.
Step 5: Build Your Poke Bowls Place sushi rice in bowls. Arrange marinated fish, avocado, cucumber, edamame, carrots, and seaweed salad in sections on top. Drizzle with sriracha mayo and garnish with sesame seeds and green onions.
What to Serve Hawaiian Poke Bowl With
Serve with miso soup or clear broth soup as a starter. Crispy wonton chips or seaweed snacks make great accompaniments. Fresh pineapple or mochi makes a perfect light dessert.
Top Tips for Perfecting Hawaiian Poke Bowl
Use Sushi-Grade Fish Only This is crucial for food safety since the fish is raw. Buy from reputable seafood markets and use within 24 hours.
Keep Everything Cold Raw fish should stay cold until serving. Prepare bowls quickly and serve immediately for food safety and best taste.
Customize Your Bowl Add tobiko (fish roe), pickled ginger, wasabi, or furikake seasoning for authentic Hawaiian poke shop flavor.
Storing and Reheating Tips
This bowl is best enjoyed immediately and should not be stored assembled. Raw fish should be consumed within 24 hours of purchase and kept refrigerated until serving. The rice and vegetables can be prepped ahead and stored separately for up to 2 days. Marinate fish right before serving for optimal freshness and safety.
Recipe 12: Cajun Chicken and Rice Bowl
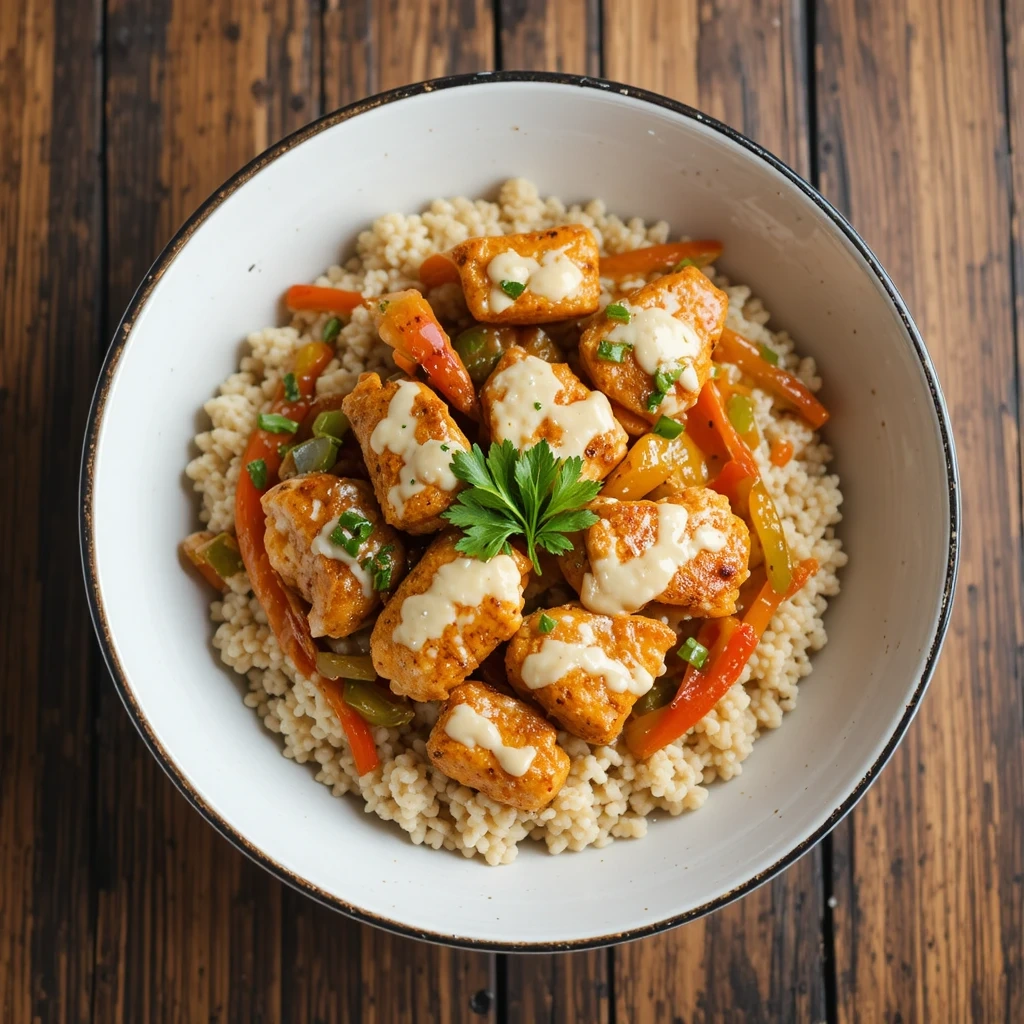
This Louisiana-inspired bowl features spicy Cajun chicken with peppers, onions, and creamy rice. It’s bold, comforting, and packed with southern flavor.
Quick Overview
Cajun-spiced chicken gets seared until golden, then combined with sautéed peppers and onions over creamy, seasoned rice. The spice level is adjustable, making this bowl perfect for families with varying heat preferences. One bite and you’ll feel transported to New Orleans!
Preparation Time: 10 minutes
Cooking Time: 25 minutes
Total Time: 35 minutes
Servings: 4
Key Ingredients for Cajun Chicken and Rice Bowl
- 1.5 pounds chicken breast, cut into strips
- 2 tablespoons Cajun seasoning
- 3 cups cooked long-grain rice
- 1 red bell pepper, sliced
- 1 green bell pepper, sliced
- 1 yellow onion, sliced
- 3 cloves garlic, minced
- 1 cup chicken broth
- 1/2 cup heavy cream
- 2 tablespoons butter
- 2 tablespoons olive oil
- Fresh parsley, chopped
- Salt and pepper to taste
- Hot sauce (optional)
Step-by-Step Instructions
Step 1: Season the Chicken Coat chicken strips generously with Cajun seasoning, pressing it into the meat.
Step 2: Sear the Chicken Heat olive oil in a large skillet over medium-high heat. Cook chicken strips for 6-7 minutes until golden brown and cooked through. Remove and set aside.
Step 3: Sauté Vegetables In the same skillet, add butter. Sauté bell peppers and onions for 5-6 minutes until softened. Add garlic and cook 1 minute more.
Step 4: Make Creamy Sauce Pour chicken broth into the pan, scraping up any browned bits. Add heavy cream and a teaspoon of Cajun seasoning. Simmer for 3-4 minutes until slightly thickened.
Step 5: Combine and Serve Return chicken to the pan and toss with vegetables and sauce. Serve over rice and garnish with fresh parsley. Add hot sauce if desired.
What to Serve Cajun Chicken and Rice Bowl With
Serve with cornbread or garlic bread for soaking up the creamy sauce. A simple coleslaw or green salad provides cooling contrast. Sweet tea or lemonade pairs perfectly with the spicy flavors.
Top Tips for Perfecting Cajun Chicken and Rice Bowl
Adjust Heat Level Cajun seasoning varies in spiciness. Start with less and add more to taste. You can always make it spicier later.
Don’t Skip the Sauce The creamy sauce brings everything together. If it seems too thick, add a splash more broth.
Make Your Own Cajun Seasoning Combine paprika, cayenne, garlic powder, onion powder, oregano, and thyme for homemade Cajun spice.
Storing and Reheating Tips
Store in an airtight container in the refrigerator for up to 4 days. The flavors actually improve overnight as the spices meld. Reheat gently on the stovetop over medium heat, adding a splash of cream or broth if the sauce has thickened too much. Microwave reheating works too but may separate the cream slightly.
Recipe 13: Vietnamese Lemongrass Chicken Bowl (Gà Xào Sả)
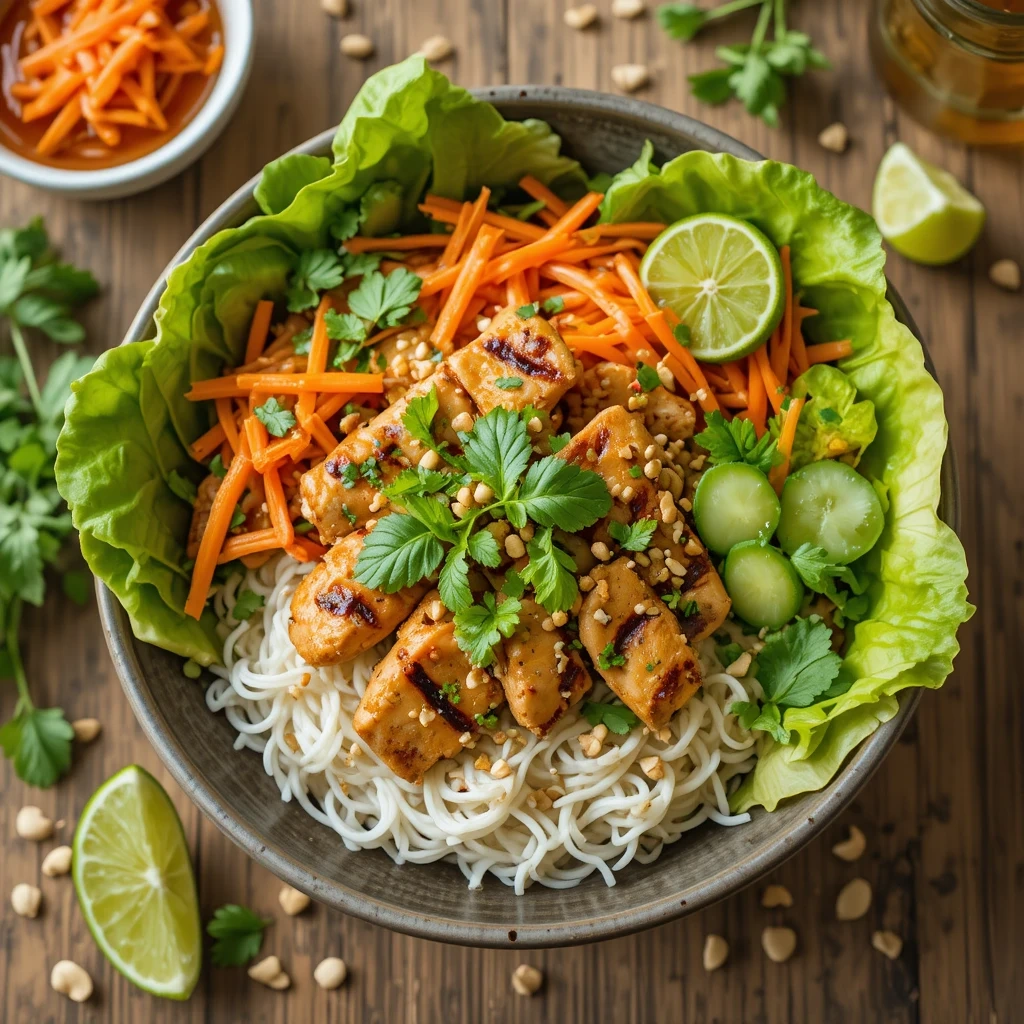
This fragrant bowl features lemongrass-marinated chicken with rice noodles, fresh herbs, and pickled vegetables. It’s light, aromatic, and incredibly refreshing.
Quick Overview
Tender chicken marinated in bright lemongrass and fish sauce becomes aromatic and delicious when grilled or pan-fried. Served over vermicelli noodles with fresh herbs and pickled vegetables, this bowl delivers authentic Vietnamese flavors. It’s healthy, gluten-free friendly, and tastes like a vacation.
Preparation Time: 20 minutes (plus marinating)
Cooking Time: 15 minutes
Total Time: 35 minutes
Servings: 4
Key Ingredients for Vietnamese Lemongrass Chicken Bowl
- 1.5 pounds chicken thighs, sliced
- 3 stalks lemongrass, minced (white parts only)
- 3 cloves garlic, minced
- 2 tablespoons fish sauce
- 1 tablespoon honey
- 1 tablespoon vegetable oil
- 8 oz rice vermicelli noodles
- 2 cups shredded lettuce
- 1 cucumber, julienned
- 1 carrot, julienned and pickled
- Fresh mint leaves
- Fresh cilantro
- Fresh basil
- Crushed peanuts
- Lime wedges
For Pickled Carrots:
- 1 carrot, julienned
- 2 tablespoons rice vinegar
- 1 tablespoon sugar
- Pinch of salt
Step-by-Step Instructions
Step 1: Marinate the Chicken Combine minced lemongrass, garlic, fish sauce, honey, and oil. Add chicken and toss to coat. Marinate for at least 30 minutes or up to 4 hours.
Step 2: Quick-Pickle Carrots Mix julienned carrots with rice vinegar, sugar, and salt. Let sit for at least 20 minutes while you prepare everything else.
Step 3: Cook Vermicelli Noodles Prepare rice noodles according to package directions. Drain and rinse with cold water. Set aside.
Step 4: Cook the Chicken Heat a grill pan or skillet over medium-high heat. Cook marinated chicken for 6-8 minutes, turning once, until cooked through and slightly charred.
Step 5: Assemble Vietnamese Bowls Place noodles in bowls. Top with shredded lettuce, lemongrass chicken, pickled carrots, cucumber, and fresh herbs. Garnish with crushed peanuts. Serve with lime wedges for squeezing.
What to Serve Vietnamese Lemongrass Chicken Bowl With
Serve with Vietnamese spring rolls or summer rolls on the side. A bowl of clear pho broth makes a nice starter. For dessert, try Vietnamese iced coffee or fresh mango.
Top Tips for Perfecting Vietnamese Lemongrass Chicken Bowl
Prepare Lemongrass Properly Use only the white and light green parts. Remove tough outer layers and mince finely or use a food processor.
Don’t Overcook the Chicken Chicken thighs stay juicier than breasts, but still watch the time. Overcooked chicken becomes dry and tough.
Load Up on Fresh Herbs The fresh herbs aren’t just garnish—they’re essential to authentic flavor. Don’t skip them!
Storing and Reheating Tips
Store components separately for up to 3 days. Keep noodles, chicken, and fresh vegetables in different containers. The chicken reheats well in a skillet or microwave. Noodles can be served cold or quickly dunked in hot water to warm. Fresh herbs and pickled vegetables should be added just before eating for the best texture and flavor.
Recipe 14: Indian Chicken Tikka Masala Bowl
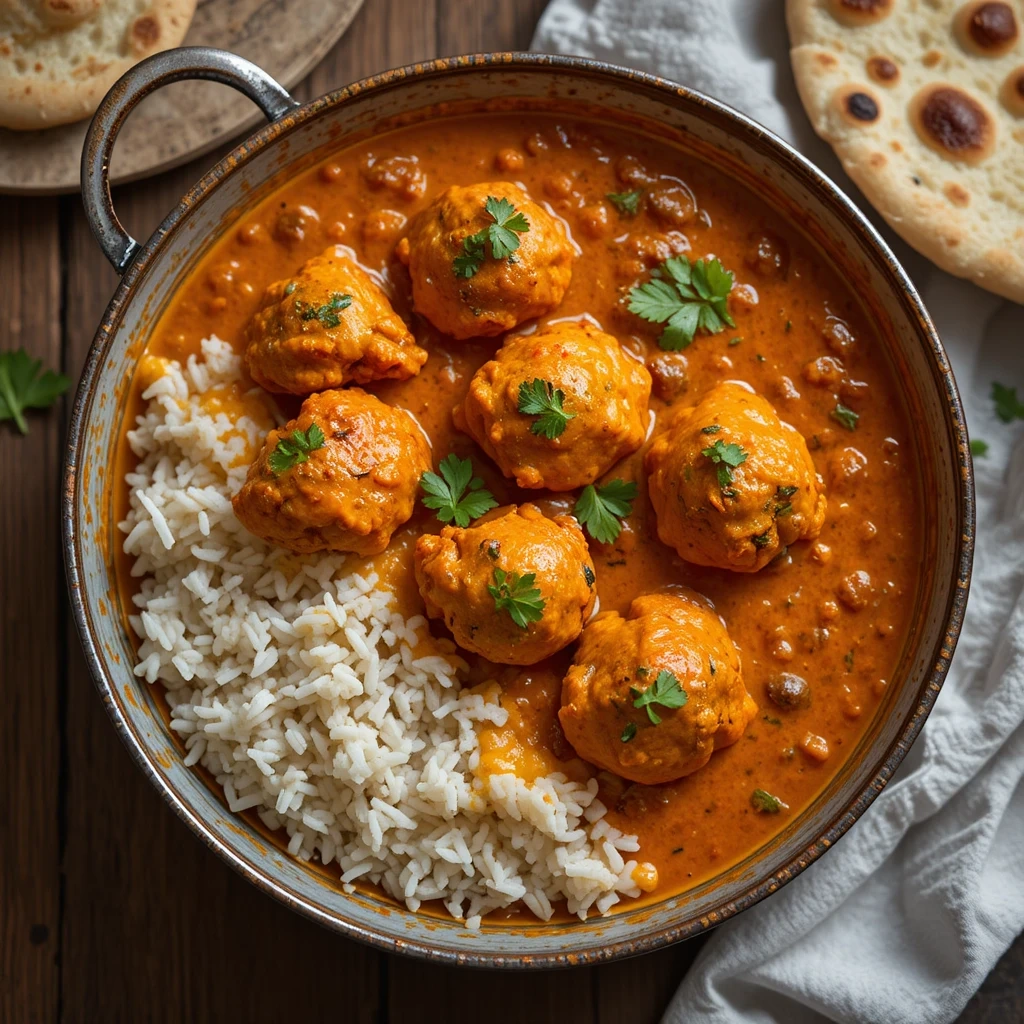
This popular Indian dish features tender chicken in a creamy tomato sauce served over rice with naan. It’s rich, aromatic, and absolutely comforting.
Quick Overview
Marinated chicken gets pan-fried until golden, then simmered in a luscious tomato cream sauce fragrant with warming spices. Served over basmati rice, this bowl brings restaurant-quality Indian food to your home kitchen. The flavors are complex but the technique is surprisingly simple.
Preparation Time: 20 minutes (plus marinating)
Cooking Time: 30 minutes
Total Time: 50 minutes
Servings: 4-6
Key Ingredients for Indian Chicken Tikka Masala Bowl
- 1.5 pounds chicken breast, cubed
- 1 cup plain yogurt
- 2 teaspoons garam masala
- 1 teaspoon turmeric
- 1 teaspoon cumin
- 1 teaspoon paprika
- 4 cloves garlic, minced
- 1 tablespoon fresh ginger, grated
- 1 can (14 oz) crushed tomatoes
- 1 cup heavy cream
- 2 tablespoons butter
- 1 onion, diced
- 3 cups cooked basmati rice
- Fresh cilantro
- Naan bread (optional)
- Salt to taste
Step-by-Step Instructions
Step 1: Marinate the Chicken Mix yogurt with 1 teaspoon garam masala, half the garlic, half the ginger, turmeric, salt, and cumin. Add chicken cubes and refrigerate for 30 minutes to 2 hours.
Step 2: Cook the Chicken Heat oil in a large pan over medium-high heat. Remove chicken from marinade and cook for 6-8 minutes until browned on all sides. Remove and set aside.
Step 3: Make the Sauce Base In the same pan, melt butter. Sauté onions until soft, about 5 minutes. Add remaining garlic and ginger, cook for 1 minute until fragrant.
Step 4: Add Spices and Tomatoes Stir in remaining garam masala, paprika, and cumin. Cook for 30 seconds. Add crushed tomatoes and simmer for 10 minutes until thickened.
Step 5: Finish with Cream Reduce heat to low. Stir in heavy cream and return chicken to the pan. Simmer for 5-7 minutes until chicken is cooked through and sauce is creamy.
Step 6: Serve Over Rice Divide basmati rice among bowls. Top generously with chicken tikka masala. Garnish with fresh cilantro and serve with naan bread.
What to Serve Indian Chicken Tikka Masala Bowl With
Serve with garlic naan, roti, or parathas for scooping. Cucumber raita (yogurt sauce) provides cooling contrast. Mango lassi or sweet chai tea complement the spices perfectly.
Top Tips for Perfecting Indian Chicken Tikka Masala Bowl
Toast Your Spices Briefly toasting garam masala and cumin in the pan before adding liquids intensifies their flavor dramatically.
Control the Heat Indian dishes can be mild or spicy. Add cayenne pepper for heat, or keep it mild with just paprika for color.
Make It Ahead This dish tastes even better the next day. The flavors deepen and meld beautifully when refrigerated overnight.
Storing and Reheating Tips
Store in an airtight container in the refrigerator for up to 4 days or freeze for up to 3 months. The sauce may thicken when stored—add a splash of cream or water when reheating. Reheat gently on the stovetop over medium-low heat, stirring occasionally, or microwave in 90-second intervals. Store rice separately for best texture.
Recipe 15: Japanese Teriyaki Salmon Bowl
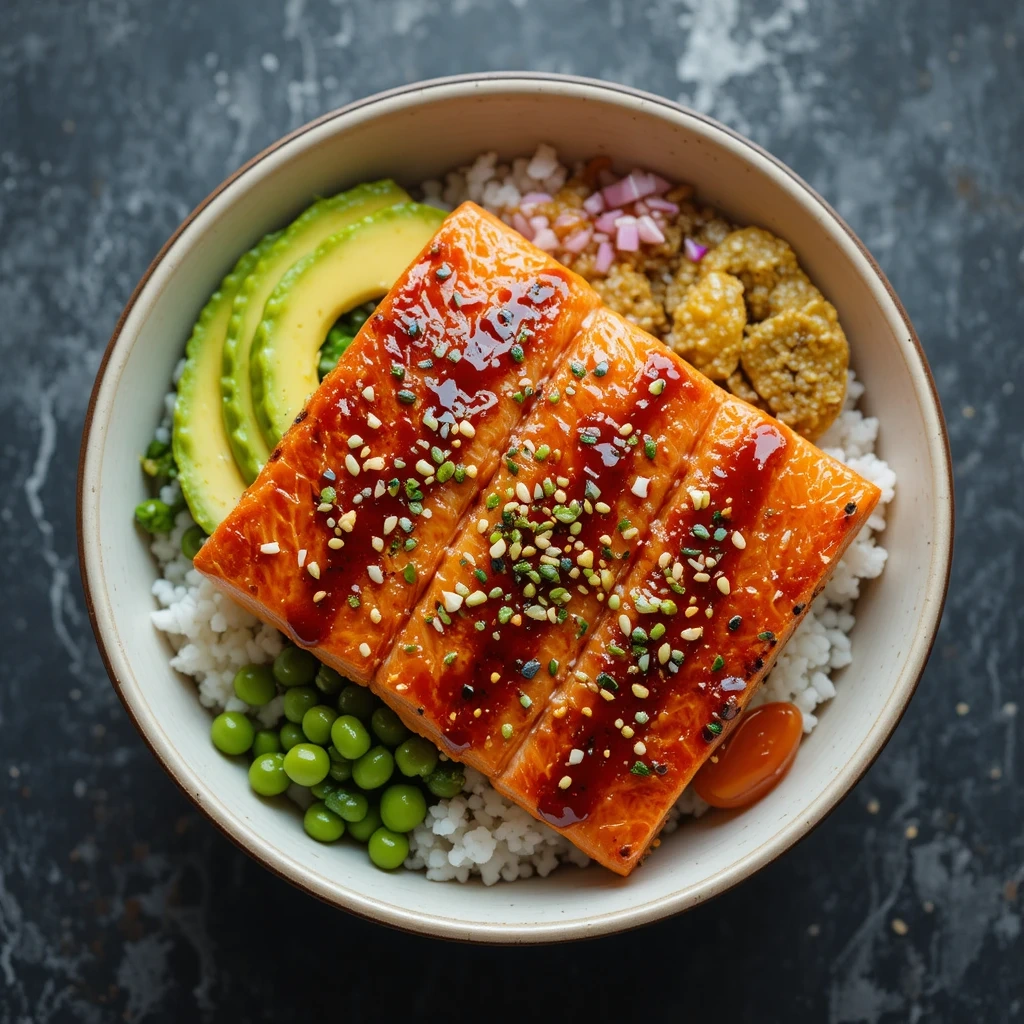
This elegant bowl showcases glazed salmon with edamame, avocado, and sushi rice. It’s healthy, beautiful, and restaurant-quality.
Quick Overview
Rich, fatty salmon gets coated in a sweet teriyaki glaze that caramelizes beautifully. Paired with creamy avocado, protein-rich edamame, and perfectly seasoned sushi rice, this bowl is as nutritious as it is delicious. It feels fancy but comes together in just 20 minutes!
Preparation Time: 10 minutes
Cooking Time: 15 minutes
Total Time: 25 minutes
Servings: 4
Key Ingredients for Japanese Teriyaki Salmon Bowl
- 4 salmon fillets (6 oz each)
- 1/4 cup soy sauce
- 3 tablespoons mirin (or substitute with honey and water)
- 2 tablespoons brown sugar
- 1 teaspoon cornstarch
- 3 cups cooked sushi rice
- 1 tablespoon rice vinegar
- 1 teaspoon sugar
- 2 cups edamame, shelled
- 2 avocados, sliced
- 1 cucumber, sliced
- 2 sheets nori, cut into strips
- Sesame seeds
- Pickled ginger (optional)
- Wasabi (optional)
Step-by-Step Instructions
Step 1: Make Teriyaki Sauce Combine soy sauce, mirin, brown sugar, and cornstarch in a small saucepan. Simmer over medium heat for 3-4 minutes until slightly thickened. Set aside.
Step 2: Season Sushi Rice Mix warm cooked rice with rice vinegar and sugar. Fluff with a fork and let cool slightly.
Step 3: Cook the Salmon Pat salmon fillets dry and season with salt. Heat oil in a non-stick skillet over medium-high heat. Place salmon skin-side up and cook for 4 minutes.
Step 4: Glaze and Finish Flip salmon and brush with teriyaki sauce. Cook for 3-4 more minutes, brushing with more sauce until salmon is cooked through and glazed.
Step 5: Prepare Edamame Cook edamame according to package directions, usually 3-4 minutes in boiling water. Drain and season with a pinch of salt.
Step 6: Build Your Bowls Place sushi rice in bowls. Add teriyaki salmon, edamame, avocado slices, cucumber, and nori strips. Drizzle with remaining teriyaki sauce and sprinkle with sesame seeds. Add pickled ginger and wasabi if desired.
What to Serve Japanese Teriyaki Salmon Bowl With
Serve with miso soup and a simple seaweed salad. Vegetable gyoza or edamame make great appetizers. Green tea or sake complement the meal beautifully.
Top Tips for Perfecting Japanese Teriyaki Salmon Bowl
Choose Quality Salmon Fresh, wild-caught salmon has better flavor and texture. Look for bright color and firm flesh.
Don’t Overcook Salmon should be slightly pink in the center for optimal moisture. It continues cooking after removing from heat.
Crispy Skin Option Start salmon skin-side down in the pan for crispy skin. Pat it very dry before cooking and use high heat.
Storing and Reheating Tips
Store components separately for up to 2 days. Salmon is best enjoyed fresh but can be gently reheated in a 300°F oven for 5-7 minutes or eaten cold. The rice stores well and reheats in the microwave with a damp paper towel. Add fresh avocado, cucumber, and nori just before serving to maintain their texture.
Nutrition Information Table
| Recipe Name | Calories (approx.) | Protein | Carbs | Prep Time |
|---|---|---|---|---|
| Teriyaki Chicken Bowl | 450-500 | 35g | 55g | 25 min |
| Mexican Burrito Bowl | 520-580 | 32g | 58g | 35 min |
| Mediterranean Chicken Bowl | 480-520 | 38g | 52g | 35 min |
| Thai Peanut Noodle Bowl | 460-510 | 28g | 48g | 20 min |
| Korean Beef Bowl | 510-560 | 36g | 54g | 25 min |
| Greek Lamb Bowl | 530-580 | 34g | 48g | 30 min |
| Honey Garlic Shrimp Bowl | 420-470 | 32g | 52g | 20 min |
| Southwest Chicken Bowl | 490-540 | 38g | 56g | 35 min |
| Sesame Ginger Tofu Bowl | 410-450 | 18g | 58g | 35 min |
| Mongolian Beef Bowl | 520-570 | 35g | 56g | 25 min |
| Hawaiian Poke Bowl | 380-430 | 28g | 48g | 20 min |
| Cajun Chicken Bowl | 540-590 | 36g | 52g | 35 min |
| Vietnamese Lemongrass Bowl | 420-470 | 34g | 50g | 35 min |
| Chicken Tikka Masala Bowl | 580-630 | 40g | 54g | 50 min |
| Teriyaki Salmon Bowl | 510-560 | 36g | 52g | 25 min |
Nutrition values are approximate and vary based on specific ingredients and portion sizes
What to Serve with Dinner Bowls
Dinner bowls are complete meals, but these additions enhance the experience:
Light Appetizers: Spring rolls, edamame, soup (miso, egg drop, or wonton), small salads, or veggie chips
Bread Options: Naan, pita, tortilla chips, garlic bread, or dinner rolls for scooping
Refreshing Sides: Cucumber salad, coleslaw, pickled vegetables, or fresh fruit
Beverages: Green tea, iced tea, sparkling water with citrus, fruit juice, or smoothies
Top Tips for Perfecting Any Dinner Bowl
Always Prep Ingredients First
Chopping everything before you start cooking makes assembly quick and stress-free. This is especially important for bowls with multiple components.
Layer Flavors and Textures
The best bowls combine crunchy, creamy, tender, and fresh elements. Think crispy vegetables, creamy avocado, tender protein, and soft rice.
Don’t Overcrowd Your Pan
Whether cooking meat or vegetables, give ingredients space. Overcrowding creates steam instead of the golden-brown sear that adds flavor.
Taste and Adjust Seasonings
Always taste your components before assembling. Adjust salt, acid (lime or vinegar), or spice levels to your preference.
Make Extra for Meal Prep
Double the recipe and store components separately. You’ll have ready-to-assemble lunches or dinners all week long.
Invest in Good Storage Containers
Quality meal prep containers with dividers keep ingredients separate and fresh, preventing soggy bowls.
Storing and Reheating Tips for Dinner Bowls
General Storage Guidelines
Store components separately in airtight containers. This prevents soggy ingredients and maintains the best texture. Most cooked proteins and grains last 3-4 days refrigerated.
What Stores Well:
- Cooked rice and grains (4-5 days)
- Cooked proteins (3-4 days)
- Cooked beans (4-5 days)
- Roasted vegetables (3-4 days)
- Most sauces (5-7 days)
What to Keep Fresh:
- Leafy greens (add when serving)
- Avocado (slice fresh or store with lime juice)
- Cucumber (keeps 2-3 days when diced)
- Fresh herbs (add just before eating)
Reheating Methods:
- Microwave: Best for rice, beans, and saucy dishes (1.5-2 minutes)
- Stovetop: Ideal for proteins and maintaining texture (3-5 minutes)
- Oven: Perfect for restoring crispiness (300°F for 5-10 minutes)
Freezing Tips:
Most cooked proteins, grains, and sauces freeze well for 2-3 months. Freeze in individual portions for easy defrosting. Avoid freezing fresh vegetables, avocado, or dairy-based sauces as they don’t maintain good texture.
Common Mistakes to Avoid When Making Dinner Bowls
Mistake 1: Cooking Everything at the Same Temperature
Different ingredients need different cooking temperatures. High heat for searing meat, medium for sautéing vegetables, and gentle heat for sauces prevents burning and ensures everything cooks properly.
Mistake 2: Not Seasoning Each Component
Season rice, proteins, and vegetables individually rather than relying on sauce alone. This creates layers of flavor throughout the bowl.
Mistake 3: Making Bowls Too Dry
Always include a sauce, dressing, or creamy element. Dry bowls are disappointing bowls. Keep extra sauce on the side for those who want more.
Mistake 4: Using Cold Rice or Grains
Cold rice clumps together and doesn’t absorb flavors well. Always use warm or room-temperature grains for the best texture and taste.
Mistake 5: Overcooking Proteins
Whether it’s chicken, beef, shrimp, or tofu, overcooked protein becomes dry and tough. Use a meat thermometer and remove proteins just before they’re done—carryover cooking finishes the job.
Mistake 6: Skipping the Marinade
Marinades tenderize meat and infuse flavor throughout. Even 15-30 minutes makes a significant difference in the final dish.
Mistake 7: Not Balancing Textures
A bowl with only soft ingredients becomes boring. Include something crunchy (nuts, crispy vegetables, or sesame seeds) for textural contrast.
Mistake 8: Forgetting Acid
A squeeze of lime or lemon juice brightens flavors and balances rich ingredients. Never skip this final touch.
Frequently Asked Questions
Can I make dinner bowls ahead of time?
Yes! Dinner bowls are perfect for meal prep. Cook all components and store them separately in airtight containers. Keep cooked proteins, grains, and roasted vegetables for 3-4 days. Add fresh ingredients like lettuce, avocado, and herbs when you’re ready to eat. This keeps everything fresh and prevents sogginess.
What’s the best rice for dinner bowls?
It depends on the bowl style. White or brown rice works for most Asian-inspired bowls. Jasmine rice is perfect for Thai and Vietnamese bowls. Short-grain rice suits Japanese bowls. Cilantro lime rice pairs beautifully with Mexican bowls. You can also use quinoa, couscous, or cauliflower rice for variety.
How do I keep my bowls from getting soggy?
Store wet and dry ingredients separately. Keep sauces and dressings in small containers and add them right before eating. Don’t mix everything together until serving time. If meal prepping, place a paper towel in the container to absorb excess moisture.
Can I substitute proteins in these recipes?
Absolutely! Most bowls work with various proteins. Swap chicken for tofu, beef for turkey, or shrimp for chicken. Just adjust cooking times accordingly. Tofu needs pressing before cooking, shrimp cooks in minutes, and ground meats need thorough cooking until no pink remains.
Are dinner bowls healthy?
Yes, when balanced properly! Dinner bowls include protein, whole grains, and plenty of vegetables in one meal. Control portions and choose lean proteins, whole grains, and healthy fats. They’re naturally portion-controlled and you can easily adjust ingredients to meet dietary needs.
What size bowls should I use?
Use bowls that hold 3-4 cups of food comfortably. Wide, shallow bowls work better than deep ones because they allow you to see and access all the ingredients easily. Restaurant-style ramen bowls or large salad bowls work perfectly.
Can kids help make dinner bowls?
Definitely! Dinner bowls are perfect for getting kids involved. They can wash vegetables, measure ingredients, stir sauces, and most importantly, build their own bowls with their favorite ingredients. This gives them control and makes them more likely to eat the meal.
How do I prevent my chicken from drying out?
Don’t overcook it! Chicken breast reaches safe temperature at 165°F. Remove it from heat at 160-162°F and let it rest—carryover cooking brings it to temperature. Chicken thighs stay juicier because they have more fat. Marinating also helps keep meat moist.
Can dinner bowls be frozen?
Most components freeze well except fresh vegetables and dairy-based sauces. Freeze cooked proteins, grains, and beans in individual portions for up to 3 months. Thaw overnight in the refrigerator and reheat thoroughly. Add fresh vegetables and toppings after reheating.
What if I don’t have all the ingredients?
Dinner bowls are incredibly flexible! Substitute vegetables based on what you have. Use different proteins or make them vegetarian. Change up grains or use what’s in your pantry. The key is balancing protein, grain, vegetables, and a flavorful sauce.
Final Thoughts
Dinner bowls have revolutionized weeknight cooking for good reason. These versatile one-bowl meals deliver complete nutrition, incredible flavors, and beautiful presentation without complicated techniques or lengthy cleanup. From Asian-inspired teriyaki to Mediterranean freshness to Mexican fiesta flavors, these 15 recipes offer something for every taste preference and dietary need.
The beauty of dinner bowls lies in their flexibility. Make them your own by swapping proteins, adjusting vegetables based on what’s seasonal, and controlling spice levels to suit your family. They’re perfect for meal prep, customizable for picky eaters, and impressive enough to serve to guests.
Start with one or two recipes that speak to you, then branch out to discover new favorites. Your family will love the variety, you’ll appreciate the simplicity, and everyone will enjoy the delicious results. These dinner bowls prove that healthy, homemade meals can be quick, easy, and absolutely crave-worthy.
Which bowl will you try first? Grab your ingredients, prep your components, and get ready to bowl over your family with these amazing recipes!