
15+ Bridal Shower Food Ideas Everyone Will Love
There’s something magical about hosting a bridal shower—the laughter, the love, and most importantly, the food that brings everyone together. Last spring, I hosted my best friend’s bridal shower, and I’ll never forget the moment when guests couldn’t stop raving about the homemade treats.
Creating the perfect bridal shower food spread doesn’t have to stress you out. These elegant yet simple recipes will have your guests swooning and the bride-to-be feeling absolutely cherished.
What is Bridal Shower Food?
Ever wondered why bridal shower food feels so different from regular party food? It’s all about those dainty, elegant bites that make guests feel pampered without being too heavy or filling. Think finger foods, delicate pastries, and beautiful presentations that photograph just as well as they taste.
After all, they say the way to anyone’s heart is through their stomach—and what better way to celebrate love than with food made with love? Trust me, once you see how these recipes come together, you’ll be itching to throw your own celebration!
This recipe is fully AI-written and untested in our kitchen. We believe in transparency, and readers who’ve made other recipes from our site often report good results.
Why You’ll Love This Bridal Shower Food Collection
First, let me tell you about the incredible variety here. From savory appetizers to sweet treats, this collection covers every taste preference your guests might have.
Second, these recipes are seriously budget-friendly. Instead of spending hundreds on catering, you can create an impressive spread for a fraction of the cost. Your wallet will thank you, and honestly, homemade food always tastes better anyway.
Third, the flavors and presentations are absolutely stunning. Each recipe features ingredients that complement each other beautifully, creating those “wow” moments that make parties memorable. Similar to my popular [Party Appetizer Collection], these recipes are designed to impress without requiring professional chef skills. Ready to create an unforgettable bridal shower menu? Let’s dive in!
How to Plan Your Bridal Shower Food Menu
Quick Overview
Planning bridal shower food doesn’t have to be complicated. The key is choosing recipes that can be prepared ahead, look beautiful on the table, and cater to different dietary preferences. These 20 recipes strike the perfect balance between elegant and achievable.
Most recipes can be completed in under an hour, with many requiring just 30-45 minutes of active prep time. The beauty of bridal shower food is that most items can be made the morning of (or even the night before) and simply arranged before guests arrive.
Preparation Overview:
- Total menu planning time: 2-3 days ahead
- Shopping and ingredient prep: 1-2 days before
- Day-of cooking and assembly: 2-4 hours
- Recipes that can be made ahead: 15 out of 20
- Best served fresh: 5 recipes (marked in each recipe)
1. Savory Cream Cheese Pinwheels
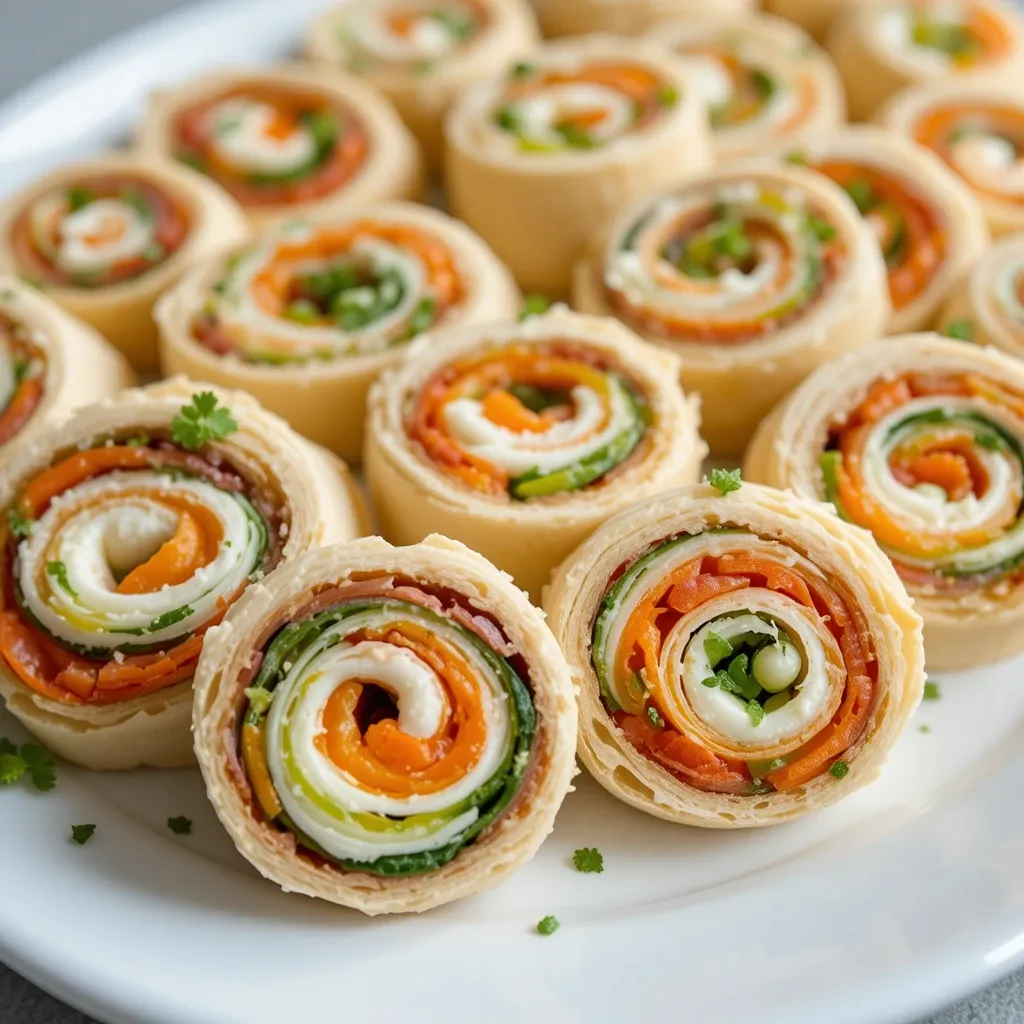
These colorful spirals are always the first to disappear from any bridal shower spread. The combination of creamy filling, fresh vegetables, and tender tortillas creates the perfect bite-sized appetizer.
Key Ingredients for Savory Cream Cheese Pinwheels
- 8 oz cream cheese, softened
- 1/4 cup sour cream
- 2 tablespoons ranch seasoning mix
- 4 large flour tortillas (10-inch)
- 1/2 cup finely chopped red bell pepper
- 1/2 cup shredded carrots
- 1/4 cup finely chopped green onions
- 1/2 cup baby spinach, finely chopped
- Salt and pepper to taste
Step-by-Step Instructions
Step 1: In a medium bowl, beat together the softened cream cheese and sour cream until smooth and creamy. Add the ranch seasoning mix and stir until fully combined. This creates your flavorful base that holds everything together.
Step 2: Lay one tortilla flat on a clean surface. Spread about one-quarter of the cream cheese mixture evenly across the entire tortilla, reaching all the way to the edges.
Step 3: Sprinkle the chopped bell peppers, carrots, green onions, and spinach evenly over the cream cheese layer. Press down gently with your hands to help the vegetables stick to the cheese.
Step 4: Starting from one edge, tightly roll the tortilla into a log shape. The tighter you roll, the better your pinwheels will hold together. Wrap the roll tightly in plastic wrap.
Step 5: Refrigerate for at least 2 hours or overnight. This chilling time is crucial—it helps the cream cheese firm up and makes slicing much easier.
Step 6: When ready to serve, unwrap the roll and slice into 1-inch thick pinwheels using a sharp knife. Arrange on a serving platter with the spiral side facing up.
2. Honey Balsamic Fruit Skewers
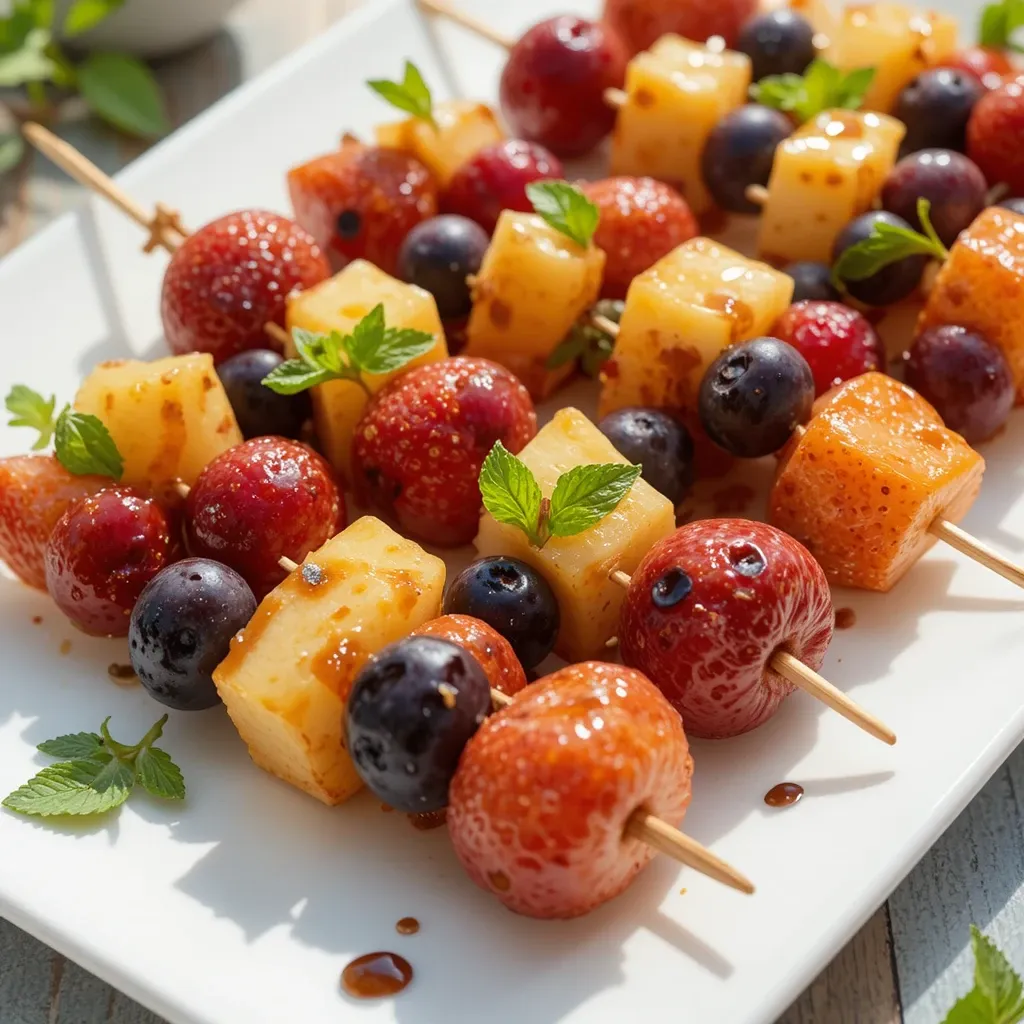
Nothing says celebration quite like fresh fruit displayed on elegant skewers. These are naturally sweet, refreshing, and absolutely gorgeous on a serving tray.
Key Ingredients for Honey Balsamic Fruit Skewers
- 1 lb fresh strawberries, hulled
- 2 cups fresh pineapple chunks
- 2 cups seedless grapes (red or green)
- 1 cup blueberries
- 2 tablespoons honey
- 1 tablespoon balsamic glaze
- Fresh mint leaves for garnish
- 20 wooden skewers
Step-by-Step Instructions
Step 1: Wash all fruit thoroughly and pat dry with paper towels. Make sure strawberries are hulled and cut any large strawberries in half so all pieces are similar in size.
Step 2: Thread the fruit onto skewers in an alternating pattern. A nice combination is strawberry, pineapple, grape, blueberry, then repeat. This creates visual appeal and flavor variety in each bite.
Step 3: Arrange the completed skewers on a large serving platter in a fan pattern or standing upright in a glass for dramatic presentation.
Step 4: In a small bowl, whisk together honey and balsamic glaze until smooth. Drizzle this mixture lightly over the fruit skewers just before serving.
Step 5: Garnish with fresh mint leaves tucked between skewers. The mint adds a pop of color and a refreshing aroma that complements the sweet fruit.
3. Mini Caprese Salad Bites
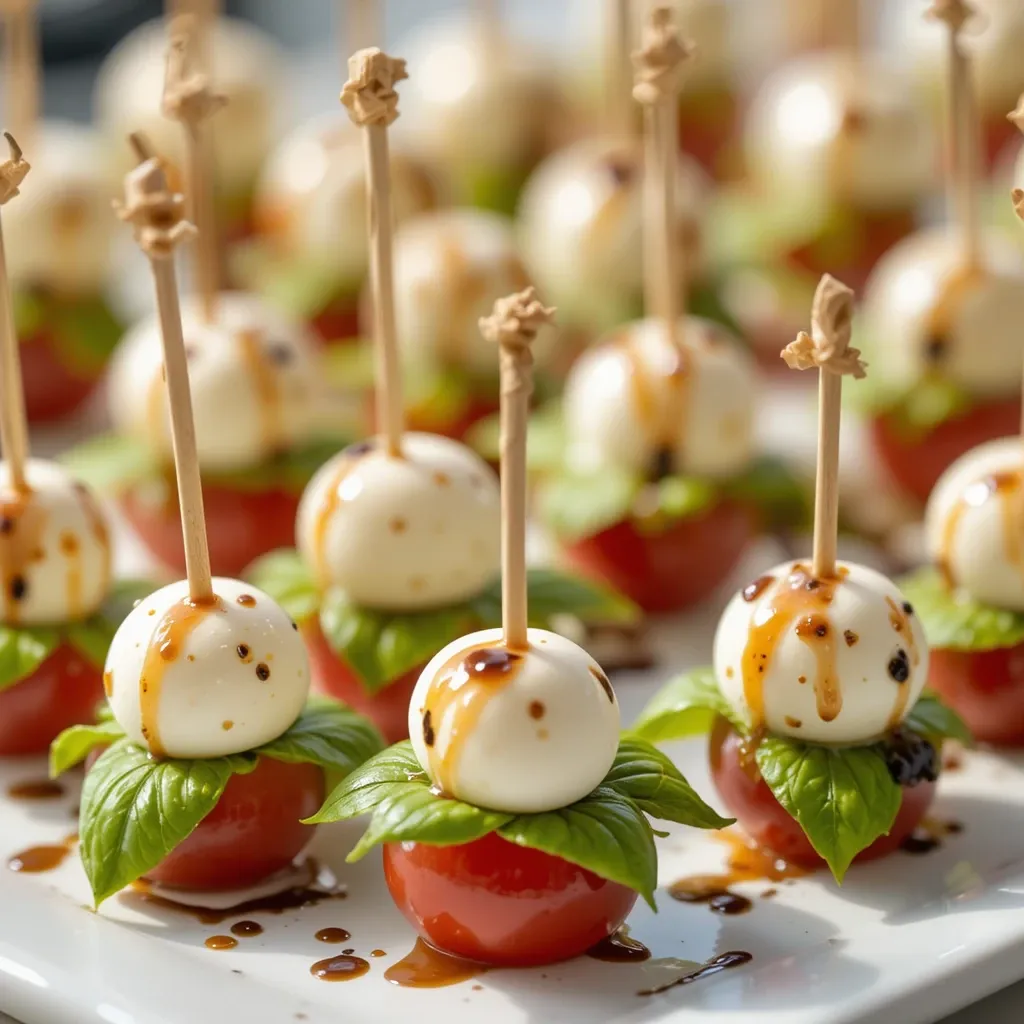
These adorable little bites bring the classic Italian flavors of tomato, mozzarella, and basil to your bridal shower in the cutest way possible.
Key Ingredients for Mini Caprese Salad Bites
- 1 pint cherry tomatoes
- 8 oz fresh mozzarella balls (ciliegine)
- 1/4 cup fresh basil leaves
- 3 tablespoons extra virgin olive oil
- 1 tablespoon balsamic glaze
- 1/4 teaspoon salt
- 1/4 teaspoon black pepper
- 20 toothpicks or small skewers
Step-by-Step Instructions
Step 1: Wash and dry the cherry tomatoes. Drain the mozzarella balls and pat them dry with paper towels. This prevents excess moisture from making your bites soggy.
Step 2: Thread one cherry tomato onto a toothpick, followed by a folded basil leaf, then a mozzarella ball. The order matters—starting with tomato provides a stable base.
Step 3: Arrange all assembled bites on a serving platter. They should be standing upright with the mozzarella ball on top.
Step 4: In a small bowl, whisk together olive oil, balsamic glaze, salt, and pepper. Drizzle this dressing over the caprese bites right before serving.
Step 5: For best results, assemble these 1-2 hours before your shower and keep refrigerated. Bring to room temperature 15 minutes before serving for optimal flavor.
4. Cucumber Tea Sandwiches with Herbed Cream Cheese
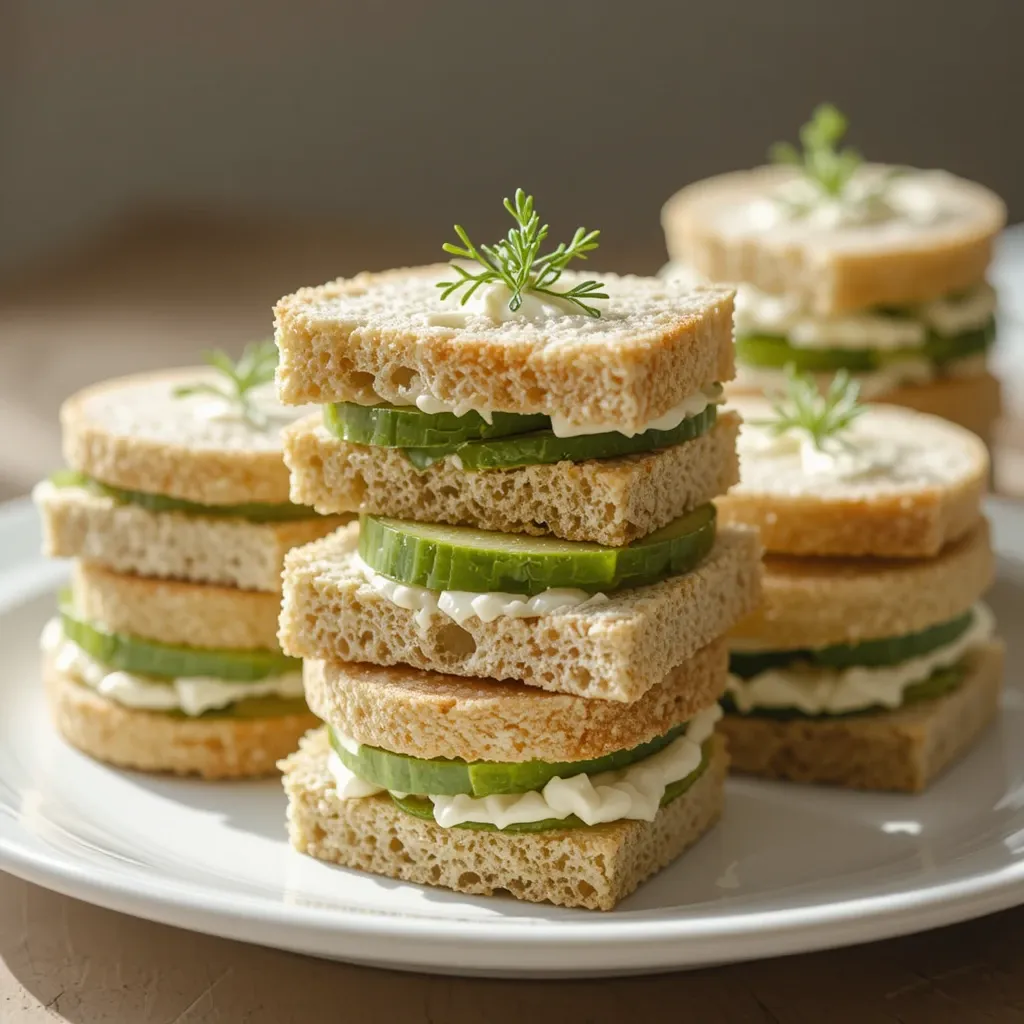
These delicate sandwiches are the epitome of elegance and are surprisingly simple to make. They’re light, refreshing, and perfect for an afternoon shower.
Key Ingredients for Cucumber Tea Sandwiches
- 1 loaf white or wheat sandwich bread
- 8 oz cream cheese, softened
- 2 tablespoons fresh dill, finely chopped
- 1 tablespoon fresh chives, minced
- 1 English cucumber, thinly sliced
- 2 tablespoons lemon juice
- Salt and white pepper to taste
- Fresh dill sprigs for garnish
Step-by-Step Instructions
Step 1: In a medium bowl, combine softened cream cheese, chopped dill, chives, 1 tablespoon lemon juice, salt, and white pepper. Mix until smooth and well combined.
Step 2: Using a bread knife, trim the crusts from all sides of each bread slice. This creates that classic tea sandwich look and makes them easier to eat.
Step 3: Spread a thin, even layer of the herbed cream cheese mixture on each slice of bread. Don’t overfill—about 1-2 tablespoons per slice is perfect.
Step 4: Arrange cucumber slices in a single layer on half of the bread slices. Sprinkle the remaining lemon juice over the cucumbers to keep them fresh and add brightness.
Step 5: Top with the remaining cream cheese-covered bread slices to create sandwiches. Press down gently to help them stick together.
Step 6: Cut each sandwich into quarters diagonally or into three rectangular “fingers.” Arrange on a tiered serving stand and garnish with fresh dill sprigs.
5. Mini Quiche Bites with Spinach and Feta

These protein-packed little quiches are perfect for brunch showers. They’re fluffy, flavorful, and can be served warm or at room temperature.
Key Ingredients for Mini Quiche Bites
- 1 package refrigerated pie crust (2 crusts)
- 6 large eggs
- 1/2 cup heavy cream
- 1 cup fresh spinach, chopped
- 1/2 cup crumbled feta cheese
- 1/4 cup diced sun-dried tomatoes
- 1/4 teaspoon garlic powder
- Salt and pepper to taste
- Cooking spray
Step-by-Step Instructions
Step 1: Preheat oven to 375°F. Spray a 24-cup mini muffin tin generously with cooking spray to prevent sticking.
Step 2: Roll out the pie crusts on a lightly floured surface. Using a round cookie cutter (about 3 inches in diameter), cut circles from the dough. Gently press each circle into a muffin cup, forming a small crust.
Step 3: In a large bowl, whisk together eggs and heavy cream until well combined and slightly frothy. Add garlic powder, salt, and pepper.
Step 4: Divide the chopped spinach, feta cheese, and sun-dried tomatoes evenly among the mini crusts. Each should be filled about two-thirds full.
Step 5: Carefully pour the egg mixture over the filling in each cup, filling almost to the top but leaving a tiny bit of room for expansion.
Step 6: Bake for 18-20 minutes until the egg is set and the tops are lightly golden. A toothpick inserted in the center should come out clean. Let cool for 5 minutes before removing from the tin.
6. Smoked Salmon Canapés

These sophisticated bites bring a touch of luxury to your bridal shower. The combination of creamy, smoky, and crisp textures is absolutely divine.
Key Ingredients for Smoked Salmon Canapés
- 24 small crackers or toasted baguette rounds
- 4 oz cream cheese, softened
- 2 tablespoons sour cream
- 1 tablespoon fresh lemon juice
- 8 oz smoked salmon, thinly sliced
- 2 tablespoons capers, drained
- Fresh dill for garnish
- Lemon zest for garnish
Step-by-Step Instructions
Step 1: If using baguette, slice into 1/4-inch rounds and toast in a 350°F oven for 5-7 minutes until lightly golden and crisp. Let cool completely.
Step 2: In a small bowl, combine cream cheese, sour cream, and lemon juice. Mix until smooth and spreadable. This tangy base perfectly complements the smoky salmon.
Step 3: Spread about 1 teaspoon of the cream cheese mixture onto each cracker or toast round, creating an even layer.
Step 4: Cut the smoked salmon into pieces sized to fit your crackers. Fold or roll each piece and place on top of the cream cheese.
Step 5: Top each canapé with 2-3 capers and a small sprig of fresh dill. Add a tiny pinch of lemon zest for extra brightness.
Step 6: Arrange on a serving platter and keep refrigerated until serving time. These are best served cold.
7. Sweet Almond Cookies with Raspberry Glaze
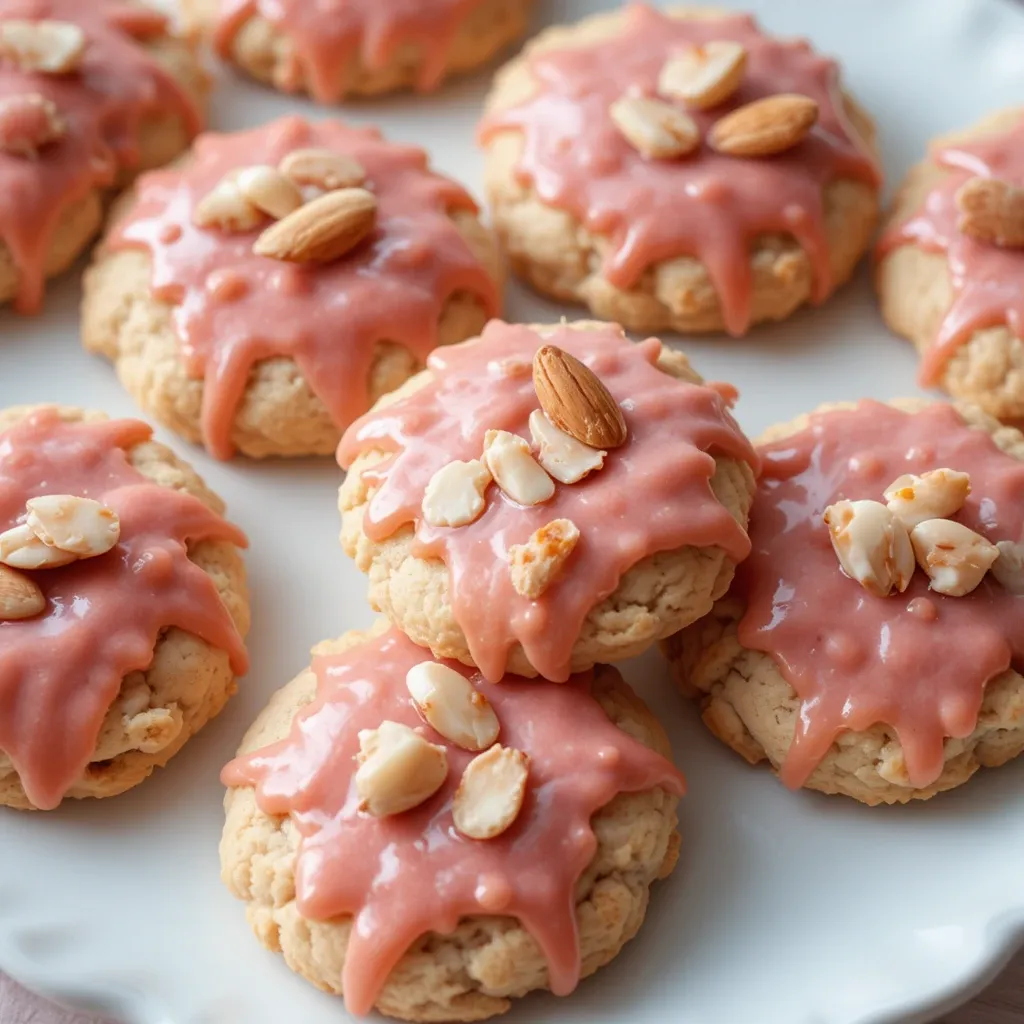
These delicate cookies are buttery, nutty, and topped with a beautiful pink glaze that’s perfect for a bridal shower theme.
Key Ingredients for Sweet Almond Cookies
- 1 cup unsalted butter, softened
- 2/3 cup granulated sugar
- 1 teaspoon almond extract
- 2 cups all-purpose flour
- 1/4 teaspoon salt
- 1/2 cup sliced almonds
For the Raspberry Glaze:
- 1 1/2 cups powdered sugar
- 3 tablespoons raspberry jam
- 2-3 tablespoons milk
- Pink food coloring (optional)
Step-by-Step Instructions
Step 1: Preheat oven to 350°F and line two baking sheets with parchment paper. In a large bowl, cream together butter and sugar until light and fluffy, about 3 minutes.
Step 2: Add almond extract and mix well. Gradually add flour and salt, mixing until a soft dough forms. The dough should come together easily and not be sticky.
Step 3: Roll dough into 1-inch balls and place on prepared baking sheets, spacing them 2 inches apart. Flatten each ball slightly with the bottom of a glass.
Step 4: Press 3-4 sliced almonds gently into the top of each cookie for decoration. Bake for 12-15 minutes until edges are just barely golden. Don’t overbake—they should remain pale.
Step 5: Let cookies cool on the baking sheet for 5 minutes, then transfer to a wire rack to cool completely.
Step 6: For the glaze, whisk together powdered sugar, raspberry jam, and milk until smooth. Add food coloring if desired. Drizzle or spread glaze over cooled cookies and let set for 30 minutes.
8. Mediterranean Hummus Cups
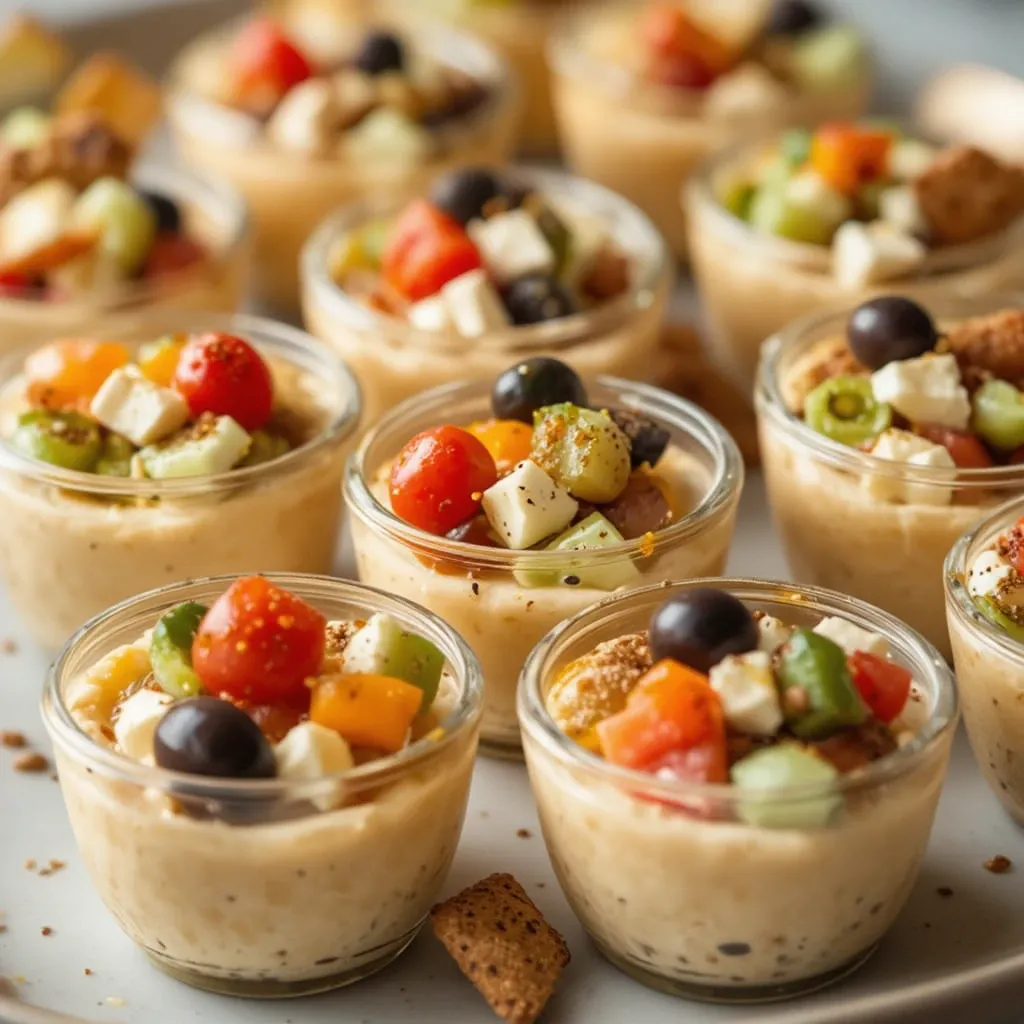
These individual serving cups are not only delicious but also make portion control easy and keep your table tidy.
Key Ingredients for Mediterranean Hummus Cups
- 2 cups prepared hummus (homemade or store-bought)
- 1 cup cherry tomatoes, quartered
- 1/2 cup cucumber, finely diced
- 1/4 cup Kalamata olives, chopped
- 1/4 cup crumbled feta cheese
- 2 tablespoons olive oil
- 1 tablespoon lemon juice
- 1 teaspoon za’atar seasoning
- 20 small clear plastic cups
- Pita chips for serving
Step-by-Step Instructions
Step 1: Spoon about 2-3 tablespoons of hummus into the bottom of each small cup. Use the back of the spoon to create a smooth, even layer.
Step 2: In a medium bowl, combine diced tomatoes, cucumber, olives, and feta cheese. Drizzle with olive oil and lemon juice, then toss gently to combine.
Step 3: Spoon the Mediterranean topping evenly over the hummus in each cup. You want a good balance of vegetables and cheese in each serving.
Step 4: Sprinkle a pinch of za’atar seasoning over the top of each cup. This Middle Eastern spice blend adds amazing flavor and visual appeal.
Step 5: Arrange the cups on a serving tray. Place pita chips in a separate basket or arrange them standing up in some of the cups for easy access.
Step 6: These can be assembled up to 4 hours ahead and kept refrigerated. Let them sit at room temperature for 10 minutes before serving for best flavor.
9. Lemon Blueberry Mini Muffins
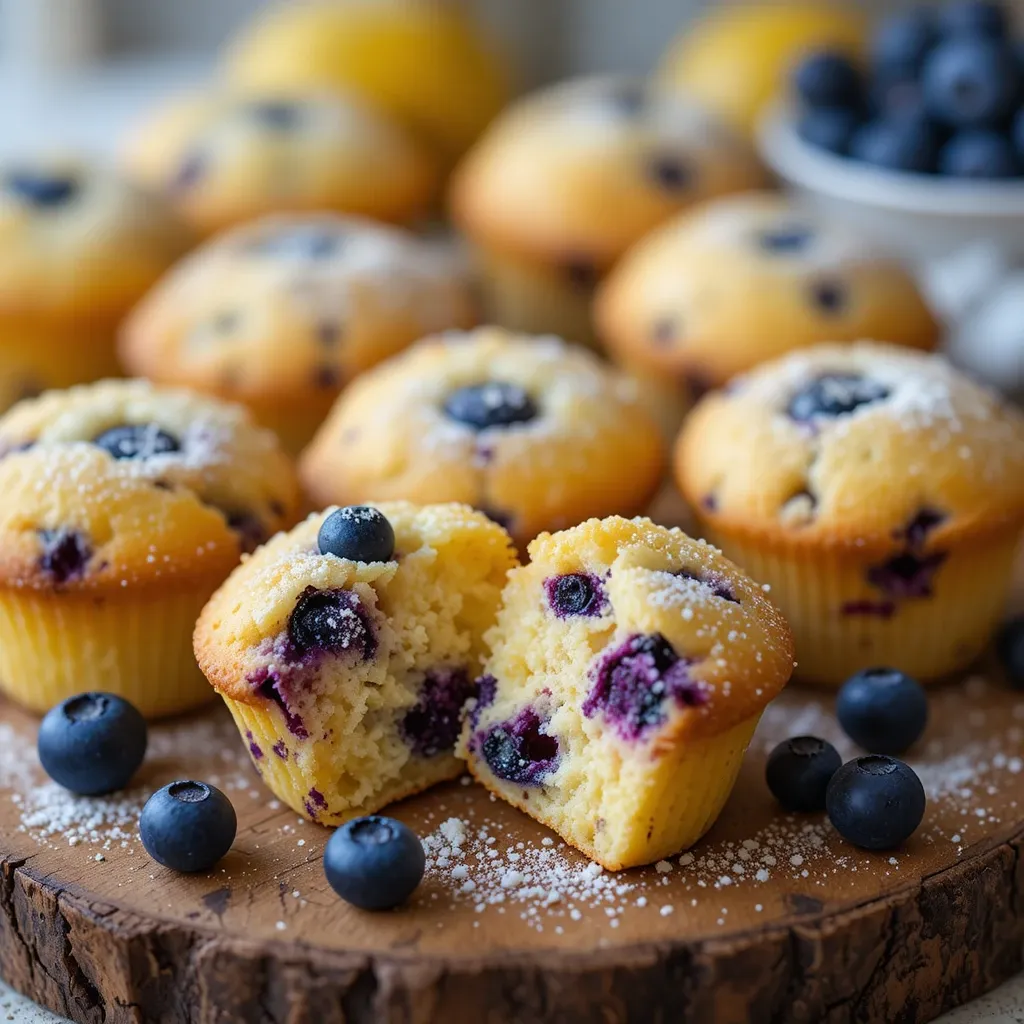
These tender, moist mini muffins burst with fresh blueberries and bright lemon flavor. They’re perfect for morning or afternoon showers.
Key Ingredients for Lemon Blueberry Mini Muffins
- 2 cups all-purpose flour
- 2/3 cup granulated sugar
- 2 teaspoons baking powder
- 1/2 teaspoon salt
- 1/3 cup vegetable oil
- 2 large eggs
- 2/3 cup milk
- 2 tablespoons fresh lemon juice
- 1 tablespoon lemon zest
- 1 cup fresh blueberries
- 2 tablespoons flour (for coating berries)
Step-by-Step Instructions
Step 1: Preheat oven to 375°F and line a 24-cup mini muffin tin with paper liners or spray with cooking spray.
Step 2: In a large bowl, whisk together 2 cups flour, sugar, baking powder, and salt. Create a well in the center of the dry ingredients.
Step 3: In a separate bowl, whisk together oil, eggs, milk, lemon juice, and lemon zest until well combined.
Step 4: Pour the wet ingredients into the well of dry ingredients. Stir gently just until combined—don’t overmix. A few lumps are okay and preferred for tender muffins.
Step 5: Toss blueberries with 2 tablespoons flour (this prevents them from sinking). Gently fold blueberries into the batter using a rubber spatula.
Step 6: Fill each muffin cup about two-thirds full using a small cookie scoop or spoon. Bake for 12-15 minutes until tops spring back when lightly touched and a toothpick comes out clean. Cool in pan for 5 minutes before transferring to a wire rack.
10. Strawberry Pretzel Salad Cups

This beloved dessert gets a modern update with individual serving cups. The combination of sweet, salty, and creamy is absolutely addictive.
Key Ingredients for Strawberry Pretzel Salad Cups
- 2 cups crushed pretzels
- 3/4 cup melted butter
- 3 tablespoons sugar
- 8 oz cream cheese, softened
- 1 cup powdered sugar
- 8 oz whipped topping, thawed
- 6 oz strawberry gelatin
- 2 cups boiling water
- 2 cups sliced fresh strawberries
- 20 clear dessert cups
Step-by-Step Instructions
Step 1: In a bowl, mix crushed pretzels, melted butter, and 3 tablespoons sugar. Press about 2 tablespoons of this mixture into the bottom of each cup. This creates your crunchy base layer.
Step 2: In a medium bowl, beat cream cheese and powdered sugar until fluffy. Fold in half of the whipped topping until smooth and creamy.
Step 3: Spoon the cream cheese mixture over the pretzel layer in each cup, spreading it evenly. This middle layer acts as a barrier to keep the pretzel layer crispy.
Step 4: Dissolve strawberry gelatin in boiling water, stirring for 2 minutes until completely dissolved. Refrigerate for about 30 minutes until slightly thickened but not fully set.
Step 5: Stir sliced strawberries into the cooled gelatin mixture. Carefully spoon this strawberry layer over the cream cheese layer in each cup.
Step 6: Refrigerate for at least 4 hours or overnight until completely set. Before serving, top each cup with a dollop of remaining whipped topping and a fresh strawberry slice.
11. Spinach and Artichoke Phyllo Cups
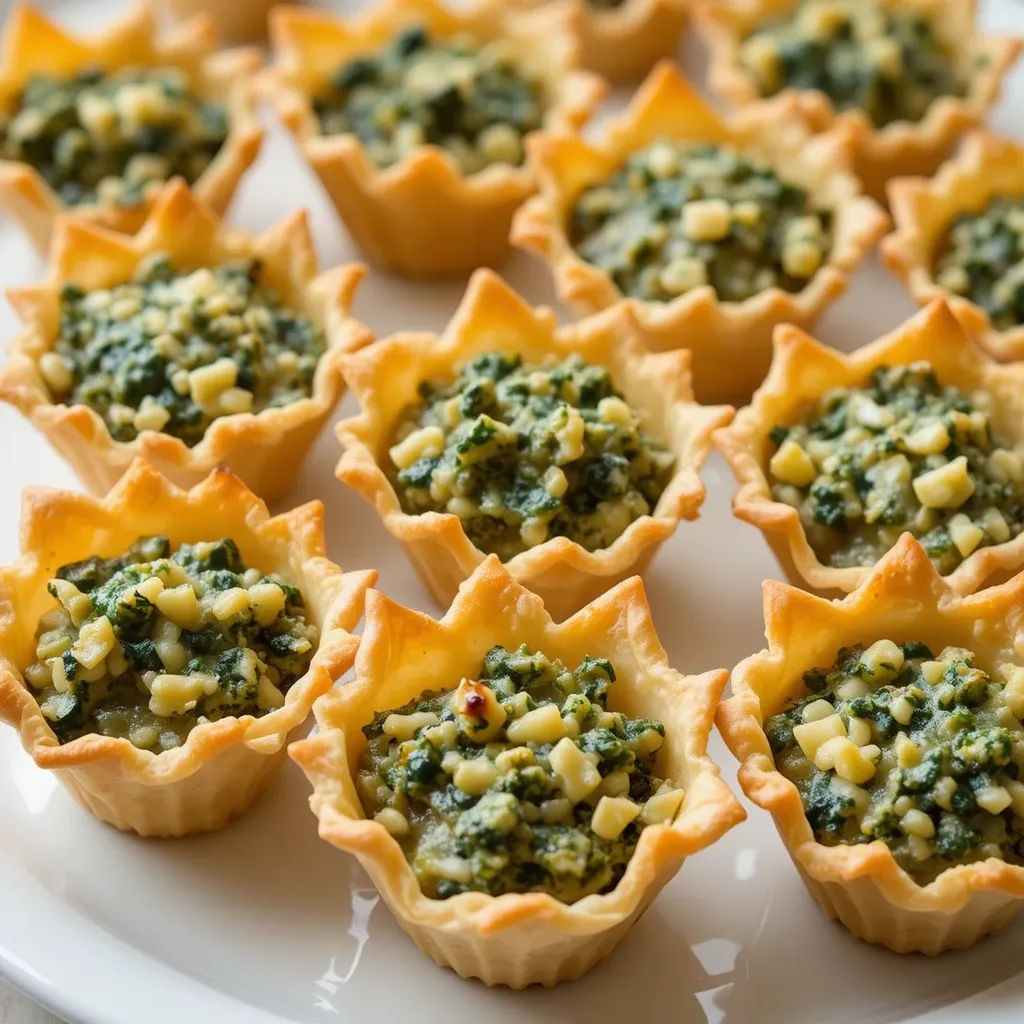
These crispy little cups are filled with the beloved spinach artichoke dip flavor in a convenient, hand-held form.
Key Ingredients for Spinach Artichoke Phyllo Cups
- 2 packages (15 count each) mini phyllo shells
- 1 cup frozen spinach, thawed and drained
- 1 can (14 oz) artichoke hearts, drained and chopped
- 4 oz cream cheese, softened
- 1/4 cup sour cream
- 1/2 cup shredded mozzarella
- 1/4 cup grated Parmesan
- 2 cloves garlic, minced
- 1/4 teaspoon red pepper flakes
- Salt and pepper to taste
Step-by-Step Instructions
Step 1: Preheat oven to 350°F. Arrange phyllo shells on a baking sheet. Make sure spinach is thoroughly drained—squeeze it in a clean kitchen towel to remove excess moisture.
Step 2: In a large bowl, combine cream cheese and sour cream. Mix until smooth. The mixture should be creamy with no lumps.
Step 3: Add spinach, chopped artichokes, mozzarella, Parmesan, garlic, and red pepper flakes. Stir until everything is well combined. Season with salt and pepper to taste.
Step 4: Using a small spoon, fill each phyllo cup with about 1 tablespoon of the spinach mixture. Don’t overfill—the cups should look neat and tidy.
Step 5: Bake for 12-15 minutes until the filling is hot and bubbly and the edges of the phyllo cups are golden brown.
Step 6: Let cool for 3-5 minutes before serving. These are delicious warm but can also be served at room temperature. Garnish with extra Parmesan if desired.
12. Chocolate-Dipped Strawberries

No bridal shower is complete without these elegant, romantic treats. They’re surprisingly easy to make yet look incredibly impressive.
Key Ingredients for Chocolate-Dipped Strawberries
- 2 lbs large fresh strawberries with stems
- 12 oz high-quality chocolate chips (milk, dark, or white)
- 2 tablespoons coconut oil
- Optional toppings: crushed nuts, sprinkles, drizzled chocolate
Step-by-Step Instructions
Step 1: Wash strawberries and pat completely dry with paper towels. Any moisture will cause the chocolate to seize. Leave stems on for easy dipping and a beautiful presentation.
Step 2: Line a large baking sheet with parchment paper or wax paper. Set aside.
Step 3: In a microwave-safe bowl, combine chocolate chips and coconut oil. Microwave in 30-second intervals, stirring between each, until completely smooth and melted. The coconut oil helps create a thin, glossy coating.
Step 4: Hold a strawberry by the stem and dip it into the melted chocolate, rotating to coat about three-quarters of the berry. Let excess chocolate drip back into the bowl.
Step 5: Place dipped strawberry on the prepared baking sheet. If adding toppings, sprinkle them on immediately while chocolate is still wet.
Step 6: Refrigerate for at least 30 minutes until chocolate is completely set. For white chocolate drizzle, melt 2 oz white chocolate and use a fork to drizzle over set berries. These are best served the same day but can be refrigerated for up to 2 days.
13. Caprese Skewers with Balsamic Reduction
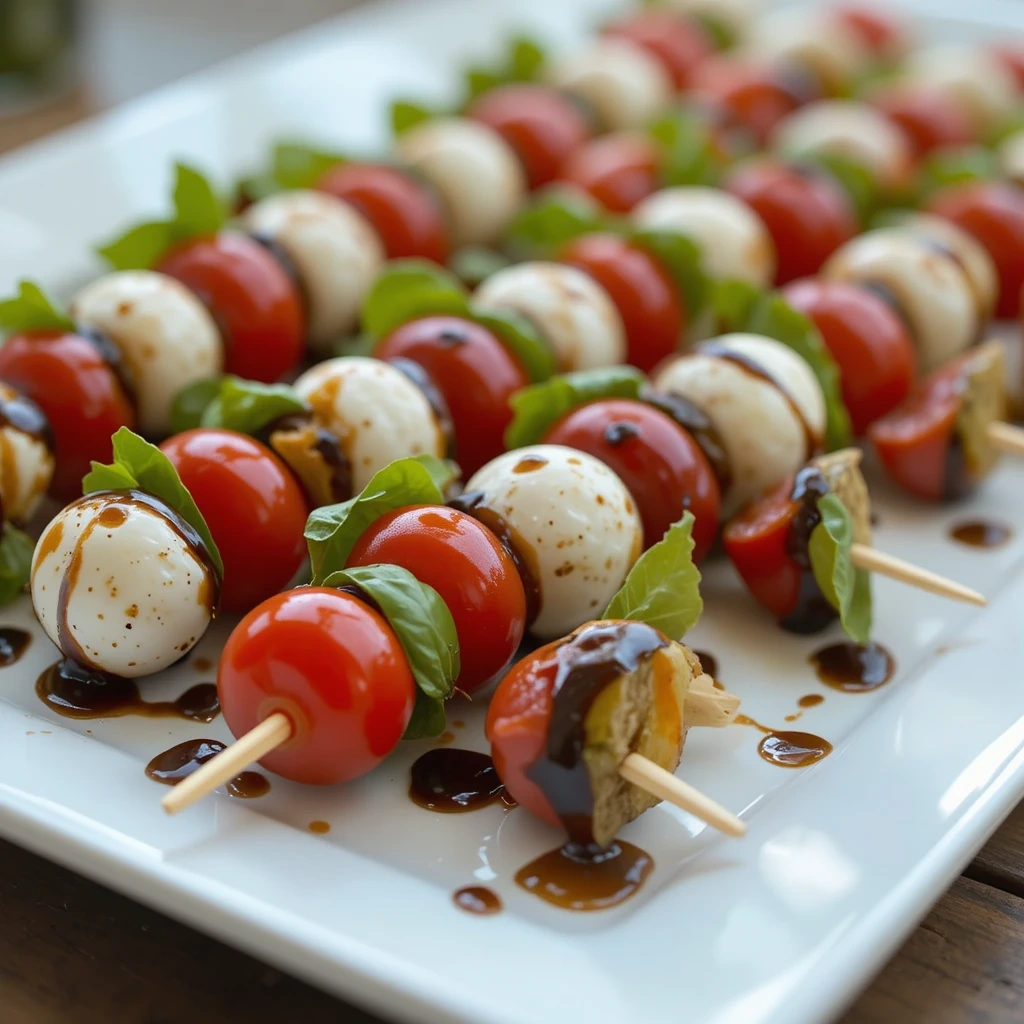
Similar to the caprese bites but presented on longer skewers, these make a stunning centerpiece and are perfect for easy grabbing.
Key Ingredients for Caprese Skewers
- 20 cherry tomatoes
- 20 fresh mozzarella balls
- 20 fresh basil leaves
- 1/4 cup extra virgin olive oil
- 1/2 cup balsamic vinegar
- 1 tablespoon honey
- 20 wooden skewers (6-inch)
- Sea salt and cracked pepper
Step-by-Step Instructions
Step 1: To make balsamic reduction, pour balsamic vinegar and honey into a small saucepan. Bring to a boil, then reduce heat and simmer for 10-12 minutes until reduced by half and syrupy. Set aside to cool.
Step 2: Wash tomatoes and drain mozzarella balls. Pat both dry with paper towels to remove excess moisture.
Step 3: Thread each skewer starting with a tomato, then a folded basil leaf, then a mozzarella ball. Push ingredients toward the bottom of the skewer, leaving the top as a handle.
Step 4: Arrange completed skewers on a large serving platter in rows or in a circular pattern. They can be standing upright or lying flat.
Step 5: Drizzle with olive oil, then drizzle with the cooled balsamic reduction. The reduction should be thick enough to coat the skewers beautifully.
Step 6: Finish with a sprinkle of sea salt and cracked black pepper. Serve immediately or within 2 hours.
14. Lemon Tart Bites with Fresh Berries
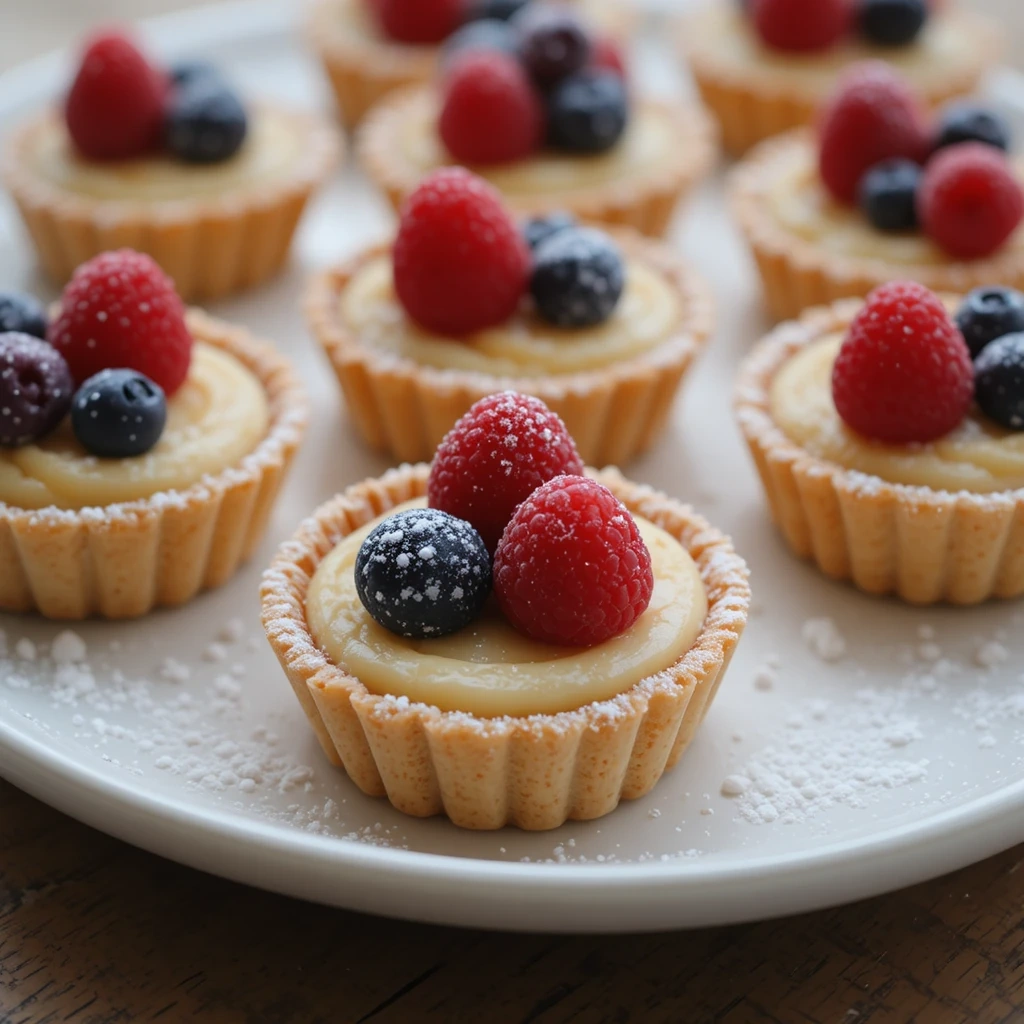
These tangy, sweet little tarts are the perfect balance of creamy filling and buttery crust, topped with colorful fresh berries.
Key Ingredients for Lemon Tart Bites
- 1 package refrigerated pie crust
- 3 large eggs
- 2/3 cup granulated sugar
- 1/2 cup fresh lemon juice
- 1 tablespoon lemon zest
- 1/4 cup butter, melted
- Fresh raspberries and blueberries
- Powdered sugar for dusting
Step-by-Step Instructions
Step 1: Preheat oven to 375°F. Spray a 24-cup mini muffin tin with cooking spray. Roll out pie crust and cut into circles using a 3-inch round cutter.
Step 2: Press each dough circle into a muffin cup, gently pressing up the sides. Prick the bottom of each crust with a fork to prevent bubbling.
Step 3: Bake empty crusts for 8-10 minutes until lightly golden. Remove from oven and let cool while you prepare the filling.
Step 4: In a medium bowl, whisk together eggs, sugar, lemon juice, lemon zest, and melted butter until smooth. Pour this lemon filling into each baked crust, filling about three-quarters full.
Step 5: Return to oven and bake for an additional 12-15 minutes until filling is set but still slightly jiggly in the center. It will firm up as it cools.
Step 6: Cool completely in the pan, then refrigerate for at least 2 hours. Before serving, top each tart with fresh berries and a light dusting of powdered sugar.
15. Goat Cheese and Fig Crostini
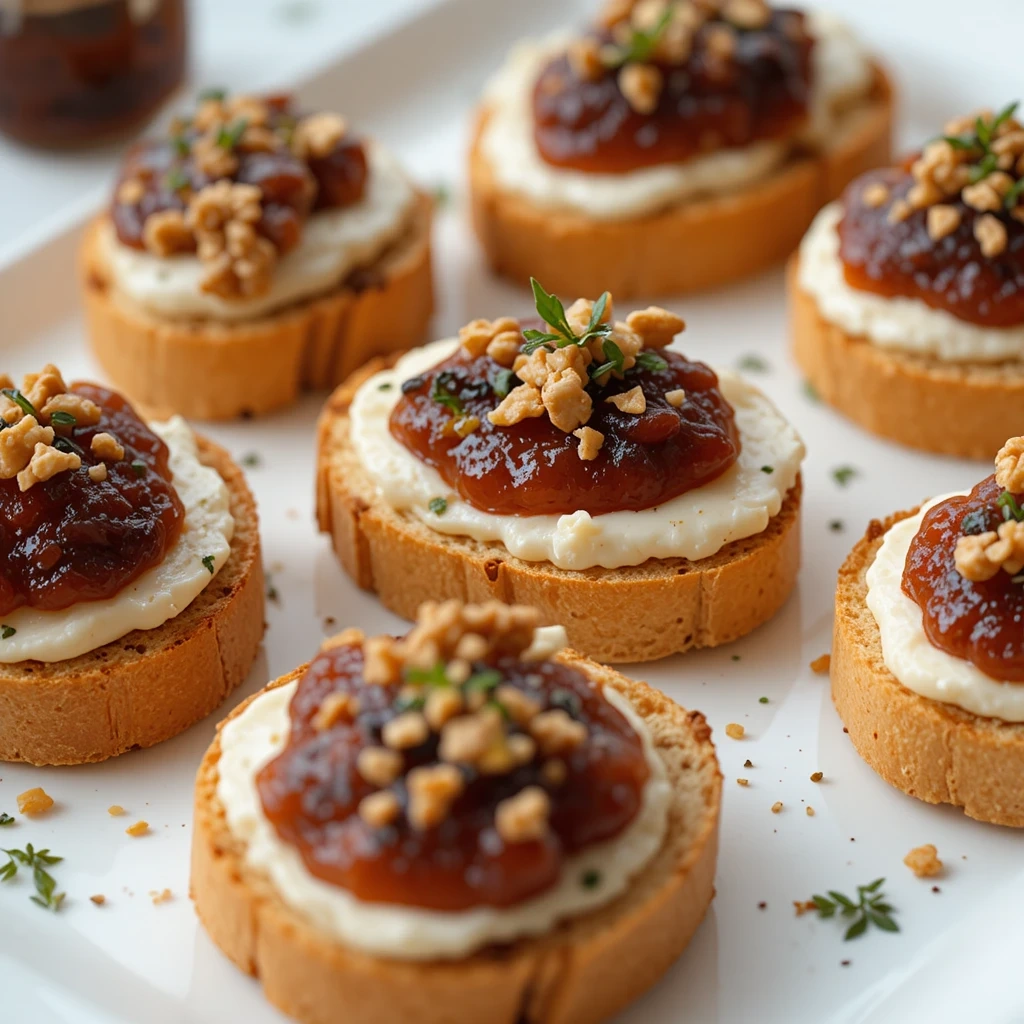
The sophisticated combination of creamy goat cheese and sweet fig preserves on crispy bread creates an upscale appetizer that’s deceptively simple.
Key Ingredients for Goat Cheese Fig Crostini
- 1 French baguette, sliced into 1/2-inch rounds
- 3 tablespoons olive oil
- 8 oz goat cheese, softened
- 1/2 cup fig preserves or jam
- 2 tablespoons honey
- Fresh thyme leaves
- Chopped walnuts for topping
- Cracked black pepper
Step-by-Step Instructions
Step 1: Preheat oven to 375°F. Arrange baguette slices on a large baking sheet. Brush both sides lightly with olive oil.
Step 2: Toast in oven for 5-7 minutes, flip, then toast another 3-5 minutes until golden and crispy. Watch carefully to prevent burning. Let cool slightly.
Step 3: Spread about 1 tablespoon of softened goat cheese on each toasted baguette slice. The cheese should be spreadable but not melting.
Step 4: Top each crostini with about 1 teaspoon of fig preserves. Spread gently or leave in a small dollop for rustic presentation.
Step 5: Drizzle each crostini with a tiny bit of honey. Sprinkle with fresh thyme leaves and chopped walnuts.
Step 6: Finish with a crack of black pepper. Arrange on a serving platter. These can be assembled 1-2 hours ahead and kept at room temperature.
16. Mini Chicken Salad Croissants
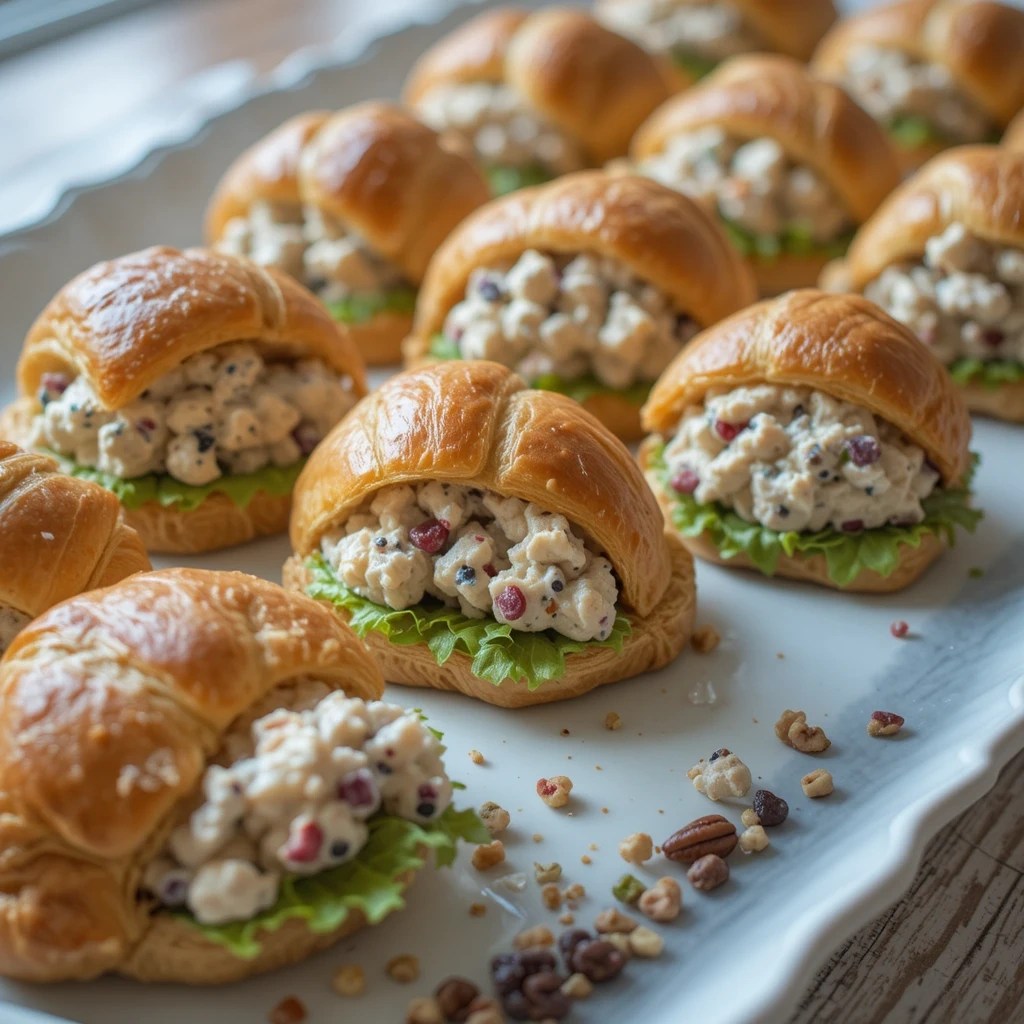
These petite sandwiches combine buttery croissants with creamy chicken salad for a filling yet elegant option.
Key Ingredients for Mini Chicken Salad Croissants
- 2 cups cooked chicken breast, finely diced
- 1/2 cup mayonnaise
- 1/4 cup Greek yogurt
- 1/4 cup finely diced celery
- 2 tablespoons finely diced red onion
- 1 tablespoon fresh lemon juice
- 1 teaspoon Dijon mustard
- 1/4 cup dried cranberries
- 1/4 cup chopped pecans
- Salt and pepper to taste
- 20 mini croissants
- Butter lettuce leaves
Step-by-Step Instructions
Step 1: In a large bowl, combine diced chicken, mayonnaise, Greek yogurt, lemon juice, and Dijon mustard. Mix until chicken is evenly coated with the creamy dressing.
Step 2: Add celery, red onion, dried cranberries, and chopped pecans to the chicken mixture. Stir gently to distribute ingredients evenly throughout. Season with salt and pepper to taste.
Step 3: Cover and refrigerate the chicken salad for at least 1 hour. This allows flavors to meld together and makes the salad easier to work with.
Step 4: Slice each mini croissant in half horizontally using a serrated knife. Be gentle—you want the croissant intact but not squished.
Step 5: Place a small piece of butter lettuce on the bottom half of each croissant. This creates a barrier that prevents the bread from getting soggy.
Step 6: Spoon about 2 tablespoons of chicken salad onto the lettuce. Top with the croissant top. Arrange on a platter and serve immediately or cover and refrigerate for up to 2 hours before serving.
17. Raspberry White Chocolate Bark

This stunning dessert requires just three ingredients but looks like it came from a fancy bakery. Perfect for guests to nibble on throughout the shower.
Key Ingredients for Raspberry White Chocolate Bark
- 16 oz white chocolate chips or bars
- 1 cup freeze-dried raspberries, slightly crushed
- 1/4 cup chopped pistachios (optional)
- Pink food-safe edible glitter (optional)
Step-by-Step Instructions
Step 1: Line a large baking sheet with parchment paper. Make sure your work surface is completely dry—any moisture will ruin the chocolate.
Step 2: Melt white chocolate in a microwave-safe bowl in 30-second intervals, stirring between each, until completely smooth. This usually takes 2-3 intervals total.
Step 3: Pour melted white chocolate onto the prepared baking sheet. Use a spatula to spread it into an even layer about 1/4-inch thick. You can make it rectangular or free-form.
Step 4: Immediately sprinkle the freeze-dried raspberries evenly over the chocolate. The raspberries will stick to the wet chocolate. Add pistachios and edible glitter if using.
Step 5: Gently press the toppings into the chocolate using the back of a spoon or your clean hands. This ensures they stick after the chocolate hardens.
Step 6: Refrigerate for at least 1 hour until completely hardened. Break into irregular pieces using your hands or a knife. Store in an airtight container at room temperature for up to 2 weeks.
What to Serve Bridal Shower Food With
Creating a complete bridal shower experience means thinking beyond just the food. Pair your appetizers and treats with refreshing beverages that complement the flavors.
Don’t forget about presentation! Use tiered serving stands to create height and visual interest on your table. Fresh flowers scattered between platters add color and tie into the wedding theme. Small menu cards describing each item help guests navigate the spread and make conversation starters.
For a complete meal experience, include at least one substantial protein option (like the mini quiches or chicken salad croissants), several vegetable-forward appetizers (hummus cups, caprese bites), and a few sweet options for dessert. This balance ensures guests leave satisfied regardless of their dietary preferences.
Top Tips for Perfecting Bridal Shower Food
Plan Your Timeline Wisely
The biggest mistake I see hosts make is trying to prepare everything the day of the shower. Start your prep 2-3 days ahead. Make your shopping list, purchase non-perishable items, and prep any components that can be refrigerated. Items like cookie dough, chicken salad, and even chocolate-dipped strawberries can be made the night before.
Consider Dietary Restrictions
Always ask the bride about guest dietary needs ahead of time. Include at least 2-3 vegetarian options, one vegan option if possible, and clearly label anything containing common allergens like nuts. Your consideration will be appreciated by guests with restrictions.
Keep It Cold
Food safety is crucial, especially with items containing dairy, meat, or eggs. Use ice underneath serving platters for items that need to stay cold. Don’t leave perishable foods out for more than 2 hours total.
Prep Garnishes Ahead
Fresh herbs, lemon slices, and other garnishes can be prepared the morning of and stored in damp paper towels in the refrigerator. This saves precious time when you’re plating.
Use Quality Ingredients
Since these recipes are simple, the quality of your ingredients really shines through. Splurge on good olive oil, real butter, and fresh herbs. Your guests will taste the difference.
Double Check Your Quantities
As a general rule, plan for 6-8 pieces per person if you’re serving appetizers only, or 3-4 pieces per person if you’re also serving a meal. It’s better to have too much than too little.
Test Recipes First
If you’re making something new, do a trial run at least a week before the shower. This helps you understand timing, identify any issues, and make adjustments.
Ingredient Substitutions That Work
Can’t find goat cheese? Use cream cheese with a squeeze of lemon. No fresh berries? Frozen berries thawed and drained work fine for most recipes. Out of fresh herbs? Dried herbs can substitute at one-third the amount (though fresh is always better for garnish).
Storing and Reheating Tips
Proper storage ensures your bridal shower food prep work doesn’t go to waste and leftovers stay delicious.
Refrigeration Guidelines:
- Cream cheese-based items: Store covered for up to 3 days
- Chicken salad: Refrigerate for up to 2 days maximum
- Chocolate-dipped strawberries: Best within 24 hours, store in single layers
- Mini quiches: Cover tightly and refrigerate for up to 4 days
- Fresh fruit skewers: Best within 4-6 hours; fruit oxidizes quickly
- Hummus cups: Assemble the day of; separate components last 5 days
- Baked goods (cookies, muffins): Room temperature in airtight container for 3 days
Freezing Options:
- Mini quiches: Freeze unbaked or baked for up to 2 months
- Cookie dough: Roll into balls and freeze for 3 months
- Mini muffins: Freeze baked muffins for up to 2 months
Reheating Instructions:
- Mini quiches: Reheat at 300°F for 10-12 minutes
- Phyllo cups: Reheat at 325°F for 5-7 minutes to re-crisp
- Flatbread: Reheat at 350°F for 5 minutes or use a toaster oven
Never refreeze previously frozen items. Always reheat to at least 165°F for food safety with meat-containing dishes.
Common Mistakes to Avoid When Making Bridal Shower Food
Mistake 1: Overcomplicating the Menu
You don’t need 20 different recipes if you’re hosting alone. Choose 8-10 recipes that mix make-ahead items with fresh preparations. Focus on variety in flavors and textures rather than quantity.
Mistake 2: Forgetting About Assembly Time
Even if everything is prepped, assembly takes time. Mini sandwiches need to be put together, platters arranged, and garnishes added. Budget at least 90 minutes for final assembly before guests arrive.
Mistake 3: Using Warm Ingredients in Cold Recipes
If a recipe calls for softened cream cheese, plan ahead! Don’t microwave it—let it sit at room temperature for 30-45 minutes instead. Warm cream cheese won’t hold its shape in pinwheels or on canapés.
Mistake 4: Not Tasting As You Go
Season your savory items properly! Taste your chicken salad, hummus cups, and other dishes before final assembly. Under-seasoned food is the most common complaint about homemade party food.
Mistake 5: Neglecting Visual Appeal
Food for showers needs to look as good as it tastes. Use fresh herbs for garnish, arrange items neatly on platters, and create height with tiered stands. These visual touches make food more appetizing.
Mistake 6: Making Everything From Scratch
There’s no shame in using store-bought shortcuts. Premade phyllo cups, store-bought hummus, or bakery croissants can save hours while still resulting in impressive food.
Mistake 7: Ignoring Serving Temperature
Some foods are meant to be served cold, others at room temperature, and some warm. Follow the recipe guidelines—serving cold items warm or vice versa can ruin texture and flavor.
Mistake 8: Skipping the Toothpick Test for Baked Goods
For mini quiches and muffins, always do the toothpick test. Insert it in the center—it should come out clean or with just a few crumbs. This prevents serving undercooked food.
Frequently Asked Questions
How far in advance can I prepare bridal shower food?
Most items can be prepped 1-2 days ahead. Baked goods like cookies and muffins are best made the day before. Savory items with fresh ingredients like cucumber sandwiches should be assembled the morning of. Platters with cured meats can be arranged 4-6 hours ahead if properly covered and refrigerated.
How many food items should I serve per guest?
Plan for 6-8 appetizer pieces per person if serving only appetizers, or 3-4 pieces per person if also serving a main course or meal. For a 2-hour shower with 20 guests, prepare 120-160 pieces total across various recipes.
What are the best make-ahead bridal shower foods?
Mini quiches, cookies, chocolate bark, chicken salad filling, and hummus cups (assembled last minute) are all excellent make-ahead options. These items actually improve in flavor when made ahead as ingredients have time to meld together.
How do I keep cold foods cold during the shower?
Use ice-filled serving trays or place smaller bowls on beds of ice. Alternatively, keep cold items refrigerated and bring out smaller batches throughout the event, refreshing as needed.
Can I accommodate vegan guests with these recipes?
Yes! The fruit skewers, hummus cups (without feta), and several appetizers can be made vegan. Substitute plant-based cream cheese in recipes and omit meat and dairy toppings. Always label vegan options clearly.
What’s the best way to transport these foods to a venue?
Use covered containers and insulated bags for temperature control. Transport items unassembled when possible and do final assembly on-site. Keep a cooler with ice packs for dairy-based items.
How do I calculate ingredient quantities for 30 guests?
Multiply each recipe by 1.5 to serve 30 guests instead of 20. For safety, round up on quantities—having a few extra treats is better than running short during the celebration.
What if I’m not confident in my cooking skills?
Start with simpler recipes like fruit skewers, chocolate-dipped strawberries, and purchased items you arrange beautifully. As you gain confidence, add more complex recipes. There’s no rule saying you must make everything from scratch.
Should I label the food items at the shower?
Yes, especially for allergens and dietary restrictions. Use small decorative cards to identify items containing nuts, dairy, or meat. This helps guests make informed choices and shows thoughtfulness.
Can these recipes work for other occasions besides bridal showers?
Absolutely! These recipes are perfect for baby showers, tea parties, birthday celebrations, graduation parties, or any elegant gathering. Simply adjust decorations and presentation to match your event theme.
Nutrition Information Table
| Recipe Name | Serving Size | Calories | Protein | Carbs | Fat |
|---|---|---|---|---|---|
| Cream Cheese Pinwheels | 1 pinwheel | 85 | 2g | 8g | 5g |
| Fruit Skewers | 1 skewer | 45 | 1g | 11g | 0g |
| Caprese Bites | 1 bite | 35 | 2g | 2g | 2g |
| Cucumber Tea Sandwiches | 1 sandwich | 95 | 3g | 12g | 4g |
| Mini Quiche Bites | 1 quiche | 90 | 4g | 6g | 6g |
| Smoked Salmon Canapés | 1 canapé | 65 | 4g | 5g | 3g |
| Almond Cookies | 1 cookie | 110 | 2g | 12g | 6g |
| Hummus Cups | 1 cup | 85 | 3g | 9g | 4g |
| Lemon Blueberry Muffins | 1 muffin | 95 | 2g | 14g | 3g |
| Strawberry Pretzel Cups | 1 cup | 165 | 2g | 24g | 7g |
| Phyllo Cups | 1 cup | 70 | 3g | 5g | 4g |
| Chocolate Strawberries | 1 strawberry | 75 | 1g | 10g | 4g |
| Caprese Skewers | 1 skewer | 45 | 3g | 3g | 3g |
| Lemon Tart Bites | 1 tart | 105 | 2g | 15g | 4g |
| Goat Cheese Crostini | 1 crostini | 95 | 3g | 11g | 4g |
| Chicken Salad Croissants | 1 croissant | 145 | 8g | 12g | 7g |
| Raspberry Chocolate Bark | 1 oz | 140 | 2g | 16g | 8g |
Note: Nutrition information is approximate and may vary based on specific ingredients and portion sizes used.
Final Thoughts
Creating beautiful bridal shower food doesn’t require professional culinary training or an unlimited budget. What matters most is putting love into each recipe and creating an atmosphere where guests feel welcomed and celebrated.
I’ve learned through hosting multiple showers that the secret ingredient isn’t exotic spices or expensive ingredients—it’s the care you put into presentation and the thoughtfulness of offering variety. When you see guests happily chatting while enjoying food you’ve made, that’s when you know you’ve created something special.
Remember, the bride-to-be will appreciate your effort regardless of whether everything turns out Pinterest-perfect. The most memorable showers are the ones filled with love, laughter, and yes, delicious food that brings people together.
Start with a few recipes that excite you most, prepare what you can ahead of time, and don’t stress about perfection. Your guests are there to celebrate love—and they’ll love whatever you create.
Now get cooking, and here’s to hosting a bridal shower that everyone will remember fondly for years to come!