
10 Black History Month Food ideas Your Family Will Love
February is the perfect time to honor Black History Month by cooking up some delicious traditional dishes that tell stories of resilience, creativity, and community. These recipes aren’t just food—they’re pieces of history passed down through generations, connecting us to the rich culinary heritage of the African diaspora.
From sweet potato pie to cornbread, each dish carries the warmth of Southern kitchens and the love of family gatherings. Let’s celebrate this beautiful culture together in the kitchen!
What Are Black History Month Food Ideas?
Ever wonder why certain foods taste like home, even if you’ve never been there before? That’s the magic of soul food and traditional Black American cuisine! These recipes represent generations of creativity, survival, and joy passed down through families.
From Africa to the Caribbean to the American South, each dish tells a story. And as they say, the way to anyone’s heart is through their stomach—so why not fill yours with love, history, and flavor? Let’s get cooking!
This recipe was created entirely by AI and has not been tested in our kitchen. Our site is made with care for our readers, and many have shared positive feedback after trying other recipes here.
Why You’ll Love These Black History Month Recipes
These recipes bring three incredible things to your table: authentic flavors that honor tradition, budget-friendly ingredients you can find anywhere, and dishes that make your home smell like comfort itself.
The best part? You’ll save money making these at home instead of ordering out. Sweet potato pie costs a fraction to make compared to buying from a bakery, and the taste is infinitely better when it’s homemade.
Each recipe features bold seasonings, rich textures, and ingredients that work together beautifully—think buttery cornbread, creamy collard greens, and perfectly seasoned chicken. These aren’t just meals; they’re experiences that bring families together and create memories around the dinner table.
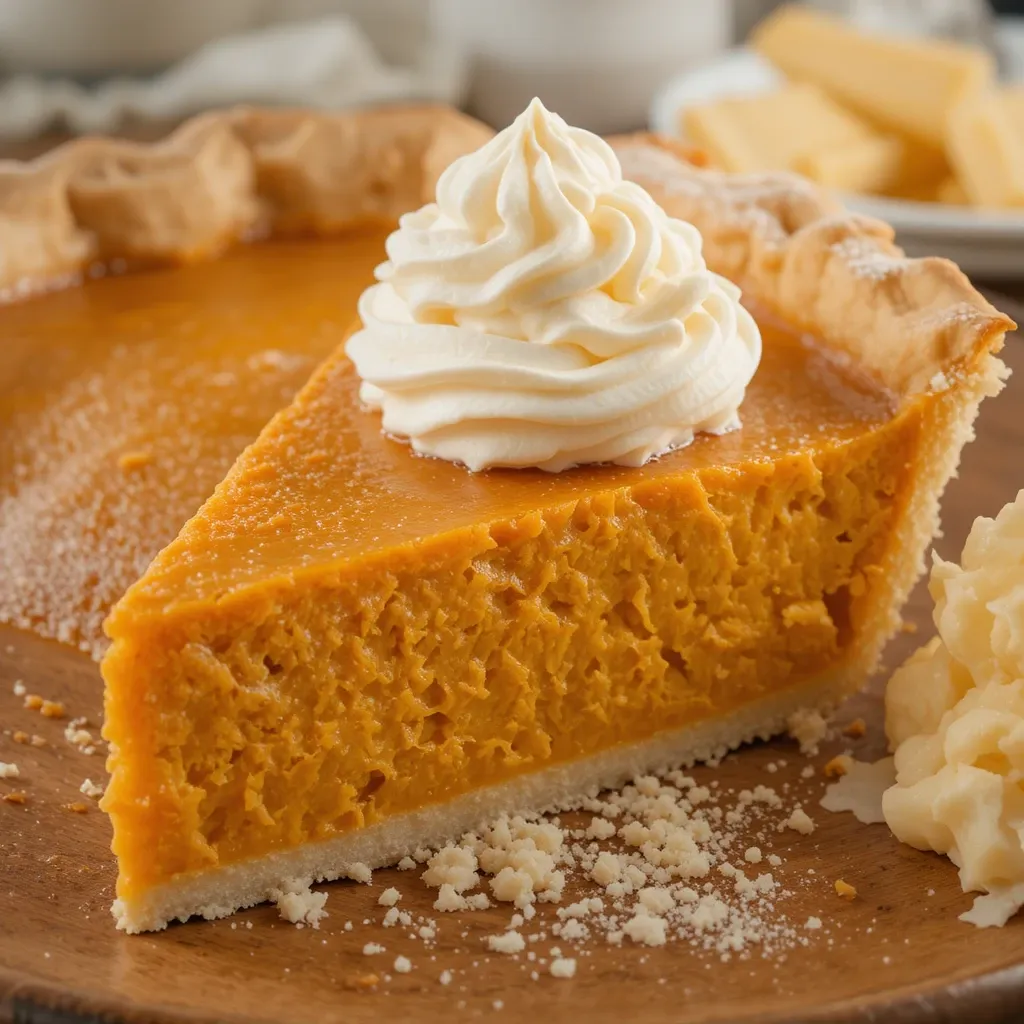
1. Classic Southern Sweet Potato Pie
Quick Overview
This creamy, perfectly spiced sweet potato pie is easier than you think! With its smooth custard-like filling and flaky crust, it’s the ultimate comfort dessert. The natural sweetness of roasted sweet potatoes shines through with just a hint of warm spices.
Prep Time: 20 minutes
Cook Time: 60 minutes
Total Time: 1 hour 20 minutes (plus cooling time)
Servings: 8 slices
Key Ingredients for Sweet Potato Pie
- 2 medium sweet potatoes (about 1½ pounds)
- 1 unbaked 9-inch pie crust
- ½ cup unsalted butter, softened
- ¾ cup granulated sugar
- ½ cup evaporated milk
- 2 large eggs, room temperature
- 1 teaspoon vanilla extract
- ½ teaspoon ground cinnamon
- ¼ teaspoon ground nutmeg
- ¼ teaspoon salt
Step-by-Step Instructions
How do I roast the sweet potatoes?
Preheat your oven to 400°F. Scrub the sweet potatoes clean and poke them several times with a fork. Place them on a baking sheet lined with foil and roast for 50-60 minutes until completely tender when pierced with a fork. Let them cool for 10 minutes, then peel off the skins.
How do I make the pie filling?
Lower oven temperature to 350°F. In a large bowl, mash the warm sweet potatoes with the softened butter until smooth. You can use a potato masher or electric mixer. Add the sugar and mix well. Pour in the evaporated milk, then add eggs one at a time, mixing after each addition. Stir in vanilla, cinnamon, nutmeg, and salt until everything is beautifully combined and creamy.
How do I bake the sweet potato pie?
Pour the filling into your unbaked pie crust, spreading it evenly. Place the pie on a baking sheet to catch any drips. Bake for 55-60 minutes until the center is set but still has a slight jiggle when you gently shake the pan. The top should look lightly golden. Let it cool completely on a wire rack before slicing—this takes about 2 hours.
What to Serve Sweet Potato Pie With
This pie is perfect on its own, but it’s heavenly with a dollop of fresh whipped cream or a scoop of vanilla ice cream. Serve it alongside a cup of hot coffee or sweet tea for the complete Southern experience. It’s also wonderful paired with pecan pie for a dessert duo at holiday gatherings.
Top Tips for Perfecting Sweet Potato Pie
Should I roast or boil sweet potatoes?
Always roast your sweet potatoes instead of boiling them. Roasting caramelizes the natural sugars and creates a richer, deeper flavor. Boiling adds extra moisture that can make your pie filling runny and dilutes the sweet potato taste.
How do I prevent a soggy crust?
Make sure your pie filling isn’t too watery. Using roasted (not boiled) sweet potatoes helps with this. If your crust edges brown too quickly, cover them with aluminum foil strips or a pie shield halfway through baking.
Can I make this ahead?
Absolutely! You can roast and mash the sweet potatoes up to 2 days ahead and refrigerate them. The finished pie can be made a day before serving and stored covered in the refrigerator.
Storing and Reheating Tips
Store leftover sweet potato pie covered in the refrigerator for up to 4 days. Let slices come to room temperature before serving, or warm individual slices in the microwave for 15-20 seconds.
For freezing, wrap the cooled pie tightly in plastic wrap, then in aluminum foil. Freeze for up to 2 months. Thaw overnight in the refrigerator before serving.
Nutrition Information
| Nutrient | Per Slice |
|---|---|
| Calories | 340 |
| Carbohydrates | 50g |
| Protein | 5g |
| Fat | 14g |
| Fiber | 3g |
| Sugar | 25g |
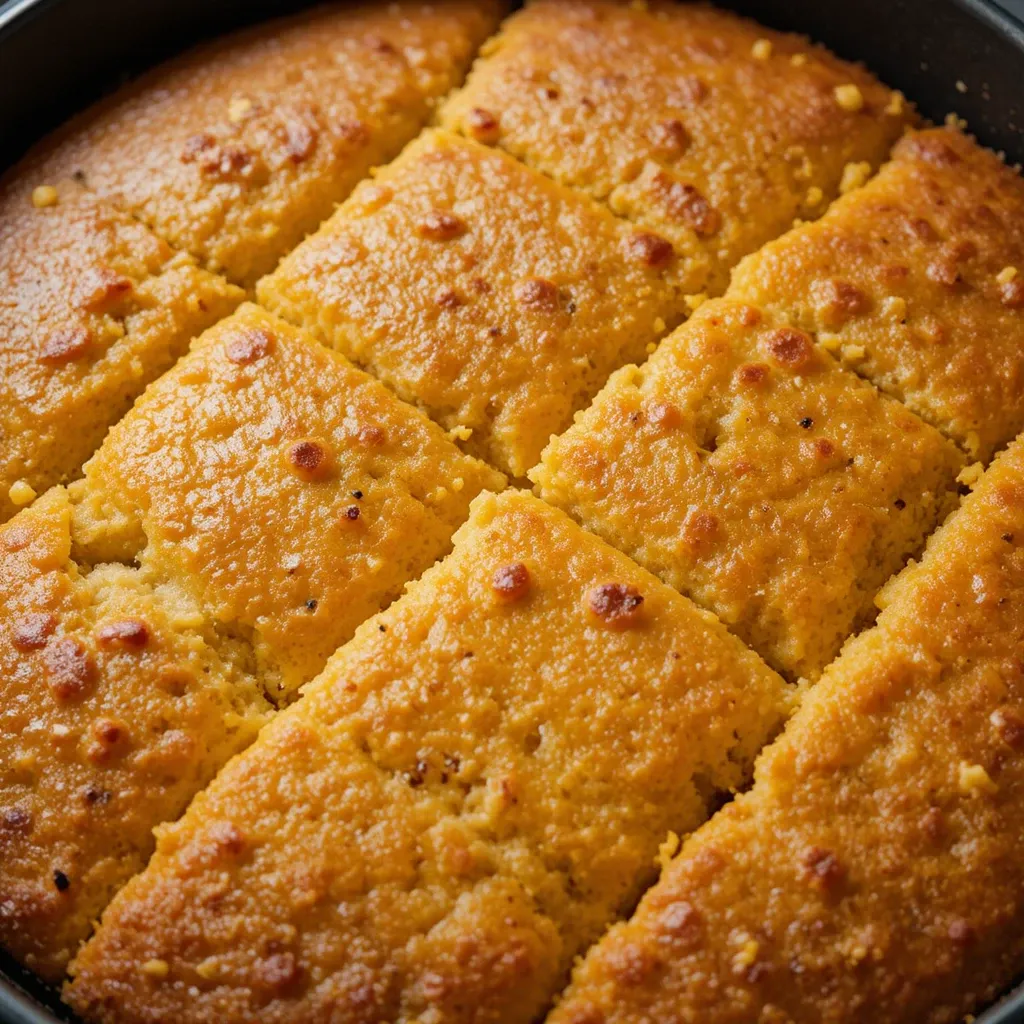
2. Southern Style Cornbread
Quick Overview
This golden, buttery cornbread is moist, slightly sweet, and absolutely addictive. It’s the perfect side dish for any soul food meal and comes together in just 30 minutes!
Prep Time: 10 minutes
Cook Time: 20 minutes
Total Time: 30 minutes
Servings: 9 squares
Key Ingredients for Southern Cornbread
- 1 cup yellow cornmeal
- 1 cup all-purpose flour
- ¼ cup granulated sugar
- 1 tablespoon baking powder
- ½ teaspoon salt
- 1 cup buttermilk
- ⅓ cup melted butter
- 2 large eggs
- 2 tablespoons butter for greasing pan
Step-by-Step Instructions
How do I prepare the pan?
Preheat your oven to 400°F. Place 2 tablespoons of butter in a 9×9-inch baking pan or cast-iron skillet and put it in the oven while it preheats. This creates a crispy, golden crust on the bottom of your cornbread.
How do I mix the cornbread batter?
In a large bowl, whisk together the cornmeal, flour, sugar, baking powder, and salt. In a separate bowl, beat the eggs, then add the buttermilk and melted butter. Pour the wet ingredients into the dry ingredients and stir just until combined. Don’t overmix—a few lumps are perfectly fine!
How do I bake the cornbread?
Carefully remove the hot pan from the oven and swirl the melted butter to coat the bottom and sides. Pour the batter into the hot pan and spread evenly. Bake for 20-25 minutes until the top is golden brown and a toothpick inserted in the center comes out clean. Let it cool for 5 minutes before cutting into squares.
What to Serve Cornbread With
Cornbread is the ultimate companion to collard greens, black-eyed peas, chili, or any soup or stew. Spread it with honey butter while it’s still warm, or crumble it into a glass of buttermilk for a traditional Southern treat.
Top Tips for Perfecting Cornbread
Why is my cornbread dry?
Overbaking is the main culprit. Check your cornbread at 20 minutes—it’s done when a toothpick comes out with just a few moist crumbs. Also, don’t overmix the batter, as this can make it tough and dry.
Can I make it less sweet?
Yes! Reduce the sugar to 2 tablespoons or omit it entirely for a more savory cornbread that pairs perfectly with hearty dishes.
What if I don’t have buttermilk?
Make your own! Add 1 tablespoon of lemon juice or vinegar to 1 cup of regular milk and let it sit for 5 minutes before using.
Storing and Reheating Tips
Store cornbread in an airtight container at room temperature for 2 days or refrigerate for up to 5 days. Reheat individual pieces in the microwave for 15-20 seconds or warm the whole pan covered with foil in a 300°F oven for 10 minutes.
Cornbread freezes beautifully! Wrap pieces individually in plastic wrap, then place in a freezer bag. Freeze for up to 3 months and thaw at room temperature.
Nutrition Information
| Nutrient | Per Square |
|---|---|
| Calories | 210 |
| Carbohydrates | 28g |
| Protein | 4g |
| Fat | 9g |
| Fiber | 1g |
| Sugar | 8g |
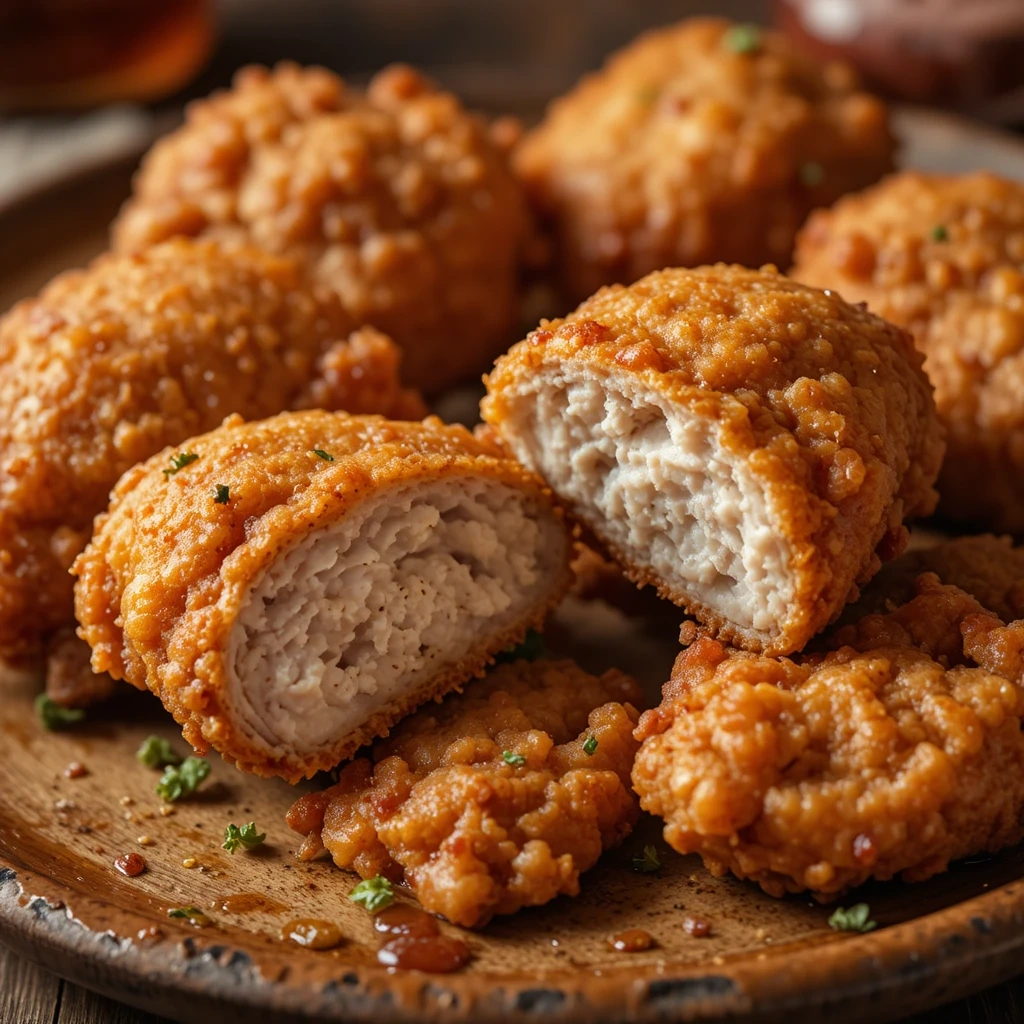
3. Southern Fried Chicken
Quick Overview
Crispy on the outside, juicy on the inside—this fried chicken is seasoned to perfection and easier to make than you’d think! The secret is in the seasoning and getting your oil to the right temperature.
Prep Time: 30 minutes (plus 2 hours brining)
Cook Time: 25 minutes
Total Time: 3 hours
Servings: 6-8 pieces
Key Ingredients for Southern Fried Chicken
- 3 pounds chicken pieces (drumsticks, thighs, breasts)
- 2 cups buttermilk
- 2 cups all-purpose flour
- ½ cup cornstarch
- 2 tablespoons garlic powder
- 2 tablespoons onion powder
- 1 tablespoon paprika
- 2 teaspoons salt
- 1 teaspoon black pepper
- 1 teaspoon cayenne pepper (optional)
- Vegetable oil for frying (about 3-4 cups)
Step-by-Step Instructions
How do I prepare the chicken?
Place chicken pieces in a large bowl or zip-top bag. Pour buttermilk over the chicken, making sure all pieces are coated. Cover and refrigerate for at least 2 hours or overnight. This tenderizes the meat and adds flavor.
How do I make the coating?
In a large shallow dish, combine flour, cornstarch, garlic powder, onion powder, paprika, salt, black pepper, and cayenne pepper. Mix well with a fork. Take 3 tablespoons of the buttermilk from the chicken and drizzle it into the flour mixture, stirring with a fork to create small clumps—this creates extra crispy bits!
How do I fry the chicken?
Heat oil in a large, deep skillet or Dutch oven to 350°F. Use a thermometer to check. Remove chicken from buttermilk one piece at a time, letting excess drip off. Dredge in the flour mixture, pressing firmly so the coating sticks. Shake off excess. Carefully place 3-4 pieces in the hot oil without crowding. Fry for 12-15 minutes, turning once, until golden brown and the internal temperature reaches 165°F. Drain on a wire rack set over paper towels.
What to Serve Fried Chicken With
Fried chicken pairs beautifully with mac and cheese, coleslaw, mashed potatoes, or cornbread. Don’t forget the hot sauce on the side! For a complete soul food meal, add collard greens and black-eyed peas.
Top Tips for Perfecting Fried Chicken
How do I keep the coating from falling off?
Let the coated chicken rest on a rack for 10 minutes before frying. This helps the coating set. Make sure your oil is at the right temperature—if it’s too cool, the coating gets soggy and falls off.
What if I don’t have a thermometer?
Test the oil by dropping a small pinch of flour in it. If it sizzles and bubbles immediately, the oil is ready. If it browns instantly, it’s too hot.
Can I bake instead of fry?
Yes! Place coated chicken on a greased baking sheet and bake at 425°F for 35-45 minutes, flipping halfway through, until golden and cooked through.
Storing and Reheating Tips
Store leftover fried chicken in an airtight container in the refrigerator for up to 3 days. To reheat and restore crispiness, place pieces on a wire rack over a baking sheet and bake at 375°F for 15-20 minutes.
Fried chicken can be frozen for up to 3 months. Freeze pieces on a baking sheet, then transfer to a freezer bag. Thaw in the refrigerator overnight before reheating.
Nutrition Information
| Nutrient | Per Piece |
|---|---|
| Calories | 385 |
| Carbohydrates | 24g |
| Protein | 32g |
| Fat | 18g |
| Fiber | 1g |
| Sugar | 2g |
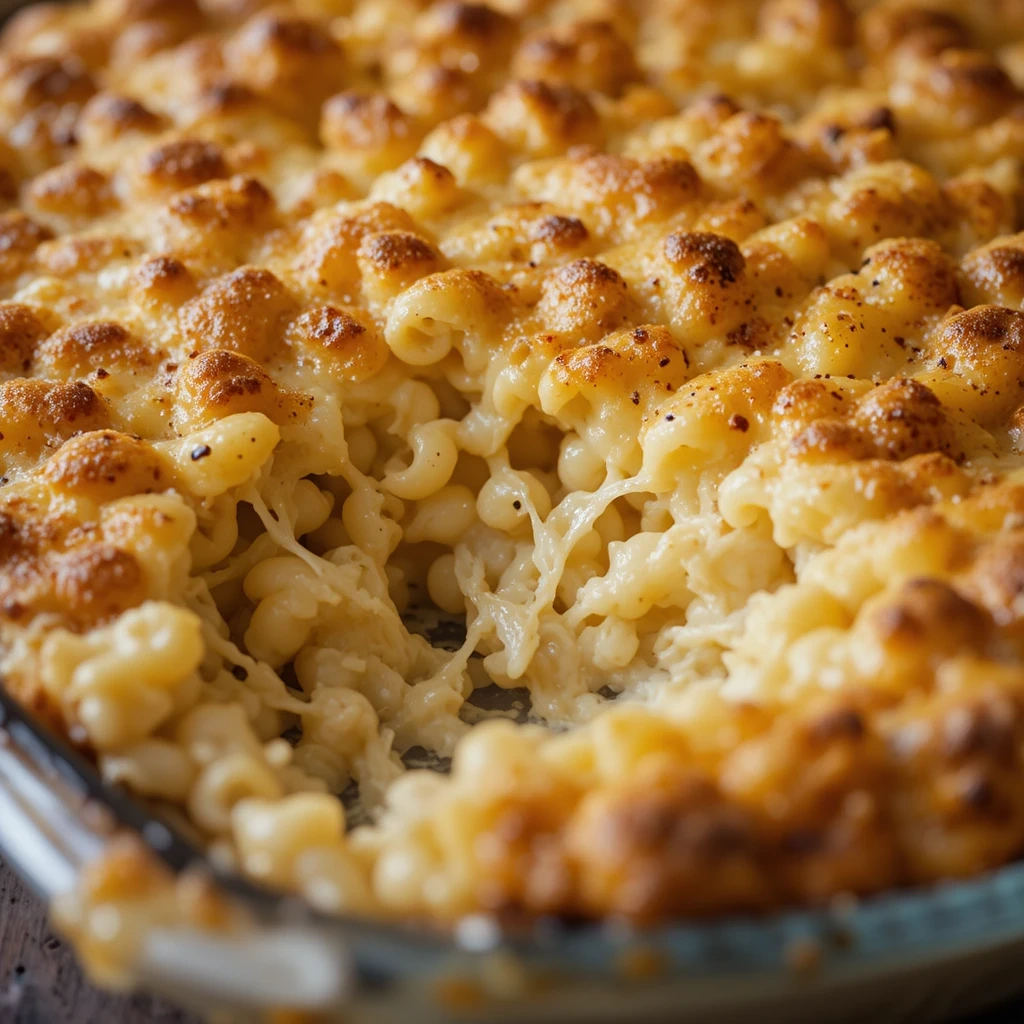
4. Creamy Macaroni and Cheese
Quick Overview
This isn’t your box mac and cheese! This Southern-style baked mac and cheese is ultra-creamy, cheesy, and has a perfectly golden top. It’s pure comfort in a dish.
Prep Time: 15 minutes
Cook Time: 30 minutes
Total Time: 45 minutes
Servings: 8-10
Key Ingredients for Macaroni and Cheese
- 1 pound elbow macaroni
- 4 tablespoons butter
- 3 cups shredded sharp cheddar cheese
- 2 cups shredded mozzarella cheese
- 1 cup shredded Monterey Jack cheese
- 2½ cups whole milk
- 2 large eggs, beaten
- 1 teaspoon salt
- ½ teaspoon black pepper
- ½ teaspoon garlic powder
- ¼ teaspoon paprika
Step-by-Step Instructions
How do I cook the pasta?
Bring a large pot of salted water to a boil. Add macaroni and cook for 7 minutes—it should be slightly undercooked because it will continue cooking in the oven. Drain well and return to the pot. Add butter and stir until melted.
How do I make the cheese sauce?
In a large bowl, whisk together milk, beaten eggs, salt, pepper, and garlic powder. Reserve 1 cup of shredded cheese for topping. Add the remaining cheese to the pasta and stir until combined. Pour the milk mixture over everything and stir gently until well mixed.
How do I bake the mac and cheese?
Preheat oven to 350°F. Grease a 9×13-inch baking dish. Pour the mac and cheese mixture into the dish and spread evenly. Sprinkle the reserved cheese on top and dust with paprika. Bake for 30-35 minutes until the top is golden and bubbling. Let it rest for 5 minutes before serving.
What to Serve Macaroni and Cheese With
Mac and cheese is a fantastic side dish for BBQ ribs, fried chicken, or collard greens. It’s also delicious on its own as a main dish with a simple green salad on the side.
Top Tips for Perfecting Macaroni and Cheese
How do I prevent dry mac and cheese?
Don’t overcook the pasta initially, and make sure you use enough liquid. If it looks dry before baking, add an extra ¼ cup of milk. Cover the dish with foil for the first 20 minutes of baking to lock in moisture.
Can I make it ahead?
Yes! Assemble the mac and cheese completely but don’t bake it. Cover tightly and refrigerate for up to 24 hours. When ready to bake, let it sit at room temperature for 30 minutes, then bake as directed, adding 5-10 extra minutes.
What cheeses work best?
Sharp cheddar provides flavor, mozzarella adds stretch and creaminess, and Monterey Jack makes it smooth. You can also add a little cream cheese for extra richness.
Storing and Reheating Tips
Store leftovers covered in the refrigerator for up to 4 days. Reheat individual portions in the microwave with a splash of milk, or reheat the whole dish covered with foil at 350°F for 20 minutes.
Mac and cheese freezes well for up to 2 months. Thaw overnight in the refrigerator before reheating.
Nutrition Information
| Nutrient | Per Serving |
|---|---|
| Calories | 425 |
| Carbohydrates | 38g |
| Protein | 20g |
| Fat | 21g |
| Fiber | 2g |
| Sugar | 5g |
5. Collard Greens with Smoked Turkey
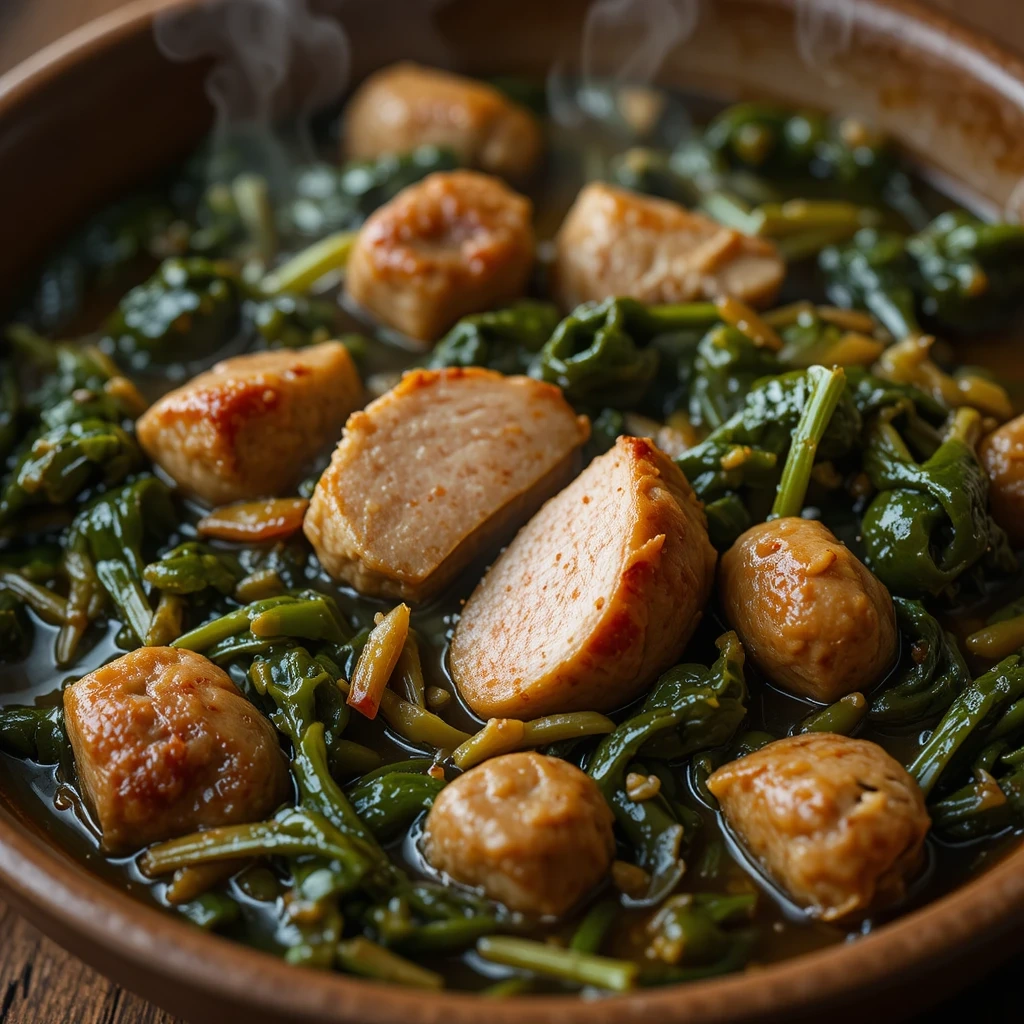
Quick Overview
These tender, flavorful collard greens are cooked low and slow until they’re perfectly seasoned. Using smoked turkey keeps them lighter but still full of that deep, smoky flavor.
Prep Time: 20 minutes
Cook Time: 1 hour 30 minutes
Total Time: 1 hour 50 minutes
Servings: 6-8
Key Ingredients for Collard Greens
- 2 large bunches fresh collard greens (about 2 pounds)
- 1 pound smoked turkey wings or necks
- 1 large onion, diced
- 4 cloves garlic, minced
- 6 cups chicken broth
- 2 tablespoons apple cider vinegar
- 1 tablespoon sugar
- 1 teaspoon red pepper flakes
- 1 teaspoon salt
- ½ teaspoon black pepper
- 2 tablespoons olive oil
Step-by-Step Instructions
How do I prepare collard greens?
Wash the collard greens thoroughly under cold water—they can be sandy! Remove the tough center stem from each leaf by folding the leaf in half and cutting along the stem. Stack several leaves, roll them up like a cigar, and slice into 1-inch strips.
How do I cook the greens?
Heat olive oil in a large pot over medium heat. Add diced onion and cook for 5 minutes until soft. Add garlic and cook for 1 minute more. Add the smoked turkey pieces and chicken broth. Bring to a boil, then reduce heat and simmer for 30 minutes to build flavor in the broth.
How do I finish the dish?
Add the collard greens in batches, stirring as they wilt down to make room for more. Once all greens are in the pot, add vinegar, sugar, red pepper flakes, salt, and pepper. Cover and simmer on low heat for 1 hour, stirring occasionally, until the greens are very tender. Remove turkey pieces, pull off any meat, chop it, and return it to the pot. Discard bones.
What to Serve Collard Greens With
Collard greens are a classic side for fried chicken, BBQ ribs, cornbread, and black-eyed peas. Don’t forget to serve the pot liquor (the flavorful cooking liquid) on the side—it’s delicious for soaking up with cornbread!
Top Tips for Perfecting Collard Greens
How do I reduce bitterness?
The sugar and vinegar balance helps cut bitterness. Also, don’t skip the long cooking time—it mellows the flavor. Young, tender greens are less bitter than older, larger leaves.
Can I use a different meat?
Absolutely! or turkey bacon all work beautifully. For a vegetarian version, use vegetable broth and add liquid smoke for that smoky flavor.
Why are my greens tough?
They need more cooking time. Collard greens should simmer for at least 1 hour to become tender. Some cooks go even longer for that melt-in-your-mouth texture.
Storing and Reheating Tips
Collard greens taste even better the next day! Store in an airtight container with the pot liquor in the refrigerator for up to 5 days. Reheat on the stovetop over medium heat until warmed through.
Freeze cooked collard greens in freezer-safe containers for up to 3 months. Thaw in the refrigerator overnight and reheat on the stovetop.
Nutrition Information
| Nutrient | Per Serving |
|---|---|
| Calories | 145 |
| Carbohydrates | 12g |
| Protein | 15g |
| Fat | 5g |
| Fiber | 5g |
| Sugar | 4g |
6. Black-Eyed Peas (Hoppin’ John)
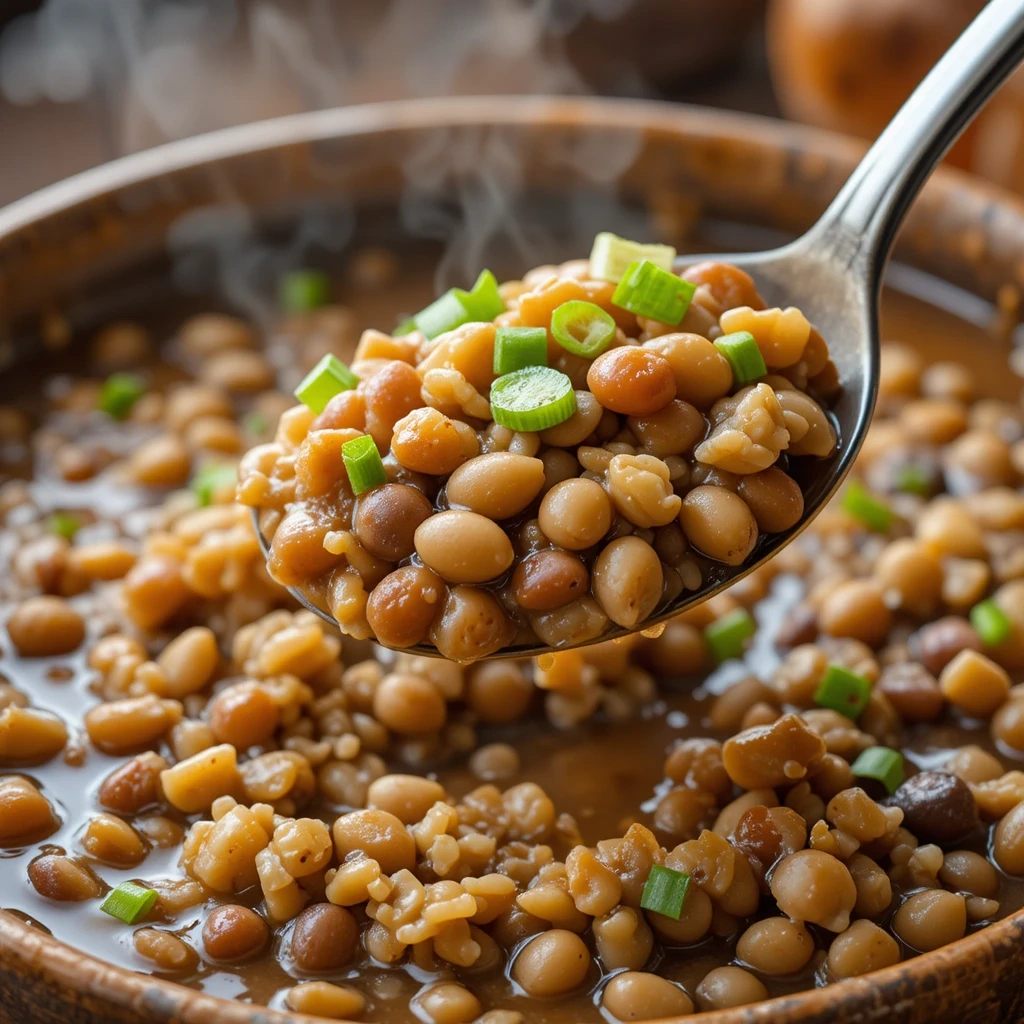
Quick Overview
This traditional dish brings good luck for the new year and delicious flavor all year round! Black-eyed peas cooked with rice, vegetables, and savory seasonings create a hearty, satisfying meal.
Prep Time: 15 minutes
Cook Time: 45 minutes
Total Time: 1 hour
Servings: 6
Key Ingredients for Black-Eyed Peas
- 1 pound dried black-eyed peas (or 3 cans, drained)
- 1 cup long-grain white rice
- 1 large onion, diced
- 1 green bell pepper, diced
- 3 celery stalks, diced
- 4 cloves garlic, minced
- 4 cups chicken or vegetable broth
- 1 bay leaf
- 1 teaspoon smoked paprika
- ½ teaspoon cayenne pepper
- 1 teaspoon dried thyme
- Salt and black pepper to taste
- 2 tablespoons olive oil
- 3 green onions, sliced for garnish
Step-by-Step Instructions
How do I prepare dried black-eyed peas?
If using dried peas, rinse them and pick out any debris. You can quick-soak them by bringing them to a boil in water, then removing from heat and letting them sit for 1 hour. Drain before using. Or use canned peas for a faster option!
How do I cook the base?
Heat olive oil in a large pot over medium heat. Add onion, bell pepper, and celery (this is called the “holy trinity” in Southern cooking). Cook for 5-7 minutes until soft. Add garlic and cook for 1 minute until fragrant.
How do I finish cooking?
Add the black-eyed peas, rice, broth, bay leaf, smoked paprika, cayenne, thyme, salt, and pepper. Bring to a boil, then reduce heat to low. Cover and simmer for 35-40 minutes until the peas and rice are tender and most of the liquid is absorbed. Remove bay leaf, fluff with a fork, and garnish with green onions.
What to Serve Black-Eyed Peas With
Serve this as a main dish with cornbread and collard greens for a complete Southern meal. It’s also delicious topped with hot sauce, sliced avocado, or a fried egg for extra protein.
Top Tips for Perfecting Black-Eyed Peas
Can I use canned peas?
Yes! Skip the soaking step and add drained canned peas along with the rice. They’ll still absorb all the delicious flavors.
Why is my rice mushy?
Too much liquid or cooking too long can make rice mushy. Check at 35 minutes—if there’s still liquid but the rice is tender, remove the lid and let it steam off for a few minutes.
How do I add more flavor?
smoked sausage A splash of hot sauce or apple cider vinegar at the end brightens all the flavors.
Storing and Reheating Tips
Store leftovers in an airtight container in the refrigerator for up to 5 days. Reheat in the microwave or on the stovetop with a splash of broth to prevent drying out.
This dish freezes well for up to 3 months. Thaw in the refrigerator overnight and reheat with a little extra liquid.
Nutrition Information
| Nutrient | Per Serving |
|---|---|
| Calories | 285 |
| Carbohydrates | 52g |
| Protein | 14g |
| Fat | 3g |
| Fiber | 8g |
| Sugar | 4g |
7. Red Beans and Rice

Quick Overview
This Louisiana classic is comfort food at its finest! Creamy red beans seasoned with Creole spices served over fluffy white rice make a hearty, budget-friendly meal the whole family will love.
Prep Time: 15 minutes
Cook Time: 2 hours
Total Time: 2 hours 15 minutes
Servings: 8
Key Ingredients for Red Beans and Rice
- 1 pound dried red kidney beans
- 1 pound smoked sausage, sliced
- 1 large onion, diced
- 1 green bell pepper, diced
- 3 celery stalks, diced
- 6 cloves garlic, minced
- 6 cups chicken broth
- 2 bay leaves
- 2 teaspoons Creole seasoning
- 1 teaspoon dried thyme
- ½ teaspoon cayenne pepper
- 1 teaspoon smoked paprika
- Salt and pepper to taste
- 4 cups cooked white rice for serving
- Hot sauce for serving
Step-by-Step Instructions
How do I prepare the beans?
Rinse the beans and pick out any debris or damaged beans. Place them in a large pot, cover with water by 2 inches, and bring to a boil. Boil for 2 minutes, then remove from heat, cover, and let soak for 1 hour. Drain and rinse.
How do I build the flavor?
In a large heavy pot, cook the sliced sausage over medium heat until browned, about 5 minutes. Remove and set aside. In the same pot, add onion, bell pepper, and celery. Cook for 6-8 minutes until soft. Add garlic and cook for 1 minute more.
How do I cook the beans?
Add the soaked beans, chicken broth, bay leaves, Creole seasoning, thyme, cayenne, and smoked paprika to the pot. Bring to a boil, then reduce to a simmer. Cover and cook for 1½ to 2 hours, stirring occasionally, until beans are very tender and starting to break down. Add the browned sausage back in during the last 30 minutes. Mash some of the beans against the side of the pot to create a creamy texture. Season with salt and pepper.
What to Serve Red Beans and Rice With
Serve over fluffy white rice with cornbread on the side. Add hot sauce, sliced green onions, and a dash of apple cider vinegar for extra flavor. This is delicious with a simple green salad or coleslaw.
Top Tips for Perfecting Red Beans and Rice
Can I use canned beans?
Yes! Use 3 cans of red kidney beans (drained and rinsed). Reduce the cooking time to 45 minutes—you’re just building flavor, not cooking the beans from scratch.
Why are my beans still hard?
Old beans take longer to cook. Also, adding acidic ingredients (like tomatoes or vinegar) too early can prevent beans from softening. Add these at the end.
Can I make this in a slow cooker?
Absolutely! After browning the sausage and sautéing the vegetables, transfer everything to a slow cooker. Cook on low for 8 hours or high for 4-5 hours.
Storing and Reheating Tips
Store red beans separately from rice in airtight containers in the refrigerator for up to 5 days. The beans actually taste better the next day! Reheat on the stovetop with a splash of broth if needed.
Red beans freeze beautifully for up to 3 months. Thaw overnight in the refrigerator and reheat gently on the stovetop.
Nutrition Information
| Nutrient | Per Serving |
|---|---|
| Calories | 385 |
| Carbohydrates | 58g |
| Protein | 18g |
| Fat | 9g |
| Fiber | 11g |
| Sugar | 3g |
8. Peach Cobbler
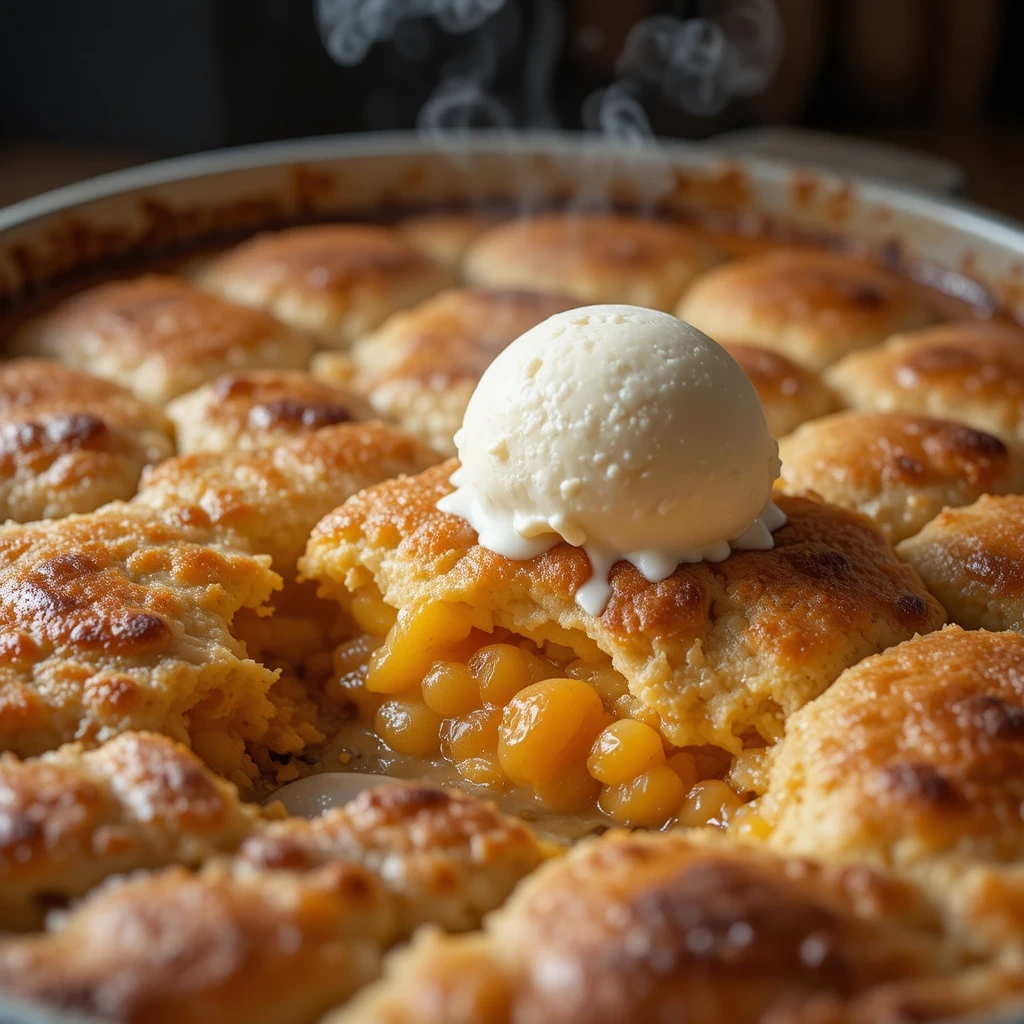
Quick Overview
This classic Southern dessert features sweet, juicy peaches topped with a buttery, cake-like topping. It’s easier than pie and always a crowd-pleaser!
Prep Time: 15 minutes
Cook Time: 45 minutes
Total Time: 1 hour
Servings: 9
Key Ingredients for Peach Cobbler
- 6 cups sliced fresh or frozen peaches (about 6-7 peaches)
- 1 cup granulated sugar (divided)
- 1 cup all-purpose flour
- 1 cup whole milk
- ½ cup unsalted butter, melted
- 1 tablespoon baking powder
- ½ teaspoon salt
- 1 teaspoon vanilla extract
- ½ teaspoon cinnamon
- ¼ teaspoon nutmeg
Step-by-Step Instructions
How do I prepare the peaches?
If using fresh peaches, peel and slice them. Toss the peaches in a bowl with ½ cup sugar, cinnamon, and nutmeg. Let them sit for 10 minutes to release their juices. If using frozen peaches, let them thaw slightly first.
How do I make the batter?
Preheat oven to 350°F. In a medium bowl, whisk together flour, remaining ½ cup sugar, baking powder, and salt. Add milk, melted butter, and vanilla. Stir until just combined—a few lumps are okay!
How do I assemble and bake?
Pour the batter into a greased 9×13-inch baking dish. Spoon the peaches and their juices evenly over the batter—don’t stir! The batter will rise up around the peaches as it bakes. Bake for 45-50 minutes until the top is golden brown and the fruit is bubbling. Let cool for 15 minutes before serving.
What to Serve Peach Cobbler With
Serve warm with vanilla ice cream melting on top, or with fresh whipped cream. It’s also delicious with a drizzle of heavy cream or a dollop of Greek yogurt for breakfast the next morning!
Top Tips for Perfecting Peach Cobbler
Can I use canned peaches?
Yes! Use 2 cans (29 ounces each) of sliced peaches. Drain them well and reduce the sugar to ⅓ cup since canned peaches are already sweetened.
Why is my cobbler soggy?
Make sure you don’t stir the batter and fruit together. The batter needs to rise up through the fruit. Also, don’t add extra liquid—the peaches release enough juice as they bake.
How do I know when it’s done?
The top should be golden brown and set when you gently shake the pan. A toothpick inserted into the cakey part should come out clean.
Storing and Reheating Tips
Store cobbler covered at room temperature for 1 day or refrigerated for up to 4 days. Reheat individual portions in the microwave for 30-45 seconds or warm the whole dish covered with foil at 325°F for 15 minutes.
Peach cobbler can be frozen for up to 2 months. Thaw in the refrigerator overnight before reheating.
Nutrition Information
| Nutrient | Per Serving |
|---|---|
| Calories | 295 |
| Carbohydrates | 48g |
| Protein | 3g |
| Fat | 11g |
| Fiber | 2g |
| Sugar | 35g |
9. Southern Buttermilk Biscuits
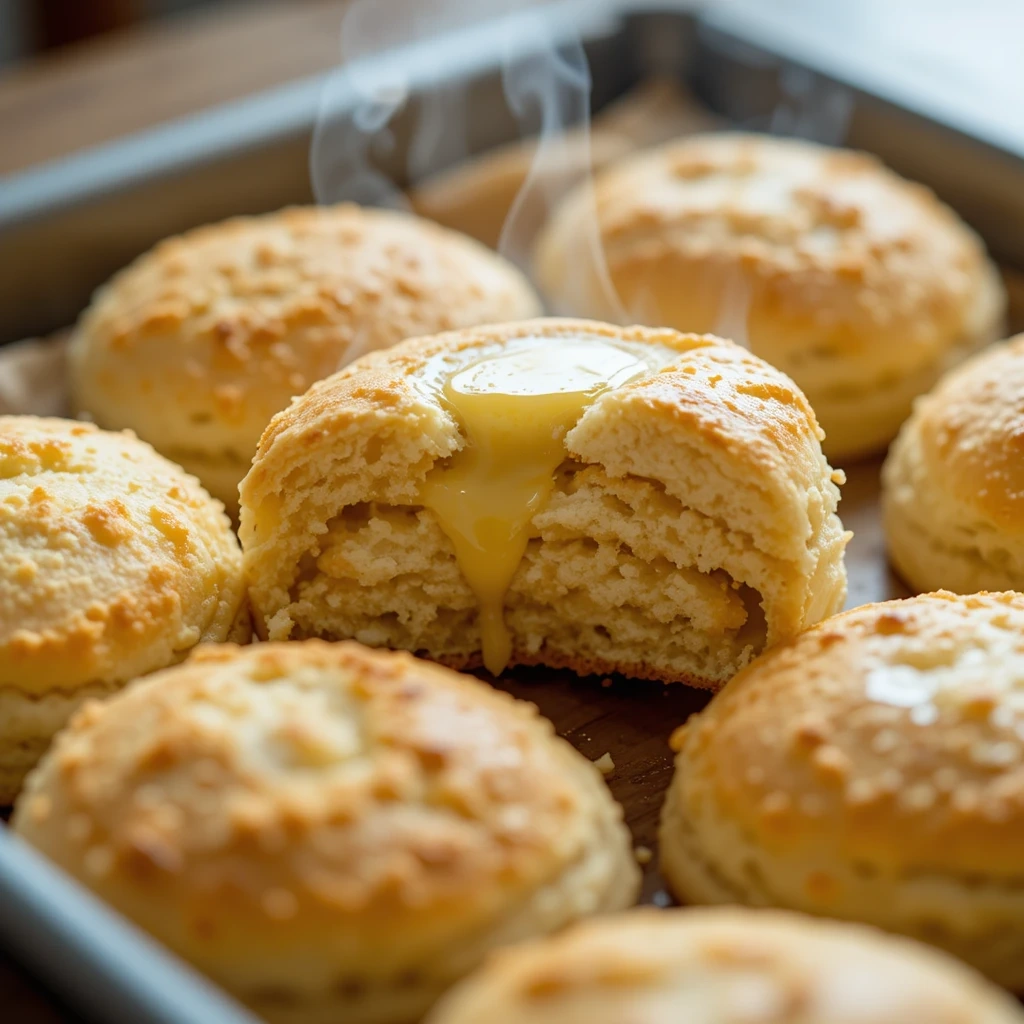
Quick Overview
Flaky, buttery biscuits that melt in your mouth! These Southern-style biscuits are perfect for breakfast, dinner, or anytime you need comfort food. They’re surprisingly easy to make once you know the tricks.
Prep Time: 15 minutes
Cook Time: 12 minutes
Total Time: 27 minutes
Servings: 10 biscuits
Key Ingredients for Buttermilk Biscuits
- 2½ cups all-purpose flour
- 2 tablespoons baking powder
- 1 tablespoon sugar
- 1 teaspoon salt
- ½ cup cold unsalted butter, cubed
- 1 cup cold buttermilk
- 2 tablespoons melted butter for brushing
Step-by-Step Instructions
How do I make the dough?
Preheat oven to 450°F. In a large bowl, whisk together flour, baking powder, sugar, and salt. Add the cold butter cubes and use a pastry cutter or your fingers to work the butter into the flour until it looks like coarse crumbs with some pea-sized pieces of butter remaining. Don’t overmix—those butter pieces create flaky layers!
How do I shape the biscuits?
Make a well in the center of the flour mixture and pour in the cold buttermilk. Stir gently with a fork just until the dough comes together. Turn the dough out onto a lightly floured surface and gently pat it into a rectangle about 1 inch thick. Fold the dough in half, pat it out again, and repeat this folding process 3-4 times—this creates layers.
How do I cut and bake the biscuits?
Pat the dough to about ¾ inch thick. Use a 2½-inch round biscuit cutter dipped in flour to cut straight down without twisting—twisting seals the edges and prevents rising. Place biscuits touching each other on a baking sheet (this helps them rise taller). Brush tops with melted butter. Bake for 12-15 minutes until golden brown on top.
What to Serve Buttermilk Biscuits With
Serve warm with butter and honey, or use them to soak up gravy, jam, or molasses. They’re perfect for breakfast sandwiches, served alongside fried chicken, or split and topped with butter and apple butter.
Top Tips for Perfecting Buttermilk Biscuits
Why aren’t my biscuits flaky?
The butter needs to stay cold! Work quickly and don’t overhandle the dough. Cold butter creates steam pockets when baking, which makes those beautiful flaky layers.
Can I make these ahead?
Yes! Cut the biscuits and freeze them unbaked on a baking sheet. Once frozen, transfer to a freezer bag. Bake from frozen, adding 2-3 extra minutes to the baking time.
What if I don’t have a biscuit cutter?
Use a drinking glass with a thin rim, or cut the dough into squares with a knife—no waste and they still taste amazing!
Storing and Reheating Tips
Store biscuits in an airtight container at room temperature for 2 days or refrigerate for up to 5 days. Reheat in a 350°F oven for 5-7 minutes until warm.
Freeze baked biscuits for up to 2 months. Reheat from frozen in the oven for 10-12 minutes.
Nutrition Information
| Nutrient | Per Biscuit |
|---|---|
| Calories | 190 |
| Carbohydrates | 24g |
| Protein | 4g |
| Fat | 9g |
| Fiber | 1g |
| Sugar | 3g |
10. Candied Yams
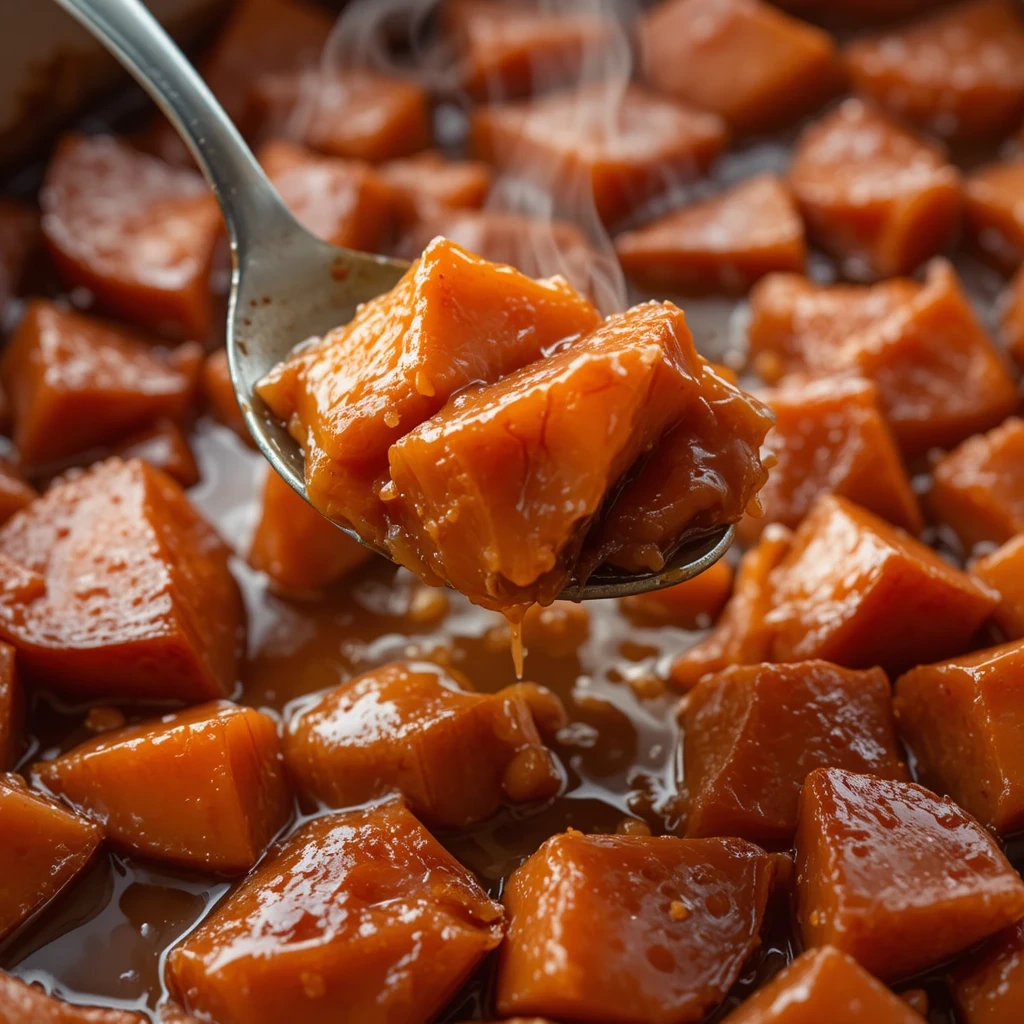
Quick Overview
Sweet, buttery, and perfectly spiced—these candied yams are a must-have for any celebration! They’re easy to make and always disappear fast from the table.
Prep Time: 15 minutes
Cook Time: 50 minutes
Total Time: 1 hour 5 minutes
Servings: 8
Key Ingredients for Candied Yams
- 4 large sweet potatoes or yams (about 3½ pounds)
- ½ cup unsalted butter
- 1 cup packed brown sugar
- ¼ cup honey or maple syrup
- 1 teaspoon vanilla extract
- 1 teaspoon cinnamon
- ½ teaspoon nutmeg
- ¼ teaspoon salt
- ½ cup orange juice or water
Step-by-Step Instructions
How do I prepare the sweet potatoes?
Peel the sweet potatoes and cut them into 1-inch thick rounds or chunks. Try to keep them similar in size so they cook evenly. Rinse them under cold water and pat dry.
How do I make the candied sauce?
Preheat oven to 375°F. In a medium saucepan, melt the butter over medium heat. Add brown sugar, honey, vanilla, cinnamon, nutmeg, and salt. Stir until the sugar dissolves and the mixture is smooth, about 3 minutes. Add the orange juice and stir to combine.
How do I bake the yams?
Arrange the sweet potato slices in a greased 9×13-inch baking dish in overlapping layers. Pour the candied sauce evenly over the top, making sure all pieces are coated. Cover with aluminum foil and bake for 30 minutes. Remove foil, baste the yams with the sauce from the bottom of the dish, and bake uncovered for another 20-25 minutes until the yams are tender and the sauce is thick and bubbly.
What to Serve Candied Yams With
Candied yams are the perfect side dish for holiday meals alongside turkey, or fried chicken. They pair beautifully with collard greens and cornbread for a complete soul food spread.
Top Tips for Perfecting Candied Yams
What’s the difference between yams and sweet potatoes?
In the US, what we call “yams” are actually orange-fleshed sweet potatoes. True yams are rarely found in American grocery stores. Either variety works perfectly for this recipe!
How do I prevent mushy yams?
Don’t cut them too thin—1-inch pieces are ideal. Also, check them at 50 minutes and remove from the oven when they’re fork-tender but still hold their shape.
Can I add marshmallows?
Absolutely! Add mini marshmallows during the last 10 minutes of baking for a sweet, toasted topping that kids especially love.
Storing and Reheating Tips
Store leftover candied yams in an airtight container in the refrigerator for up to 5 days. Reheat in the oven at 350°F for 15-20 minutes or in the microwave until heated through.
You can freeze candied yams for up to 3 months. Thaw in the refrigerator overnight and reheat in the oven.
Nutrition Information
| Nutrient | Per Serving |
|---|---|
| Calories | 315 |
| Carbohydrates | 58g |
| Protein | 2g |
| Fat | 12g |
| Fiber | 4g |
| Sugar | 38g |
Frequently Asked Questions
What makes soul food special for Black History Month?
Soul food represents the creativity, resilience, and cultural heritage of African Americans. These dishes were created by enslaved people who transformed simple, often undesirable ingredients into flavorful meals that brought families together. Each recipe carries history and tradition passed down through generations.
Are these recipes kid-friendly?
Yes! All of these recipes are family-friendly and can be adjusted to your children’s taste preferences. You can reduce spices like cayenne pepper for milder versions, and dishes like mac and cheese, cornbread, and sweet potato pie are especially popular with kids.
Can I make these recipes healthier?
Absolutely! You can bake instead of fry chicken, use turkey sausage, reduce sugar in sweet dishes, or use low-fat dairy products. The key is balancing tradition with your family’s dietary needs while still honoring the authentic flavors.
What are the most important dishes for Black History Month?
While all soul food is significant, sweet potato pie, collard greens, black-eyed peas, cornbread, and fried chicken are considered essential dishes that represent African American culinary traditions and appear at most celebrations.
How far in advance can I prepare these dishes?
Many soul food dishes taste better the next day! Collard greens, red beans, and black-eyed peas can be made 1-2 days ahead. Pies and cobblers are best made the day before. Fried chicken and biscuits are best fresh but can be reheated successfully.
What should I serve for a complete soul food meal?
A traditional soul food spread includes a protein (fried chicken or BBQ), two to three sides (collard greens, mac and cheese, black-eyed peas or red beans and rice), cornbread, and a dessert (sweet potato pie or peach cobbler). Don’t forget sweet tea!
Can I freeze these dishes?
Most of these recipes freeze well! Soups, stews, cooked greens, beans, and rice dishes freeze beautifully for 2-3 months. Baked goods like cornbread, biscuits, and pies also freeze well. Fried foods are best eaten fresh but can be frozen and reheated.
What cooking equipment do I need?
You’ll need basic kitchen equipment: a large pot for greens and beans, a cast-iron skillet for cornbread and frying, baking dishes for casseroles and pies, and standard mixing bowls and utensils. Cast iron is traditional and adds flavor, but regular cookware works too.
Common Mistakes to Avoid When Making Soul Food
Rushing the cooking process
Soul food needs time to develop deep flavors. Don’t rush collard greens or red beans—they need long, slow cooking to become tender and flavorful. Patience makes all the difference!
Using low-quality ingredients
Since many soul food recipes use simple ingredients, quality matters. Fresh vegetables, good butter, and quality spices make your dishes shine. Don’t skimp on the basics.
Overcrowding the pan when frying
Whether frying chicken or making crispy edges on your cornbread, give food space to cook properly. Overcrowding lowers the oil temperature and creates soggy, greasy results instead of crispy perfection.
Not seasoning properly
Soul food is known for bold, well-developed flavors. Don’t be afraid to season generously, but taste as you go. Build layers of flavor throughout the cooking process, not just at the end.
Skipping the tasting and adjusting step
Always taste before serving! Soul food should be balanced—adjust salt, add a splash of vinegar for brightness, or a pinch of sugar to balance acidity. Those final adjustments make good food great.
Final Thoughts
Cooking these traditional dishes is more than just making dinner—it’s honoring generations of creativity, survival, and love. Each recipe tells a story of people who turned simple ingredients into extraordinary meals that brought families and communities together.
Whether you’re making sweet potato pie for dessert or slow-cooking collard greens all afternoon, you’re participating in a rich culinary tradition that deserves to be celebrated not just in February, but all year long.
These recipes are meant to be shared, adapted, and passed down. Don’t be afraid to make them your own while respecting their origins. Gather your family in the kitchen, share the stories behind each dish, and create new memories while honoring the past.
Happy cooking, and enjoy every delicious bite of history!