
10 Best Asian Side Dishes That Make Dinner Special
Picture this: colorful plates filled with crispy, savory, and absolutely delicious bites that make your taste buds dance. These 10 Asian side dishes bring restaurant-quality flavor straight to your family table without the fuss. From crunchy edamame to tangy cucumber salad, each recipe celebrates the bold, fresh tastes that make Asian cuisine so special.
Here’s a fun fact: many Asian cultures serve meals family-style with multiple small dishes, turning dinner into a joyful sharing experience. These recipes are perfect for busy weeknights since most take just 15-20 minutes to prepare.
If you loved our Asian Garlic Green Beans, you’ll adore these equally quick and kid-friendly options. Get ready to transform your dinner routine with sides so good, they might just steal the spotlight from your main dish!
What Are Asian Side Dishes?
Ever wonder why Asian restaurants serve so many small plates? It’s called banchan in Korean cuisine, or simply side dishes across Asia. These aren’t just afterthoughts; they’re flavor-packed companions that balance your meal perfectly. Think of them as the supporting cast that makes the main character shine even brighter.
The saying goes that variety is the spice of life, and Asian side dishes prove it deliciously true. Ready to bring this tradition home? Let’s dive in!
This recipe was written by artificial intelligence and has not been personally prepared in our kitchen. Feedback from readers who tried other recipes on our site has been encouraging.
Why You’ll Love These Asian Side Dishes
Quick and Easy Preparation
These recipes celebrate the beauty of simplicity. Most dishes come together in under 20 minutes using everyday ingredients you can find at any grocery store. No complicated techniques or hard-to-find specialty items required.
Budget-Friendly Home Cooking
Skip the expensive takeout! Making these dishes at home costs a fraction of restaurant prices. A single bag of frozen edamame feeds your whole family for just a few dollars. Fresh vegetables, simple seasonings, and pantry staples create restaurant-quality results without breaking the bank.
Bold Flavors the Whole Family Enjoys
From sweet and savory glazes to tangy sesame dressings, these sides burst with the umami-rich flavors that make Asian cuisine irresistible. Garlic, ginger, soy sauce, and sesame oil work their magic to transform simple vegetables into crave-worthy treats. Even picky eaters find themselves reaching for seconds. Just like our Honey Sriracha Brussels Sprouts, these recipes prove that vegetables can be exciting. Roll up your sleeves and let’s create something amazing together!
1. Garlic Edamame

Quick Overview
This protein-packed snack transforms frozen edamame into a restaurant-worthy appetizer. Tender green soybeans get a savory upgrade with aromatic garlic and a touch of soy sauce. The pods steam to perfection, creating that satisfying pop when you squeeze the beans into your mouth.
Prep Time: 5 minutes
Cook Time: 10 minutes
Total Time: 15 minutes
Servings: 4
Key Ingredients for Garlic Edamame
- 1 pound frozen edamame in pods
- 1 tablespoon vegetable oil
- 3 cloves garlic, minced
- 2 tablespoons soy sauce
- 1 teaspoon sugar
- 1 teaspoon coarse sea salt
- Optional: red pepper flakes for heat
Step-by-Step Instructions
Step 1: Boil the Edamame
Bring a large pot of salted water to a rolling boil. Add the frozen edamame directly from the freezer. Cook for 4-5 minutes until the pods turn bright green and become tender. You’ll know they’re ready when the beans easily pop out of their pods. Drain thoroughly in a colander.
Step 2: Sauté the Garlic
Heat the vegetable oil in a large skillet over medium heat. Add the minced garlic and cook for about 30 seconds, stirring constantly. Watch carefully because garlic burns quickly. You want it fragrant and golden, not brown.
Step 3: Combine and Season
Add the drained edamame to the skillet with the garlic. Pour in the soy sauce and sprinkle the sugar over everything. Toss well to coat the pods evenly. Cook for 3-4 minutes, stirring frequently, until the sauce reduces slightly and clings to the edamame.
Step 4: Finish and Serve
Transfer the edamame to a serving bowl. Sprinkle with coarse sea salt for that perfect salty crunch. Serve warm and watch your family fight over the last few pods!
| Nutrition Information (Per Serving) | Amount |
|---|---|
| Calories | 151 |
| Protein | 10g |
| Carbohydrates | 12g |
| Fat | 8g |
| Fiber | 5g |
2. Asian Cucumber Salad
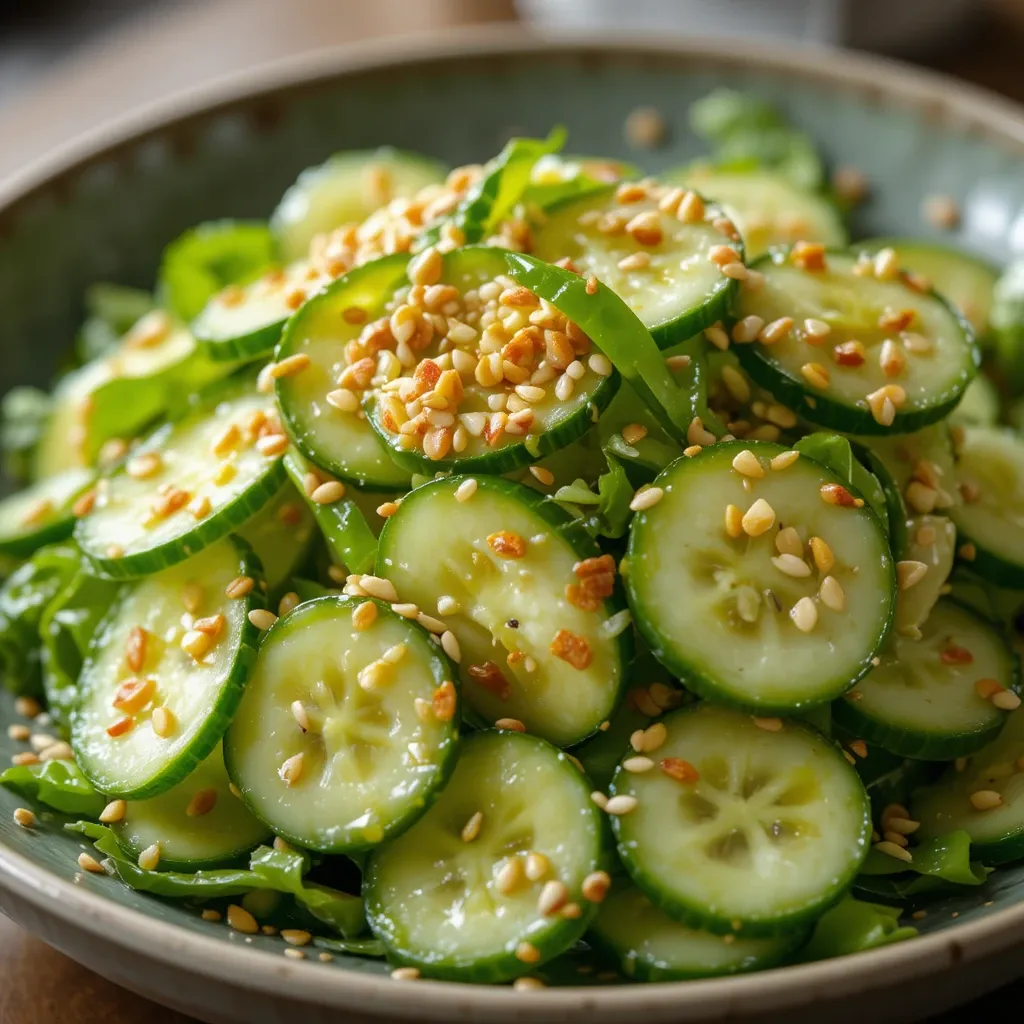
Quick Overview
Crisp, refreshing, and incredibly addictive, this cucumber salad brings restaurant vibes home. Thinly sliced cucumbers marinate in a tangy sesame-vinegar dressing that’s sweet, salty, and just a little bit spicy. Perfect for hot summer days or as a cooling contrast to rich main dishes.
Prep Time: 10 minutes
Chill Time: 15 minutes
Total Time: 25 minutes
Servings: 4
Key Ingredients for Asian Cucumber Salad
- 2 large English cucumbers or 4 Persian cucumbers
- 1½ tablespoons kosher salt (for salting cucumbers)
- 3 tablespoons rice vinegar
- 2 tablespoons soy sauce
- 1 tablespoon toasted sesame oil
- 1 tablespoon sugar or honey
- 2 cloves garlic, minced
- 1 tablespoon sesame seeds, toasted
- Optional: 1 teaspoon chili oil or red pepper flakes
Step-by-Step Instructions
Step 1: Prep the Cucumbers
Slice the cucumbers very thin using a sharp knife or mandoline slicer. Aim for slices about 1/8 inch thick. Place them in a colander and toss with the kosher salt. Let sit for 10 minutes. This draws out excess moisture and makes the cucumbers extra crisp.
Step 2: Make the Dressing
While the cucumbers rest, whisk together rice vinegar, soy sauce, sesame oil, sugar, and minced garlic in a large bowl. Stir until the sugar completely dissolves. Taste and adjust the balance of sweet, salty, and tangy to your preference.
Step 3: Rinse and Drain
Rinse the salted cucumbers under cold water to remove excess salt. Squeeze them gently with your hands or press them in the colander to release as much liquid as possible. This step is crucial for preventing a watery salad.
Step 4: Combine and Chill
Add the cucumbers to the bowl with the dressing. Toss everything together until the cucumbers are evenly coated. Sprinkle with toasted sesame seeds and chili oil if using. Refrigerate for at least 15 minutes before serving to let the flavors meld together beautifully.
3. Garlic Bok Choy Stir-Fry
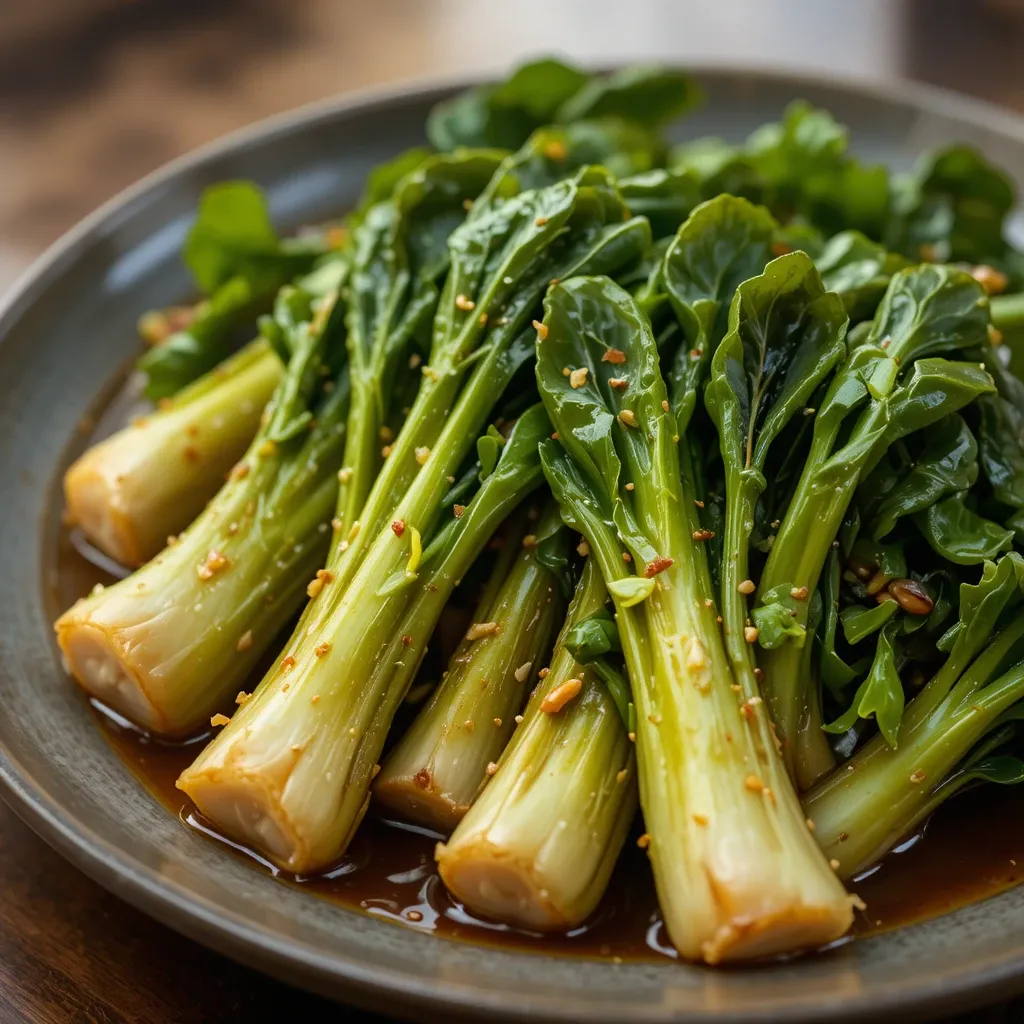
Quick Overview
Baby bok choy transforms into tender, flavorful perfection in this lightning-fast stir-fry. The leafy greens wilt beautifully while the stems stay crisp-tender. Garlic and ginger create an aromatic base that makes this simple vegetable absolutely irresistible.
Prep Time: 5 minutes
Cook Time: 8 minutes
Total Time: 13 minutes
Servings: 4
Key Ingredients for Garlic Bok Choy Stir-Fry
- 1 pound baby bok choy (about 4-5 heads)
- 2 tablespoons vegetable oil
- 4 cloves garlic, sliced thin
- 1 tablespoon fresh ginger, minced
- 2 tablespoons soy sauce
- 1 tablespoon oyster sauce
- 1 teaspoon toasted sesame oil
- Pinch of sugar
- 2 tablespoons water or chicken broth
Step-by-Step Instructions
Step 1: Prepare the Bok Choy
Cut each bok choy head in half lengthwise. Rinse thoroughly under cold water to remove any dirt or grit between the leaves. Pat dry with paper towels or a clean kitchen towel. Keeping them in halves helps them cook evenly while maintaining their beautiful shape.
Step 2: Start the Stir-Fry
Heat a large wok or skillet over high heat until it’s smoking hot. Add the vegetable oil and swirl to coat the pan. Toss in the garlic and ginger. Stir-fry for just 15-20 seconds until fragrant but not burned. The aroma should fill your kitchen immediately.
Step 3: Cook the Bok Choy
Add the bok choy halves cut-side down to the hot pan. Let them sear for 2 minutes without moving them. This creates lovely caramelized spots. Flip them over and add the soy sauce, oyster sauce, sesame oil, sugar, and water. Cover the pan with a lid and let steam for 2-3 minutes.
Step 4: Finish and Plate
Remove the lid and increase heat to high. Cook for another minute to reduce the sauce slightly. The leaves should be tender and the stems still have a pleasant crunch. Transfer to a serving plate and drizzle with any remaining sauce from the pan.
4. Sesame Garlic Green Beans
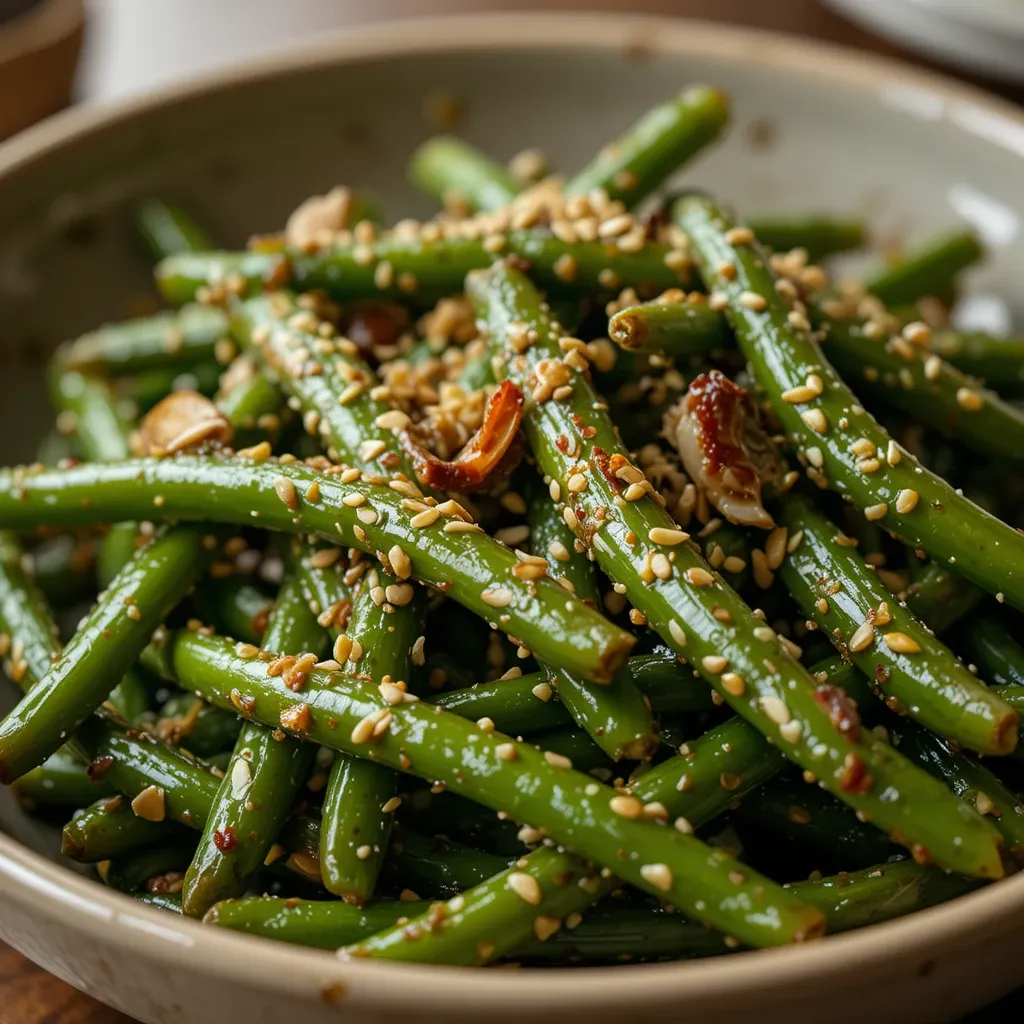
Quick Overview
Tender-crisp green beans get a flavor boost from toasted sesame seeds and aromatic garlic. This side dish proves that simple vegetables can be absolutely spectacular. The nutty sesame taste pairs perfectly with the natural sweetness of fresh green beans.
Prep Time: 8 minutes
Cook Time: 10 minutes
Total Time: 18 minutes
Servings: 4
Key Ingredients for Sesame Garlic Green Beans
- 1 pound fresh green beans, trimmed
- 2 tablespoons vegetable oil
- 3 cloves garlic, minced
- 2 tablespoons soy sauce
- 1 tablespoon rice vinegar
- 1 tablespoon honey or sugar
- 2 tablespoons sesame seeds, toasted
- 1 teaspoon toasted sesame oil
- Pinch of red pepper flakes (optional)
Step-by-Step Instructions
Step 1: Blanch the Beans
Bring a large pot of salted water to boil. Add the trimmed green beans and cook for 3-4 minutes until bright green and tender-crisp. Drain immediately and plunge them into ice water to stop the cooking. This preserves their vibrant color and perfect texture. Drain well and pat dry.
Step 2: Prepare the Sauce
While the beans cool, whisk together soy sauce, rice vinegar, and honey in a small bowl. Set aside. Toast the sesame seeds in a dry pan over medium heat for 2-3 minutes, shaking frequently, until golden and fragrant. Watch them closely because they burn easily.
Step 3: Stir-Fry Everything
Heat vegetable oil in a large skillet or wok over high heat. Add the minced garlic and cook for 30 seconds. Add the blanched green beans and stir-fry for 2-3 minutes. Pour in the sauce and toss everything together until the beans are evenly coated and the sauce reduces slightly.
Step 4: Garnish and Serve
Remove from heat and drizzle with toasted sesame oil. Sprinkle the toasted sesame seeds generously over the top. Add a pinch of red pepper flakes if you like a little heat. Serve immediately while they’re still hot and crispy.
5. Simple Vegetable Fried Rice
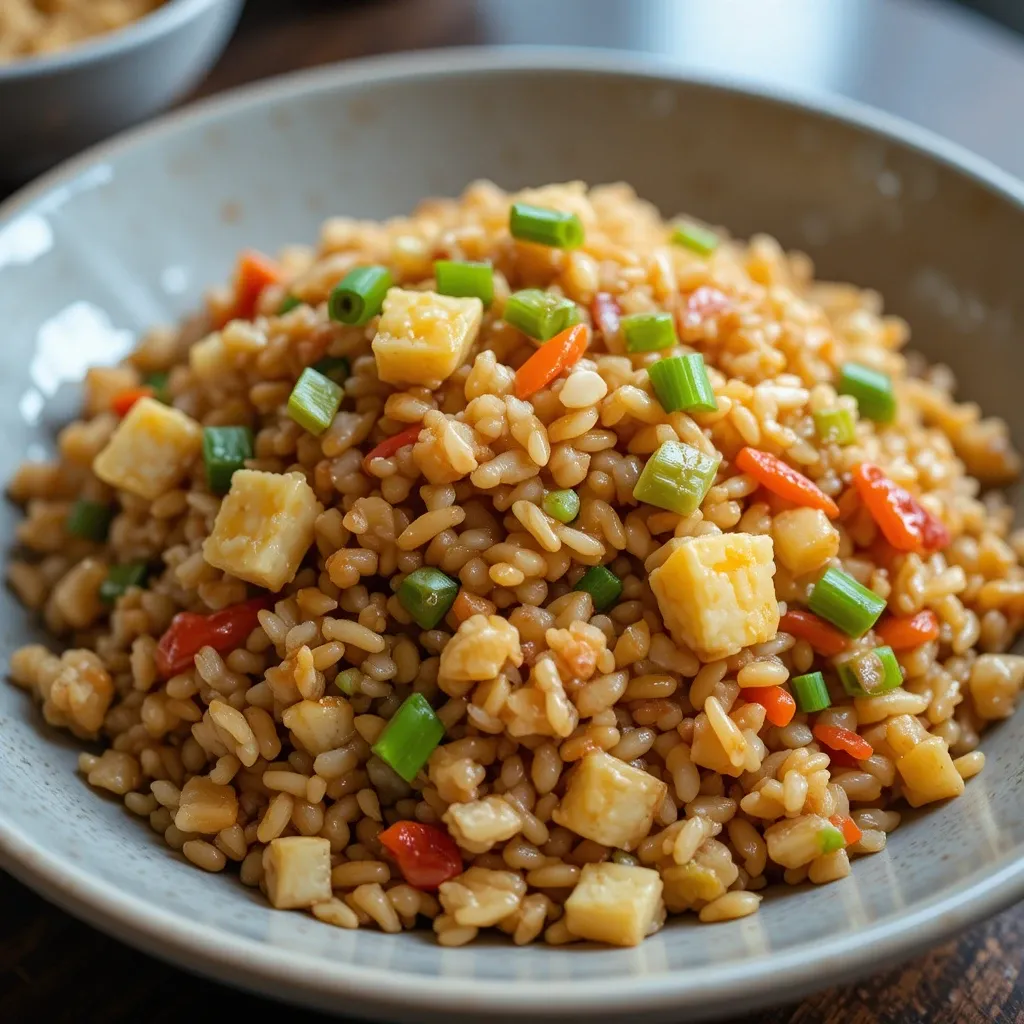
Quick Overview
Transform leftover rice into something magical with this classic fried rice recipe. Fluffy grains get tossed with colorful vegetables, scrambled eggs, and savory seasonings. This versatile side works with absolutely any Asian meal and tastes even better than takeout.
Prep Time: 10 minutes
Cook Time: 12 minutes
Total Time: 22 minutes
Servings: 4-6
Key Ingredients for Simple Vegetable Fried Rice
- 4 cups cooked white rice, cold (day-old is best)
- 3 tablespoons vegetable oil, divided
- 2 eggs, beaten
- 1 cup frozen mixed vegetables (peas, carrots, corn)
- 3 green onions, sliced thin
- 2 cloves garlic, minced
- 3 tablespoons soy sauce
- 1 tablespoon oyster sauce
- 1 teaspoon toasted sesame oil
- Salt and pepper to taste
Step-by-Step Instructions
Step 1: Scramble the Eggs
Heat 1 tablespoon of oil in a large wok or skillet over medium-high heat. Pour in the beaten eggs and let them set for a few seconds. Gently scramble them into small curds. When just set but still slightly wet, transfer to a plate and set aside. Don’t overcook them at this stage.
Step 2: Cook the Vegetables
Add another tablespoon of oil to the same pan. Toss in the frozen vegetables and stir-fry for 3-4 minutes until heated through and any excess moisture evaporates. Add the minced garlic and white parts of the green onions. Cook for another 30 seconds until fragrant.
Step 3: Add the Rice
Increase heat to high and add the remaining tablespoon of oil. Break up the cold rice with your hands before adding it to the pan. Press it down and let it sit for 1-2 minutes to develop a slight crust. Then stir-fry vigorously, breaking up any clumps. The rice should separate into individual grains.
Step 4: Season and Finish
Pour the soy sauce and oyster sauce over the rice. Toss everything together until evenly mixed. Add the scrambled eggs back in and fold them through the rice. Drizzle with sesame oil and sprinkle with the green parts of the green onions. Taste and adjust seasoning with salt and pepper if needed.
6. Quick Cucumber Kimchi
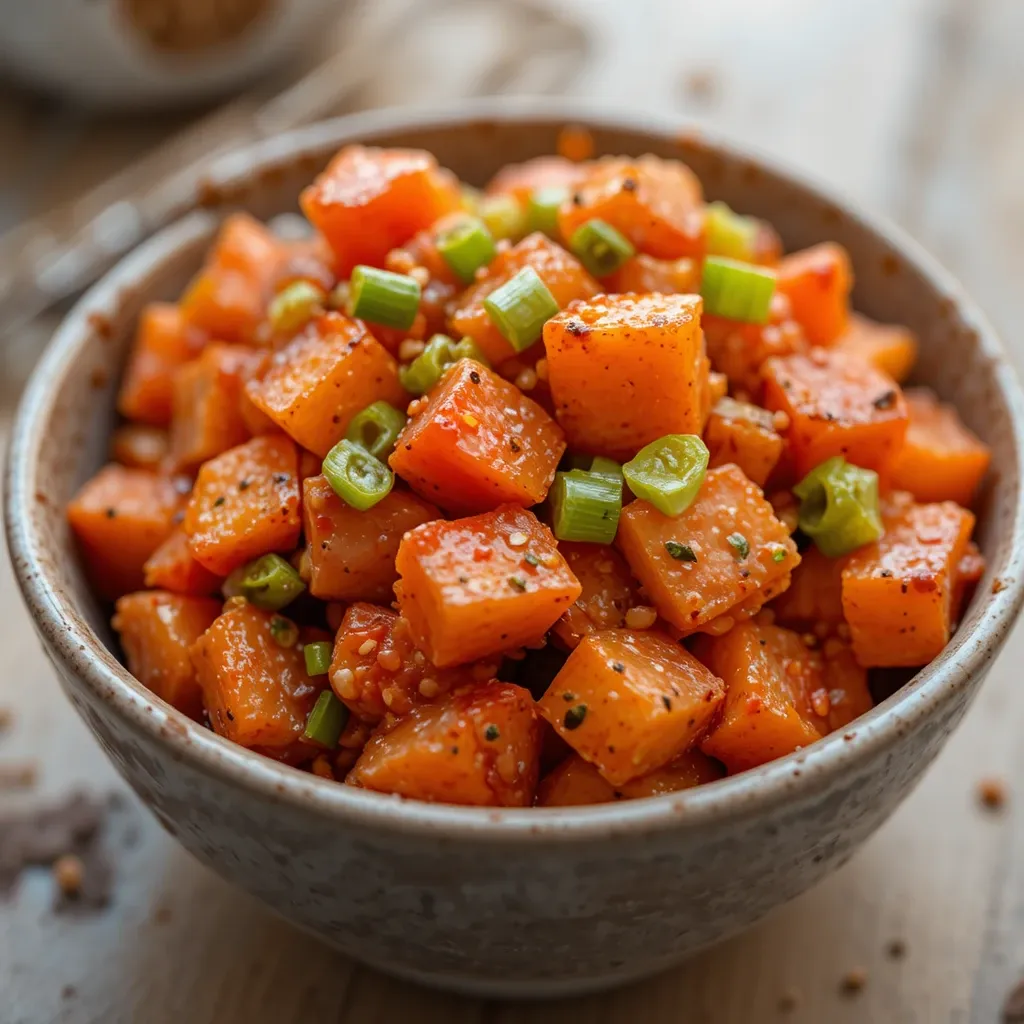
Quick Overview
This fast version of the Korean classic brings tangy, spicy, and crunchy goodness to your table without the long fermentation wait. Crisp cucumbers soak up a flavor-packed marinade of garlic, ginger, and Korean red pepper flakes. Ready to eat in just a few hours instead of days.
Prep Time: 15 minutes
Marinating Time: 2 hours
Total Time: 2 hours 15 minutes
Servings: 4
Key Ingredients for Quick Cucumber Kimchi
- 2 pounds Persian or Kirby cucumbers
- 2 tablespoons kosher salt
- 4 cloves garlic, minced
- 1 tablespoon fresh ginger, grated
- 2 tablespoons Korean red pepper flakes (gochugaru)
- 1 tablespoon fish sauce (or soy sauce for vegetarian)
- 1 tablespoon rice vinegar
- 1 tablespoon sugar
- 4 green onions, cut into 1-inch pieces
Step-by-Step Instructions
Step 1: Cut and Salt Cucumbers
Cut cucumbers into quarters lengthwise, then slice into 2-inch pieces. Place them in a large bowl and toss with the kosher salt. Let sit for 30 minutes at room temperature. The salt draws out moisture, making the cucumbers extra crunchy and helping them absorb the marinade better.
Step 2: Make the Kimchi Paste
While cucumbers drain, combine minced garlic, grated ginger, Korean red pepper flakes, fish sauce, rice vinegar, and sugar in a bowl. Mix into a thick paste. Adjust the spice level by adding more or less red pepper flakes according to your family’s taste preferences.
Step 3: Rinse and Drain
After 30 minutes, rinse the cucumbers under cold water to remove excess salt. Give them a good squeeze to remove as much liquid as possible. Pat them dry with paper towels. Removing the moisture prevents the kimchi from becoming watery.
Step 4: Mix and Marinate
Transfer the dry cucumbers to a clean bowl. Add the kimchi paste and green onions. Using clean hands or a spoon, mix everything together until the cucumbers are evenly coated with the red paste. Transfer to an airtight container and refrigerate for at least 2 hours before serving. The flavor gets better after a day or two.
7. Fresh Vietnamese Spring Rolls
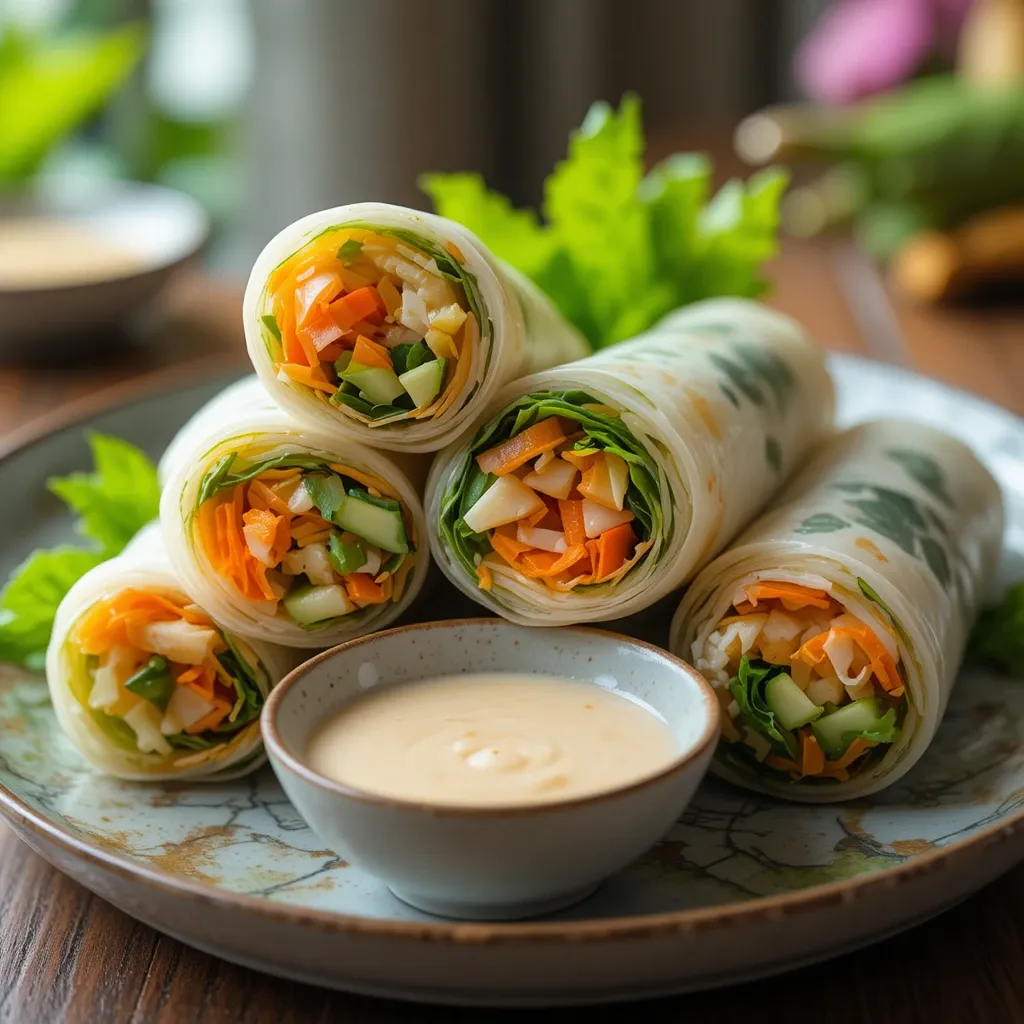
Quick Overview
These light and refreshing rolls showcase colorful vegetables and herbs wrapped in delicate rice paper. Each bite delivers a satisfying mix of textures from crunchy carrots, tender rice noodles, and fresh herbs. Served with a sweet and savory peanut dipping sauce, they’re healthy, beautiful, and fun to make together as a family.
Prep Time: 20 minutes
Cook Time: 5 minutes
Total Time: 25 minutes
Servings: 8 rolls
Key Ingredients for Fresh Vietnamese Spring Rolls
- 8 rice paper wrappers (8-inch rounds)
- 2 ounces rice vermicelli noodles
- 1 cup lettuce leaves, torn into pieces
- 1 carrot, julienned
- 1 cucumber, julienned
- ½ cup fresh mint leaves
- ½ cup fresh cilantro
- Optional: cooked shrimp or tofu strips
For Peanut Sauce:
- ⅓ cup peanut butter
- 2 tablespoons soy sauce
- 1 tablespoon honey
- 1 tablespoon rice vinegar
- 2 tablespoons warm water
- 1 clove garlic, minced
Step-by-Step Instructions
Step 1: Prep the Filling
Cook rice noodles according to package directions, usually 3-4 minutes in boiling water. Drain and rinse with cold water. Cut them into shorter lengths for easier rolling. Arrange all your filling ingredients on a large platter or cutting board, assembly-line style. This makes rolling much easier.
Step 2: Make the Peanut Sauce
Whisk together peanut butter, soy sauce, honey, rice vinegar, warm water, and minced garlic in a small bowl. The sauce should be smooth and pourable. Add more water if it’s too thick. Adjust sweetness or saltiness to taste. Set aside until serving.
Step 3: Soften the Rice Paper
Fill a large shallow dish with warm water. Dip one rice paper wrapper into the water for about 5-10 seconds, just until it starts to soften. Don’t leave it too long or it will tear. Lay the dampened wrapper on a clean, damp kitchen towel or cutting board.
Step 4: Roll the Spring Rolls
Place lettuce in the center of the wrapper. Top with a small handful of noodles, a few strips of carrot and cucumber, and some herbs. If using shrimp or tofu, add those now. Fold the bottom of the wrapper up over the filling. Fold in the sides tightly, then roll up like a burrito. The wrapper will seal itself as it dries. Repeat with remaining wrappers.
8. Simple Miso Soup
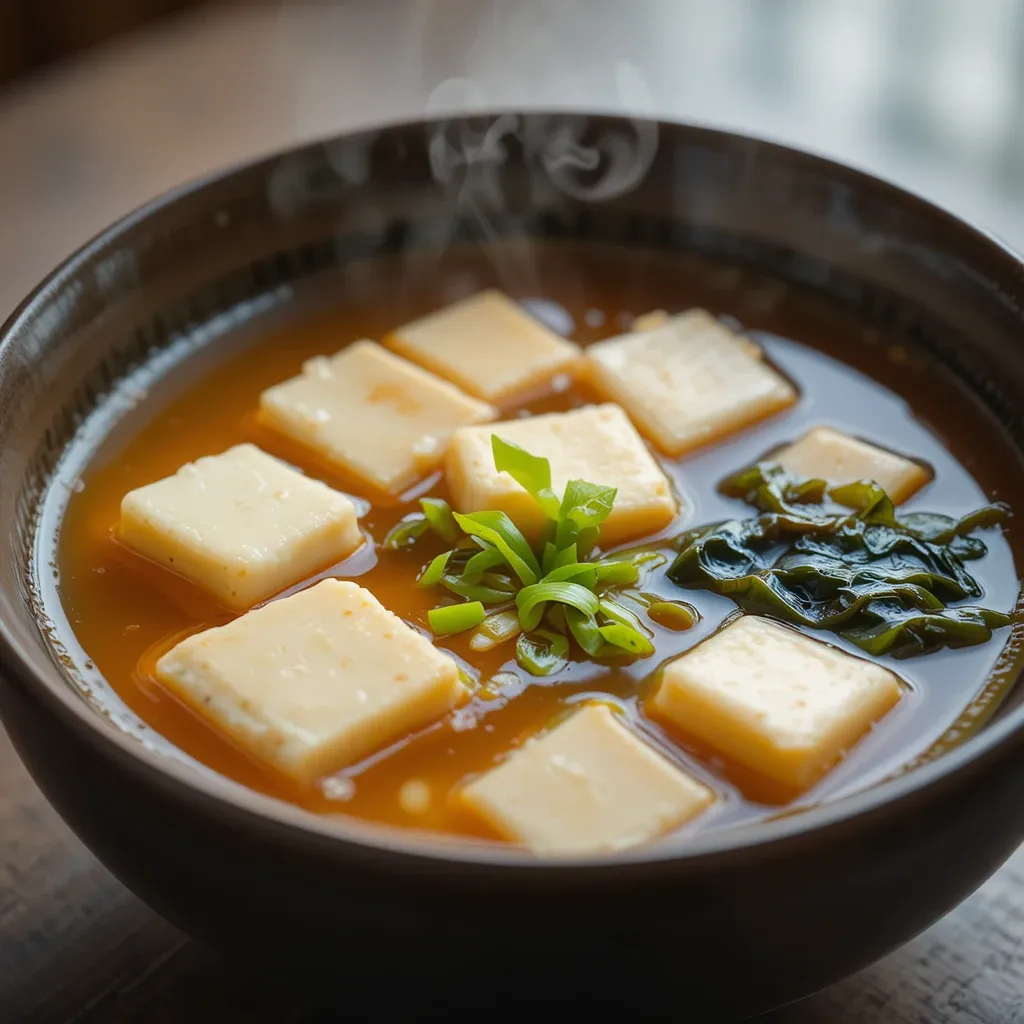
Quick Overview
Warm, comforting, and incredibly easy, this classic Japanese soup requires just three basic ingredients. The savory miso broth with silky tofu and tender seaweed makes the perfect light starter or side dish. It’s restaurant-quality but ready in your kitchen in just 15 minutes.
Prep Time: 5 minutes
Cook Time: 10 minutes
Total Time: 15 minutes
Servings: 4
Key Ingredients for Simple Miso Soup
- 4 cups water
- 1 tablespoon dashi powder (or vegetable broth)
- 3 tablespoons miso paste (white or red)
- 8 ounces silken tofu, cut into small cubes
- 2 tablespoons dried wakame seaweed
- 2 green onions, sliced thin
Step-by-Step Instructions
Step 1: Make the Broth
Bring water to a boil in a medium saucepan. Add the dashi powder and stir to dissolve completely. Reduce heat to medium-low and let it simmer gently. The dashi creates that signature umami flavor that makes miso soup so satisfying.
Step 2: Dissolve the Miso
Place the miso paste in a small bowl or ladle. Add a few spoonfuls of the hot broth and whisk until smooth. This prevents lumps. Pour the dissolved miso back into the pot and stir gently. Never let miso boil after adding it, as high heat destroys its beneficial probiotics and delicate flavor.
Step 3: Add Tofu and Seaweed
Gently slide the tofu cubes into the soup. Add the dried wakame seaweed. The seaweed will quickly rehydrate and expand. Let everything heat through for 2-3 minutes over low heat. Be gentle when stirring so the delicate tofu doesn’t break apart.
Step 4: Garnish and Serve
Remove from heat immediately. Ladle the soup into bowls and sprinkle with sliced green onions. Serve hot. Miso soup tastes best when freshly made but can be gently reheated if needed. Just don’t let it boil.
9. Pan-Fried Vegetable Dumplings
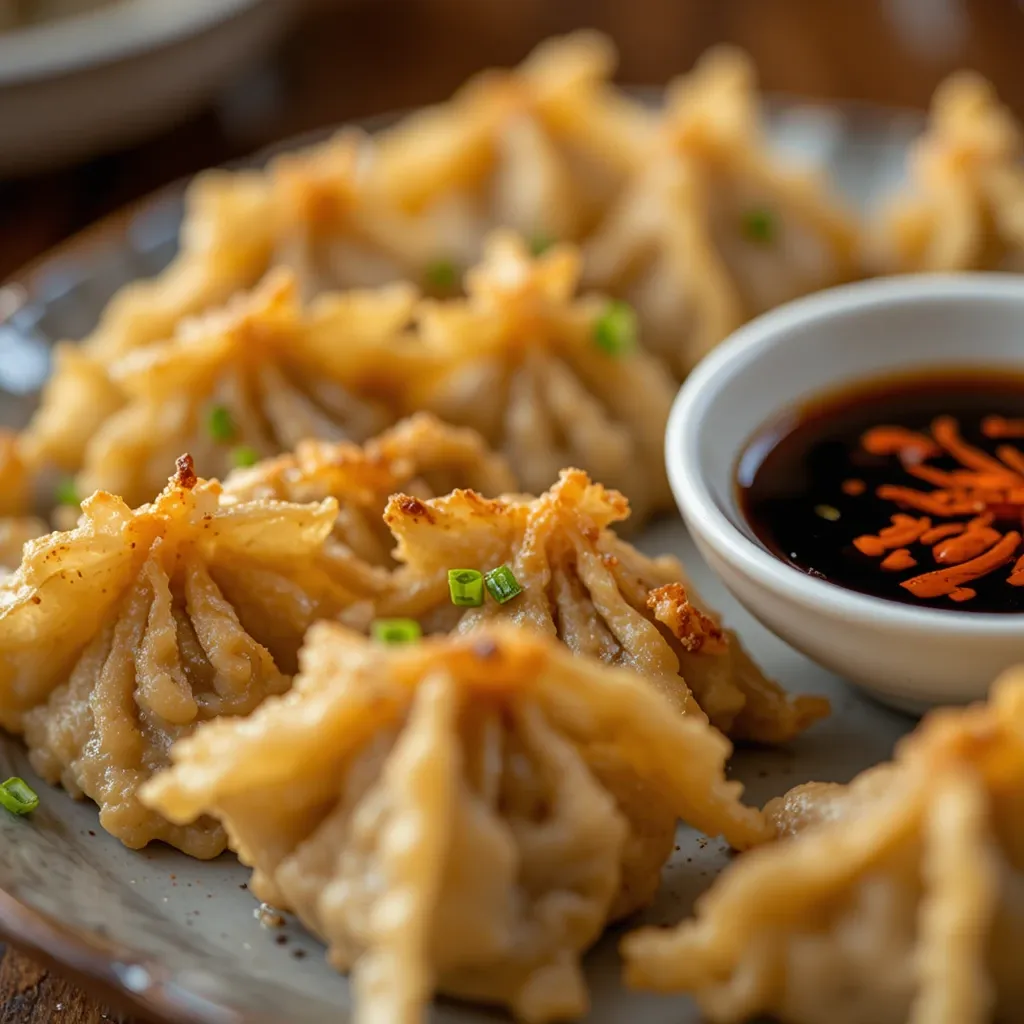
Quick Overview
Crispy on the bottom and tender on top, these dumplings deliver the perfect textural contrast. The savory vegetable filling wrapped in delicate wrappers makes an impressive side dish that’s easier to make than you might think. Kids love helping to fold these little pockets of joy.
Prep Time: 25 minutes
Cook Time: 15 minutes
Total Time: 40 minutes
Servings: 24 dumplings
Key Ingredients for Pan-Fried Vegetable Dumplings
- 24 round dumpling wrappers
- 2 cups napa cabbage, finely chopped
- 1 cup shiitake mushrooms, finely chopped
- 2 green onions, minced
- 2 cloves garlic, minced
- 1 tablespoon fresh ginger, grated
- 2 tablespoons soy sauce
- 1 tablespoon toasted sesame oil
- ½ teaspoon salt
- 2 tablespoons vegetable oil for pan-frying
- ½ cup water for steaming
For Dipping Sauce:
- 3 tablespoons soy sauce
- 1 tablespoon rice vinegar
- 1 teaspoon chili oil (optional)
Step-by-Step Instructions
Step 1: Prepare the Filling
Sprinkle the chopped cabbage with a pinch of salt and let sit for 10 minutes. Squeeze out excess moisture with your hands or a clean towel. Mix the cabbage with mushrooms, green onions, garlic, ginger, soy sauce, sesame oil, and salt in a large bowl. The filling should hold together when pressed.
Step 2: Fill and Fold Dumplings
Place a wrapper on a clean surface. Add about 1 tablespoon of filling to the center. Dip your finger in water and moisten the edges of the wrapper. Fold it in half to create a half-moon shape. Press the edges together firmly, making small pleats if desired. Set on a plate and cover with a damp towel while you finish the rest.
Step 3: Pan-Fry the Dumplings
Heat vegetable oil in a large nonstick skillet over medium-high heat. Arrange dumplings in the pan flat-side down, making sure they don’t touch. Cook for 2-3 minutes until the bottoms turn golden brown and crispy. Don’t move them during this time.
Step 4: Steam and Finish
Carefully pour water into the pan and immediately cover with a tight-fitting lid. The water will sizzle and steam vigorously. Steam for 5-6 minutes until the wrappers become translucent and the filling is cooked through. Remove the lid and let any remaining water evaporate. Serve hot with dipping sauce.
10. Sesame Seaweed Salad
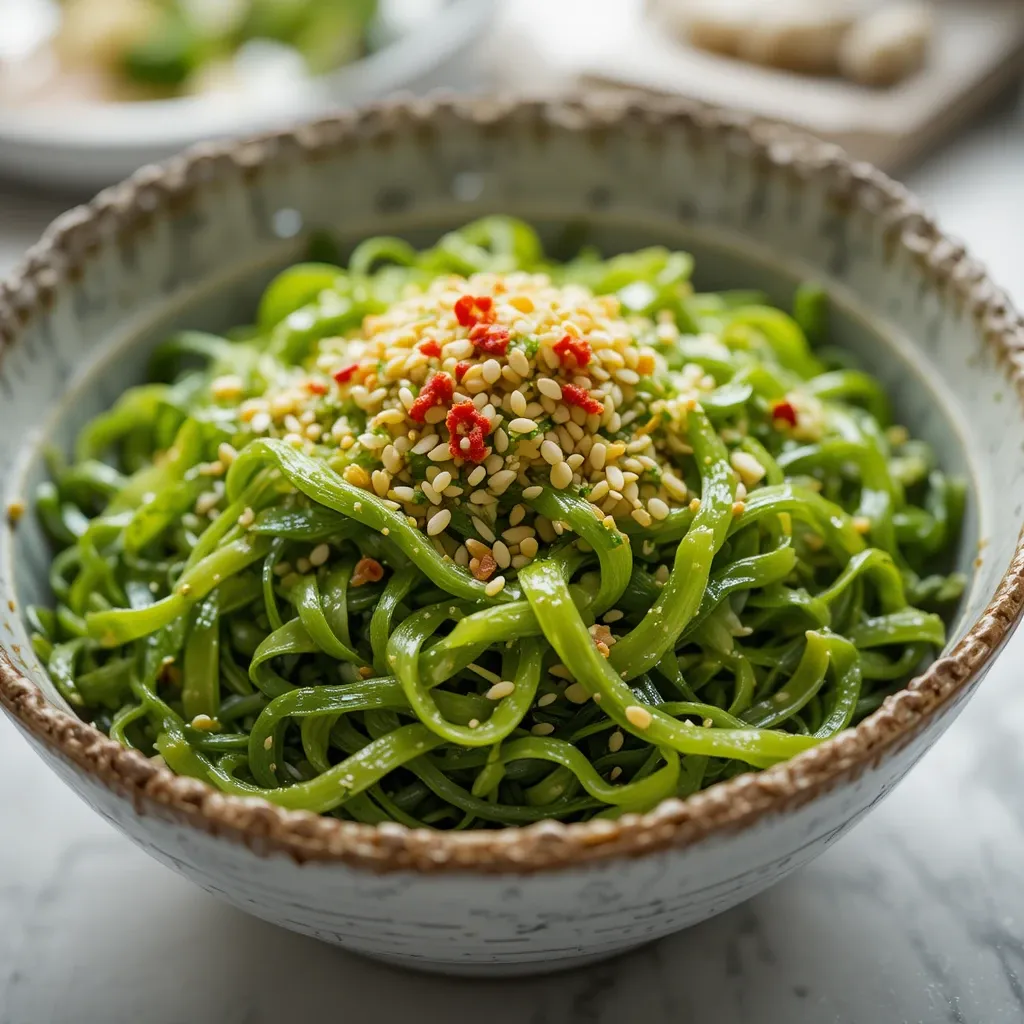
Quick Overview
This bright green salad brings ocean freshness to your table with its sweet and tangy sesame dressing. The tender seaweed has a pleasant chewy texture that’s both refreshing and satisfying. It’s packed with nutrients and takes just minutes to prepare.
Prep Time: 10 minutes
Soaking Time: 5 minutes
Total Time: 15 minutes
Servings: 4
Key Ingredients for Sesame Seaweed Salad
- 1 ounce dried wakame seaweed
- 2 tablespoons rice vinegar
- 1 tablespoon soy sauce
- 1 tablespoon toasted sesame oil
- 1 tablespoon sugar or honey
- 1 teaspoon fresh ginger, grated
- 2 tablespoons sesame seeds, toasted
- 1 small cucumber, julienned
- Pinch of red pepper flakes (optional)
Step-by-Step Instructions
Step 1: Rehydrate the Seaweed
Place the dried wakame in a large bowl and cover with cold water. Let it soak for 5-10 minutes until fully expanded. The seaweed will grow to about five times its dried size. Drain well and gently squeeze out excess water. If the pieces are very long, cut them into bite-sized strips.
Step 2: Make the Dressing
Whisk together rice vinegar, soy sauce, sesame oil, sugar, and grated ginger in a medium bowl. Taste and adjust the balance of sweet, salty, and tangy. The dressing should be well-balanced with a pleasant sesame aroma.
Step 3: Combine Everything
Add the drained seaweed to the bowl with the dressing. Toss well to coat every piece. Add the julienned cucumber for extra crunch and freshness. Let the salad marinate for at least 5 minutes to allow the flavors to blend together.
Step 4: Garnish and Serve
Transfer to a serving bowl and sprinkle generously with toasted sesame seeds. Add a pinch of red pepper flakes if you like a little kick. Serve chilled or at room temperature. This salad actually tastes better after sitting for a while as the seaweed absorbs more of the dressing.
What to Serve Asian Side Dishes With
These versatile sides pair beautifully with almost any main dish. Serve them alongside teriyaki chicken, grilled salmon, beef stir-fry, or tofu bowls. They work wonderfully with rice-based dishes like fried rice or rice bowls.
Mix and match several sides to create a complete Asian-inspired feast. Try pairing the cucumber salad with dumplings, or serve miso soup with fried rice and edamame. The fresh spring rolls complement heavier dishes perfectly.
For drinks, green tea, jasmine tea, or sparkling water with lime make excellent companions. The light, refreshing beverages won’t overpower the delicate flavors of your carefully prepared sides.
Top Tips for Perfecting Asian Side Dishes
Use Day-Old Rice for Fried Rice
Freshly cooked rice is too moist and sticky for fried rice. Day-old refrigerated rice has the perfect texture because it has dried out slightly. The grains separate easily and crisp up beautifully when stir-fried. If you don’t have leftover rice, spread fresh rice on a baking sheet and refrigerate for an hour before using.
Toast Your Sesame Seeds
Raw sesame seeds taste bland compared to toasted ones. Toast them in a dry pan over medium heat for 2-3 minutes, shaking frequently. They’re ready when they turn golden and smell nutty. This simple step dramatically boosts flavor in salads, green beans, and seaweed dishes.
Don’t Overcook Vegetables
Asian cooking values crisp-tender vegetables that maintain their bright colors and nutrients. Remove vegetables from heat when they’re just tender. They’ll continue cooking slightly from residual heat. Mushy vegetables lose their appeal and nutritional value.
Balance Your Flavors
Great Asian cooking balances sweet, salty, sour, and umami flavors. Taste your dishes before serving and adjust seasoning. Too salty? Add a pinch of sugar. Too sweet? Add more soy sauce or vinegar. This balancing act creates depth and complexity.
Prep Ingredients Before Cooking
Asian cooking moves fast, especially stir-frying. Have all ingredients chopped, measured, and ready before you turn on the heat. This practice called mise en place prevents burning and ensures even cooking. You can’t step away to chop garlic once the pan is hot.
Invest in Quality Soy Sauce and Sesame Oil
These two ingredients appear in almost every recipe and greatly impact final flavor. Cheap soy sauce tastes harsh and one-dimensional. Good quality soy sauce has complex umami depth. Similarly, toasted sesame oil should smell intensely nutty. These staples are worth the extra cost.
Storing and Reheating Tips
Most Asian side dishes store well in airtight containers in the refrigerator. Fried rice, stir-fried vegetables, and edamame keep for 3-4 days. Cucumber salad and seaweed salad stay fresh for 2-3 days but may release water, so drain before serving.
Spring rolls are best eaten fresh but can be stored wrapped individually in plastic wrap for up to 24 hours. The wrappers may become slightly sticky but still taste delicious. Don’t refrigerate them uncovered or they’ll dry out.
Reheat fried rice and stir-fries in a hot skillet or wok rather than the microwave. This restores their texture and prevents sogginess. Add a splash of water if they seem dry. Dumplings reheat beautifully in a steamer for 3-4 minutes or pan-fried again for extra crispiness.
Miso soup is best made fresh, but leftovers can be gently reheated over low heat. Never boil it as this destroys the beneficial probiotics in miso. The tofu may break down slightly but the soup still tastes good.
For freezing, fried rice and dumplings freeze exceptionally well for up to 3 months. Cool completely before transferring to freezer bags. Reheat dumplings by steaming from frozen. Thaw fried rice overnight in the refrigerator before reheating in a skillet.
Common Mistakes to Avoid
Using a Cold Pan for Stir-Frying
Your wok or skillet should be smoking hot before adding ingredients. A cold pan causes vegetables to steam rather than sear, resulting in soggy, bland food. Preheat your pan for at least 2-3 minutes over high heat.
Overcrowding the Pan
Adding too much food at once lowers the pan temperature dramatically. Ingredients steam instead of getting that desirable caramelized exterior. Cook in batches if necessary, especially for fried rice and stir-fries. Better to take a little extra time than ruin the texture.
Not Drying Vegetables Properly
Water is the enemy of crispy stir-fries and salads. Always dry washed vegetables thoroughly before cooking or marinating. Excess moisture dilutes sauces and prevents proper browning. Use a salad spinner or pat dry with kitchen towels.
Skipping the Salt Step for Cucumbers
Salting cucumbers before making cucumber salad or kimchi isn’t optional. This crucial step removes excess water, concentrates flavor, and creates the perfect crunchy texture. Skipping it results in watery, disappointing salads that taste diluted.
Boiling Miso Soup After Adding Miso
High heat destroys the beneficial bacteria in miso paste and can make it taste bitter. Always add miso at the end and keep the soup below boiling temperature. Gentle heating preserves both the health benefits and delicate flavor.
Using Old or Rancid Sesame Oil
Toasted sesame oil goes rancid faster than other oils due to its high polyunsaturated fat content. Old sesame oil smells off and tastes bitter, ruining your carefully prepared dishes. Store it in a cool, dark place and replace bottles that smell stale or fishy. Fresh sesame oil should smell intensely nutty and appetizing.
Frequently Asked Questions
Can I make these recipes ahead of time?
Yes, many of these sides actually improve when made ahead. Cucumber salad, seaweed salad, and cucumber kimchi develop better flavor after marinating for several hours or overnight. Fried rice components can be prepped in advance and quickly assembled at dinner time. Spring roll filling can be prepared ahead, but roll them fresh for best texture. Miso soup is the exception and tastes best freshly made.
Are these recipes suitable for vegetarians?
Most recipes are vegetarian or easily adaptable. For strict vegetarians, substitute fish sauce with soy sauce in the kimchi recipe. Use vegetable broth instead of dashi in miso soup. Oyster sauce can be replaced with mushroom-based vegetarian oyster sauce available at Asian markets. All other recipes are naturally vegetarian as written.
Where can I find specialty ingredients?
Most ingredients are available at regular grocery stores now. Items like rice paper, miso paste, and sesame oil appear in the international aisle. For harder-to-find items like Korean red pepper flakes or wakame seaweed, visit Asian grocery stores or order online. Substitutions work in most cases, so don’t let one missing ingredient stop you from cooking.
Can I adjust the spice level in these recipes?
Absolutely! All spice levels are completely adjustable. Leave out chili oil, red pepper flakes, or Korean red pepper flakes for kid-friendly versions. Conversely, add more for adults who love heat. Start with less and taste as you go. You can always add more spice, but you can’t take it away.
What’s the difference between rice vinegar and regular vinegar?
Rice vinegar is milder and slightly sweet compared to white or apple cider vinegar. It’s specifically made from fermented rice and has a delicate flavor perfect for Asian dishes. In a pinch, dilute white vinegar with a little water and add a pinch of sugar to approximate rice vinegar. However, for authentic taste, rice vinegar is worth buying.
How do I know when edamame is cooked?
Properly cooked edamame pods are bright green and tender. The beans inside should pop out easily when you squeeze the pod. They should taste slightly sweet and nutty, not starchy or raw. Overcooking makes them mushy and dulls their color. Four to five minutes in boiling water is typically perfect.
Can kids help make these recipes?
Many of these recipes are perfect for cooking with kids. Children love squeezing edamame beans out of pods, rolling spring rolls, and folding dumplings. They can mix salad dressings, toast sesame seeds under supervision, and help measure ingredients. Cooking together builds confidence and creates wonderful family memories while teaching valuable life skills.
Why do my dumplings stick to the pan?
Sticking usually happens when the pan isn’t hot enough or lacks sufficient oil. Preheat your nonstick pan thoroughly and use enough oil to coat the bottom. Don’t move the dumplings during the initial frying phase. They’ll release naturally once a golden crust forms. Using a good nonstick pan specifically helps prevent sticking issues.
Conclusion
These 10 Asian side dishes bring exciting flavors and satisfying textures to your family table without complicated techniques or expensive ingredients. From the protein-packed edamame to the refreshing cucumber salad, each recipe celebrates the best of Asian cuisine in ways that even picky eaters enjoy.
The beauty of these sides lies in their versatility and speed. Most come together in under 20 minutes using ingredients from your regular grocery store. Mix and match them to create complete meals or serve alongside your favorite main dishes.
Start with one or two recipes that appeal to you most. Master those, then gradually expand your repertoire. Before long, you’ll have a collection of go-to sides that make every dinner feel special. Your family will thank you for bringing these restaurant-quality flavors home!
Happy cooking, and may your kitchen always be filled with the wonderful aromas of garlic, ginger, and sesame!