
Tuna Melt Wrap Easy Meal Prep
Are you tired of boring lunches that leave you hungry an hour later? Say hello to the perfect solution: the tuna melt wrap! This delicious and easy meal combines the classic comfort of a tuna melt with the convenience of a portable wrap. Whether you’re rushing to work or packing lunch for the kids, this tuna melt wrap recipe will become your go-to meal prep hero.
Table of Contents
Why Choose Tuna Melt Wrap for Meal Prep
The tuna melt wrap isn’t just another lunch option – it’s a game-changer for busy people who want tasty, healthy meals without the fuss. Let’s dive into why this recipe deserves a spot in your meal prep routine.
Tuna serves as an excellent protein source, packing about 25 grams of protein per can. This lean fish provides essential omega-3 fatty acids that support heart health and brain function. Unlike other proteins that require cooking, canned tuna is ready to use straight from the can, making it perfect for quick meal prep.
The wrap format offers unbeatable convenience. Unlike traditional sandwiches that can fall apart or get soggy, wraps hold their shape beautifully. You can eat them with one hand while driving, walking, or working at your desk. Plus, they’re less messy than open-faced tuna melts.
From a budget perspective, this tuna melt wrap recipe is incredibly cost-effective. A single can of tuna costs around $1-2, and one recipe makes four generous servings. Compare that to a $10-12 restaurant lunch, and you’re saving serious money while eating better food.
Nutritionally, this meal hits all the right notes. You get high-quality protein from tuna, complex carbs from the tortilla, healthy fats from mayo or Greek yogurt, and vitamins from fresh vegetables. It’s a complete meal that keeps you satisfied for hours.
Essential Ingredients for Your Tuna Melt Wrap
Getting the right ingredients makes all the difference in creating the perfect tuna melt wrap. Here’s everything you need to make four delicious servings:
| Ingredient | Quantity | Purpose | Substitutes |
|---|---|---|---|
| Canned tuna | 2 cans (5 oz each) | Protein base | Salmon, chicken |
| Large tortillas | 4 wraps | Wrap base | Pita, lavash |
| Cheddar cheese | 1 cup shredded | Melted topping | Swiss, provolone |
| Mayonnaise | 1/4 cup | Binding agent | Greek yogurt |
| Celery | 2 stalks diced | Crunch texture | Bell peppers |
| Red onion | 1/4 cup diced | Flavor enhancer | Green onion |
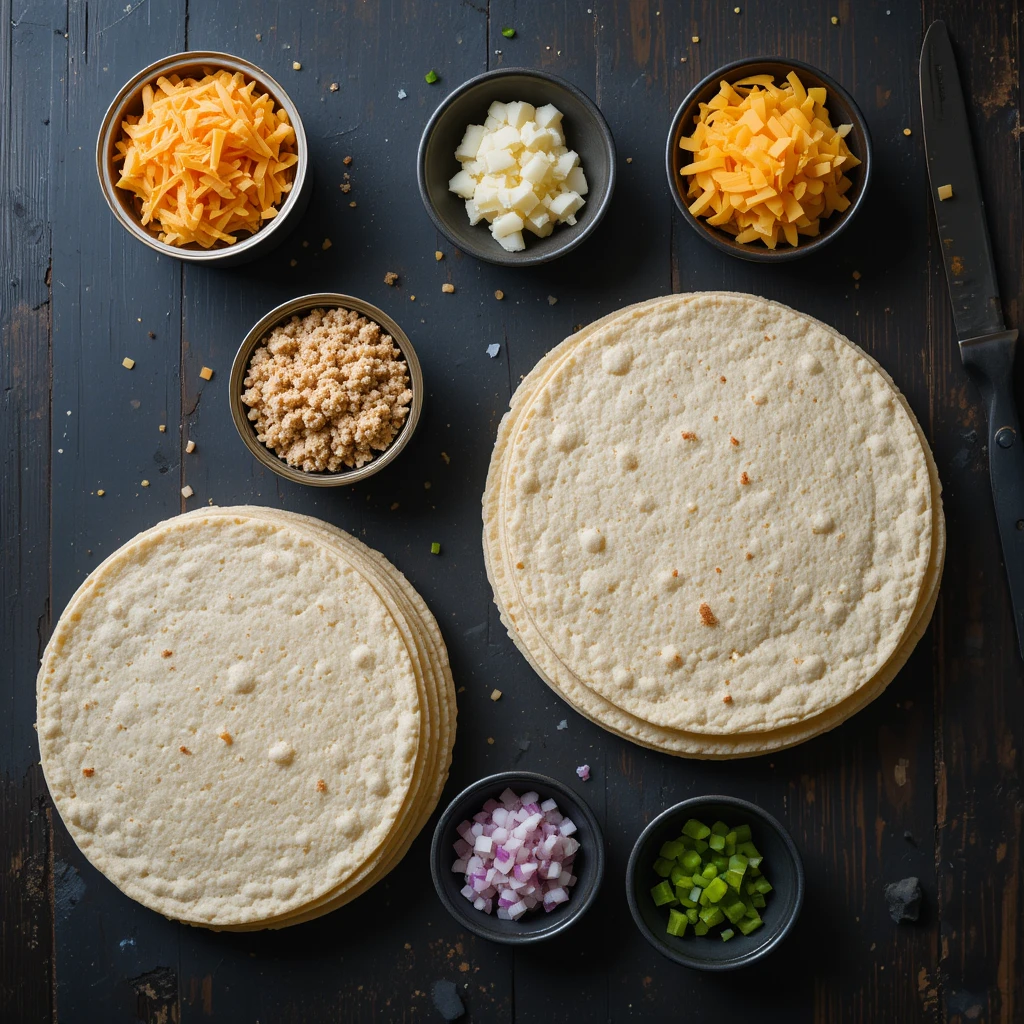
Choose high-quality canned tuna packed in water for the best texture and flavor. Look for large flour tortillas that won’t tear when you roll them. Sharp cheddar cheese melts beautifully and adds that classic tuna melt taste, but feel free to experiment with your favorite cheese varieties.
Step-by-Step Tuna Melt Wrap Recipe
Creating the perfect tuna melt wrap is easier than you think. Follow these simple steps for amazing results every time.
Preparation Phase
Start by draining your tuna completely. Press it gently with paper towels to remove excess moisture – this prevents soggy wraps later. Flake the tuna with a fork, breaking it into bite-sized pieces that spread easily.
Next, chop your vegetables uniformly. Dice the celery into small pieces for the perfect crunch without overwhelming the wrap. Cut the red onion finely – you want flavor, not big chunks that might fall out.
Mix your tuna salad base by combining the flaked tuna, diced celery, red onion, and mayonnaise in a large bowl. Season with salt and pepper to taste. The mixture should hold together but not be too wet.
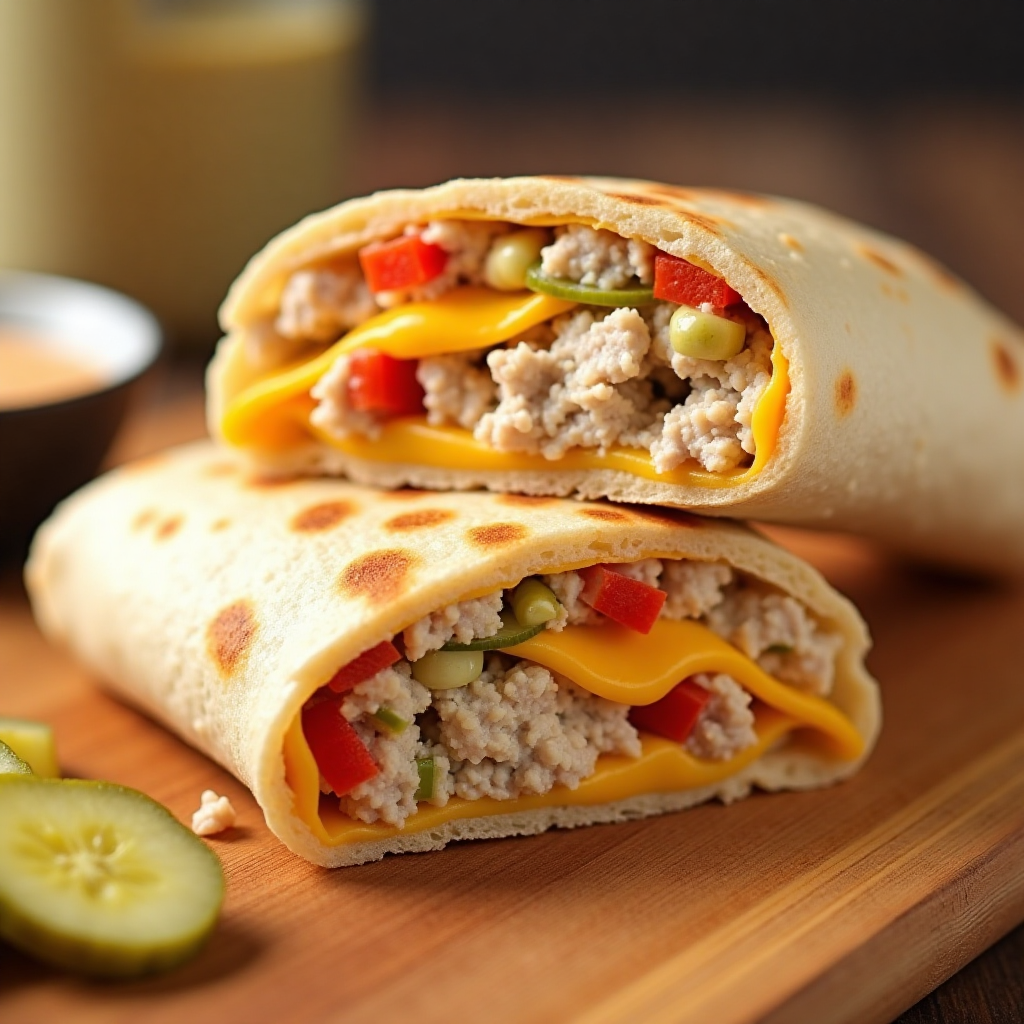
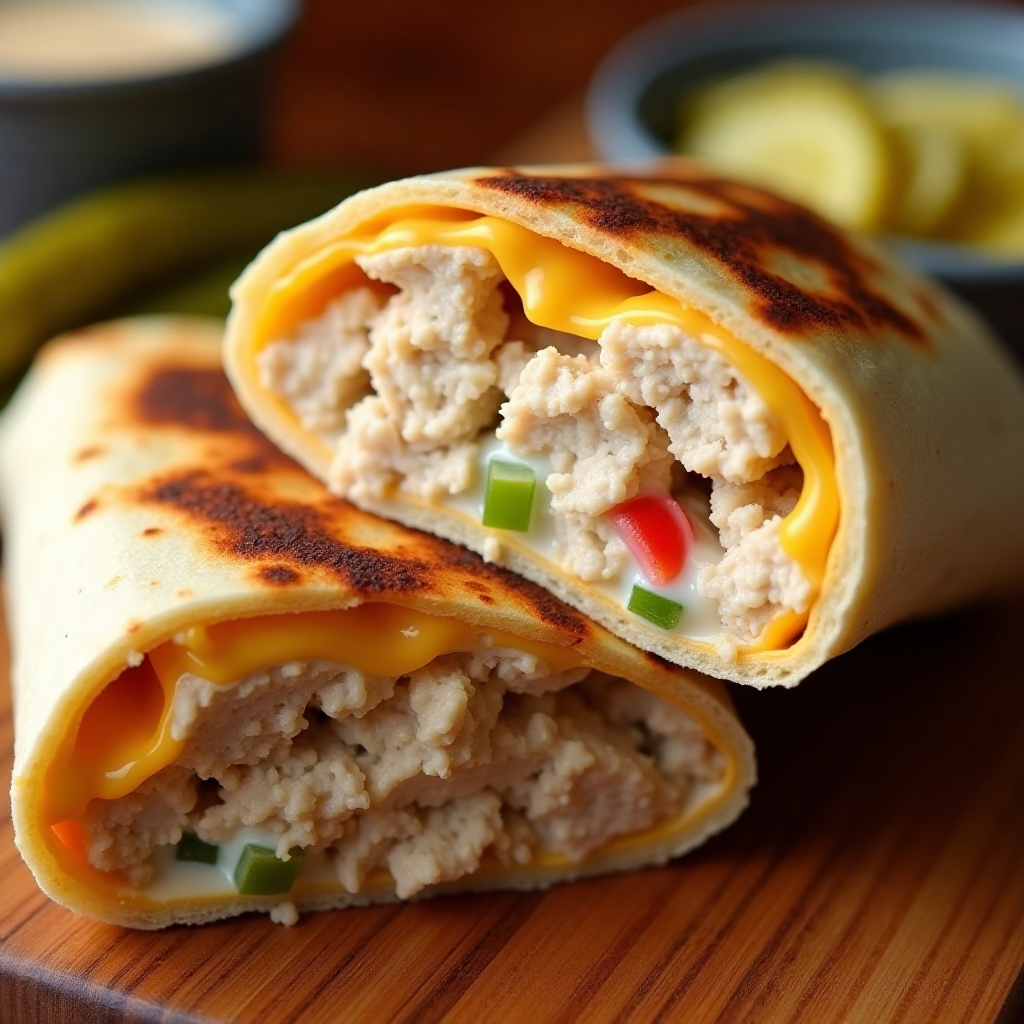
Assembly Process
Lay your tortillas flat on a clean surface. Warm them slightly in the microwave for 10-15 seconds to make them more pliable. This simple step prevents cracking when you roll the wraps.
Distribute your tuna mixture evenly across the lower third of each tortilla, leaving about an inch border on the sides. Don’t overfill – less is more when it comes to wraps.
Sprinkle the shredded cheese strategically over the tuna mixture. The cheese will melt and help bind everything together when heated.
Cooking Methods
For the stovetop grilling technique, heat a large skillet over medium heat. Place the wrapped tuna melt wrap seam-side down and cook for 2-3 minutes until golden brown. Flip carefully and cook another 2-3 minutes until the cheese melts completely.
The oven baking option works great for multiple wraps. Preheat your oven to 375°F, place wraps on a baking sheet, and bake for 8-10 minutes, flipping halfway through.
An air fryer creates perfectly crispy wraps in just 5-6 minutes at 350°F. This method gives you the crunchiest exterior while keeping the inside perfectly melted.
Meal Prep Strategies for Tuna Melt Wrap
Smart meal prep makes enjoying your tuna melt wrap throughout the week effortless. Here’s how to set yourself up for success.
Make-Ahead Components
Prepare your tuna mixture up to three days in advance. Store it in an airtight container in the refrigerator. The flavors actually improve after a day, making your wraps even more delicious.
Pre-chop all your vegetables and store them separately. This keeps them fresh and crisp. Grate your cheese ahead of time too – it saves precious minutes during busy mornings.
Consider portioning your ingredients into individual containers. This makes assembly super quick and ensures each wrap has the perfect amount of filling.
Storage Solutions
The best containers for tuna melt wraps are airtight containers that prevent air exposure. Glass containers work wonderfully and don’t absorb odors like plastic sometimes does.
For refrigerator storage, wrap each individual tuna melt wrap in aluminum foil or plastic wrap. This prevents them from drying out and keeps flavors fresh for up to four days.
If you want to freeze your wraps, wrap them individually in plastic wrap, then place in freezer bags. They’ll keep for up to one month. Thaw overnight in the refrigerator before reheating.
Nutritional Benefits of Tuna Melt Wrap
Understanding the nutritional value of your tuna melt wrap helps you make informed choices about your meals. Here’s what you’re getting in each serving:
| Nutrient | Amount | % Daily Value |
|---|---|---|
| Calories | 385 | 19% |
| Protein | 28g | 56% |
| Carbohydrates | 32g | 12% |
| Fat | 18g | 23% |
| Fiber | 3g | 11% |
| Sodium | 720mg | 31% |
This nutritional profile makes the tuna melt wrap an excellent choice for active individuals, growing teens, or anyone looking to maintain steady energy levels throughout the day. The high protein content helps with muscle maintenance and keeps you feeling full longer.
Creative Variations of Tuna Melt Wrap
Flavor Combinations
Transform your basic tuna melt wrap into exciting variations that prevent meal boredom. The Mediterranean style adds diced tomatoes, olives, and feta cheese for a fresh twist. Include some fresh herbs like dill or parsley for extra flavor.
For a spicy jalapeño version, add diced jalapeños, pepper jack cheese, and a dash of hot sauce. This variation packs heat while maintaining the classic tuna melt comfort.
The avocado and sprouts option brings freshness and extra nutrition. Mashed avocado replaces some of the mayo, while sprouts add crunch and vitamins.
Dietary Modifications
Create a low-carb lettuce wrap alternative by using large butter lettuce leaves instead of tortillas. This cuts carbs significantly while adding extra vitamins and minerals.
For gluten-free options, choose certified gluten-free tortillas or corn tortillas. Many stores now carry excellent gluten-free wraps that taste just as good as traditional ones.
Dairy-free cheese substitutes work perfectly in this recipe. Nutritional yeast also adds a cheesy flavor while providing B vitamins.
Meal Prep Timeline and Tips
Planning your tuna melt wrap meal prep saves time and reduces stress during busy weekdays. Here’s your complete timeline:
| Day | Task | Time Required |
|---|---|---|
| Sunday | Prep tuna mixture | 15 minutes |
| Sunday | Chop vegetables | 10 minutes |
| Sunday | Assemble 4 wraps | 20 minutes |
| Monday-Thursday | Heat and enjoy | 2 minutes each |
This 45-minute Sunday investment gives you four days of delicious, ready-to-eat lunches. You’ll save time, money, and avoid the daily “what’s for lunch?” decision fatigue.
Storage and Reheating Instructions
Proper Storage Techniques
Wrap individual tuna melt wraps tightly in aluminum foil or plastic wrap. This prevents air exposure that can make tortillas tough and dry. Label each wrap with the date to track freshness.
Choose containers that fit your wraps snugly without squishing them. Glass containers with tight-fitting lids work best for maintaining freshness and preventing odor transfer.
Properly stored tuna melt wraps stay fresh for 3-4 days in the refrigerator. Don’t store them longer than this, as the quality starts to decline and food safety becomes a concern.
Reheating Methods
For microwave reheating, remove any foil wrapping and place the wrap on a microwave-safe plate. Heat for 45-60 seconds, checking halfway through. The cheese should be melted and the wrap heated through.
The skillet warming technique creates a crispier exterior. Heat a dry skillet over medium heat and warm the wrap for 1-2 minutes on each side until heated through and lightly golden.
Using a toaster oven gives you the best of both worlds – quick heating with a crispy exterior. Toast for 3-4 minutes at 350°F, watching carefully to prevent burning.
Troubleshooting Common Tuna Melt Wrap Issues
Prevent soggy wraps by draining your tuna thoroughly and not over-saucing the mixture. If your wraps seem wet, add a paper towel inside the storage container to absorb excess moisture.
Avoid overfilling your wraps, which makes them difficult to roll and prone to tearing. Use about 1/3 cup of filling per wrap for the perfect balance.
Maintain cheese melt quality by not overheating. High heat can make cheese rubbery and unappetizing. Medium heat ensures even melting without burning.
Budget-Friendly Meal Prep Benefits
Compare the cost of homemade tuna melt wraps to restaurant options, and you’ll be amazed at the savings. Each homemade wrap costs approximately $2-3, while restaurant versions often cost $8-12.
Buy tuna in bulk when it’s on sale and store extra cans in your pantry. Frozen vegetables work just as well as fresh in many cases and cost significantly less.
Ingredient substitutions can save money without sacrificing flavor. Greek yogurt instead of mayo, frozen corn instead of fresh, or whatever cheese is on sale all work beautifully.
Conclusion and Next Steps
The tuna melt wrap proves that healthy, delicious meals don’t have to be complicated or expensive. With just a few simple ingredients and minimal prep time, you can create satisfying lunches that beat any fast-food option. The combination of protein-rich tuna, melted cheese, and fresh vegetables wrapped in a convenient tortilla makes this recipe a winner for busy lifestyles.
Ready to transform your lunch routine? Start by trying this basic tuna melt wrap recipe this weekend. Once you master the technique, experiment with different variations to keep things interesting. Your taste buds and your wallet will thank you!
Don’t stop here – explore other meal prep recipes like chicken salad wraps, egg salad sandwiches, or veggie-packed quinoa bowls. The key to successful meal prep is finding recipes you actually enjoy eating. Give this tuna melt wrap a try, and discover how easy it is to eat well every day of the week!