
The Ultimate Thanksgiving Charcuterie Board Dessert
Picture this: It’s 4 PM on Thanksgiving, and your guests are lingering around the kitchen island, bellies full from dinner but eyes lighting up at the sight of something sweet. Last year, I made the mistake of serving traditional pumpkin pie right after our massive meal, and honestly? Most of it sat untouched. People were just too full for plated desserts.
This year changed everything. I created a thanksgiving charcuterie board dessert that guests could graze on throughout the evening, and let me tell you – it disappeared in under an hour.
The genius? Bite-sized portions, stunning presentation, and zero pressure to commit to a full slice of anything. My sister-in-law actually took a photo before anyone touched it, and it got over 300 likes on her Instagram. (I’m not competitive, but that felt amazing.)
Here’s the thing about dessert boards: they look impressive, but they’re surprisingly forgiving to put together. After making this four times now – twice for Friendsgiving, once for a test run, and once for the actual holiday – I’ve figured out exactly what works and what doesn’t. And I’m sharing all my secrets with you today.
What Makes a Thanksgiving Dessert Board Different
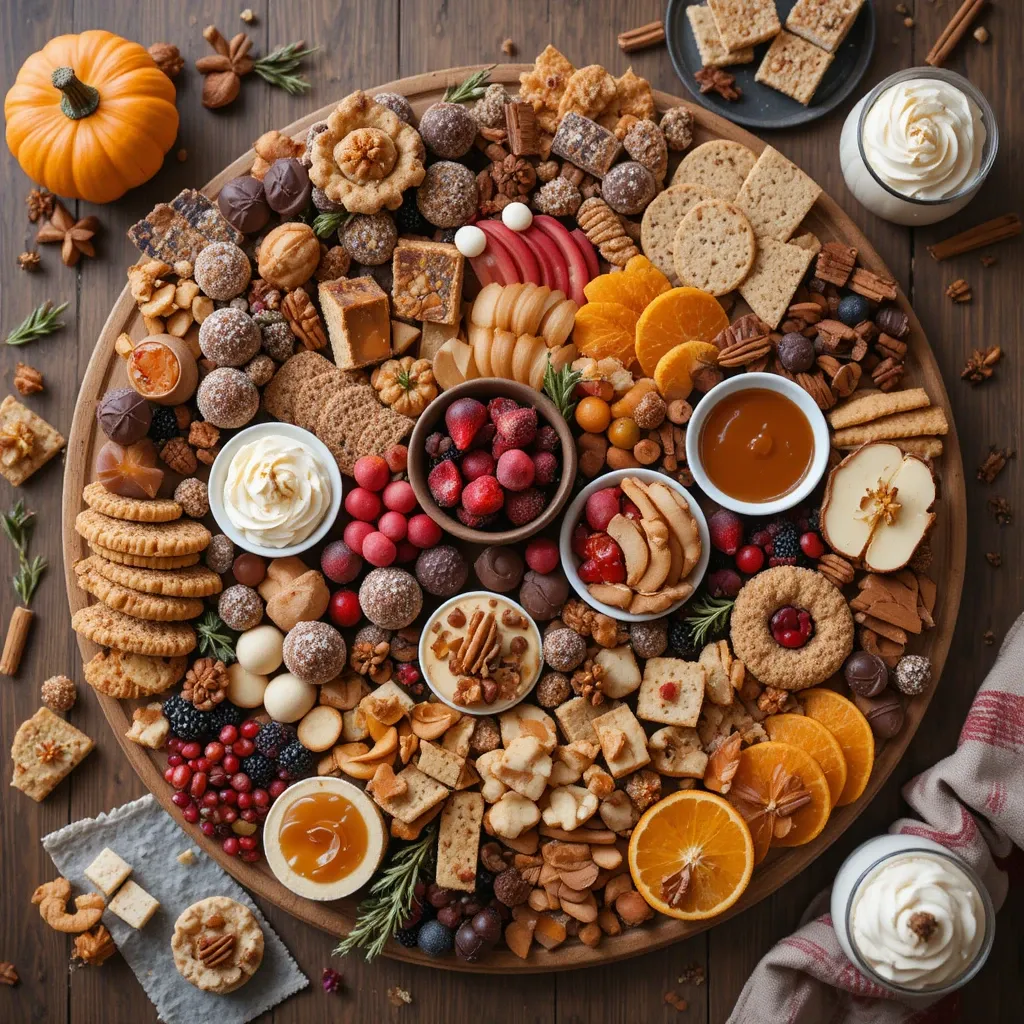
A thanksgiving charcuterie board dessert isn’t just a regular dessert platter with a fall twist. It’s a carefully curated collection that balances flavors, textures, and colors while celebrating the season’s best ingredients. Think warm spices, rich chocolate, tart cranberries, and everything pumpkin.
The first time I made one, I basically threw every fall dessert I could find onto a board. Big mistake. It looked chaotic and honestly a bit overwhelming. What I’ve learned is that successful dessert boards follow a loose formula: you need something creamy, something crunchy, something fruity, and something indulgent. Everything else is just bonus.
Most people think these boards take hours of baking, but that’s where they’re wrong. I use a mix of homemade items, store-bought favorites, and strategic shortcuts. My kitchen smelled incredible for days after making the homemade components, but I only spent about 90 minutes on actual prep. The rest? Smart shopping and clever arrangement.
Why This Dessert Board Wins Every Time
It Takes the Pressure Off Dessert
Nobody has to choose between pumpkin pie or apple crisp anymore. They can have both! In tiny, guilt-free portions. I’ve noticed that people try way more variety when desserts are presented this way. My brother, who claims he “doesn’t like pumpkin,” ate three pumpkin cheesecake bites without even realizing what they were.
You Can Prep Most of It Ahead
This is huge for Thanksgiving when oven space is basically currency. I make about 80% of my board components the day before, wrap them in the fridge, and just arrange everything an hour before guests arrive. The actual assembly took me 23 minutes the first time, but now I can do it in about 15.
It’s Gorgeous Without Being Fussy
Even if you think you’re not “artistic,” these boards are hard to mess up. The variety of colors and textures does the work for you. Pro tip: I always start with the largest items first, then fill gaps with smaller pieces. Works every single time.
Budget-Friendly and Flexible
You don’t need fancy ingredients. Most of what I use comes from regular grocery stores, and you can easily adjust based on what’s on sale. When pecans were expensive last year, I swapped in walnuts. Nobody noticed, and I saved $8.
Makes Hosting Feel Effortless
Here’s my favorite part: while everyone’s oohing and aahing over the board, I’m just sitting back enjoying the compliments. There’s no last-minute plating, no worrying about serving temperatures, and no dessert-cutting ceremony. People serve themselves, and I actually get to relax.
Recipe Card
| Recipe Details | |
|---|---|
| Prep Time | 90 minutes |
| Assembly Time | 15-20 minutes |
| Total Time | 110 minutes |
| Servings | 12-16 people |
| Difficulty | Easy |
| Calories | ~300-400 per serving (varies) |
| Make-Ahead | Yes – 80% can be prepped 1-2 days ahead |
| Dietary Notes | Can be adapted for gluten-free, dairy-free |
| Cost | $40-60 for full board |
Ingredients for Thanksgiving Charcuterie Board Dessert
Here’s what makes this board absolutely sing. I always use a mix of homemade and store-bought because, honestly, life’s too short to bake everything from scratch on Thanksgiving. The key is choosing high-quality store-bought items that look and taste homemade.
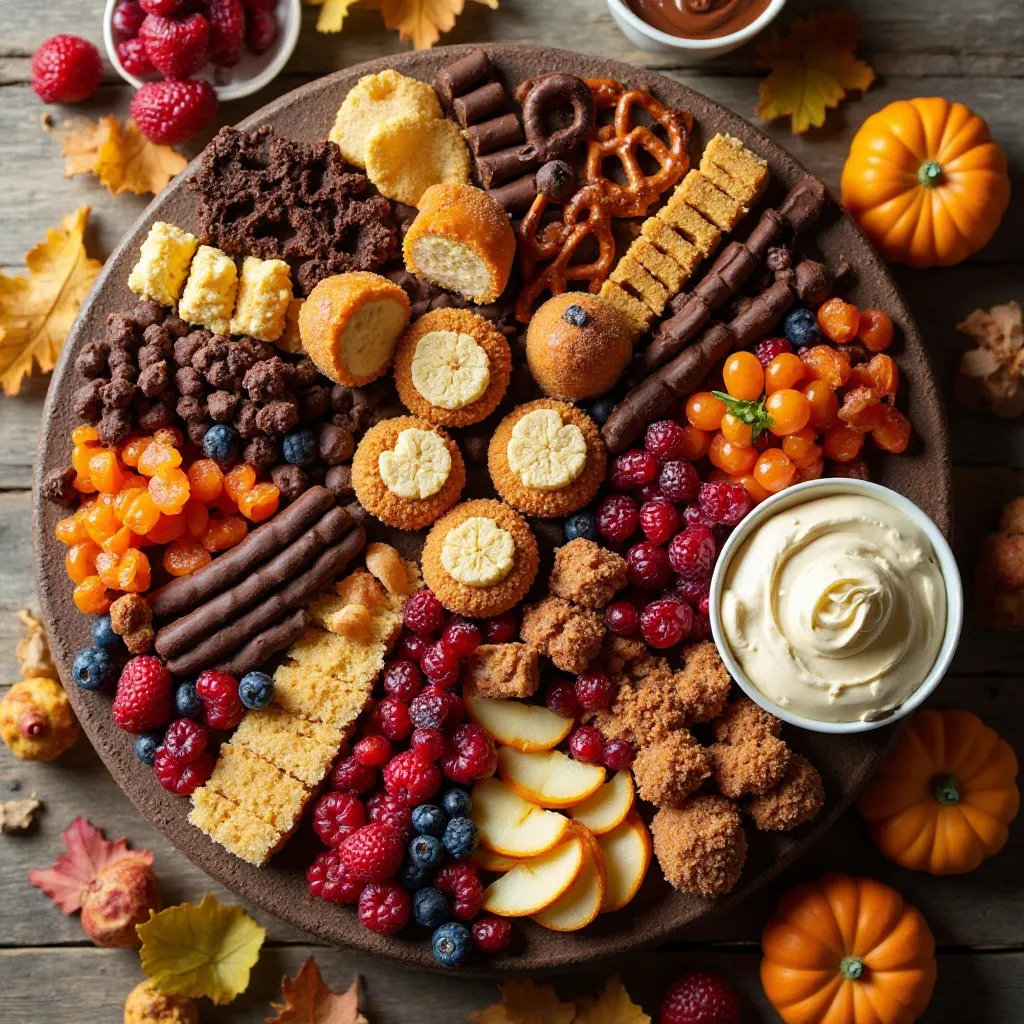
The Sweet Foundations
- Mini pumpkin cheesecake bites (12-16 pieces) – I make these ahead; recipe takes 45 minutes
- Chocolate-covered pretzels (about 20 pieces) – Half milk chocolate, half dark
- Caramel apple slices (2 large apples) – Cut fresh, drizzled with store-bought caramel
- Pecan pie bars (cut into 1-inch squares) – My secret weapon; everyone asks for the recipe
- Cranberry white chocolate fudge (16-20 small pieces) – Tart meets sweet perfectly
- Cinnamon sugar donut holes (12-15 pieces) – Buy from a good bakery that morning
The Crunchy Elements
- Candied pecans (1 cup) – Homemade in 15 minutes, or buy pre-made
- Pirouette cookies (8-10 cookies) – The wafer cookies add height and elegance
- Gingersnap cookies (12-15 small cookies) – Store-bought is totally fine
- Stroopwafels (6-8 cookies) – Not traditional but trust me on this
- Honeycomb candy (broken into chunks) – Adds wow-factor texture
The Fruity & Fresh
- Fresh berries – Raspberries, blackberries, and a few strawberries for color
- Dried cranberries (½ cup) – Fill in gaps beautifully
- Dried apricots (8-10 pieces) – Sliced in half
- Pomegranate seeds (½ cup) – Jewel-toned and gorgeous
- Orange slices (for garnish and eating) – Dehydrated ones look amazing
The Spreads & Dippers
- Cream cheese frosting (in a small bowl) – For dipping cookies and fruit
- Salted caramel sauce (warmed) – Drizzle over everything
- Chocolate hazelnut spread (small bowl) – Because Nutella makes everything better
- Maple cream (optional) – Very New England, very delicious
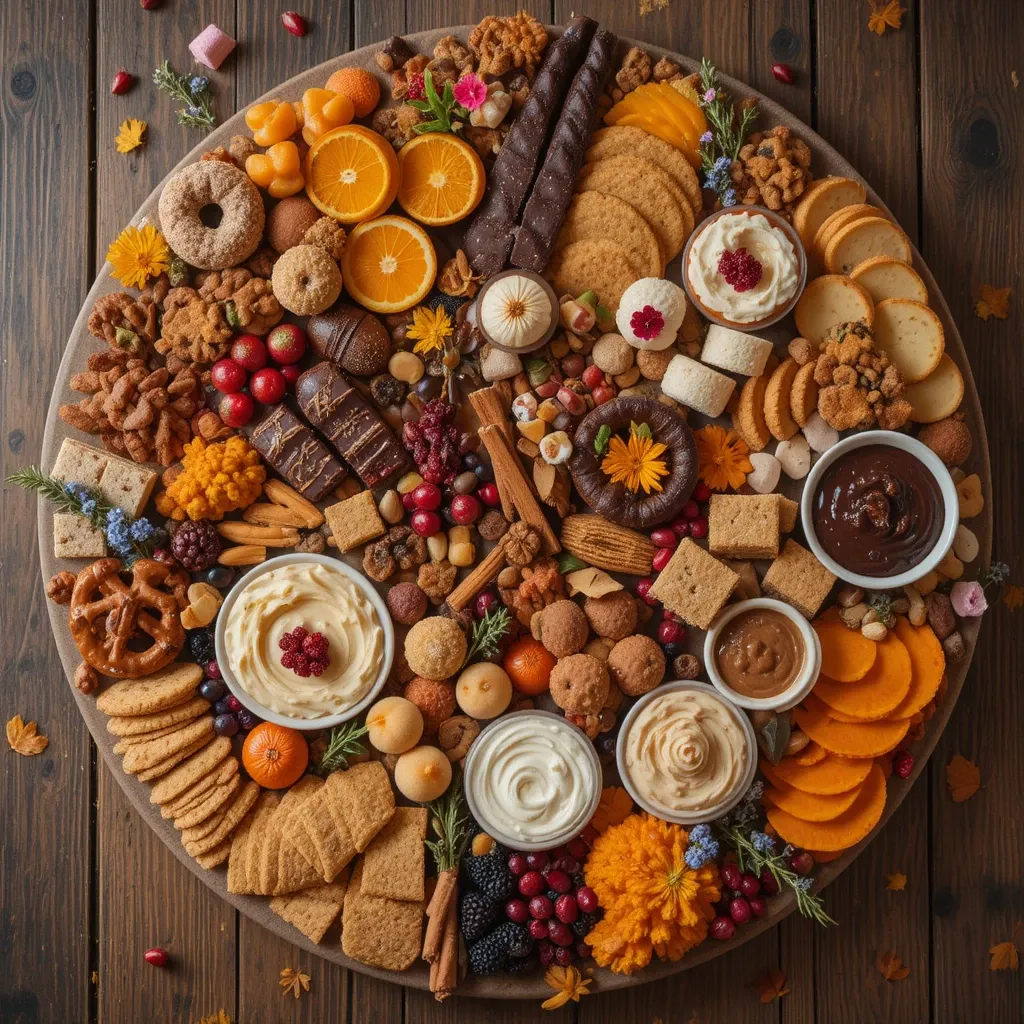
The Finishing Touches
- Dark chocolate squares (good quality)
- Pumpkin spice marshmallows (8-10 large ones)
- Edible flowers (optional but pretty) – Pansies or mums
- Fresh rosemary sprigs (for garnish) – Smells incredible
- Cinnamon sticks (decorative)
Don’t skip the variety of textures here. The first time I made this, I focused too much on chocolate items, and it felt one-note. In my opinion, the mix of creamy, crunchy, chewy, and smooth is what makes people keep coming back for more.
Let’s Build This Masterpiece
Choose Your Board
First things first: you need a large surface. I use an 18×24 inch wooden cutting board, but I’ve also used a marble slab, a large slate tile, and even a clean baking sheet covered with parchment paper. The key is having enough real estate to create little “zones” of different treats.
The board should be food-safe and flat. I learned this the hard way when I used a slightly warped board and my caramel sauce bowl kept tipping over. Not cute.
Step 1: Set Your Bowls and Anchor Pieces
Start by placing your dipping bowls (caramel, frosting, chocolate spread) in strategic spots around the board. I do one in the center-left, one in the upper right, and one near the bottom. This creates natural focal points and helps guide your arrangement.
Next, add your largest items – for me, that’s the plate of pumpkin cheesecake bites and a small stack of pecan pie bars. These “anchor” the design and give you reference points for filling in the rest. Takes about 3 minutes, and suddenly your board looks intentional instead of random.
Step 2: Layer in Medium-Sized Items
Now add your cookies, pretzels, and fudge pieces. I like creating little rows or clusters rather than scattering things randomly. For example, I’ll make a diagonal line of chocolate pretzels, then a cluster of gingersnaps nearby.
Pro tip: Turn cookies and bars at different angles. It looks way more dynamic than everything facing the same direction. This step takes me about 5 minutes, and it’s where the board really starts coming together.
Step 3: Fill Gaps with Small Items
Here’s where the magic happens. Use your candied pecans, berries, dried fruits, and pomegranate seeds to fill any empty spaces. I literally just pour small amounts and nudge them around until there are no awkward gaps.
The dried cranberries are my secret weapon here – they’re small enough to tuck into tiny spaces and add beautiful pops of red. This is also when I add my donut holes, creating little groupings of 3-4 in different spots.
Step 4: Add Height and Drama
Place your pirouette cookies standing up in the dipping bowls or leaning against taller items. Tuck in fresh rosemary sprigs – they add gorgeous green color and smell amazing. If you’re using cinnamon sticks, nestle them between items.
I once forgot this step and the board looked flat and boring in photos. Height makes SUCH a difference. Even just propping a few cookies upright completely changes the visual appeal.
Step 5: Final Touches and Drizzles
Warm your caramel sauce slightly and drizzle it over the apple slices and a few other spots. Add your edible flowers if using (I place 3-4 around the board). Scatter those final pomegranate seeds over everything like edible confetti.
Stand back and look for any holes or color imbalances. Sometimes I’ll add a few more berries or shift something slightly. This whole assembly process, from empty board to Instagram-worthy, takes me about 15 minutes now.
My Favorite Ways to Serve This
The beauty of a thanksgiving charcuterie board dessert is that it works at any point in your celebration. I typically set mine out about an hour after dinner, giving people time to digest before diving into dessert. But honestly? It’s flexible enough to work however you need it to.
I place the board on the kitchen island with small dessert plates, cocktail napkins, and toothpicks nearby. People naturally gather around it, and it becomes this lovely social dessert experience. Way better than everyone eating pie in isolated silence, you know?
For drinks, I serve it alongside coffee (regular and decaf), hot apple cider, and a dessert wine. The board pairs beautifully with a tawny port or a late-harvest Riesling. My aunt brings bourbon-spiked hot chocolate, and that combo is absolutely divine.
If you’re serving this for a crowd bigger than 15, I’d recommend making two smaller boards instead of one giant one. It prevents bottlenecking and gives people more access points. I learned this at Friendsgiving when 20 people tried to crowd around one board – not my finest hosting moment.
Secrets to Success
Start with room temperature ingredients
Everything should sit out for about 15 minutes before assembly (except fresh fruit). Cold items don’t arrange as nicely and can create condensation that makes your board look wet and messy. I once rushed this step, and my chocolate items had these weird water droplets. Learn from my mistakes!
Make your homemade items worth it
I always make the pumpkin cheesecake bites and pecan pie bars myself because they’re the stars of the show and people always ask about them. But the cookies? Store-bought all the way. Save your energy for what matters. The secret that took me years to figure out is that mixing homemade and store-bought actually makes the homemade stuff stand out more.
Color matters more than you think
I aim for a mix of browns, whites, reds, oranges, and greens. If everything’s the same color, it reads as boring even if it tastes incredible. This is where those pomegranate seeds and fresh berries earn their keep – they’re edible color therapy.
Don’t overcrowd
You want the board to look abundant but not sloppy. Leave a little breathing room between items. If you can’t fit everything, save some items for refilling later. I’ve noticed that when I overcrowd the board, it actually looks less impressive somehow.
The caramel drizzle is non-negotiable
It adds this glossy, professional finish that makes everything look like it came from a fancy bakery. I warm mine for exactly 15 seconds in the microwave – any longer and it gets too runny. Drizzle from about 6 inches above the board for the best effect.
Consider your guests
If you have kids coming, cluster some kid-friendly items together in one area (donut holes, chocolate pretzels, marshmallows). Adults appreciate having a designated “safe zone” to steer children toward. My nephew made a beeline for the donut holes and left everything else beautifully intact.
Make-Ahead and Storage Guide
What to Prep 2 Days Ahead
The pumpkin cheesecake bites store beautifully in an airtight container in the fridge. I actually think they taste better after sitting overnight – the flavors meld together. Same with the pecan pie bars. Make them, cut them, store them in layers separated by parchment paper.
Candied pecans can be made up to a week ahead and stored in a mason jar at room temperature. They stay crunchy and delicious.
What to Prep 1 Day Ahead
The fudge is best made the day before so it has time to fully set. I cut it the night before and keep it refrigerated until about 30 minutes before assembly.
Chocolate-dipped pretzels should be made 1 day ahead. They need time to set completely, and making them fresh the day of means you’re dealing with melted chocolate when you should be arranging the board.
Day-of-Tasks
Cut your apples no more than 1 hour before serving and immediately toss them with a little lemon juice to prevent browning. Drizzle with caramel right before serving.
Wash and dry all fresh berries. Make sure they’re completely dry – water makes everything soggy.
Assemble the board 30-60 minutes before serving. It holds up well at room temperature for about 3 hours.
Leftover Tips (If You’re Lucky Enough to Have Any)
In my experience, there are rarely leftovers, but if there are, separate items by type. Store cookies and crunchy items in airtight containers at room temperature. Refrigerate anything with cream cheese or fresh fruit.
The homemade cheesecake bites will keep for 5 days in the fridge, though they never last that long at my house. The pecan pie bars stay fresh for 3-4 days covered at room temperature. Don’t freeze assembled items – the textures get weird.
Variations to Try
Make It Chocolate-Focused
Replace half the items with different chocolate varieties: white chocolate bark, chocolate-covered cherries, chocolate truffles, brownies, and chocolate-dipped cookies. Still include some fruit and nuts for contrast, but go heavy on the cocoa.
Kid-Friendly Version
Load up on cookies, brownies, rice crispy treats, chocolate chips, mini marshmallows, and lots of dipping sauces. Skip anything too fancy or boozy. My friend does this for her kids’ Thanksgiving table, and they think it’s the coolest thing ever.
Healthier Spin
Focus on fresh and dried fruits, dark chocolate, homemade energy balls, yogurt-covered items, and honey-drizzled nuts. You can absolutely make a lighter version that still looks stunning and tastes indulgent enough for the holiday.
Common Questions About Dessert Boards
How far ahead can I assemble it?
I wouldn’t go more than 2 hours before serving. Some items can get soft or lose their appeal. The sweet spot is 30-60 minutes before you want people to start eating. That said, I’ve assembled one up to 3 hours ahead when necessary, and it was totally fine – just keep it in a cool spot, not next to the stove.
What if I have dietary restrictions to accommodate?
This board is actually super adaptable! For gluten-free guests, swap in gluten-free cookies and make sure your bars are made with almond flour. For dairy-free, use coconut-based fudge and dairy-free chocolate. I always label items at big gatherings so people know what they can safely eat.
Do I really need that many different items?
You can scale down to maybe 10-12 components for a smaller gathering. The variety is nice, but you don’t need every single thing I listed. Focus on hitting different flavor profiles (sweet, salty, tart, rich) and textures (crunchy, creamy, chewy), and you’ll be golden.
What size board do I need for 12 people?
An 18×24 inch board works perfectly for 12-16 people. For 8-10 people, you could use a 16×20 inch board. Anything smaller than 14×18 inches will feel cramped unless you’re doing a mini version with fewer components.
Can I use a regular platter instead of a wooden board?
Absolutely! I’ve used white serving platters, slate tiles, even a large mirror (put parchment paper down first). The board is just one option. Whatever you have that’s flat and large enough will work beautifully.
Final Thoughts
Creating a thanksgiving charcuterie board dessert has honestly changed how I do holiday hosting. It takes so much pressure off the day-of prep, it’s gorgeous enough to impress everyone, and people genuinely love the casual, social vibe of gathering around it.
The best part? Every time I make one, I tweak something based on what I learned last time. This year, I’m adding some maple glazed walnuts because I found an amazing recipe, and I might swap out the pirouettes for chocolate-dipped biscotti just to change things up.
If you make this for your Thanksgiving, please come back and tell me how it went! I love hearing which items disappeared first and what you added or changed. And snap a photo before people dive in – trust me, you’ll want to remember how gorgeous it looked before it got devoured.
Happy Thanksgiving, and here’s to making hosting a little easier and a lot more delicious!