
Thanksgiving Turkey Recipes Brine – Juiciest Bird Ever
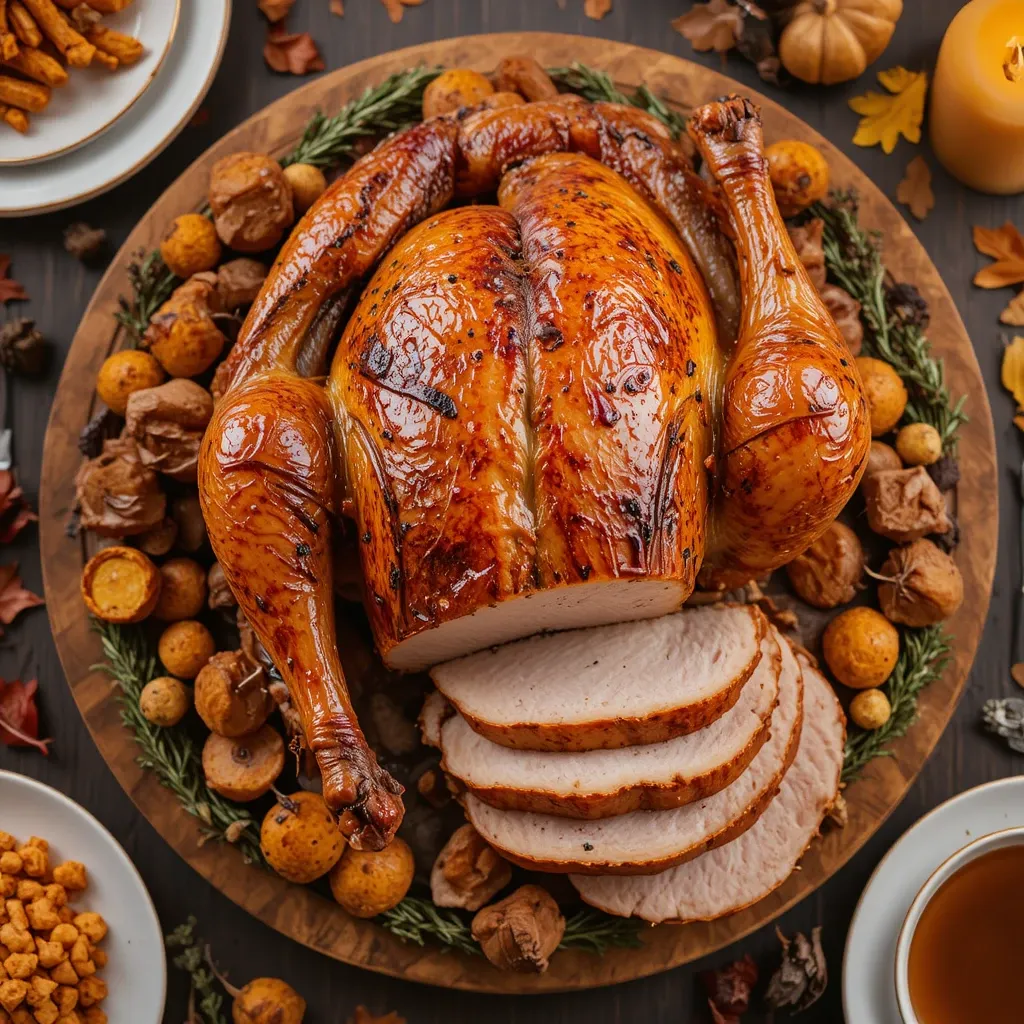
Picture this: a golden-brown turkey with impossibly crispy skin and meat so tender it practically falls off the bone. That’s the magic of a proper thanksgiving turkey recipes brine! This foolproof method transforms ordinary turkey into an extraordinary centerpiece that’ll have your guests asking for seconds.
Did you know that brining has been used since ancient times to preserve and enhance meat? Today, we use it to create the juiciest, most flavorful turkey you’ve ever tasted. This recipe is surprisingly simple, requires minimal active prep time, and works perfectly for both beginners and seasoned cooks.
Unlike our popular herb-roasted chicken, this brined turkey takes moisture and flavor to a whole new level. Get ready to become the holiday hero everyone’s been waiting for!
What is Thanksgiving Turkey Recipes Brine?
Ever wonder why some turkeys taste like cardboard while others are bursting with flavor? The secret’s in the brine, my friend! A thanksgiving turkey recipes brine is basically a magical saltwater solution infused with herbs, spices, and aromatics that transforms your bird from meh to magnificent.
Think of it as giving your turkey a luxurious spa treatment before its big debut. After all, they say the way to everyone’s heart is through their stomach, and nothing says “I love you” quite like a perfectly brined turkey. Ready to impress your family and become a Thanksgiving legend? Let’s dive in!
Why You’ll Love This Thanksgiving Turkey Recipes Brine
The Game-Changing Moisture Lock
This brine works like a flavor insurance policy for your turkey. The salt solution penetrates deep into the meat through osmosis, helping the turkey retain up to 40% more moisture during cooking. No more dry, disappointing turkey that requires gallons of gravy to swallow! The result is succulent, juicy meat from the breast to the thigh.
Budget-Friendly Holiday Magic
Why spend $100+ on a pre-brined or specialty turkey when you can create restaurant-quality results at home? This brine costs just a few dollars to make using pantry staples like salt, sugar, and everyday herbs. You’ll save money while delivering premium taste that rivals any expensive store-bought option.
Aromatic Flavor Infusion
The combination of bay leaves, peppercorns, fresh herbs, citrus, and warming spices creates layers of complex flavor that permeate every bite. Unlike our simple roasted vegetables, this brine adds depth that cooking alone can’t achieve. Each slice reveals hints of rosemary, thyme, and a subtle sweetness that perfectly complements the natural turkey flavor.
Ready to create the best turkey your family has ever tasted? Let’s get brining!
How to Make Thanksgiving Turkey Recipes Brine
Quick Overview
This thanksgiving turkey recipes brine is remarkably straightforward and delivers consistently perfect results. The brine itself takes just 20 minutes to prepare, though you’ll need to plan ahead for the brining time. Your turkey soaks in this flavor-packed solution for 12-24 hours, allowing the salt and aromatics to work their magic. The result? Impossibly moist meat with golden, crispy skin and flavor that goes beyond the surface.
Time Breakdown:
- Prep Time: 20 minutes
- Brining Time: 12-24 hours
- Cook Time: 3-4 hours (depending on turkey size)
- Total Time: 15-28 hours (mostly hands-off)
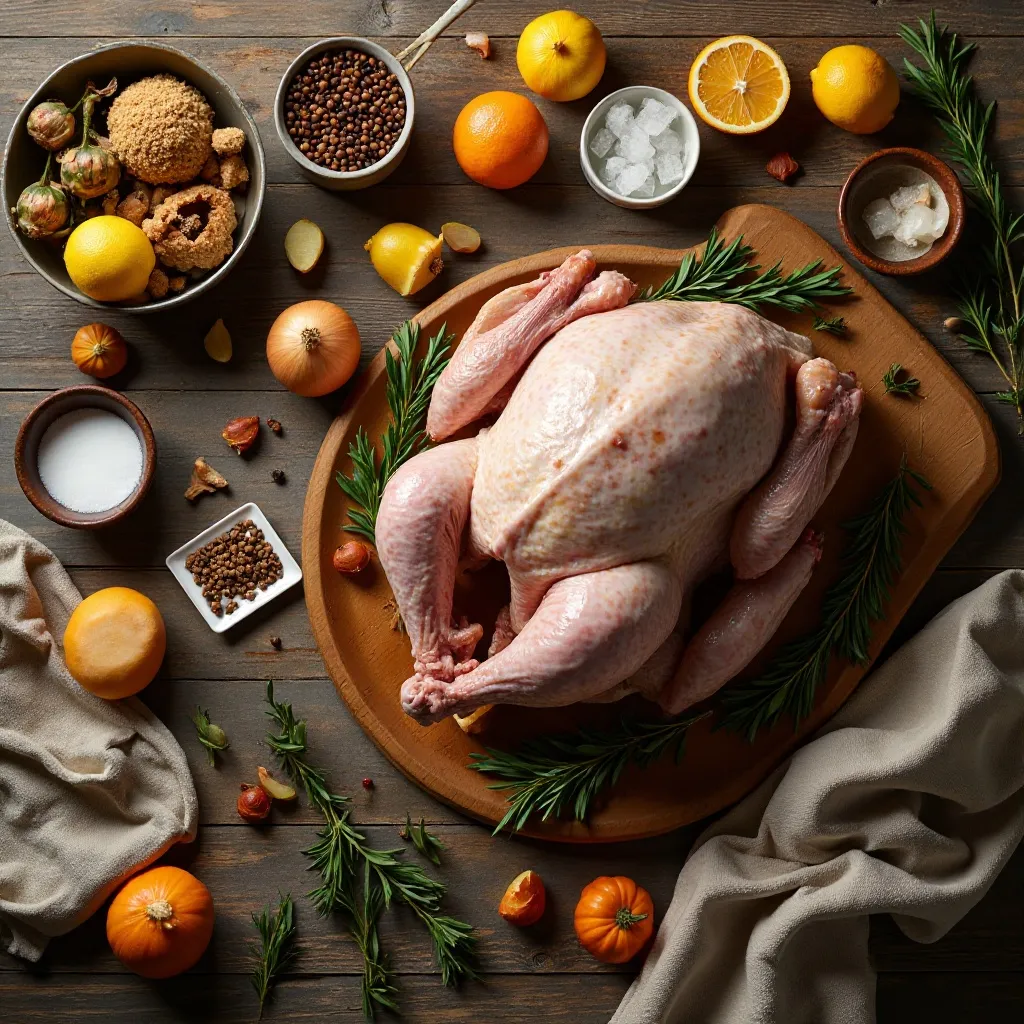
Key Ingredients for Thanksgiving Turkey Recipes Brine
For the Brine:
- 2 gallons cold water (divided)
- 2 cups kosher salt
- 1 cup brown sugar
- 2 tablespoons whole black peppercorns
- 1 tablespoon whole allspice berries
- 6-8 fresh bay leaves
- 1 large bunch fresh thyme (about 8-10 sprigs)
- 1 large bunch fresh rosemary (about 6-8 sprigs)
- 1 large bunch fresh sage (about 10-12 leaves)
- 4 cloves garlic, smashed
- 2 large oranges, quartered
- 2 large lemons, quartered
- 1 large yellow onion, quartered
- 6 cups ice
For the Turkey:
- 1 whole turkey (12-16 pounds), thawed if frozen
- 4 tablespoons unsalted butter, melted
- 2 teaspoons black pepper
- 1 teaspoon garlic powder
Step-by-Step Instructions
Step 1: Create the Brine Base
In a large stockpot, combine 1 gallon of water, kosher salt, and brown sugar. Place the pot over medium-high heat and stir continuously until the salt and sugar completely dissolve, about 5-7 minutes. This creates your brine concentrate. Remove from heat and let it cool slightly for 5 minutes.
Step 2: Add the Aromatics
Add the peppercorns, allspice berries, bay leaves, fresh thyme, rosemary, sage, smashed garlic cloves, orange quarters, lemon quarters, and onion quarters to the warm brine. Stir everything together, gently pressing on the citrus to release some juices. Let this aromatic mixture steep for 10 minutes, allowing the flavors to bloom.
Step 3: Cool the Brine Completely
Pour the remaining gallon of cold water into the pot, then add all 6 cups of ice. Stir well until the ice melts completely and the brine is cold to the touch. This step is crucial—never put your turkey in warm brine, as it can promote bacterial growth. The brine should feel ice-cold before proceeding.
Step 4: Prepare Your Turkey
Remove the turkey from its packaging and take out the giblets and neck from the cavity (save these for gravy if desired). Rinse the turkey inside and out under cold water, then pat it completely dry with paper towels. Trim any excess fat or skin from the neck and cavity area.
Step 5: Submerge and Brine
Place the turkey in a brining bag, extra-large food-safe bucket, or clean cooler. Pour the entire brine mixture over the turkey, including all the herbs and aromatics. Make sure the turkey is completely submerged—if needed, place a plate on top to weigh it down. Seal the bag or cover the container tightly.
Step 6: Refrigerate and Wait
Refrigerate the turkey for 12-24 hours. For a 12-14 pound turkey, 12-16 hours is perfect. For larger birds (15-18 pounds), go for the full 24 hours. Keep the temperature at 40°F or below. If using a cooler, add ice packs around the container and monitor the temperature.
Step 7: Remove and Dry
After brining, remove the turkey from the brine and discard all the liquid and aromatics. Rinse the turkey thoroughly under cold water, inside and out, to remove excess salt. This prevents overly salty skin. Pat the turkey completely dry with paper towels, including the cavity. Place it on a rack set over a baking sheet.
Step 8: Air-Dry for Crispy Skin
Refrigerate the turkey uncovered for 4-8 hours, or overnight if time allows. This air-drying step removes surface moisture and helps achieve incredibly crispy skin. The turkey should look slightly dry to the touch and the skin will tighten.
Step 9: Season and Roast
Preheat your oven to 325°F. Brush the turkey all over with melted butter and season with black pepper and garlic powder. Do not add extra salt—the brine has done that work. Tuck the wing tips under and tie the legs together with kitchen twine. Place on a roasting rack in a large roasting pan.
Step 10: Roast to Perfection
Roast the turkey, basting every 45 minutes with pan drippings. A 12-14 pound turkey needs about 3 to 3.5 hours; a 15-18 pound bird needs 3.5 to 4 hours. The turkey is done when a meat thermometer inserted into the thickest part of the thigh reads 165°F. Tent loosely with foil if the skin browns too quickly.
Step 11: Rest and Carve
Remove the turkey from the oven and tent loosely with aluminum foil. Let it rest for at least 30 minutes before carving. This allows the juices to redistribute throughout the meat, ensuring every slice is moist and tender. Carve and serve your masterpiece!
What to Serve Thanksgiving Turkey Recipes Brine With
Your beautifully brined turkey deserves equally impressive sides! Classic mashed potatoes with rich turkey gravy are essential—the creamy texture perfectly complements the juicy meat.
Herb-roasted root vegetables like carrots, parsnips, and Brussels sprouts add color and earthy flavors that balance the rich turkey. The slight char on roasted vegetables provides textural contrast to the tender meat.
Homemade cranberry sauce, both jellied and whole-berry varieties, cuts through the richness with bright, tart sweetness. Don’t forget warm, buttery dinner rolls for soaking up all those delicious pan juices!
For beverages, serve a medium-bodied red wine like Pinot Noir or a crisp white wine like Chardonnay. Sparkling apple cider is a festive non-alcoholic option that everyone will love.
Consider adding green bean casserole, sweet potato casserole with marshmallows, cornbread stuffing, and a fresh autumn salad with mixed greens, dried cranberries, and candied pecans for a complete feast.
Top Tips for Perfecting Thanksgiving Turkey Recipes Brine
Use the Right Salt
Kosher salt is essential for brining—table salt is too fine and can make your turkey overly salty. If you must substitute, use only 1.5 cups of table salt instead of 2 cups kosher salt. Sea salt works well too, but avoid iodized salt as it can impart a metallic flavor.
Keep Everything Cold
Food safety is paramount when brining. Your turkey must stay at 40°F or below throughout the entire brining process. If your refrigerator isn’t large enough, use a clean cooler with ice packs. Check and refresh ice packs every 6-8 hours to maintain safe temperatures.
Don’t Overbrine
More time doesn’t equal better results. Brining longer than 24 hours can make the meat mushy and overly salty. Stick to 12-16 hours for smaller turkeys (under 15 pounds) and 18-24 hours for larger birds. Set a timer so you don’t forget!
Dry Thoroughly After Brining
The secret to crispy skin is removing all surface moisture. After rinsing, pat the turkey completely dry with paper towels, then refrigerate it uncovered. This air-drying step is what creates that coveted golden, crispy skin everyone fights over.
Skip the Stuffing Inside
Brined turkeys cook more evenly and safely when not stuffed. The cavity’s moisture can prevent stuffing from reaching safe temperatures. Instead, make your stuffing in a separate baking dish where it can get crispy on top while staying moist inside.
Adjust Seasonings
Since the brine adds significant salt, skip adding salt to the turkey’s exterior before roasting. Use only butter, black pepper, and herbs on the outside. Your gravy may also need less salt than usual, so taste before seasoning.
Choose the Right Container
You’ll need a container large enough to hold your turkey and 2+ gallons of liquid. Brining bags are convenient and affordable. Alternatively, use a 5-gallon food-safe bucket, a large stockpot, or a thoroughly cleaned cooler. Never use trash bags or non-food-safe containers.
Customize Your Aromatics
Feel free to adjust the herbs and spices to your taste. Try adding fresh ginger, star anise, cinnamon sticks, or apple cider. Swap oranges for apples or add maple syrup instead of brown sugar. The brine is forgiving and welcomes creativity!
Storing and Reheating Tips
Refrigerating Leftover Turkey
Let the carved turkey cool to room temperature within 2 hours of cooking. Place the meat in airtight containers or wrap tightly in aluminum foil. Properly stored turkey stays fresh in the refrigerator for 3-4 days. Store the breast meat and dark meat separately for best results, as dark meat stays moist longer.
Freezing for Later
For longer storage, freeze turkey portions in freezer-safe bags or containers. Remove as much air as possible to prevent freezer burn. Frozen turkey maintains quality for up to 3 months. Label containers with the date so you can track freshness. Slice or shred the meat before freezing for easier portion control.
Reheating Without Drying Out
The key to reheating brined turkey is adding moisture. Place turkey slices in a baking dish with a few tablespoons of chicken broth or leftover gravy. Cover tightly with foil and reheat at 325°F for 15-20 minutes until warmed through. For individual servings, microwave with a damp paper towel covering the meat for 1-2 minutes.
Making the Most of Leftovers
Don’t let any precious turkey go to waste! Shred leftover turkey for sandwiches, tacos, or soup. The bones make incredible turkey stock—simmer with vegetables and herbs for 3-4 hours. Turkey salad, pot pie, and casseroles are delicious ways to transform leftovers into new meals.
Avoiding Common Brining Mistakes
Using Too Small a Container
Don’t underestimate how much space you need. Your turkey must be completely submerged in brine. If you can’t find a large enough food-safe container, use a large oven roasting bag inside a roasting pan, or invest in a brining bag designed for turkeys.
Forgetting to Thaw Completely
Never brine a frozen or partially frozen turkey. The brine can’t penetrate frozen meat, and you risk bacterial growth in the outer layers while the inside stays frozen. Thaw your turkey completely in the refrigerator (24 hours per 5 pounds) before brining.
Skipping the Rinse
Always rinse your brined turkey thoroughly before cooking. Excess salt on the surface leads to overly salty, unpalatable skin. Rinse under cold running water for 2-3 minutes, ensuring you clean inside the cavity too.
Brining Pre-Seasoned Turkey
Check your turkey’s label carefully. Many store-bought turkeys are pre-brined or injected with sodium solutions. These turkeys say “self-basting,” “kosher,” or “enhanced” on the package. Brining these birds results in inedibly salty meat. Only brine fresh, natural turkeys with no added solutions.
Not Planning Enough Time
Brining requires advance planning. You need time to prepare the brine, let it cool, brine the turkey for 12-24 hours, and ideally air-dry for another 4-8 hours. Start calculating backward from your serving time at least 2-3 days ahead.
Ignoring Temperature Monitoring
Always use a meat thermometer to check doneness. Brined turkeys can look done on the outside before reaching safe internal temperatures. Check the thickest part of the thigh (165°F), the breast (165°F), and the stuffing if you didn’t heed our advice (165°F).
Frequently Asked Questions
Do I really need to brine my Thanksgiving turkey?
While not absolutely necessary, brining makes a dramatic difference in moisture and flavor. If you’ve ever had dry turkey, brining solves that problem. The process adds insurance against overcooking and infuses the meat with aromatic flavors. Once you try brined turkey, you’ll never go back!
Can I brine a frozen turkey?
No, you must completely thaw your turkey before brining. Brine cannot penetrate frozen meat, rendering the process useless. Plan ahead and thaw your turkey in the refrigerator for 24 hours per every 5 pounds of weight. A 15-pound turkey needs 3 days to thaw.
How long should I brine my turkey?
For optimal results, brine your turkey for 12-24 hours depending on size. Smaller turkeys (12-14 pounds) need 12-16 hours, while larger birds (15-20 pounds) benefit from 18-24 hours. Never exceed 24 hours or the meat becomes mushy and overly salty.
Can I reuse turkey brine?
Never reuse brine that’s been in contact with raw turkey. The liquid contains bacteria from the raw meat and isn’t safe to use again. Discard all used brine and aromatics. Always make fresh brine for each turkey.
What if my refrigerator isn’t big enough?
Use a large, clean cooler for brining if your refrigerator lacks space. Place the brining bag or container inside the cooler and surround it with ice packs or bags of ice. Monitor the temperature with a thermometer and add fresh ice as needed to keep it below 40°F.
Should I rinse the turkey after brining?
Yes, absolutely! Rinsing removes excess salt from the surface, preventing overly salty skin. Rinse thoroughly under cold running water, inside and out, for 2-3 minutes. Pat completely dry afterward for the crispiest skin.
Can I brine a turkey breast instead of a whole turkey?
Definitely! Turkey breasts benefit enormously from brining. Reduce the brining time to 6-8 hours for a bone-in breast. Use the same brine recipe but reduce the total volume if you’re using a smaller container. The results are just as juicy and flavorful.
Will brining make my turkey too salty?
Not if you follow the recipe correctly and rinse thoroughly after brining. The salt in the brine helps the meat retain moisture rather than making it salty. Always skip additional salt when seasoning before roasting, and taste your gravy before adding salt.
Can I add butter under the skin after brining?
Yes, you can add herb butter under the skin for extra richness, but it’s not necessary with a properly brined turkey. If you do, use it sparingly since the turkey will already be moist. Separate the skin from the breast meat gently and spread softened butter with herbs underneath.
Does brining change the cooking time?
Brined turkeys may cook slightly faster than unbrined ones due to their higher moisture content. Always rely on a meat thermometer rather than cooking time estimates. The turkey is done when the thickest part of the thigh reaches 165°F.
Nutrition Information
| Nutrient | Per Serving (6 oz turkey) |
|---|---|
| Calories | 340 |
| Protein | 42g |
| Fat | 17g |
| Saturated Fat | 5g |
| Carbohydrates | 2g |
| Sugar | 1g |
| Sodium | 720mg |
| Cholesterol | 165mg |
| Fiber | 0g |
Note: Nutrition values are approximate and include the brine’s contribution. Most excess salt rinses away.
Final Thoughts
Mastering this thanksgiving turkey recipes brine transforms you from a holiday cook into a Thanksgiving hero. The beauty lies in its simplicity—basic ingredients create extraordinary results that’ll have everyone asking for your secret.
Yes, brining requires planning ahead, but the actual hands-on work is minimal. The reward? A turkey so juicy, so flavorful, and so perfectly cooked that it becomes your new non-negotiable holiday tradition.
Remember: cold brine, proper timing, thorough rinsing, and complete drying are your keys to success. Follow these steps, and you’ll serve the best turkey your family has ever tasted.
This year, skip the stress and anxiety about dry turkey. Armed with this brine recipe and our detailed instructions, you’re fully prepared to create a centerpiece worthy of celebration. Your guests won’t stop talking about it until next Thanksgiving!
Now grab your ingredients, clear some fridge space, and get ready to revolutionize your holiday meal. Happy Thanksgiving, and happy brining!
Have you tried this thanksgiving turkey recipes brine? Share your results in the comments below! Don’t forget to pin this recipe for next year’s feast.